This post contains affiliate links. As an Amazon Associate, I earn from qualifying purchases. This comes at no extra cost to you.
4th Of July Oreo Cream Cheese Balls Recipe
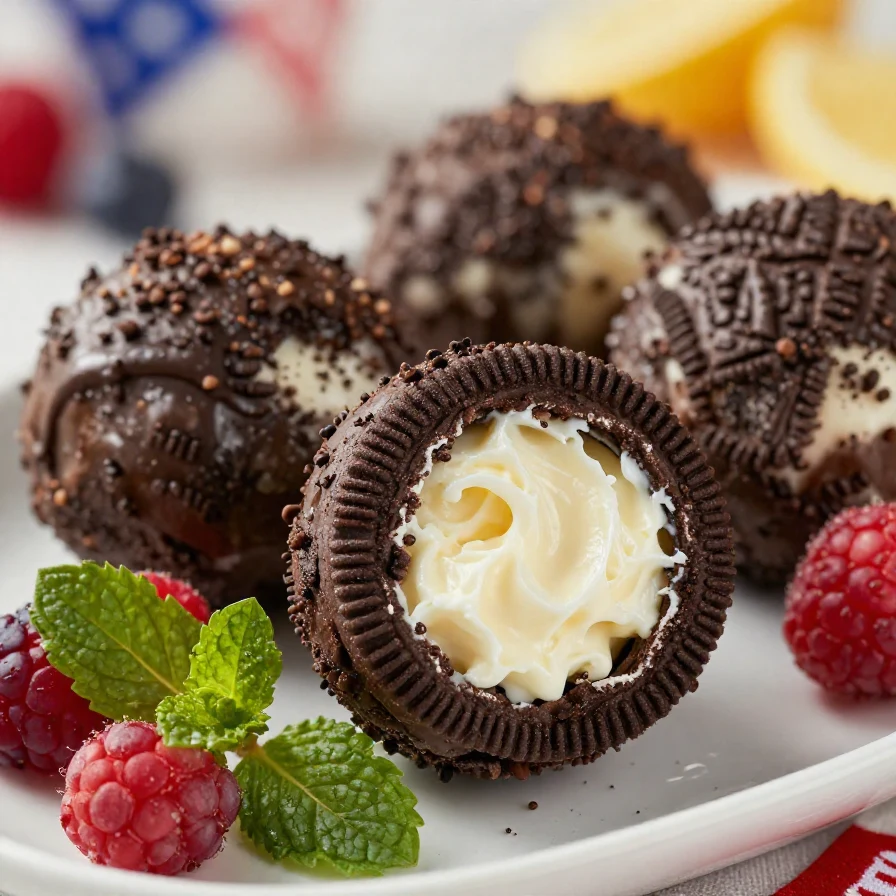
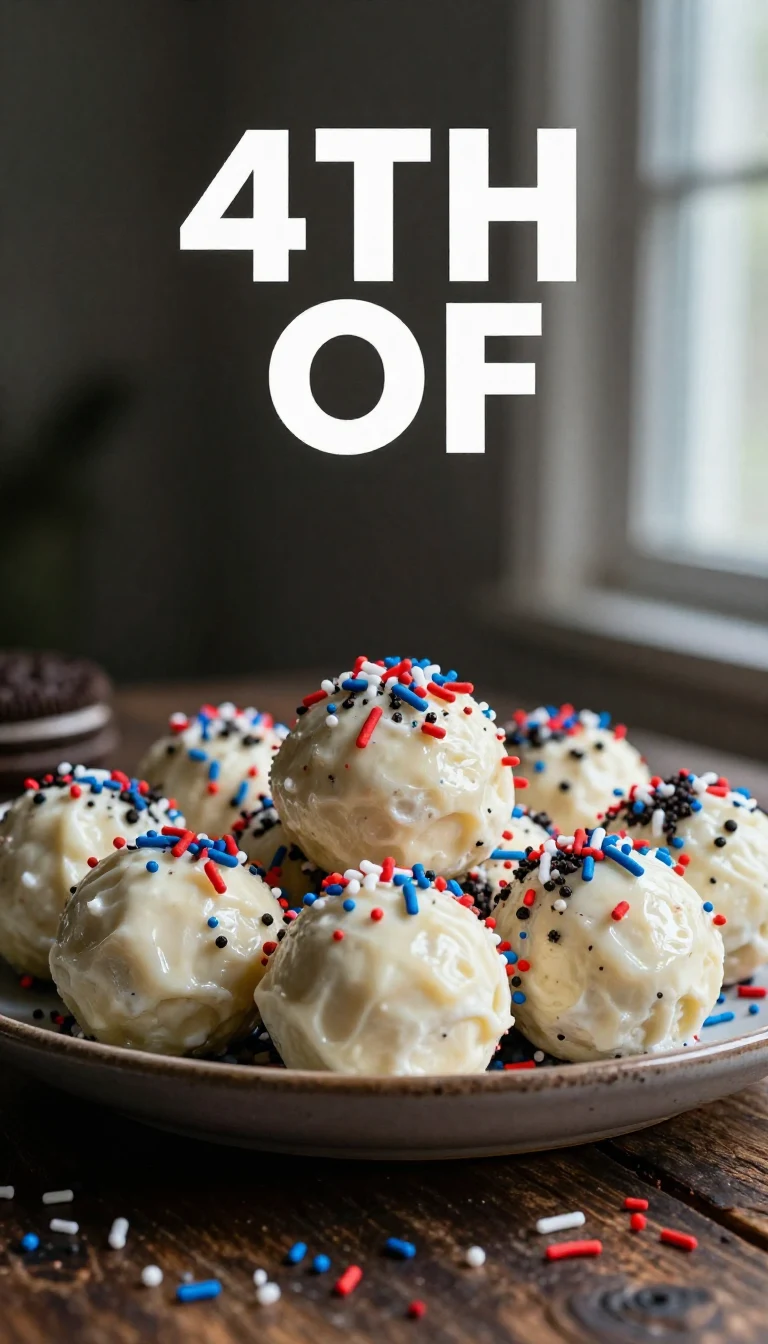
This 4th Of July Oreo Cream Cheese Balls Recipe brings together the rich chocolate flavor of crushed Oreos, the dreamy creaminess of cream cheese, and a festive candy coating in red, white, and blue. With a satisfying crunch on the outside and a melt-in-your-mouth interior, these no-bake treats are perfect for any Independence Day celebration. Quick, fun, and undeniably patriotic, these dessert bites are an easy way to add a pop of sweetness to your 4th of July party spread.
Table of Contents
- Why This Recipe Is Perfect for July 4th
- Everything You Need for 4th Of July Oreo Cream Cheese Balls Recipe
- How To Make 4th Of July Oreo Cream Cheese Balls Recipe Step by Step
- Easy Ingredient Swaps for This Recipe
- Common Questions About This Recipe
- How To Store and Reheat Oreo Cream Cheese Balls
- A Little History Behind This Festive Treat
Why This Recipe Is Perfect for July 4th
- These Oreo cream cheese balls are no-bake, keeping your kitchen cool on a hot July day. No need to turn on the oven, so you can focus on enjoying your holiday.
- The red, white, and blue candy coating makes these treats irresistibly festive. They’re guaranteed to stand out on your dessert table at any 4th of July party.
- Perfect for sharing, this recipe yields a batch of bite-sized treats. They’re easy to grab and eat, making them ideal for large gatherings or potlucks.
- This recipe uses just a handful of simple ingredients, making it affordable and stress-free. You’ll spend less time prepping and more time celebrating!
Everything You Need for 4th Of July Oreo Cream Cheese Balls Recipe
- 36 Oreo cookies
- 8 oz cream cheese, softened
- 12 oz red candy melts
- 12 oz blue candy melts
- 12 oz white candy melts
- Patriotic sprinkles
The Oreo cookies form the rich chocolate base, while the cream cheese binds everything together for a smooth texture. The candy melts in red, white, and blue turn each ball into a festive masterpiece, and the sprinkles add the final patriotic touch.
How To Make 4th Of July Oreo Cream Cheese Balls Recipe Step by Step
- Place the Oreo cookies in a food processor and pulse until they are fine crumbs. Ensure there are no large pieces for a smooth mixture.
- Add the softened cream cheese to the Oreo crumbs and blend until fully combined. The mixture should hold its shape when pressed together.
- Roll the mixture into 1-inch balls and place them on a parchment-lined baking sheet. Chill in the refrigerator for 30 minutes to firm up.
- Melt the red candy melts according to package instructions. Dip one-third of the balls into the red coating and place back on the baking sheet.
 Kitchen ApplianceCuisinart DFP-14BCNY 14-Cup Food Processor
Effortlessly crush Oreos and mix ingredients — a must-have for making these cream cheese balls.
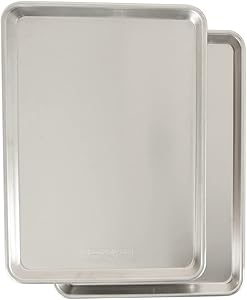
Essential CookwareNordic Ware Baker’s Half SheetA durable baking sheet perfect for chilling and baking — essential for this no-bake recipe.
- Repeat the melting and dipping process using the blue candy melts and then the white candy melts, ensuring a third of the balls are coated in each color.
- While the coating is still wet, decorate each ball with patriotic sprinkles. Allow the balls to set completely at room temperature or in the refrigerator.

Easy Ingredient Swaps for This Recipe
- If you don’t have candy melts, use white chocolate chips with a few drops of food coloring. It’ll create a similarly festive look with a slightly creamier coating.
- Swap patriotic sprinkles for crushed candy canes or colored sugar if making these balls for a different occasion. It’s an easy way to customize the theme.
- Feel free to experiment with different Oreo flavors, like Golden Oreos or Red Velvet Oreos. This will add a subtle twist to the flavor without altering the texture.
Common Questions About This Recipe
- Can I make these ahead of time? Yes, these Oreo cream cheese balls can be made up to 3 days in advance and stored in the fridge.
- Why is my candy coating cracking? This usually happens if the balls are too cold when dipped. Let them sit out for 5 minutes before coating to prevent this issue.
- Can I freeze these? Absolutely! Freeze them on a baking sheet first, then transfer to an airtight container for up to 3 months.
How To Store and Reheat Oreo Cream Cheese Balls
Store these Oreo cream cheese balls in an airtight container in the refrigerator for up to 5 days. They stay fresh and firm when stored properly.
To freeze them, arrange the balls in a single layer on a baking sheet and freeze until solid. Once frozen, transfer them to a zip-top bag or airtight container for long-term storage. Thaw them in the fridge overnight before serving—no reheating is necessary.
You might also enjoy our lemon blueberry cake with cream.
A Little History Behind This Festive Treat
Oreo balls, sometimes called Oreo truffles, are a modern dessert trend that gained popularity for their simplicity and decadent flavor. Adapting them for the 4th of July with red, white, and blue decorations is a creative twist that adds patriotic flair to a universally loved treat.
For more ideas, check out our lemon blueberry cake with whipped.
These bite-sized desserts are a favorite at potlucks and parties, thanks to their no-bake preparation and customizable coatings. They’ve become a staple for festive occasions, especially when a quick and easy dessert is needed.
Looking for something similar? Try our lemon blueberry cake with lemon.

4th Of July Oreo Cream Cheese Balls Recipe
Ingredients
- 1 package Oreo cookies
- 8 oz cream cheese (softened)
- 1 cup white chocolate (for coating)
- 1 cup sprinkles (for decoration)
Instructions
- Crush the Oreo cookies into fine crumbs.
- Mix the crushed Oreos with softened cream cheese until well combined.
- Form the mixture into small balls and place them on a baking sheet.
- Melt the white chocolate and dip each ball into it, then place back on the baking sheet.
- Sprinkle with decorations and refrigerate until set.
Notes
Nutrition
Loved this recipe? Save it to your favorite Pinterest board so you can easily find it later! ✨