Welcome to Emily’s Must-Try Kitchen, where every recipe is a story waiting to be told! Today, I’m thrilled to share a delightful treat that’s sure to become a favorite in your home: Chocolate Thumbprint Cookies. These little gems are not just cookies; they’re a celebration of flavor, nostalgia, and the joy of sharing sweet moments with loved ones. I still remember the first time I had a thumbprint cookie at a family gathering. The combination of rich chocolate and a gooey center was like a warm hug from my grandma. It’s amazing how food can transport us back to cherished memories, isn’t it?
As we dive into this recipe, I want you to know that these cookies are perfect for any occasion—from holiday gatherings to cozy nights in with a cup of tea. They’re simple enough to whip up on a whim yet impressive enough to steal the show at any dessert table. So, roll up your sleeves, and let’s make some magic happen in the kitchen!
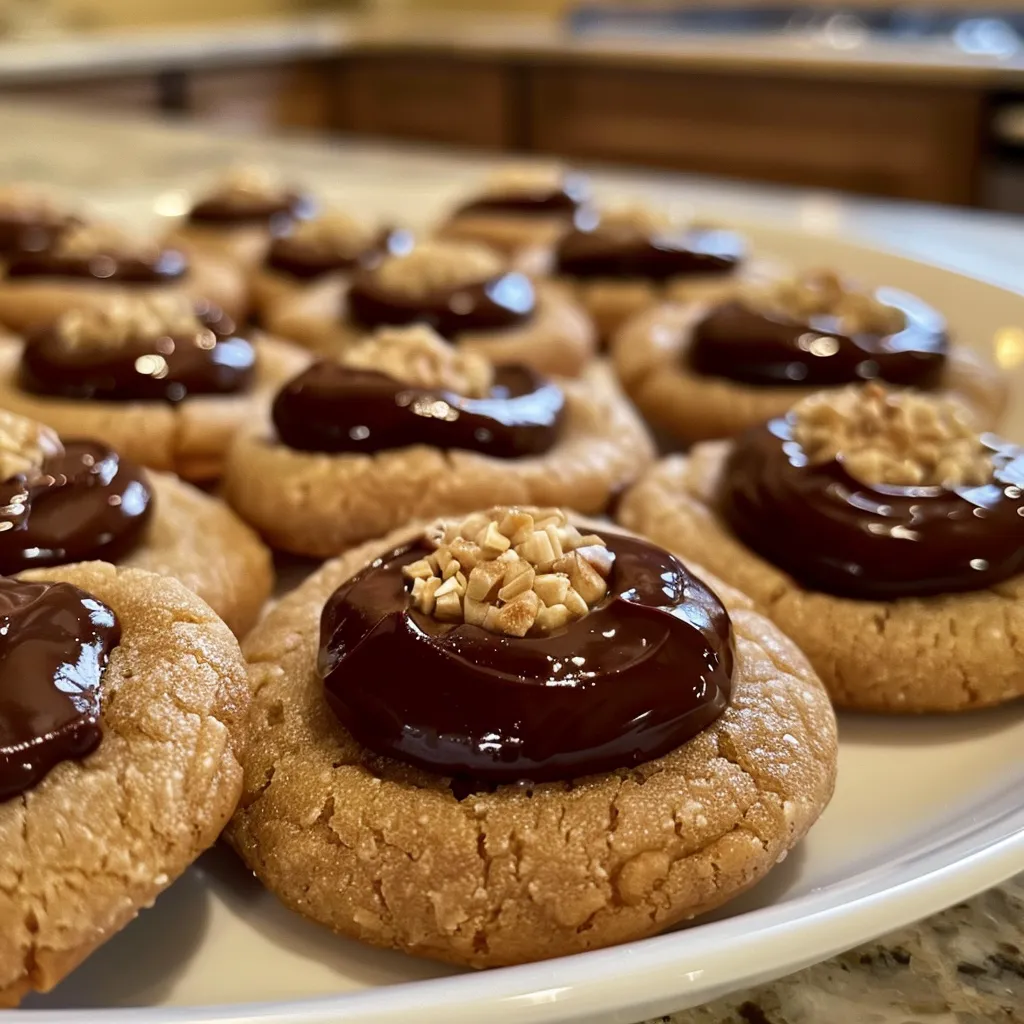
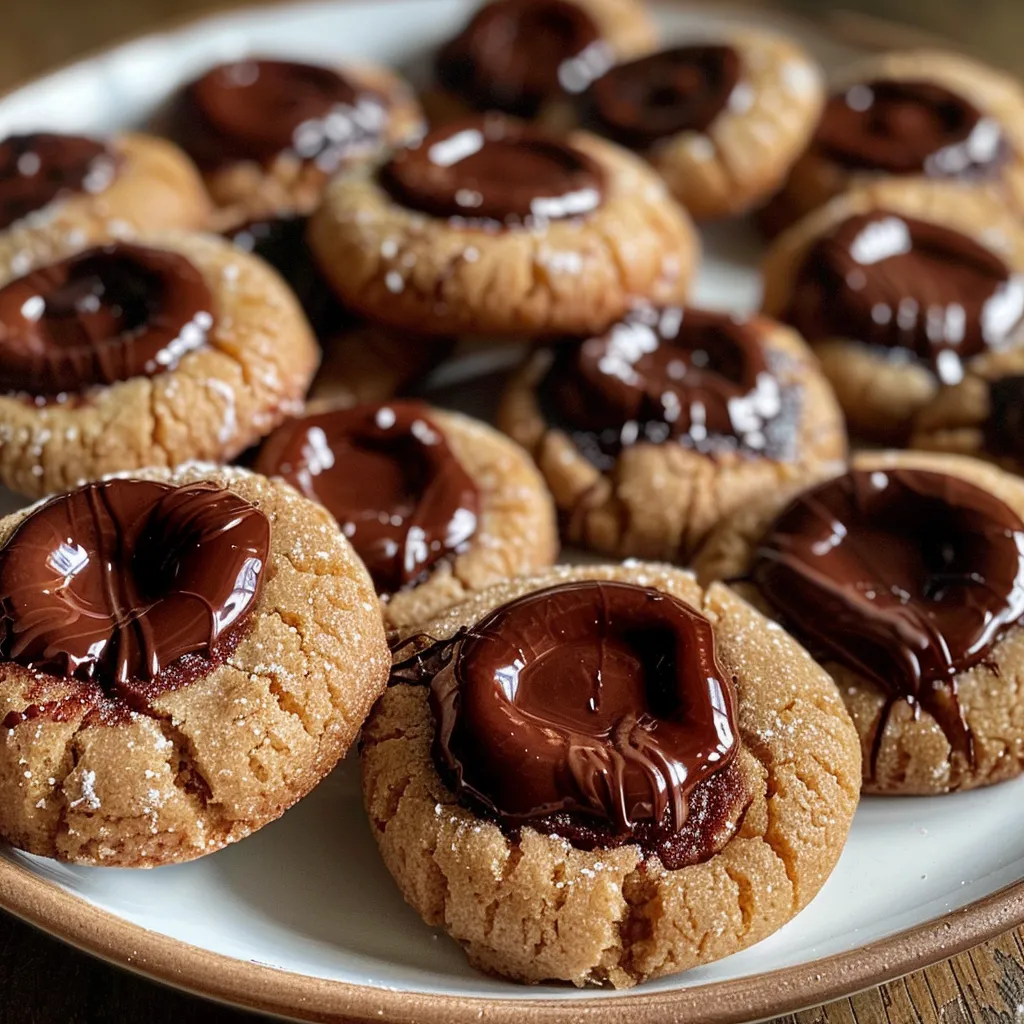
Why You’ll Absolutely Love Chocolate Thumbprint Cookies – In Bloom Bakery
These Chocolate Thumbprint Cookies have a few delicious secrets that make them irresistible. Here’s why you’re going to adore them:
- Easy to Make: With straightforward steps, even novice bakers will find joy in creating these cookies.
- Decadent Chocolate Flavor: The combination of cocoa powder and melted chocolate chips creates a rich, chocolatey experience that chocolate lovers will cherish.
- Customizable Fillings: While I love classic chocolate filling, feel free to get creative! Try peanut butter, caramel, or even fruit preserves for a twist.
- Perfect for Sharing: These cookies are made for sharing—perfect for holiday parties, bake sales, or simply enjoying with friends over coffee.
Ingredients You’ll Need
Gathering the right ingredients is half the fun! Here’s what you’ll need for these delightful Chocolate Thumbprint Cookies:
- 1 cup unsalted butter, softened
- 3/4 cup granulated sugar
- 1/4 cup brown sugar, packed
- 2 large eggs
- 1 teaspoon vanilla extract
- 2 cups all-purpose flour
- 1/2 cup unsweetened cocoa powder
- 1/2 teaspoon baking powder
- 1/4 teaspoon salt
- 1 cup chocolate chips (for filling)
- 1/4 cup powdered sugar (for dusting)
You’ll find the full ingredient list with measurements in the recipe card below!
How to Make Chocolate Thumbprint Cookies – In Bloom Bakery, Step-by-Step
Now, let’s get to the fun part—making these cookies! Follow this step-by-step guide and let your creativity shine:
- Preheat your oven to 350°F (175°C) and line a baking sheet with parchment paper. This little step ensures your cookies won’t stick and makes cleanup a breeze!
- In a large mixing bowl, cream together the softened butter, granulated sugar, and brown sugar until light and fluffy. This is where the magic begins—your kitchen will smell heavenly!
- Add the eggs one at a time, mixing well after each addition. Stir in the vanilla extract for that lovely aromatic touch.
- In a separate bowl, sift together the flour, cocoa powder, baking powder, and salt. Sifting is a great way to avoid clumps and ensure a smooth cookie dough.
- Gradually add the dry ingredients to the wet mixture, mixing until combined. Don’t overmix; we want tender cookies!
- Scoop tablespoon-sized portions of dough and roll them into balls. Place them on the prepared baking sheet, spacing them apart to give them room to spread.
- Use your thumb or the back of a spoon to make an indentation in the center of each dough ball. This is where your chocolate filling will go, so make it nice and deep!
- Bake in the preheated oven for 10-12 minutes. Remove from the oven and let cool slightly. You want them to be soft and chewy!
- While the cookies are cooling, melt the chocolate chips in a microwave-safe bowl or over a double boiler. Stir until smooth and luscious.
- Once the cookies are cool, fill each thumbprint indentation with melted chocolate. This is the moment you can really indulge!
- Dust with powdered sugar before serving. Enjoy your delicious Chocolate Thumbprint Cookies!

Pro Tips for the Best Results
Here are some of my favorite tips to ensure your cookies turn out perfectly:
- Butter Temperature: Make sure your butter is softened but not melted. This helps create that fluffy texture we all love!
- Chill the Dough: If you find your dough is too sticky to handle, pop it in the fridge for about 30 minutes. Chilled dough is easier to work with and results in neater cookies.
- Experiment with Fillings: Don’t be afraid to switch things up! Try using different flavored chocolate chips or even nut butters for a unique twist.
Serving Suggestions
These Chocolate Thumbprint Cookies are perfect on their own, but here are some fun serving suggestions to elevate your dessert experience:
- Pair them with a scoop of vanilla ice cream for a decadent sundae.
- Serve alongside a cup of steaming hot cocoa or coffee for a cozy treat.
- Arrange on a festive platter for holiday gatherings and watch them disappear!
Storage and Make-Ahead Tips
Want to enjoy these cookies later? No problem! Here’s how to store and make them ahead of time:
- Store baked cookies in an airtight container at room temperature for up to a week. They’ll stay soft and delicious!
- If you want to make them ahead, prepare the dough and refrigerate it for up to three days before baking.
- You can also freeze the baked cookies for up to three months. Just place them in a freezer-safe container and separate layers with parchment paper.
Thank you for joining me in making these Chocolate Thumbprint Cookies today! I hope you find as much joy in baking them as I do. Remember, cooking is all about having fun and sharing love through food, so don’t be afraid to get a bit messy. Happy baking, and I can’t wait to hear about your cookie adventures!
Chocolate Thumbprint Cookies - In Bloom Bakery
Ingredients
Dough
- 1 cup unsalted butter, softened
- 3/4 cup granulated sugar
- 1/4 cup brown sugar, packed
- 2 large eggs
- 1 teaspoon vanilla extract
Dry ingredients
- 2 cups all-purpose flour
- 1/2 cup unsweetened cocoa powder
- 1/2 teaspoon baking powder
- 1/4 teaspoon salt
Filling and dusting
- 1 cup chocolate chips (for filling)
- 1/4 cup powdered sugar (for dusting)
Instructions
- Preheat oven to 350°F (175°C). Mix softened butter, sugars until fluffy.
- Add eggs one at a time, then vanilla. Mix well.
- Combine dry ingredients; gradually add to wet mixture. Form dough balls and place on baking sheet.
- Make an indentation in each ball, bake for 10-12 minutes. Cool slightly.
- Melt chocolate chips, fill indentations, dust with powdered sugar. Serve.
Notes
Nutrition
Loved this recipe? Save it to your favorite Pinterest board so you can easily find it later! It’s the perfect way to keep all your sweet ideas in one place. ✨