Discover the Joy of Holiday Baking with Christmas Lights Sugar Cookies
Welcome to Emily’s Must-Try Kitchen! Today, we’re diving into the delightful world of Christmas Lights Sugar Cookies. These festive treats are more than just cookies; they’re a canvas for creativity and a sweet way to light up your holiday gatherings. With their vibrant colors and cheerful designs, these cookies will surely bring smiles to family and friends. As we roll up our sleeves and get started, let’s explore how to make these scrumptious sugar cookies together!
Why You’ll Love This Recipe
Before we jump into the nitty-gritty of the recipe, let’s talk about why you’ll adore these Christmas Lights Sugar Cookies.
- Fun for Everyone: Decorating these cookies is a fantastic activity for families and friends alike. Gather everyone around the kitchen table, and let the creativity flow!
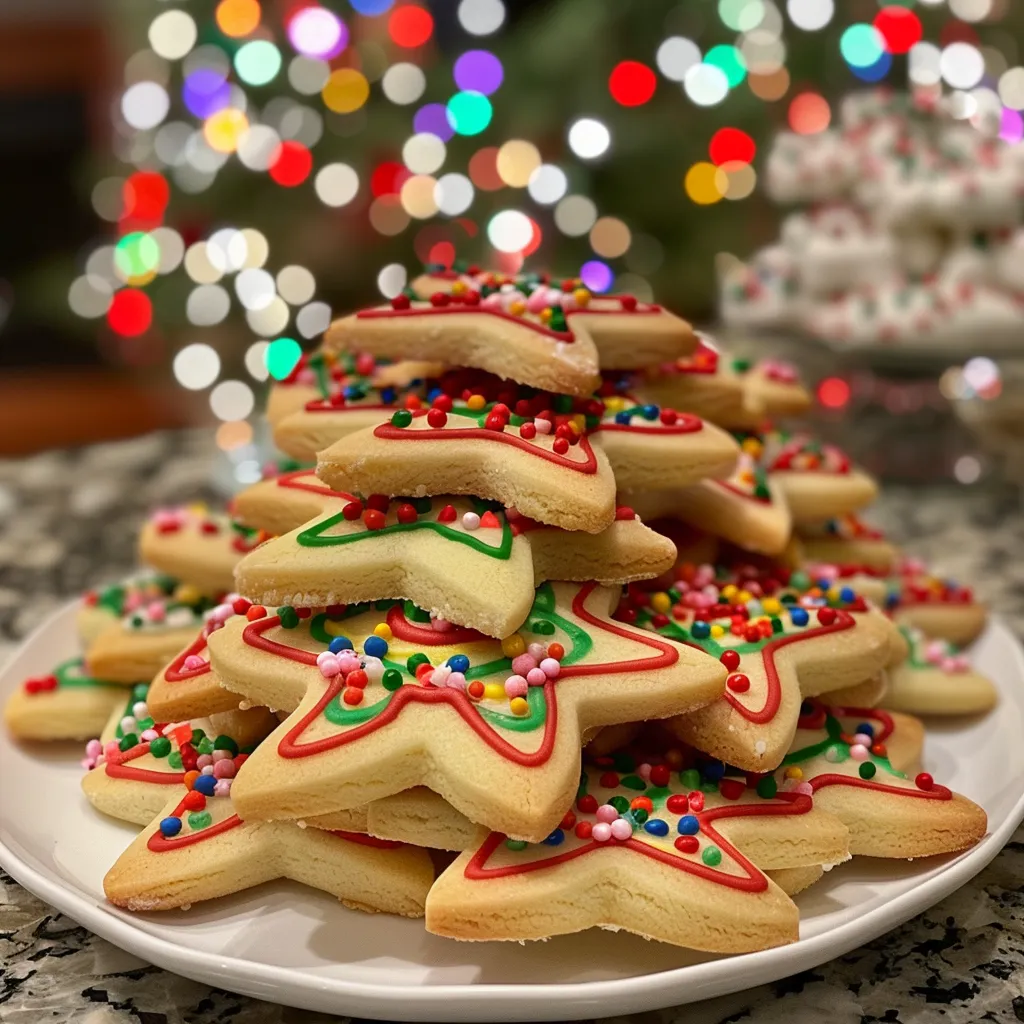
- Customizable Designs: You can craft these cookies to reflect your unique style! Use different colors of royal icing and sprinkles to create personalized designs that will wow your guests.
- Deliciously Soft and Chewy: These cookies boast a perfect balance of crisp edges and soft centers, making them a delightful treat to enjoy.
- Perfect for Gifting: Pack these cookies in festive tins or boxes as thoughtful gifts for neighbors, teachers, or anyone who deserves a sweet surprise!
- Make Ahead and Freeze: You can prepare the dough ahead of time and freeze it for later use. This is a great time-saver during the busy holiday season!
Ingredient Breakdown
Let’s gather our ingredients! Here’s what you’ll need to whip up these delightful cookies:
- 6 cups all-purpose flour (2 pounds): Essential for the structure of the cookies.
- 2 teaspoons baking powder: This helps the cookies rise perfectly.
- 2 teaspoons salt: Enhances the flavor of the cookies.
- 4 sticks unsalted butter (room temperature, 1 pound): This will give your cookies a rich, buttery flavor.
- 2 cups granulated sugar: Sweetens the cookies and helps them achieve that lovely golden color.
- 2 large eggs (room temperature): Binds the dough and contributes to the cookie’s texture.
- 2 teaspoons pure vanilla extract: Adds a warm, aromatic flavor.
- 16 ounces powdered sugar (1 pound): Essential for making that sweet royal icing.
- 1/4 cup plus 1 tablespoon meringue powder: This stabilizes the royal icing.
- 1/3 cup water, plus more if needed: To adjust the consistency of the icing.
- Food coloring (I used Wilton icing gel): To make your cookies as colorful as Christmas lights!
Substitutions: If you’re in a pinch, here are a few substitutions:
- Butter: You can use margarine, but for the best flavor, stick with butter.
- Granulated Sugar: Brown sugar can be used for a richer flavor.
- Eggs: For a vegan option, consider using flax eggs or applesauce.
- Flour: Gluten-free flour blends work well if you need a gluten-free version.
Step-by-Step Instructions

Now, let’s get to the fun part — making the cookies!
1. Prepare the Dough
Start by creaming the butter and sugar together until light and fluffy. This step is crucial as it incorporates air into the mixture, which helps your cookies rise.
2. Add Eggs and Vanilla
Mix in the eggs, one at a time, followed by the vanilla extract. Make sure everything is well combined.
3. Combine Dry Ingredients
In a separate bowl, whisk together the flour, baking powder, and salt. Gradually add this mixture to the wet ingredients, mixing until just combined. Be careful not to overmix; you want a tender cookie!
4. Chill the Dough
Divide the dough into two discs, wrap them in plastic wrap, and refrigerate for at least 1 hour. This step is essential to help the cookies hold their shape while baking.
5. Roll and Cut
Preheat your oven to 350°F (175°C). Roll out the chilled dough on a floured surface to about 1/4 inch thick. Use cookie cutters to create your desired shapes — think Christmas lights, stars, and trees!
6. Bake the Cookies
Place the cookies on a lined baking sheet and bake for 8-10 minutes or until the edges are golden. Allow them to cool completely on a wire rack before decorating.
7. Prepare the Royal Icing
In a large bowl, mix the powdered sugar, meringue powder, and water until you achieve a smooth consistency. Adjust with more water if it’s too thick. Divide the icing into separate bowls and tint with food coloring as desired.
8. Decorate
Using piping bags or a spatula, decorate your cookies with the colored icing. Get creative! Add sprinkles, edible glitter, or mini candies to enhance your designs.
Pro Tips for Success
Here are some expert insights to ensure your cookies turn out perfectly:
- Chill the Dough: Don’t skip this step! Chilling the dough prevents the cookies from spreading too much in the oven.
- Control Icing Consistency: Start with thicker icing for outlines and gradually thin it out for flooding. A little water goes a long way, so add it sparingly.
- Use Quality Ingredients: High-quality butter, vanilla, and food coloring can make a big difference in flavor and appearance.
- Practice Patience: Allow the icing to set completely before stacking or packaging the cookies to prevent smudging.
- Make It a Group Activity: Invite friends or family to join in on the decorating fun. Set up different decorating stations for a festive experience!
- Try Different Shapes: Use various cookie cutters to create a fun assortment of shapes and sizes.
- Experiment with Flavors: Add almond extract or citrus zest for a fun twist on the classic sugar cookie flavor.
- Store Properly: Keep your decorated cookies in an airtight container at room temperature for up to one week.
Common Mistakes and Troubleshooting
Even the best bakers can run into a hiccup now and then. Here are some common mistakes and how to avoid them:
- Too Sticky Dough: If your dough is too sticky, add a little more flour, but be careful not to add too much or your cookies will be tough.
- Cookies Spread Too Much: Make sure your dough is well chilled before baking, and ensure your oven is at the right temperature.
- Icing Too Runny: If your royal icing is too runny, add more powdered sugar to thicken it up.
- Decorating Challenges: If your icing is hard to work with, consider using a thinner piping tip or adjusting the consistency with water.
Variations to Try
Feeling adventurous? Here are some fun variations to try:
- Chocolate Sugar Cookies: Substitute a portion of the flour with cocoa powder for a chocolatey twist.
- Spiced Sugar Cookies: Add cinnamon and nutmeg to the dough for a warm, festive flavor.
- Gluten-Free Version: Use a gluten-free flour blend for a cookie everyone can enjoy.
- Vegan Cookies: Try using flax eggs and vegan butter to make these cookies plant-based.
Storage and Make-Ahead Instructions
These cookies are perfect for making ahead of time. Here’s how to store them:
- Make Ahead: You can make the dough and freeze it for up to 3 months. Simply thaw in the refrigerator before rolling out.
- Storage: Keep baked cookies in an airtight container at room temperature for up to one week. For longer storage, freeze the cookies and thaw as needed.
Frequently Asked Questions
Let’s address some common questions about these delightful cookies:
- Can I freeze the decorated cookies? Yes! Just ensure they are fully set before freezing. Layer with parchment paper to avoid sticking.
- What’s the best way to decorate cookies? Use piping bags for precision. You can also use a spatula for a more rustic look.
- How do I get vibrant colors in my icing? Use gel food coloring instead of liquid for more intense colors.
- Can I use a different type of icing? Absolutely! Feel free to use buttercream or glaze if you prefer.
- How long do these cookies last? They are best enjoyed within a week, but can last longer if stored properly.
- What if my cookies are too hard? If they are hard, it may be due to overbaking. Always keep an eye on them as they bake.
- Can I add flavors to the royal icing? Yes! A few drops of extract can enhance the flavor of your icing.
- What’s the best way to transport decorated cookies? Use a flat container lined with parchment paper to prevent smudging.
Nutritional Tips and Dietary Adaptations
While these cookies are a delightful treat, here are a few tips for making them a bit healthier:
- Portion Control: Enjoy one or two cookies at a time to savor the flavors without overindulging.
- Ingredient Swaps: Use whole wheat flour or coconut sugar for a healthier twist.
- Mindful Eating: Take the time to enjoy each bite; savor the flavors and textures!
Equipment Recommendations
To make your baking experience smoother, here are some must-have tools:
- Stand Mixer: A stand mixer makes creaming the butter and sugar a breeze.
- Baking Sheets: Use heavy-duty baking sheets for even baking.
- Parchment Paper: Lining your baking sheets prevents sticking and makes cleanup easier.
- Cookie Cutters: Invest in a variety of shapes for more fun!
- Piping Bags and Tips: Essential for decorating your cookies beautifully.
Serving Suggestions
Once your cookies are beautifully decorated, here are a few fun ways to serve them:
- Cookie Platters: Arrange your cookies on festive platters for a lovely holiday display.
- Gift Boxes: Pack them in decorative boxes for thoughtful gifts.
- Cookie Exchange: Host a cookie exchange party and share your creations with friends!
- Holiday Parties: Serve them at holiday gatherings as a delightful treat for guests.
Conclusion
There you have it, friends! With these Christmas Lights Sugar Cookies, you’re not just baking; you’re creating memories. Remember, cooking is about joy, and each cookie tells a story. So, gather your loved ones, have fun decorating, and share these sweet treats with everyone you know. Happy baking, and may your holiday season be filled with warmth and laughter!
Christmas Lights Sugar Cookies
Ingredients
Dough
- 6 cups all purpose flour ((2 pounds))
- 2 teaspoons baking powder
- 2 teaspoons salt
- 4 sticks unsalted butter, room temperature ((1 pound))
- 2 cups granulated sugar
- 2 large eggs (room temperature)
- 2 teaspoons pure vanilla extract
Frosting & Decoration
- 16 ounces powdered sugar ((1 pound))
- 0.25 cup plus 1 tablespoon meringue powder
- 0.33 cup water, plus more if too thick (see below)
- food coloring food coloring (Wilton icing gel)
Instructions
- Mix flour, baking powder, and salt. Cream butter and sugar until fluffy, then add eggs and vanilla.
- Gradually add dry ingredients to the wet mixture until combined. Chill dough for at least 1 hour.
- Roll out dough and cut into shapes. Bake at 350°F (175°C) for 8-10 minutes until edges are golden.
- Prepare frosting by mixing powdered sugar, meringue powder, and water until smooth. Divide and add food coloring.
- Decorate cooled cookies with colored frosting to resemble Christmas lights.