

This post contains affiliate links. As an Amazon Associate, I earn from qualifying purchases. This comes at no extra cost to you.
The Best Keto Chocolate Zucchini Bread Recipe
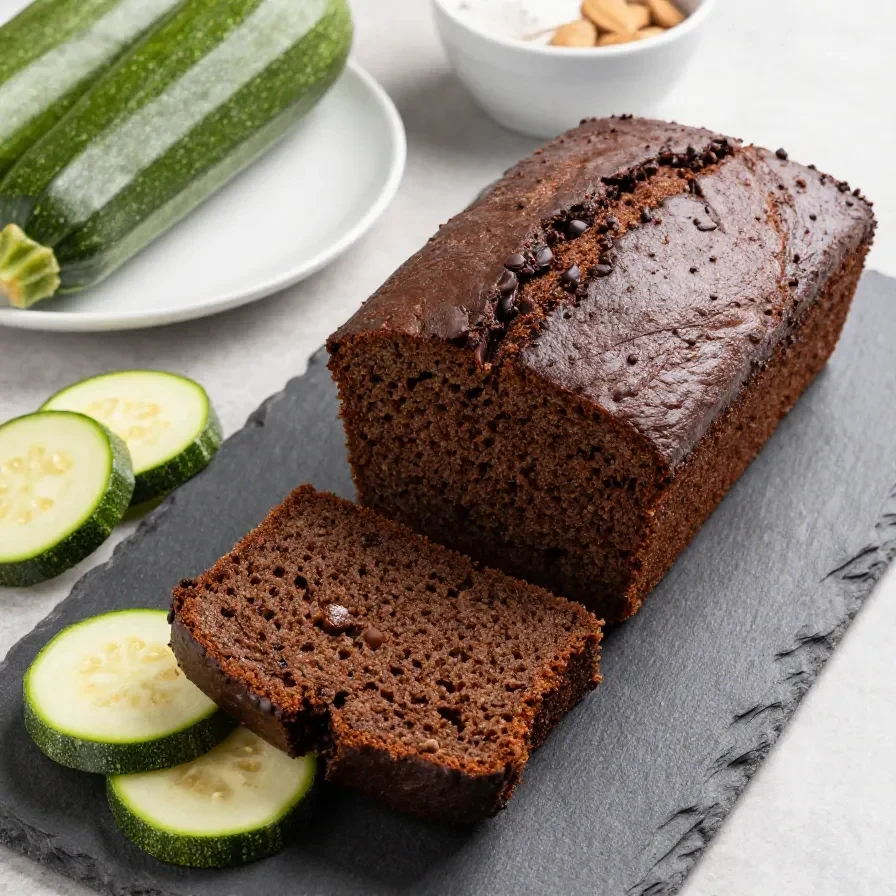
Keto zuchini baking recipes are low-carb, sugar-free treats made with almond flour, unsweetened cocoa, and grated zucchini, yielding a moist and chocolatey loaf. This recipe takes about 15 minutes of prep time and 60 minutes to bake, producing 10 hearty slices. Perfect for breakfast, a snack, or a guilt-free dessert, it combines rich flavor with nutritious simplicity.
The irresistible aroma of chocolate and the sneaky health boost from zucchini make this bread a favorite in my kitchen. I still remember the first time I experimented with zucchini in dessert—it was like a lightbulb moment for combining indulgence with health!
Table of Contents
- Why is The Best Keto Chocolate Zucchini Bread Recipe so special?
- What ingredients do you need for The Best Keto Chocolate Zucchini Bread Recipe?
- How do you make The Best Keto Chocolate Zucchini Bread Recipe step by step?
- Frequently Asked Questions About The Best Keto Chocolate Zucchini Bread Recipe
- Expert Tips and Pro Shortcuts
- Serving Ideas for This Chocolate Zucchini Bread
- How to Store and Reheat The Best Keto Chocolate Zucchini Bread
- Simple Ingredient Swaps for This Recipe
Why is The Best Keto Chocolate Zucchini Bread Recipe so special?
This recipe balances rich chocolate decadence with keto-friendly ingredients, creating a moist, guilt-free loaf perfect for low-carb diets. It’s easy to make and versatile enough for breakfast, snacks, or dessert.
- Moist texture: Grated zucchini ensures the loaf stays soft and moist without being oily.
- Rich chocolate flavor: Unsweetened cocoa powder and optional sugar-free chocolate chips make every bite indulgent.
- Low-carb and keto-friendly: Made with almond flour and erythritol, it skips the sugar and carbs.
- Quick and simple: Just one bowl for the dry ingredients, another for the wet, and it’s ready for the oven!
What ingredients do you need for The Best Keto Chocolate Zucchini Bread Recipe?
To make this keto chocolate zucchini bread, you’ll need simple low-carb ingredients that come together for a perfectly moist and chocolatey loaf. Here’s the complete list:
- 2 cups grated zucchini (about 1 medium zucchini)
- 1 cup almond flour
- 1/2 cup unsweetened cocoa powder
- 1/2 cup erythritol or preferred keto sweetener
- 1/2 teaspoon baking soda
- 1/2 teaspoon baking powder
- 1/4 teaspoon salt
- 3 large eggs
- 1/4 cup melted coconut oil or unsalted butter
- 1 teaspoon vanilla extract
- 1/2 cup sugar-free chocolate chips (optional)
The grated zucchini is the star here, adding both moisture and a subtle sweetness. Almond flour keeps the texture fluffy but not heavy, while erythritol provides sweetness without the carbs.
How do you make The Best Keto Chocolate Zucchini Bread Recipe step by step?
This easy recipe only requires a few steps to create a perfectly moist and chocolatey loaf. Here’s how to make it:
Step 1 — Prepare your oven and loaf pan
Preheat your oven to 350°F (175°C). Grease a 9×5 inch loaf pan to prevent sticking and ensure easy removal. Set the pan aside.
You might also enjoy our healthy lemon zucchini olive oil bread.
Step 2 — Combine dry ingredients
In a large bowl, mix the grated zucchini, almond flour, unsweetened cocoa powder, erythritol, baking soda, baking powder, and salt. Stir until evenly combined.
Step 3 — Mix wet ingredients
In another bowl, whisk together the eggs, melted coconut oil (or unsalted butter), and vanilla extract until smooth. Make sure the oil or butter is well incorporated.
Step 4 — Combine wet and dry ingredients
Gradually pour the wet ingredients into the dry ingredients, stirring gently until just combined. If desired, gently fold in the sugar-free chocolate chips for an extra chocolate boost.
Step 5 — Transfer to the pan
Pour the batter into the prepared loaf pan. Use a spatula to smooth the top for even baking.


For more ideas, check out our gluten free lemon zucchini bread.
Step 6 — Bake the bread
Bake in the preheated oven for 50-60 minutes, or until a toothpick inserted into the center comes out clean. The surface should be set but not over-browned.
Step 7 — Allow to cool
Let the bread cool in the pan for 10 minutes, then transfer it to a wire rack. Cool completely before slicing.
Frequently Asked Questions About The Best Keto Chocolate Zucchini Bread Recipe
Can I use a different sweetener?
Yes, you can substitute erythritol with other keto-friendly sweeteners like monk fruit or Swerve. Just ensure the sweetness level matches your taste preference.
Do I need to peel the zucchini?
No, the skin of the zucchini is edible and adds color and nutrients to the bread. Simply wash the zucchini before grating.
Looking for something similar? Try our the best lemon zucchini bread.
How can I tell if the bread is done?
Insert a toothpick into the center of the loaf. If it comes out clean or with a few crumbs, the bread is ready to come out of the oven.
Can I make this recipe dairy-free?
Yes, swap the butter with melted coconut oil for a completely dairy-free version of this bread.
How long does this bread stay fresh?
Store the bread in an airtight container at room temperature for up to 3 days. For longer storage, refrigerate for up to a week or freeze for up to 3 months.
Expert Tips and Pro Shortcuts
- Don’t overmix: Overmixing can make the bread dense. Stir just until combined.
- Grate the zucchini finely: Finely grated zucchini integrates better into the batter, ensuring a smoother texture.
- Use parchment paper: Lining your loaf pan with parchment paper makes it even easier to remove the bread after baking.
Serving Ideas for This Chocolate Zucchini Bread
- Pair a slice with a dollop of whipped cream for a treat that feels like dessert but is still keto-friendly.
- Serve with a cup of coffee or tea for a peaceful breakfast or afternoon snack.
- Top with a scoop of sugar-free ice cream for a decadent dessert.
How to Store and Reheat The Best Keto Chocolate Zucchini Bread
Store your cooled bread in an airtight container at room temperature for up to three days. For longer shelf life, refrigerate it for up to one week.
If you’d like to store it longer, wrap the bread in plastic wrap and aluminum foil, then freeze for up to three months. Thaw overnight in the fridge before enjoying.
To reheat, warm slices in the microwave for 10-15 seconds or in the oven at 300°F (150°C) for a few minutes.
Simple Ingredient Swaps for This Recipe
- Nut-free option: Replace almond flour with sunflower seed flour for a nut-free alternative while keeping the recipe low-carb.
- Sweetener substitution: Use an equal amount of allulose or stevia-based sweeteners in place of erythritol to customize sweetness.
- Oil swap: Use avocado oil instead of coconut oil or butter for a neutral-tasting, heart-healthy fat option.
The Best Keto Chocolate Zucchini Bread Recipe
Equipment
- mixing bowl
- whisk
- loaf pan
- spatula
- oven
Ingredients
- 2 cup grated zucchini ((about 1 medium zucchini))
- 1 cup almond flour
- 1/2 cup unsweetened cocoa powder
- 1/2 cup erythritol (or preferred keto sweetener)
- 1/2 teaspoon baking soda
- 1/2 teaspoon baking powder
- 1/4 teaspoon salt
- 3 large eggs
- 1/4 cup melted coconut oil (or unsalted butter)
- 1 teaspoon vanilla extract
- 1/2 cup sugar-free chocolate chips ((optional))
Instructions
- Preheat your oven to 350°F (175°C) and grease a 9x5 inch loaf pan.
- In a large bowl, combine the grated zucchini with the almond flour, cocoa powder, erythritol, baking soda, baking powder, and salt. Mix well.
- In another bowl, whisk together the eggs, melted coconut oil (or butter), and vanilla extract until smooth.
- Pour the wet ingredients into the dry ingredients and stir until just combined. If using, fold in the sugar-free chocolate chips.
- Transfer the batter into the prepared loaf pan and smooth the top with a spatula.
- Bake in the preheated oven for 50-60 minutes, or until a toothpick inserted into the center comes out clean.
- Allow the bread to cool in the pan for about 10 minutes before transferring it to a wire rack to cool completely.
- Slice and enjoy your delicious keto chocolate zucchini bread!
Notes
Nutrition

Loved this recipe? Save it to your favorite Pinterest board so you can easily find it later! ✨