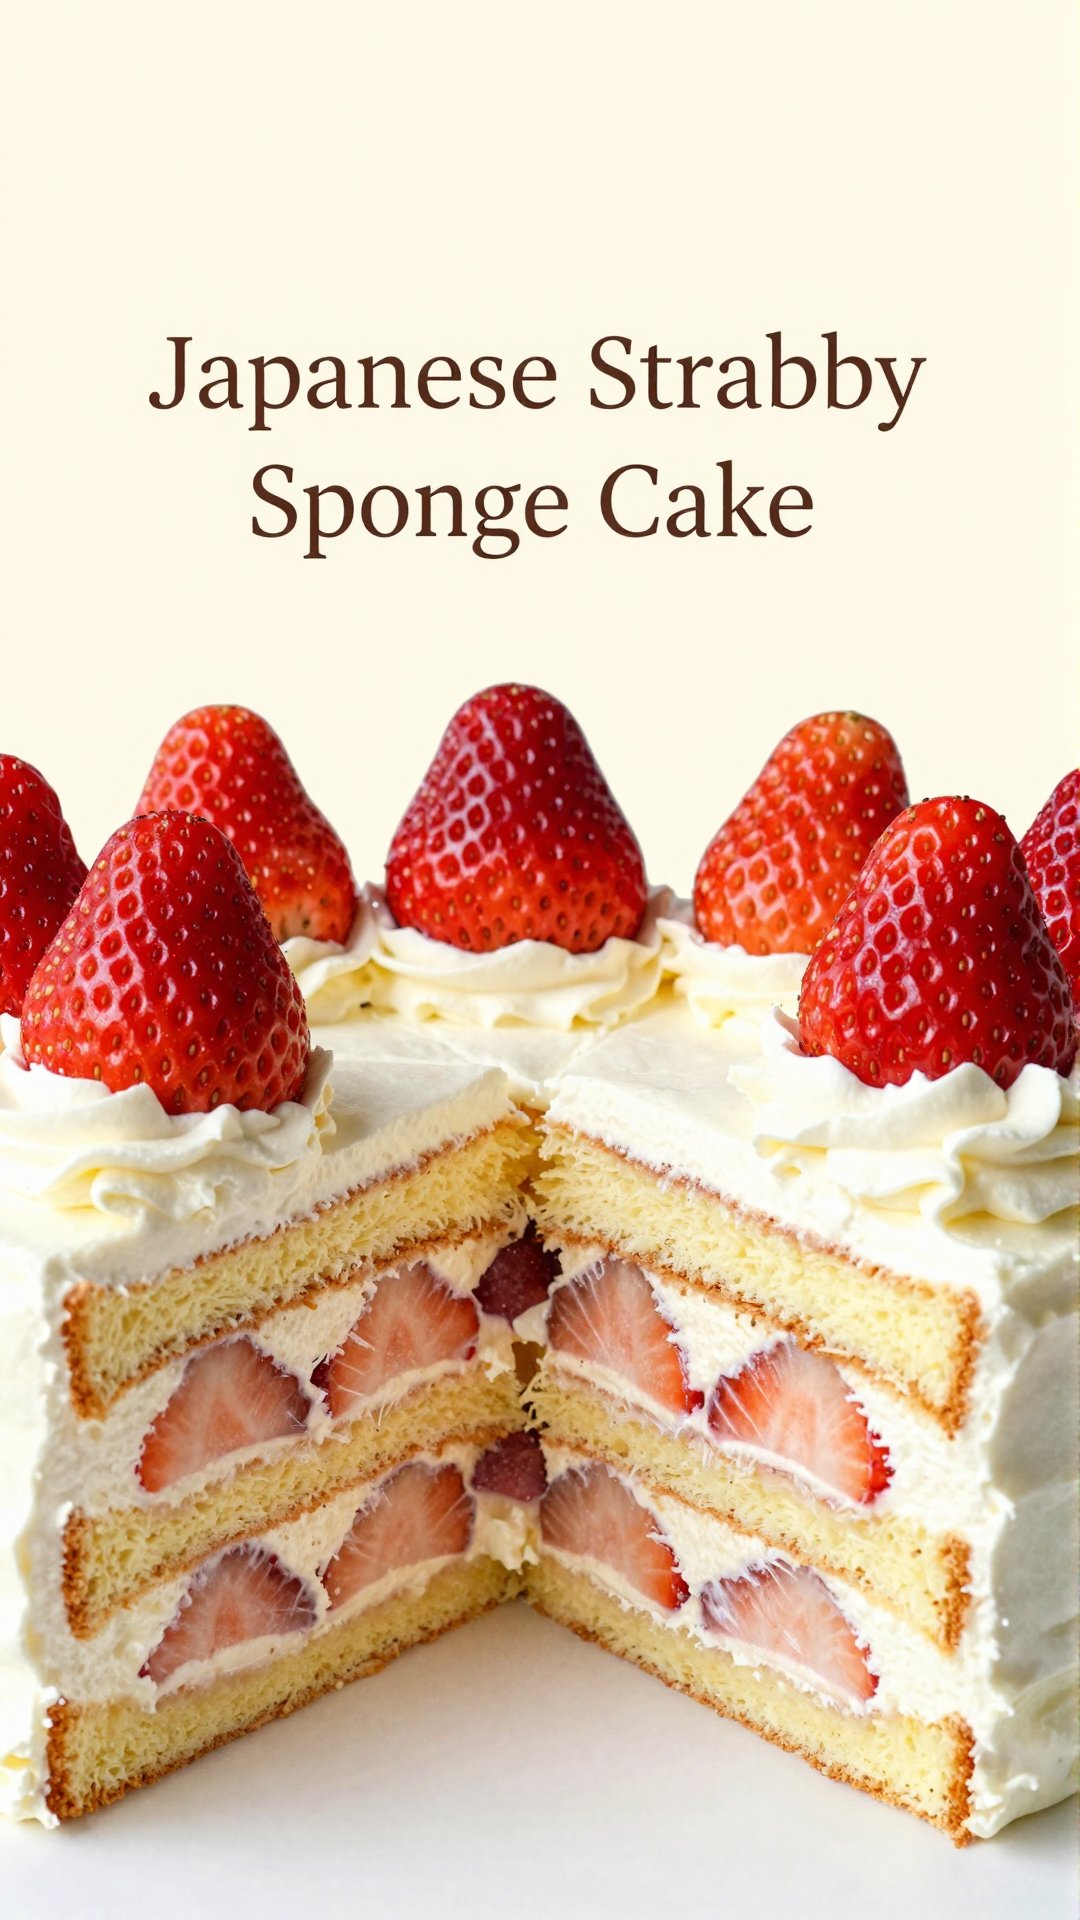
Hey there, friend! Emily Dawson here, from Emily’s Must-Try Kitchen. Today, we’re diving into a recipe that’s close to my heart – a Light & Airy Japanese Strawberry Sponge Cake, also known as Japanese Strawberry Shortcake. Think clouds, strawberries, and a whole lotta happiness in every bite. If you’re anything like me, you believe that the best desserts are the ones that feel like a warm hug, and trust me, this cake delivers just that. It’s the perfect centerpiece for birthdays, celebrations, or simply a delightful Sunday afternoon treat.
Growing up in Charleston, I was surrounded by incredible Southern desserts, but this Japanese-inspired creation brings a unique lightness and freshness to the table. It’s a delightful twist on the classic strawberry shortcake, and I can’t wait to share all my tips and tricks with you, ensuring your cake turns out absolutely perfect. Let’s get baking!
Why You’ll Love This Japanese Strawberry Sponge Cake
Okay, so why should you dedicate your precious time to making this particular cake? Let me tell you, it’s more than just a dessert; it’s an experience! This isn’t your grandma’s dense shortcake (though I love her dearly!). This Japanese Strawberry Sponge Cake is all about that ethereal, melt-in-your-mouth texture. Think of it as a cloud, kissed with the sweetness of fresh strawberries and the delicate richness of whipped cream. Here’s why I think you’ll be obsessed:
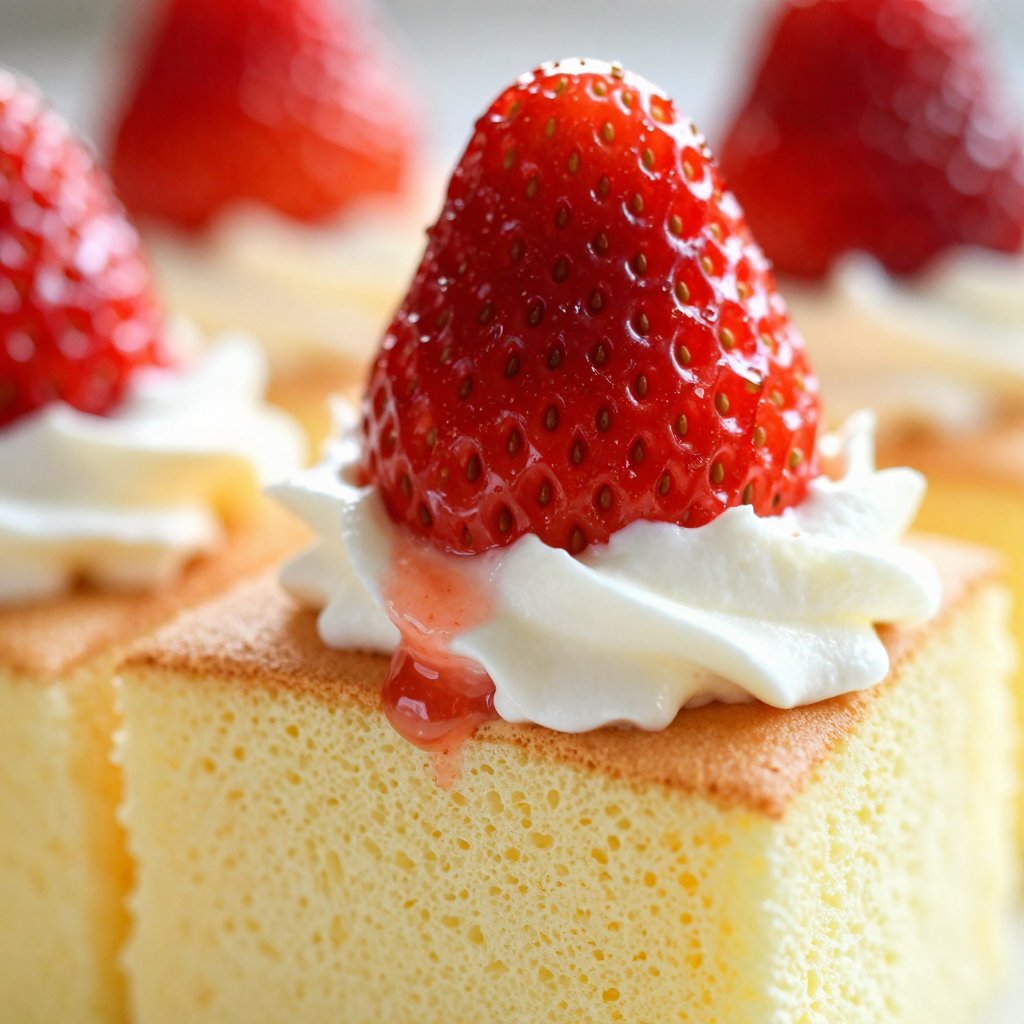
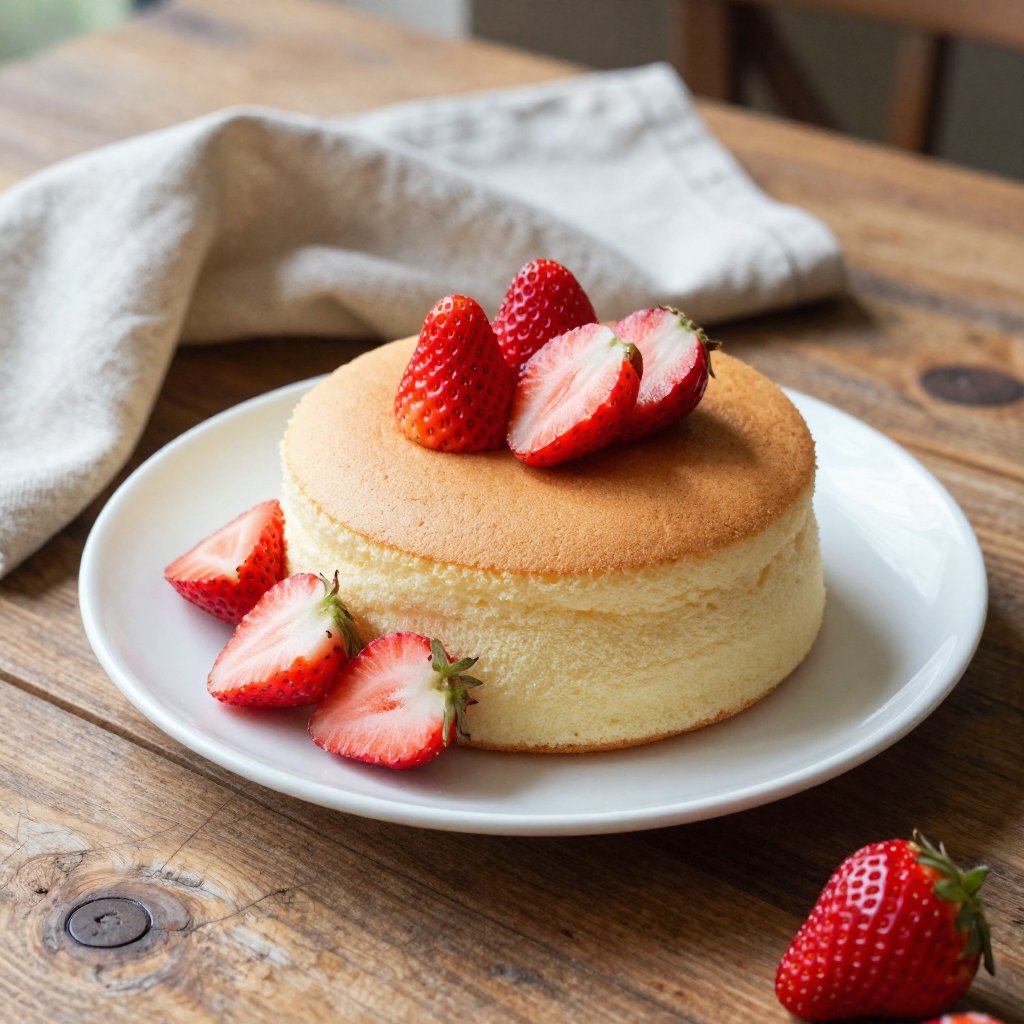
- Light and Airy Texture: The sponge cake is incredibly light, almost like a chiffon cake. It’s a welcome change from heavier desserts.
- Perfectly Balanced Sweetness: It’s sweet, but not overwhelmingly so. The fresh strawberries and lightly sweetened whipped cream balance the sponge beautifully.
- Beautiful Presentation: This cake is a showstopper! The layers of white whipped cream and vibrant red strawberries make it visually stunning.
- Easy to Customize: While strawberries are classic, you can easily swap them out for other berries or fruits.
- A Crowd-Pleaser: Everyone loves strawberry shortcake, and this Japanese version elevates it to a whole new level. It’s sure to impress your friends and family.
Ingredients: Your Shopping List
Before we get started, let’s make sure we have everything we need. Don’t worry, the ingredient list is pretty straightforward, and you probably have many of these items in your pantry already.
- 4 large eggs
- 120g (about ½ cup) granulated sugar
- 120g (about 1 cup) all-purpose flour
- 30g (about 2 tablespoons) unsalted butter, melted
- 1 teaspoon vanilla extract
- 300ml (about 1 ¼ cups) heavy whipping cream
- 30g (about ¼ cup) powdered sugar
- 500g (about 1 pound) fresh strawberries, hulled and sliced
- Extra strawberries for decoration
Step-by-Step: Baking Your Japanese Strawberry Sponge Cake
Alright, let’s get down to business! This recipe might seem a little intimidating at first, but I promise, if you follow these steps carefully, you’ll be enjoying a slice of heaven in no time. Remember, baking is a journey, not a race. So, take your time, enjoy the process, and don’t be afraid to make mistakes. That’s how we learn!
- Preheat and Prep: Preheat your oven to 170°C (340°F). Line a round cake pan (about 6-8 inches) with parchment paper. This ensures the cake doesn’t stick and makes it easy to remove.
- Whisk the Eggs and Sugar: In a mixing bowl, whisk together the eggs and granulated sugar for about 10 minutes. Yes, 10 minutes! This is crucial for creating that light and airy texture. The mixture should become thick and pale, resembling a luscious custard. Think of it as whipping air into the batter, creating the foundation for that fluffy texture that this cake is all about.
- Sift in the Flour: Gently sift the all-purpose flour over the egg mixture. Folding it in carefully is key to retaining that precious airiness. Use a spatula and gently fold from the bottom up, avoiding overmixing. Overmixing develops the gluten in the flour, which can result in a tough cake.
- Add Butter and Vanilla: Add the melted butter and vanilla extract, folding again until the batter is smooth and homogenous, ready to rise in the oven. Ensure the butter isn’t too hot, or it might deflate the batter.
- Bake the Cake: Pour the batter into the prepared cake pan, smoothing the top with a spatula. Bake for 25-30 minutes, or until a toothpick inserted in the center comes out clean. Keep an eye on it, as oven temperatures can vary. You want the cake to be golden brown but not burnt.
- Cooling Time: Once baked, remove the cake from the oven and let it cool in the pan for 10 minutes before transferring it to a wire rack to cool completely. This prevents the cake from collapsing.
- Whip the Cream: As the cake cools, whip together the heavy cream and powdered sugar until soft peaks form, creating a dreamy, fluffy topping. Be careful not to overwhip the cream, or it will turn into butter!
- Slice and Assemble: Once the cake is completely cooled, carefully slice it in half horizontally to create two layers. A serrated knife works best for this.
- Layer the Goodness: Place one layer on a serving plate, generously spread a layer of whipped cream, and top it with the luscious sliced strawberries. Don’t be shy with the strawberries!
- Top it Off: Position the second layer of cake on top of the first, and coat the top and sides with more whipped cream for that perfect finish. Smooth it out with a spatula or create decorative swirls.
- Decorate: For a beautiful presentation, decorate the top with extra strawberries, placing them artfully. Get creative! You can also add a dusting of powdered sugar or a few sprigs of mint.
- Chill and Serve: Finally, chill the assembled cake in the refrigerator for about 30 minutes before serving, allowing the flavors to meld perfectly together. This also helps the cake to set and makes it easier to slice.
Pro Tips for the Perfect Japanese Strawberry Sponge Cake
Here are some of my tried-and-true tips to ensure your cake is a masterpiece:
- Room Temperature Eggs: Use room temperature eggs for better volume when whisking.
- Sift, Sift, Sift: Sifting the flour is crucial for a light and airy texture.
- Gentle Folding: Be gentle when folding in the flour and butter to avoid deflating the batter.
- Don’t Overbake: Overbaking will result in a dry cake. Use a toothpick to check for doneness.
- Chill Time: Chilling the cake before serving allows the flavors to meld and the cake to set.
Common Mistakes to Avoid
We all make mistakes, especially in the kitchen! Here are a few common pitfalls to watch out for:
- Overmixing the Batter: This leads to a tough cake. Be gentle!
- Using Cold Eggs: Cold eggs don’t whip as well, resulting in a denser cake.
- Opening the Oven Door Too Early: This can cause the cake to collapse. Resist the urge to peek!
- Overwhipping the Cream: Overwhipped cream turns into butter. Stop when soft peaks form.
- Skipping the Parchment Paper: This makes it difficult to remove the cake from the pan.
Variations: Spice It Up!
Want to put your own spin on this recipe? Here are a few ideas:
- Different Fruits: Substitute the strawberries with other berries like blueberries, raspberries, or blackberries. Peaches or mangoes would also be delicious!
- Citrus Zest: Add a teaspoon of lemon or orange zest to the batter for a burst of citrus flavor.
- Almond Extract: Substitute the vanilla extract with almond extract for a nutty twist.
- Chocolate Version: Add cocoa powder to the batter for a chocolate sponge cake.
- Liqueur: Brush the cake layers with a bit of liqueur, like Grand Marnier or Kirsch, for an extra touch of flavor.
Storage Instructions: Keeping It Fresh
This cake is best enjoyed fresh, but if you have leftovers, here’s how to store them:
- Refrigerate: Store the cake in an airtight container in the refrigerator for up to 3 days.
- Freezing: You can freeze the cake layers separately. Wrap them tightly in plastic wrap and then in foil. Freeze for up to 2 months. Thaw in the refrigerator before assembling.
Frequently Asked Questions (FAQ)
Got questions? I’ve got answers!
- Can I use a different type of flour? While all-purpose flour is recommended for this recipe, you can use cake flour for an even lighter texture.
- Can I make this cake ahead of time? Yes, you can bake the sponge cake a day ahead of time and store it at room temperature, wrapped in plastic wrap. However, it’s best to assemble the cake just before serving to prevent the whipped cream from becoming soggy.
- Can I use store-bought whipped cream? While homemade whipped cream is always best, you can use store-bought whipped cream in a pinch. Just make sure it’s a good quality brand.
- My cake sank in the middle. What did I do wrong? This could be due to a few reasons: the oven temperature was too high, you opened the oven door too early, or you didn’t whisk the eggs and sugar long enough.
- Can I make this cake gluten-free? Yes, you can substitute the all-purpose flour with a gluten-free flour blend. Just be sure to use a blend that’s designed for baking cakes.
Serving Suggestions: The Grand Finale
Now that you’ve created this masterpiece, it’s time to enjoy it! Here are a few serving suggestions:
- Plain: Serve the cake as is, with a simple dusting of powdered sugar.
- With Berries: Add a side of fresh berries for an extra burst of flavor.
- With Ice Cream: Serve a slice of cake with a scoop of vanilla ice cream or strawberry sorbet.
- With Coffee or Tea: This cake pairs perfectly with a cup of coffee or tea.
- For Special Occasions: Decorate the cake with candles and serve it as a birthday cake or for other special celebrations.
There you have it, my friend! Your very own Light & Airy Japanese Strawberry Sponge Cake. I hope you enjoy making and eating this cake as much as I do. Remember, baking is all about having fun and creating something delicious. Don’t be afraid to experiment and make it your own. And most importantly, share it with the people you love!
Happy baking! And don’t forget to share your creations with me on social media using #EmilysMustTryKitchen. I can’t wait to see what you come up with!
Warmly,
Emily Dawson
Japanese Strawberry Sponge Cake (Strawberry Shortcake)
Ingredients
Cake
- 4 large eggs
- 120 g granulated sugar (about ½ cup)
- 120 g all-purpose flour (about 1 cup)
- 30 g unsalted butter (melted, about 2 tablespoons)
- 1 teaspoon vanilla extract
Cream and Strawberries
- 300 ml heavy whipping cream (about 1 ¼ cups)
- 30 g powdered sugar (about ¼ cup)
- 500 g fresh strawberries (hulled and sliced, about 1 pound)
- Extra strawberries (for decoration)
Instructions
- Preheat oven to 170°C (340°F) and line a cake pan with parchment paper.
- Whisk eggs and sugar for 10 minutes until thick and pale.
- Sift flour over egg mixture and fold gently.
- Add melted butter and vanilla extract, fold until smooth.
- Pour batter into pan and bake for 25-30 minutes, until a toothpick comes out clean.
- Cool cake in pan for 10 minutes, then transfer to a wire rack to cool completely.
- Whip heavy cream and powdered sugar until soft peaks form.
- Slice the cooled cake in half horizontally.
- Place one layer on a plate, spread whipped cream, and top with sliced strawberries.
- Position the second layer on top, and coat with more whipped cream.
- Decorate with extra strawberries.
- Chill for 30 minutes before serving.
Notes
Nutrition