This post contains affiliate links. As an Amazon Associate, I earn from qualifying purchases. This comes at no extra cost to you.
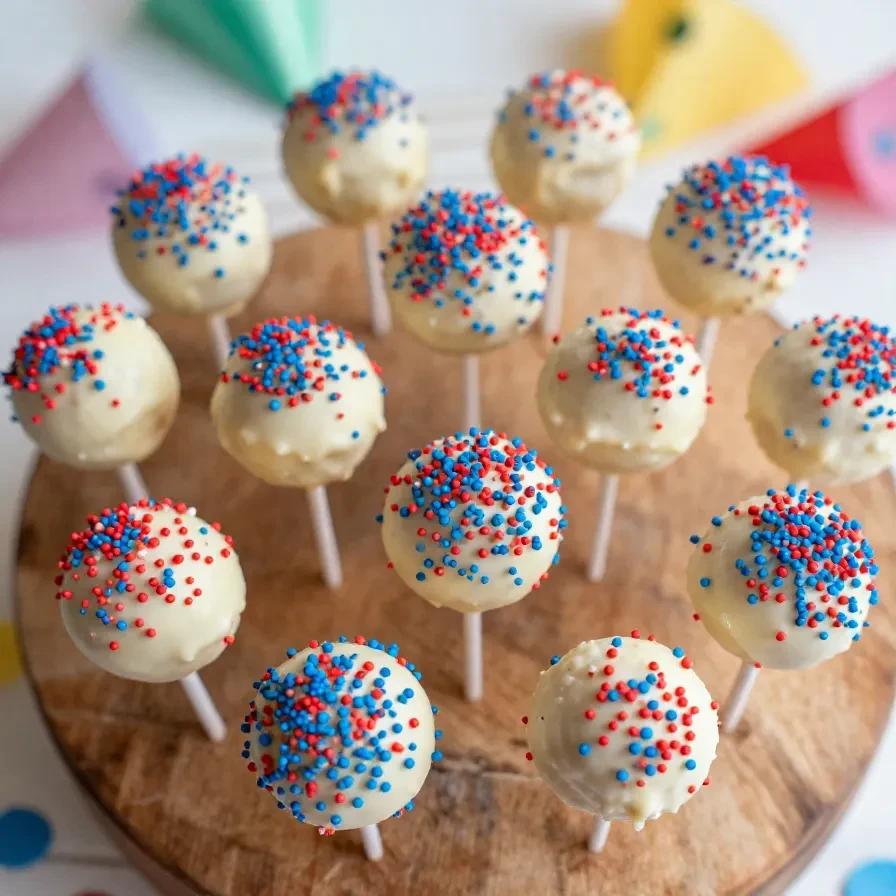
Red White Blue Cake Pops are the ultimate festive treat, combining a soft, flavorful vanilla cake base with vibrant patriotic colors. Each bite delivers a delightful contrast of rich sweetness and the playful crunch of sprinkles. These cake pops are dipped in creamy white candy melts and perfectly suited for any 4th of July celebration or bake sale.
Table of Contents
- Why Make These Cake Pops?
- Everything You Need for Red White Blue Cake Pops
- How To Make Red White Blue Cake Pops Step by Step
- The Origin of Cake Pops
- Expert Tips for Perfect Cake Pops
- Storing and Reheating Your Cake Pops
- Common Questions About Cake Pops
Why Make These Cake Pops?
- They’re a visual showstopper for patriotic holidays. The bold red, white, and blue design makes them a centerpiece for any celebration.
- Perfectly portioned for gatherings. These handheld desserts eliminate the need for plates, making them easy to share and serve.
- Great for creative fun in the kitchen. Kids and adults alike will enjoy crafting these colorful treats with melted candy and sprinkles.
- Ideal for bake sales or party favors. Wrap them individually in cellophane and tie with ribbons for a professional touch.
Everything You Need for Red White Blue Cake Pops
- 1 box vanilla cake mix (ensure halal certification)
- 3 large eggs (use halal-certified eggs)
- 1/2 cup vegetable oil
- 1 cup water
- 1 cup vanilla frosting (ensure halal certification)
- Red food coloring (gel or liquid, ensure halal certification)
- Blue food coloring (gel or liquid, ensure halal certification)
- 1 cup white candy melts (ensure halal certification)
- Sprinkles in red, white, and blue (ensure halal certification)
- Lollipop sticks (ensure halal certification)
Colorful food coloring and festive sprinkles are essential to making these cake pops pop visually. Halal-certified ingredients ensure these treats can be enjoyed by everyone.
How To Make Red White Blue Cake Pops Step by Step
- Preheat your oven to 350°F (175°C) and grease a 9×13 inch baking pan to prevent sticking.
- In a large mixing bowl, combine the vanilla cake mix, eggs, vegetable oil, and water. Stir until the batter is smooth and lump-free.
- Pour the batter into the prepared pan and bake for 25-30 minutes, or until a toothpick inserted into the center comes out clean.
- Let the cake cool completely in the pan on a wire rack before moving to the next step.
 Kitchen ApplianceKitchenAid Artisan Stand Mixer
Makes mixing dough and batters effortless — a kitchen game-changer
Essential CookwareWilton Easy-Flex Silicone SpatulaPerfect for mixing and scraping batter — essential for cake pops.
- Once cooled, crumble the cake into fine crumbs using your hands or a fork and place in a large bowl.
- Add the vanilla frosting to the crumbs and mix thoroughly until a dough-like consistency forms.
- Divide the mixture into three equal parts. Leave one plain, color one with red food coloring, and the other with blue; mix well until evenly tinted.
- Roll each portion into 1-inch balls using your hands, then arrange them on a parchment-lined baking sheet.
- Freeze the cake balls for 30 minutes to make them firm and easier to handle.
- Melt the white candy melts according to the package instructions until smooth and fluid.
- Dip the tip of each lollipop stick into the melted candy, then insert halfway into a cake ball for added stability.
- Immerse each cake pop fully in the melted candy, ensuring it’s evenly coated. Let the extra drip off before decorating.
- Quickly add red, white, and blue sprinkles to each cake pop before the coating hardens.
- Place the decorated pops upright in a styrofoam block or mug to dry completely. Serve once the candy coating is fully set!
The Origin of Cake Pops
Cake pops gained popularity in the early 2000s, credited largely to their playful, customizable nature and bite-sized convenience. They are an ingenious way to repurpose cake crumbs, turning leftovers into something both beautiful and delicious.
Today, cake pops are a staple for events ranging from birthday parties to holiday celebrations, with designs limited only by imagination.
You might also enjoy our red, white, and blue cake pops.
Expert Tips for Perfect Cake Pops
- Use gel food coloring for vibrant colors without altering the texture of the mixture.
- Don’t skip freezing the cake balls; this step ensures they hold their shape when dipped in melted candy.
- Work in batches to prevent the candy coating from hardening before applying sprinkles.
- Keep your melted candy warm by placing the bowl over a pan of hot water to maintain a smooth consistency.
Storing and Reheating Your Cake Pops
Store completed cake pops in an airtight container at room temperature for up to 3 days. For longer storage, refrigerate them for up to a week, ensuring they are fully set before chilling.
For more ideas, check out our red, white, and blue cake.
If freezing, wrap individually in plastic wrap and place in a freezer-safe container; cake pops can last for up to 3 months this way. Thaw at room temperature before serving for the best texture.
Looking for something similar? Try our edgar’s bakery – red, white,.
Common Questions About Cake Pops
- Can I make these in advance? Yes, cake pops can be prepared a day or two ahead and stored in the fridge or freezer.
- What can I use instead of candy melts? White chocolate chips can be substituted, but you may need to add a small amount of vegetable oil to achieve the right consistency.
- How do I prevent cracks in the coating? Ensure the cake balls are not too cold when dipping, as extreme temperature differences can cause cracking.

Red White Blue Cake Pops
Ingredients
- 1 box vanilla cake mix (ensure halal certification)
- 3 large eggs (use halal-certified eggs)
- 1/2 cup vegetable oil
- 1 cup water
- 1 cup vanilla frosting (ensure halal certification)
- Red food coloring (gel or liquid, ensure halal certification)
- Blue food coloring (gel or liquid, ensure halal certification)
- 1 cup white candy melts (ensure halal certification)
- Sprinkles (in red, white, and blue, ensure halal certification)
- Lollipop sticks (ensure halal certification)
Instructions
- Preheat your oven to 350°F (175°C) and grease a 9x13 inch baking pan.
- In a large mixing bowl, combine the vanilla cake mix, eggs, vegetable oil, and water. Mix until well combined and smooth.
- Pour the batter into the prepared baking pan and bake for 25-30 minutes, or until a toothpick inserted in the center comes out clean.
- Once baked, let the cake cool completely in the pan on a wire rack.
- After the cake has cooled, crumble it into a large bowl until fine crumbs form.
- Add the vanilla frosting to the cake crumbs and mix until fully combined.
- Divide the mixture into three equal portions. Leave one portion plain, color one portion with red food coloring, and color the last portion with blue food coloring. Mix well until colors are evenly distributed.
- Using your hands, roll each portion into small balls, about 1 inch in diameter, and place them on a baking sheet lined with parchment paper.
- Once all the cake balls are formed, place the baking sheet in the freezer for about 30 minutes to firm up.
- While the cake balls are freezing, melt the white candy melts according to package instructions until smooth.
- Dip the tip of each lollipop stick into the melted candy, then insert it halfway into a cake ball. This will help the stick stay in place.
- Once all the sticks are inserted, dip each cake pop into the melted white candy, allowing any excess to drip off.
- Immediately sprinkle the cake pops with red, white, and blue sprinkles before the coating sets.
- Place the completed cake pops upright in a styrofoam block or a mug to allow the coating to harden completely.
- Once set, your Red White Blue Cake Pops are ready to be served!
Notes
Nutrition

Loved this recipe? Save it to your favorite Pinterest board so you can easily find it later! ✨