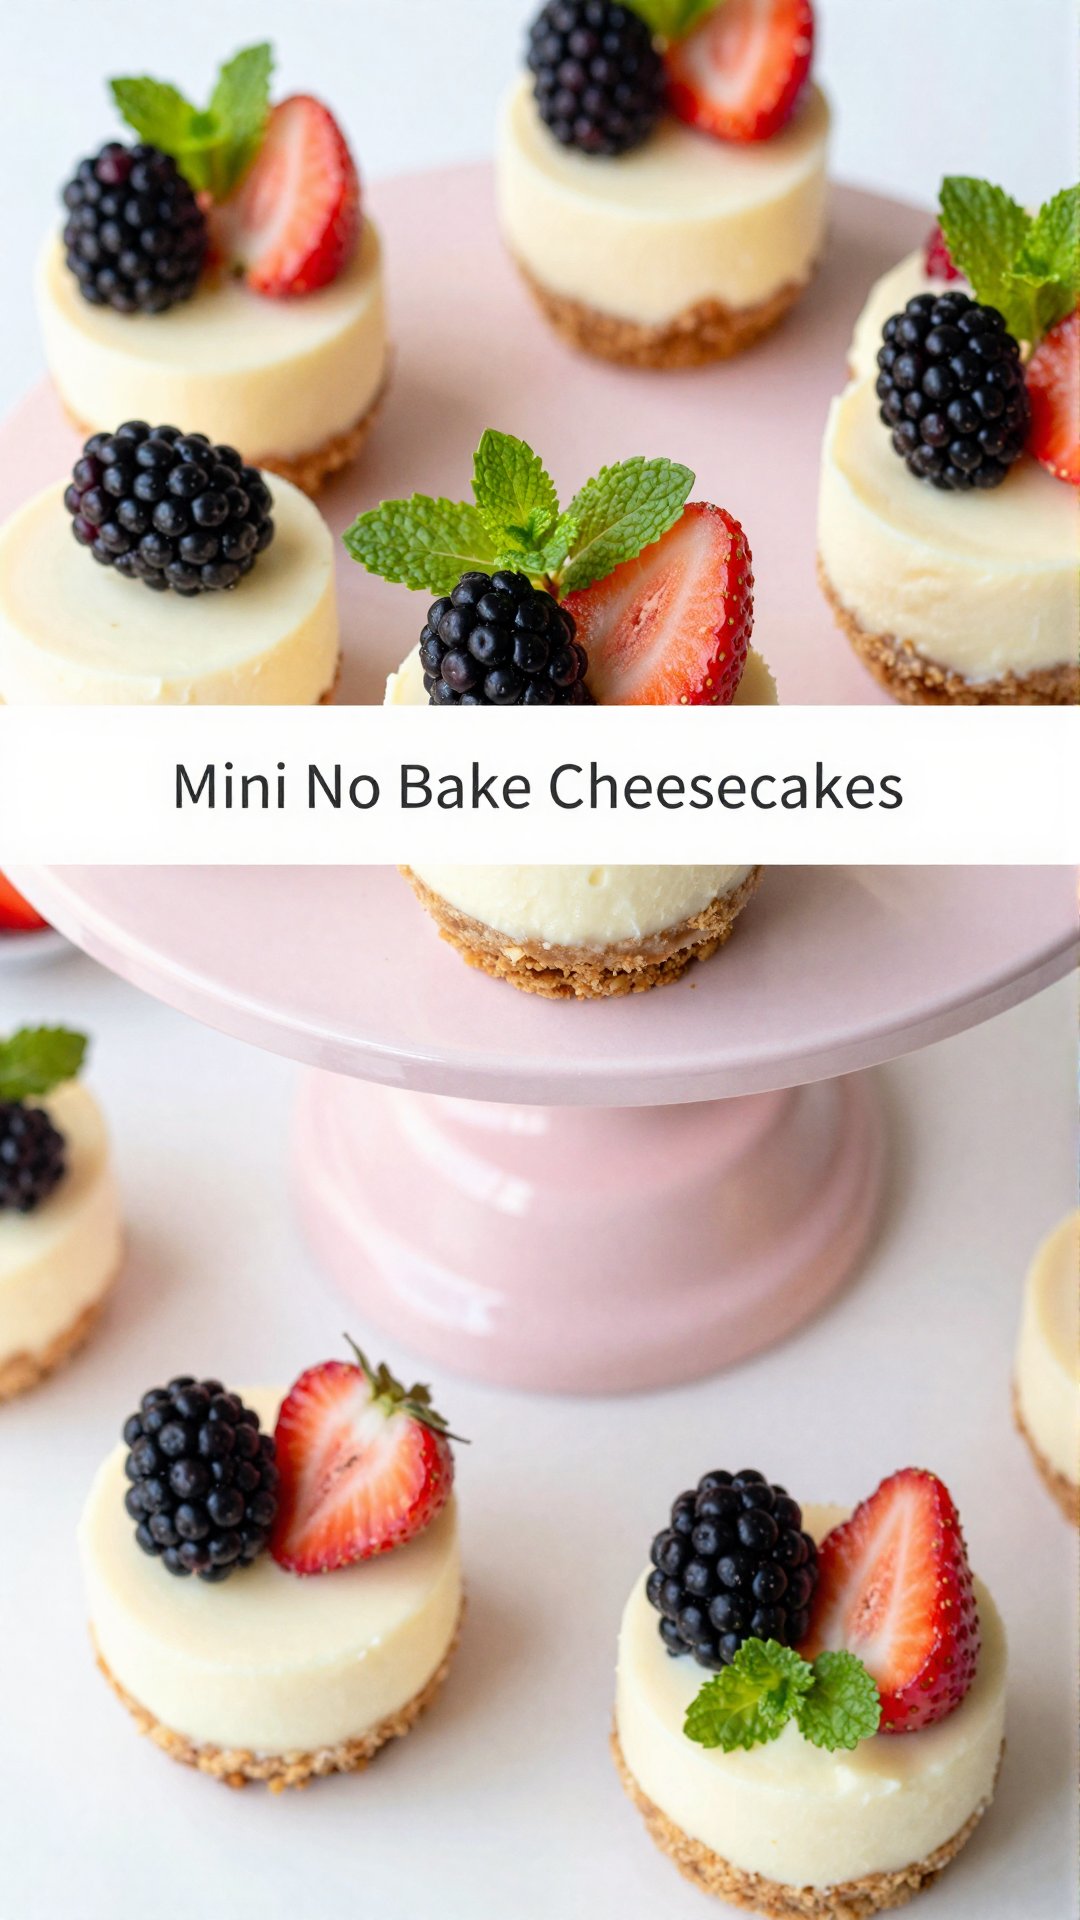
Easy Mini No-Bake Cheesecakes Recipe: A Bite-Sized Slice of Heaven
Hey there, friends! Emily Dawson here, from Emily’s Must-Try Kitchen. Today, we’re diving headfirst into a dessert that’s not only incredibly delicious but also ridiculously easy to make: Mini No-Bake Cheesecakes! These little gems are perfect for potlucks, parties, or just a simple weeknight treat. And the best part? No oven required!
Growing up in Charleston, I learned that the best recipes are the ones that bring people together. These mini cheesecakes do just that. They’re fun to make, even more fun to eat, and always a crowd-pleaser. So, grab your ingredients, and let’s get started!
Why You’ll Love This Mini No-Bake Cheesecakes Recipe
Seriously, what’s not to love? But if you need convincing, here are a few reasons why these mini cheesecakes will become your new go-to dessert:
- No-Bake Bliss: Forget turning on the oven, especially on those hot summer days. These cheesecakes are all about easy, breezy, no-bake goodness.
- Quick & Easy: From start to finish, you’re looking at minimal prep time. Perfect for when you need a dessert in a hurry.
- Customizable: The toppings are your playground! Berries, chocolate sauce, caramel, sprinkles – the possibilities are endless.
- Perfectly Portioned: Individual cheesecakes mean no slicing, no mess, and everyone gets their own little piece of happiness.
- Make-Ahead Magic: These cheesecakes are even better after a few hours in the fridge, making them ideal for prepping ahead of time.
I know you’re going to ask, so I’m going to tell you: These **mini no bake** cheesecakes are just so creamy, dreamy, and perfect for any party.
Ingredients You’ll Need
Here’s what you’ll need to whip up these delightful **mini no bake cheesecakes**:
- 2 cups (240g) graham cracker crumbs (about 16 full sheet graham crackers)
- 1/3 cup (67g) packed light or dark brown sugar
- 1/2 cup (8 Tbsp; 113g) unsalted butter, melted
- 1 cup (240ml) cold heavy cream or heavy whipping cream
- 16 ounces (452g) full-fat brick cream cheese, softened to room temperature
- 1/3 cup (67g) granulated sugar
- 2 Tablespoons (30g) sour cream or plain yogurt, at room temperature
- 1 teaspoon fresh lemon juice
- 1/2 teaspoon pure vanilla extract
- optional: your desired toppings (see recipe Note)
How to Make Mini No-Bake Cheesecakes: Step-by-Step
Alright, let’s get down to business! Here’s how to make these little beauties:
- Prep Your Pans: Line two standard 12-count muffin pans with cupcake liners. Make sure you have room in your refrigerator for both pans. (You refrigerate them later.)
- Crust Time: If your graham crackers aren’t crumbs yet, use a food processor to pulse them into fine crumbs. Pour crumbs into a medium bowl and stir in the brown sugar and melted butter until combined. Mixture will have the consistency of wet sand. Spoon 1 and 1/2 Tablespoons of the crust mixture into each cupcake liner and use the back of the spoon to pack it down tightly.
- Optional: Bake the Crust (Or Don’t!): Though it’s not required, I recommend baking the crusts for a quick 5 minutes in a 350°F (177°C) oven. The crusts are a little sturdier this way. However, if you can’t use an oven or simply **don t** want to, you can skip this step. The crust will just be a bit crumblier. If baking, let the warm crusts cool for 10 minutes before adding **the filling** on top.
- Whip It Good: Using a hand mixer or a stand mixer fitted with a whisk attachment, whip the cold heavy cream into stiff peaks on medium-high speed, about 3 minutes. Set aside.
- Cheesecake Filling Magic: Using a hand mixer or a stand mixer fitted with a whisk or paddle attachment, beat the **cream cheese** and granulated sugar together on medium speed until smooth and creamy. Scrape down the sides and up the bottom of the bowl with a silicone spatula as needed. Add the sour cream, lemon juice, and vanilla extract. Beat on medium-high speed until smooth and combined, about 1 minute. Make sure there are no large lumps of **cream cheese**. If there are lumps, keep beating until smooth.
- Fold It In: Using your mixer on low speed or a silicone spatula, fold the **whipped cream** into the **cheesecake filling** until combined. This takes several turns of your rubber spatula. Combine slowly as you **don t** want to deflate all the air in the **whipped cream**.
- Fill ‘Em Up: You can use a spoon or piping bag to transfer **the filling** on top of **the crust**s. Spoon or pipe about 2 Tablespoons of filling over each crust. I prefer piping the filling because it’s a little easier and neater. Fit your piping bag with a large star or round piping tip, then transfer the filling to the bag and pipe. (You could also use a plastic zipped-top bag. Spoon the filling inside, snip an end off a corner, and pipe.) Use the back of a spoon to smooth the tops so they are flat.
- Chill Out: Refrigerate **the mini** cheesecakes in the pans for at least 3 hours and up to 2 days. If refrigerating for longer than 3 hours, I recommend covering with aluminum foil or plastic wrap.
- Serve & Enjoy: Keep refrigerated until ready to serve. Serve with optional toppings (see recipe Note). The cheesecakes begin to soften and stick to the liners after about 30–60 minutes at room temperature.
- Store Leftovers: Cover and store leftover **mini** cheesecakes in the **refrigerator** for up to 5 days.
Pro Tips for Perfect Mini No-Bake Cheesecakes
Want to take your **mini no bake** cheesecakes to the next level? Here are a few of my favorite tips:
- Room Temperature Cream Cheese: This is crucial! Softened **cream cheese** ensures a smooth, lump-free filling. If you forget to take it out ahead of time, you can microwave it in 15-second intervals, checking and stirring in between, until softened.
- Cold Heavy Cream: Make sure your heavy cream is ice-cold for the best whipped cream. A cold bowl helps too!
- Don’t Overmix: Overmixing the cheesecake filling can lead to a dense texture. Gently fold in the whipped cream until just combined.
- Piping Bag Perfection: Using a piping bag not only looks pretty but also makes it easier to evenly distribute the filling.
- Chill Time is Key: Resist the urge to dig in too soon! The longer these cheesecakes chill, the better the flavors meld and the texture sets.
These **mini no bake** cheesecakes are so easy **to make**, that **you’re** going to want to make them all the time!
Common Mistakes to Avoid
We all make mistakes in the kitchen, but here are a few to watch out for when making these **mini no bake cheesecakes**:
- Lumpy Filling: This usually happens when the cream cheese isn’t soft enough. Make sure it’s at room temperature and beat it well before adding other ingredients.
- Deflated Whipped Cream: Be gentle when folding in the whipped cream. Overmixing will deflate it, resulting in a flat filling.
- Soggy Crust: Press the graham cracker crust firmly into the cupcake liners to prevent it from becoming soggy. Baking the crust (optional) also helps.
- Impatience: Don’t rush the chilling process! These cheesecakes need time to set up properly in the **refrigerator**.
Variations to Try
Want to switch things up? Here are some fun variations to try with these **mini no bake cheesecakes**:
- Chocolate Chip: Fold mini chocolate chips into the cheesecake filling.
- Oreo: Crush Oreo cookies and mix them into the crust or sprinkle them on top.
- Lemon: Add lemon zest to the cheesecake filling for a bright, citrusy flavor.
- Peanut Butter: Swirl peanut butter into the cheesecake filling or top with peanut butter cups.
- Berry Swirl: Swirl your favorite berry jam or compote into the cheesecake filling.
If **you** love **bake cheesecakes**, but **don’t** want to turn on **the oven**, then these **mini** **bake cheesecakes** are for you!
How to Store Mini No-Bake Cheesecakes
These **mini** cheesecakes are best stored in the **refrigerator**. Cover them with plastic wrap or aluminum foil to prevent them from drying out. They will keep for up to 5 days. I doubt they’ll last that long though!
Frequently Asked Questions (FAQ)
Got questions? I’ve got answers! Here are some common questions about making **mini no bake cheesecakes**:
- Can I use low-fat cream cheese? While you can, I recommend using full-fat **cream cheese** for the best flavor and texture. Low-fat versions may result in a slightly less creamy cheesecake.
- Can I use a different type of crust? Absolutely! Try using Oreo crumbs, shortbread cookies, or even crushed pretzels for a salty-sweet twist.
- Can I freeze these cheesecakes? Yes, you can! Wrap them individually in plastic wrap and then place them in a freezer-safe bag or container. They will keep in the freezer for up to 2 months. Thaw in the **refrigerator** before serving.
- Can I make these ahead of time? Yes! In fact, I recommend it. These cheesecakes are even better after a few hours in the **refrigerator**.
- Why is my filling not setting? Make sure you’re using full-fat **cream cheese** and that you’ve chilled the cheesecakes for at least 3 hours. If it’s still not setting, try chilling them for a longer period.
These **cheesecakes are** perfect for a party. **I’m** sure that **a few** of your friends will ask for the recipe.
Serving Suggestions
Now for the fun part: serving! Here are some of my favorite ways to enjoy these **mini no bake cheesecakes**:
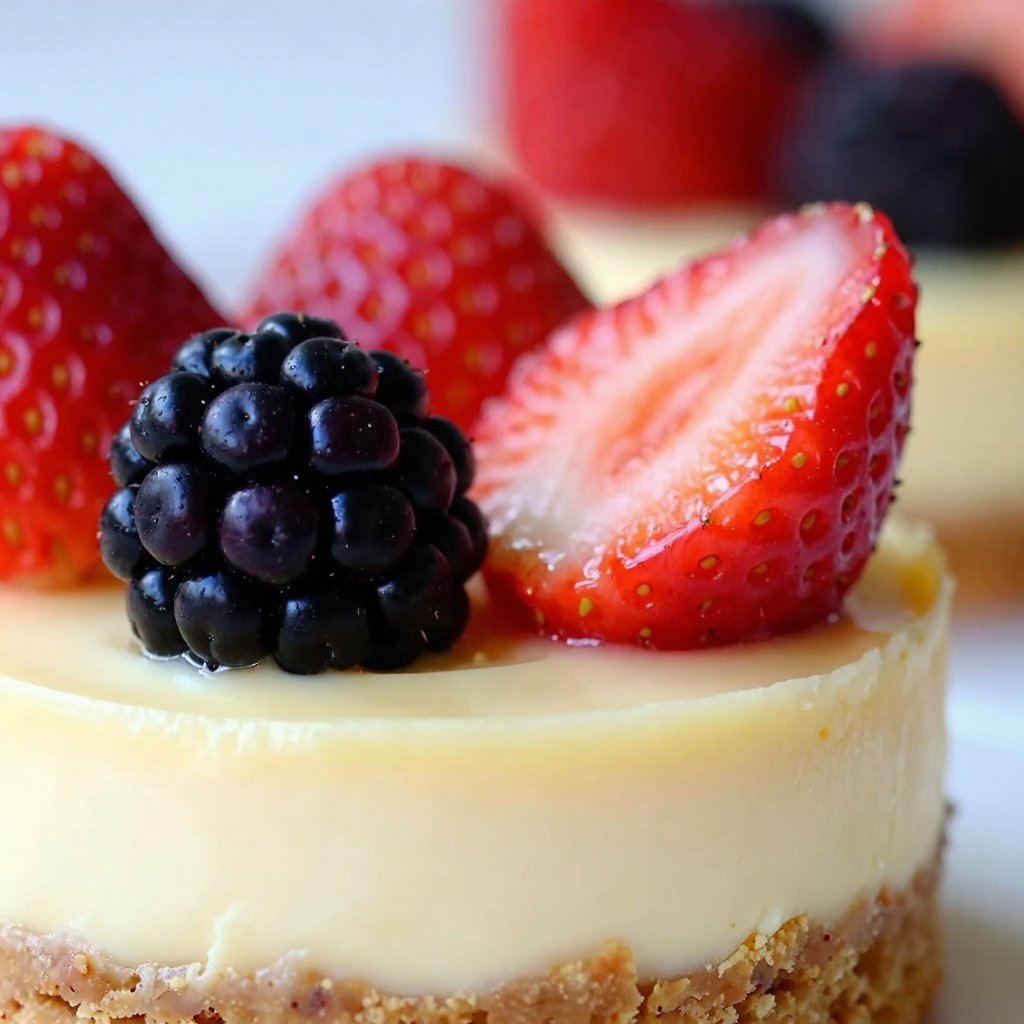
- Fresh Berries: Top with a mix of fresh berries like strawberries, raspberries, and blueberries.
- Chocolate Sauce: Drizzle with warm chocolate sauce or ganache.
- Caramel Sauce: A generous drizzle of salted caramel sauce is always a good idea.
- Whipped Cream: Add a dollop of freshly **whipped cream** for extra indulgence.
- Sprinkles: Because sprinkles make everything better!
So there you have it, friends! My Easy **Mini No Bake Cheesecakes** recipe. I hope you love it as much as I do. Remember, cooking is all about having fun and experimenting, so don’t be afraid to get creative with your toppings and variations. And most importantly, enjoy every bite!
Thanks for joining me in Emily’s Must-Try Kitchen. Until next time, happy baking (or should I say, no-baking)!

Mini No-Bake Cheesecakes
Ingredients
Crust
- 2 cups graham cracker crumbs (about 16 full sheet graham crackers)
- 1/3 cup packed light or dark brown sugar
- 1/2 cup unsalted butter, melted
Filling
- 1 cup cold heavy cream or heavy whipping cream
- 16 ounces full-fat brick cream cheese, softened (to room temperature)
- 1/3 cup granulated sugar
- 2 Tablespoons sour cream or plain yogurt (at room temperature)
- 1 teaspoon fresh lemon juice
- 1/2 teaspoon pure vanilla extract
- optional desired toppings (see recipe Note)
Instructions
- Line muffin pans with cupcake liners.
- Process graham crackers into crumbs. Combine with brown sugar and melted butter. Press into cupcake liners.
- Optionally bake crusts at 350°F (177°C) for 5 minutes. Cool for 10 minutes.
- Whip heavy cream to stiff peaks. Beat cream cheese and sugar until smooth. Add sour cream, lemon juice, and vanilla. Fold in whipped cream.
- Spoon or pipe filling over crusts. Smooth the tops.
- Refrigerate for at least 3 hours and up to 2 days.
- Keep refrigerated until ready to serve. Serve with toppings.
- Store leftovers in the refrigerator for up to 5 days.
Notes
Nutrition