Hey there, friend! Emily here, from Emily’s Must-Try Kitchen. Today, we’re diving into a recipe that’s close to my heart: homemade biscuits. I grew up in Charleston, South Carolina, where biscuits weren’t just a side dish; they were a way of life. I remember standing on a stool next to my mom, sneaking bites of the dough, and learning that the simplest things can be the most satisfying. And trust me, there’s nothing quite like a warm, fluffy biscuit straight from the oven.
If you’ve ever been intimidated by making biscuits from scratch, don’t worry! I’m here to tell you that this recipe is surprisingly easy, and I’m going to walk you through every step. I’ve tweaked and perfected this recipe over the years, and I’m so excited to share it with you. So, grab your apron, preheat your oven, and let’s get baking!
Why You’ll Love This Biscuit Recipe
Why should you try this particular biscuit recipe? Well, let me tell you! I’ve poured my heart into creating a biscuit that’s foolproof and utterly delicious. Here’s why I think you’ll absolutely adore these homemade biscuits:
- Simple Ingredients: You probably already have everything you need in your pantry and fridge.
- Quick to Make: From start to finish, you can have warm, fluffy biscuits on the table in under 30 minutes.
- Incredibly Fluffy: The secret is in the technique, and I’m going to share all my tips for achieving that perfect, cloud-like texture.
- Versatile: These biscuits are fantastic on their own, but they’re also amazing with butter and jam, as a side for your favorite soup, or even as a base for a delicious breakfast sandwich.
- Comfort Food at Its Best: There’s just something so comforting about a warm biscuit. It’s like a hug in food form!
I’ve made countless batches of these biscuits, and each time, they bring a smile to my face. I know they will for you too!
Ingredients for the Best Homemade Biscuits
Here’s what you’ll need to whip up a batch of these heavenly biscuits. Remember, using high-quality ingredients can make a big difference in the final result:
- 2 cups all-purpose flour: This forms the base of our biscuits. I recommend using unbleached flour for the best flavor.
- 1 tablespoon baking powder: This is what gives our biscuits their lift and fluffy texture. Make sure it’s fresh!
- 1 teaspoon salt: Salt enhances the flavors of all the other ingredients and balances the sweetness.
- 1/2 cup (1 stick) cold unsalted butter, cut into cubes: Cold butter is crucial for creating flaky layers in the biscuits. Don’t skimp on the quality of the butter!
- 3/4 cup cold milk: Cold milk helps to keep the butter cold and prevents the gluten from developing too much, resulting in a tender biscuit.

Step-by-Step Guide: Making the Perfect Biscuits
Alright, let’s get down to the nitty-gritty! Here’s a detailed, step-by-step guide to making the most delicious homemade biscuits you’ve ever tasted. Don’t worry, I’ll be right there with you!
- Preheat the oven: Start by preheating your oven to 450°F (232°C). This high temperature is key for getting that beautiful golden-brown color and fluffy texture.
- Combine dry ingredients: In a large bowl, whisk together the flour, baking powder, and salt. Whisking ensures that the baking powder is evenly distributed, which is essential for a good rise.
- Cut in the butter: This is where the magic happens! Add the cold, cubed butter to the flour mixture. Using a pastry blender or your fingers, cut the butter into the flour until the mixture resembles coarse crumbs. The smaller pieces of butter will create pockets of steam in the oven, resulting in flaky layers.
- Add the milk: Pour in the cold milk and stir until just combined. Be careful not to overmix! Overmixing will develop the gluten in the flour, leading to tough biscuits. The dough should be shaggy and slightly sticky.
- Shape the dough: Turn the dough out onto a lightly floured surface. Gently pat it into a 3/4-inch thick circle. You don’t want to roll the dough, as this can also develop the gluten too much.
- Cut out the biscuits: Use a biscuit cutter or a sharp knife to cut out the biscuits. If you’re using a biscuit cutter, press straight down and avoid twisting, as twisting can seal the edges and prevent the biscuits from rising properly.
- Bake: Place the biscuits on an ungreased baking sheet. Bake for 12-15 minutes, or until they are golden brown on top. Keep a close eye on them, as oven temperatures can vary.
- Serve: Remove the biscuits from the oven and let them cool for a few minutes before serving. Enjoy them warm with butter, jam, honey, or your favorite toppings!
Pro Tips for Biscuit Perfection
Want to take your biscuits to the next level? Here are a few pro tips I’ve learned over the years to make sure your biscuits are always a success:
- Keep everything cold: This is the most important tip! Cold butter and cold milk are essential for creating flaky layers. I even like to chill my flour and bowl in the freezer for 15-20 minutes before starting.
- Don’t overmix: Overmixing develops the gluten in the flour, resulting in tough biscuits. Mix the dough just until the ingredients are combined. It’s okay if there are still some streaks of flour.
- Handle the dough gently: Be gentle when patting out the dough. Avoid rolling it, as this can also develop the gluten.
- Use a sharp cutter: A sharp biscuit cutter or knife will create clean edges that allow the biscuits to rise properly.
- Don’t twist the cutter: As I mentioned before, twisting the biscuit cutter can seal the edges and prevent the biscuits from rising.
- Bake at a high temperature: A high oven temperature helps the biscuits rise quickly and develop a golden-brown crust.
Follow these tips, and you’ll be well on your way to biscuit-making mastery!
Common Mistakes to Avoid
We all make mistakes in the kitchen – it’s part of the learning process! Here are a few common mistakes to avoid when making biscuits:
- Using warm butter: This will result in flat, dense biscuits. Make sure your butter is cold and firm.
- Overmixing the dough: This is the biggest culprit when it comes to tough biscuits. Mix the dough just until the ingredients are combined.
- Rolling the dough too thin: This will also result in flat biscuits. Pat the dough into a 3/4-inch thick circle.
- Not using enough flour on the surface: This can cause the dough to stick and make it difficult to handle. Lightly flour your work surface before turning out the dough.
- Opening the oven too often: This can cause the oven temperature to drop and prevent the biscuits from rising properly. Try to resist the urge to peek until the biscuits are almost done!
If you encounter any of these issues, don’t get discouraged! Just learn from your mistakes and try again. With a little practice, you’ll be making perfect biscuits in no time.
Biscuit Variations to Try
Once you’ve mastered the basic biscuit recipe, the possibilities are endless! Here are a few fun variations to try:
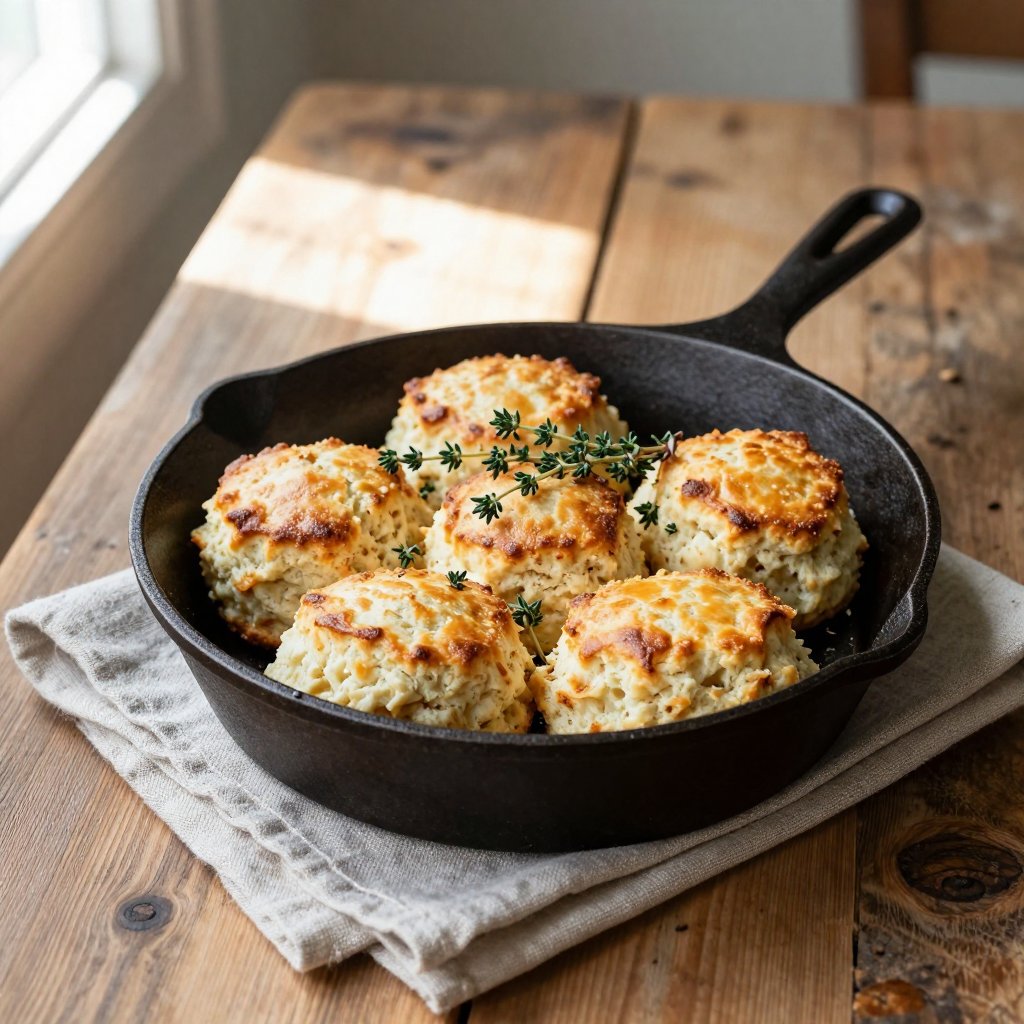
- Cheese Biscuits: Add 1/2 cup of shredded cheddar cheese to the dry ingredients for a cheesy twist.
- Herb Biscuits: Mix in 1-2 tablespoons of chopped fresh herbs, such as rosemary, thyme, or chives, for a savory flavor.
- Sweet Biscuits: Add 2-3 tablespoons of sugar to the dry ingredients for a slightly sweet biscuit. You can also add a drizzle of honey or maple syrup after baking.
- Garlic Biscuits: Add 1-2 teaspoons of garlic powder to the dry ingredients for a flavorful biscuit.
- Jalapeño Cheddar Biscuits: Add 1/4 cup of diced jalapeños and 1/2 cup of shredded cheddar cheese for a spicy, cheesy kick.
Feel free to get creative and experiment with your own variations! The only limit is your imagination.
How to Store Homemade Biscuits
If you happen to have any leftover biscuits (which is rare in my house!), here’s how to store them:
- Room Temperature: Store the biscuits in an airtight container at room temperature for up to 2 days.
- Refrigerator: For longer storage, store the biscuits in an airtight container in the refrigerator for up to 5 days.
- Freezer: To freeze the biscuits, wrap them individually in plastic wrap and then place them in a freezer-safe bag or container. They can be frozen for up to 2 months. To reheat, bake the frozen biscuits at 350°F (175°C) for 10-15 minutes, or until warmed through.
I often make a double batch of biscuits and freeze half for later. It’s so convenient to have homemade biscuits on hand whenever the craving strikes!
Frequently Asked Questions (FAQ)
Got questions? I’ve got answers! Here are some of the most common questions I get about making biscuits:
- Can I use self-rising flour?: I don’t recommend it for this recipe. Self-rising flour already contains baking powder and salt, so you’ll need to adjust the other ingredients accordingly. For the best results, stick with all-purpose flour and the amounts of baking powder and salt listed in the recipe.
- Can I use butter substitutes?: While you can use butter substitutes, I find that real butter gives the biscuits the best flavor and texture. If you do use a substitute, make sure it’s cold and firm.
- Can I make these biscuits without milk?: Yes, you can! You can substitute the milk with buttermilk, heavy cream, or even a non-dairy milk alternative like almond milk or soy milk. Keep in mind that the flavor and texture may be slightly different.
- Why are my biscuits flat?: Flat biscuits are usually caused by using warm butter, overmixing the dough, or not using enough baking powder. Make sure your butter is cold, mix the dough just until the ingredients are combined, and use fresh baking powder.
- Why are my biscuits tough?: Tough biscuits are usually caused by overmixing the dough. Be gentle when mixing and patting out the dough.
If you have any other questions, feel free to leave them in the comments below! I’m always happy to help.
Serving Suggestions for Your Delicious Biscuits
Now that you’ve made a batch of these amazing biscuits, it’s time to enjoy them! Here are a few serving suggestions:
- Butter and Jam: This is a classic for a reason! Spread warm biscuits with butter and your favorite jam or jelly.
- Honey: Drizzle warm biscuits with honey for a simple and sweet treat.
- Breakfast Sandwiches: Use the biscuits as a base for breakfast sandwiches with eggs, cheese, and your favorite breakfast meats.
- Soup or Chili: Serve the biscuits as a side with your favorite soup or chili.
- Gravy: Smother the biscuits in sausage gravy or cream gravy for a comforting Southern meal.
No matter how you choose to serve them, I hope you enjoy these homemade biscuits as much as I do. They’re perfect for breakfast, lunch, dinner, or any time in between!
I’m so glad you joined me in the kitchen today! I hope you give this easy homemade biscuit recipe a try. I’ve made it as simple as possible, and I know you’ll love the results. Remember, cooking is all about having fun and experimenting, so don’t be afraid to get creative and make it your own. Happy baking, and I’ll see you in the next recipe!
If you loved this recipe, be sure to check out my other favorites:
Homemade Biscuits
Ingredients
Ingredients
- 2 cups all-purpose flour
- 1 tablespoon baking powder
- 1 teaspoon salt
- 0.5 cup cold unsalted butter (cut into cubes)
- 0.75 cup cold milk
Instructions
- Preheat oven to 450°F (232°C).
- Whisk flour, baking powder, and salt in a bowl.
- Cut in butter until coarse crumbs form.
- Add milk and stir until just combined.
- Pat dough into a 3/4-inch thick circle.
- Cut out biscuits.
- Place biscuits on a baking sheet.
- Bake for 12-15 minutes, or until golden brown.
- Serve warm.
Notes
Nutrition