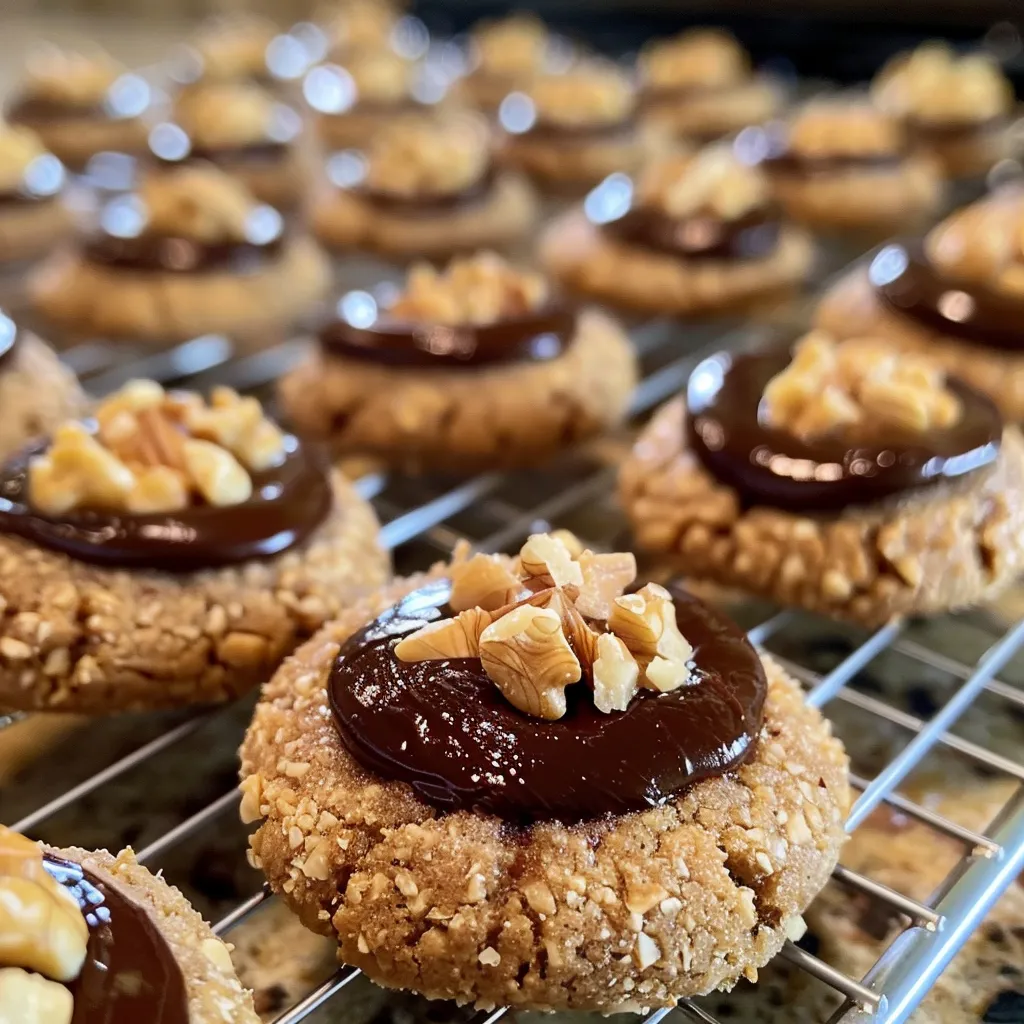
Welcome back to Emily’s Must-Try Kitchen, my cozy corner where we turn simple ingredients into delightful memories! Today, I’m excited to share a recipe that’s not only a feast for the eyes but also a joy for the taste buds: Chocolate Hazelnut Thumbprint Cookies. These little gems are a testament to how the best recipes come from the heart, blending nutty goodness with rich chocolate in a way that just begs to be shared. It takes me back to my childhood, when the kitchen would fill with laughter and delicious aromas, and I’d sneak a taste of everything that was baking in the oven.
As I stood on that stool in my mom’s kitchen, I learned that cooking is all about connection—connecting with ingredients, with memories, and with the people we love. And what better way to connect than over a plate of warm, gooey cookies? These Chocolate Hazelnut Thumbprint Cookies are perfect for any occasion, be it a festive gathering or a cozy night in. So let’s roll up our sleeves and dive into this delightful adventure together!
Why You’ll Absolutely Love Chocolate Hazelnut Thumbprint Cookies—Crunchy, Nutty, Chocolatey!
There’s something truly magical about thumbprint cookies, and when you add chocolate and hazelnuts to the mix, it’s a whole new level of deliciousness! Here’s why these cookies will quickly become a favorite in your household:
- **Irresistible Flavor**: The combination of rich chocolate hazelnut spread and crunchy nuts creates a flavor explosion that’s sure to please.
- **Easy to Make**: Even if you’re a beginner in the kitchen, this recipe is straightforward and forgiving. You’ll feel like a pro!
- **Perfect for Sharing**: These cookies are not only beautiful but also make fantastic gifts for friends and family. Who wouldn’t love a box of homemade cookies?
- **Versatile**: Enjoy them with a cup of coffee, as an after-school snack, or as a sweet addition to your holiday dessert table.
Ingredients You’ll Need
Let’s talk about the ingredients because they’re the stars of this show! For these Chocolate Hazelnut Thumbprint Cookies, you’ll need:
- 1 cup hazelnuts, toasted and chopped
- 1 cup all-purpose flour
- 1/2 teaspoon baking powder
- 1/4 teaspoon salt
- 1/2 cup unsalted butter, softened
- 1/2 cup granulated sugar
- 1/2 cup brown sugar, packed
- 1 teaspoon vanilla extract
- 1 large egg yolk
- 1/2 cup chocolate hazelnut spread
- Extra chopped hazelnuts for topping
Each ingredient plays a vital role in creating that perfect balance of crunch and gooeyness. The toasted hazelnuts add a delightful nuttiness that pairs perfectly with the creamy chocolate hazelnut spread, while the combination of sugars gives the cookies a beautiful depth of flavor. You’ll find the full ingredient list with measurements in the recipe card below!
How to Make Chocolate Hazelnut Thumbprint Cookies—Crunchy, Nutty, Chocolatey!, Step-by-Step
Alright, let’s get into the fun part—baking these scrumptious cookies! Follow these simple steps, and let’s make some magic happen in the kitchen:
- Preheat your oven to 350°F (175°C) and line a baking sheet with parchment paper. This makes for easy cleanup and prevents sticking!
- In a bowl, whisk together the flour, baking powder, and salt. Set aside.
- In a separate bowl, cream the softened butter, granulated sugar, and brown sugar until light and fluffy. This is where the magic begins, so take your time!
- Add the vanilla extract and egg yolk to the butter mixture and mix until combined. Can you smell that deliciousness already?
- Gradually add the dry ingredients to the wet ingredients, mixing until just combined. Don’t overmix; we want these cookies to be tender!
- Now, fold in the chopped hazelnuts gently, making sure they’re evenly distributed.
- Using a tablespoon, scoop out dough and roll it into balls. Place them on the prepared baking sheet, giving them a little space to spread.
- Make an indentation in the center of each ball using your thumb or the back of a spoon. This is where the chocolate hazelnut spread will go, so make it nice and deep!
- Fill each indentation with chocolate hazelnut spread and sprinkle chopped hazelnuts on top. This step is where it gets extra decadent!
- Bake for 12-15 minutes or until the edges are lightly golden. Let them cool on the baking sheet for a few minutes before transferring them to a wire rack to cool completely.
Pro Tips for the Best Results
To ensure your cookies turn out perfectly every time, here are a few pro tips from my kitchen to yours:
- **Toast Your Hazelnuts**: Toasting enhances the nutty flavor and adds a delightful crunch. Just keep an eye on them to avoid burning!
- **Don’t Overbake**: The cookies will continue to firm up as they cool, so take them out when the edges are just golden for a soft center.
- **Experiment with Fillings**: While chocolate hazelnut spread is divine, feel free to try other fillings like raspberry jam or caramel for a fun twist!
Serving Suggestions
These Chocolate Hazelnut Thumbprint Cookies are perfect on their own, but here are some fun ideas to elevate your serving game:
- Pair them with a scoop of vanilla ice cream for an indulgent dessert.
- Serve them on a beautiful platter at your next gathering, and watch your guests swoon!
- For a festive touch, dust with powdered sugar before serving, especially during the holiday season.
Storage and Make-Ahead Tips
Want to make these cookies ahead of time? No problem! Here are some handy storage tips:
- Store the cookies in an airtight container at room temperature for up to a week. They stay fresh and delicious!
- If you’d like to freeze them, layer the cookies between parchment paper in an airtight container. They’ll last up to 3 months in the freezer. Just thaw at room temperature before enjoying!
And there you have it—your guide to baking these delightful Chocolate Hazelnut Thumbprint Cookies! I hope this recipe brings as much joy to your kitchen as it does to mine. Remember, cooking is all about having fun and creating memories, so don’t be afraid to get a little messy. I can’t wait to hear how your cookies turn out—let’s keep the conversation going in the comments below!
Happy baking, friends!

Chocolate Hazelnut Thumbprint Cookies—Crunchy, Nutty, Chocolatey!
Ingredients
Nuts and Dry Ingredients
- 1 cup hazelnuts, toasted and chopped
- 1 cup all-purpose flour
- 1/2 teaspoon baking powder
- 1/4 teaspoon salt
- 1/2 cup unsalted butter, softened
- 1/2 cup granulated sugar
- 1/2 cup brown sugar, packed
- 1 teaspoon vanilla extract
- 1 large egg yolk
- 1/2 cup chocolate hazelnut spread
- extra chopped hazelnuts for topping chopped hazelnuts
Instructions
- Preheat oven to 350°F (175°C) and line a baking sheet with parchment.
- Mix dry ingredients; cream butter and sugars, then add vanilla and egg yolk.
- Combine wet and dry, fold in chopped hazelnuts, form dough balls, and place on sheet.
- Make an indentation, fill with spread, top with chopped hazelnuts, and bake 12-15 mins.
Notes
Nutrition
Loved this recipe? Save it to your favorite Pinterest board so you can easily find it later! It’s the perfect way to keep all your sweet ideas in one place. ✨