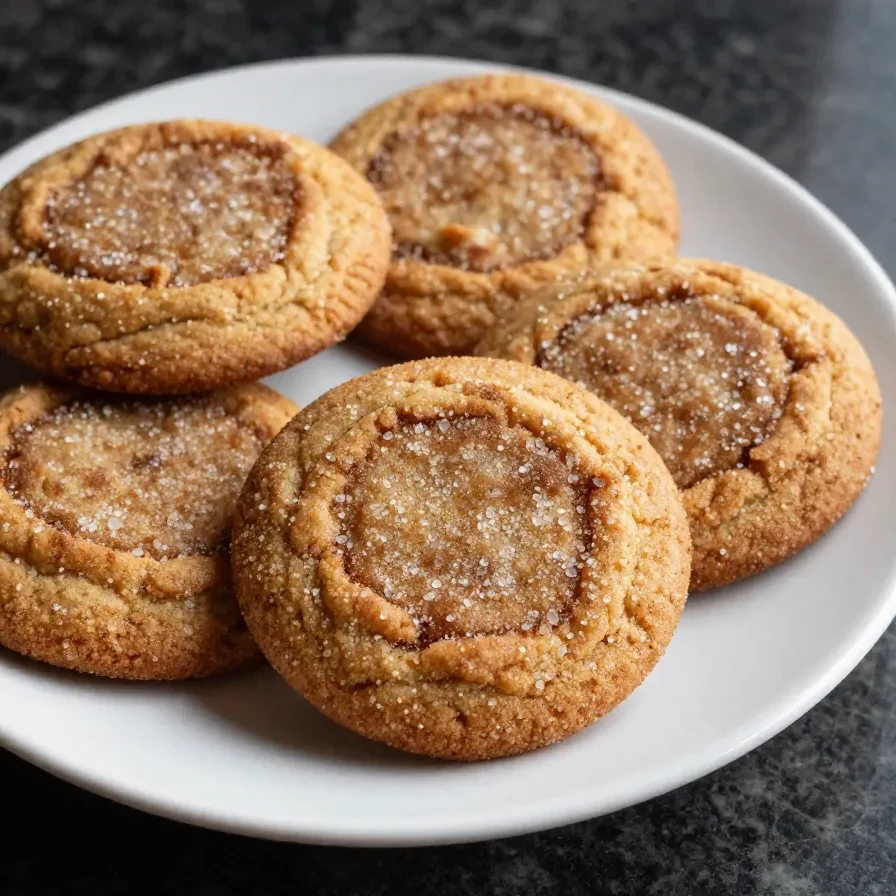
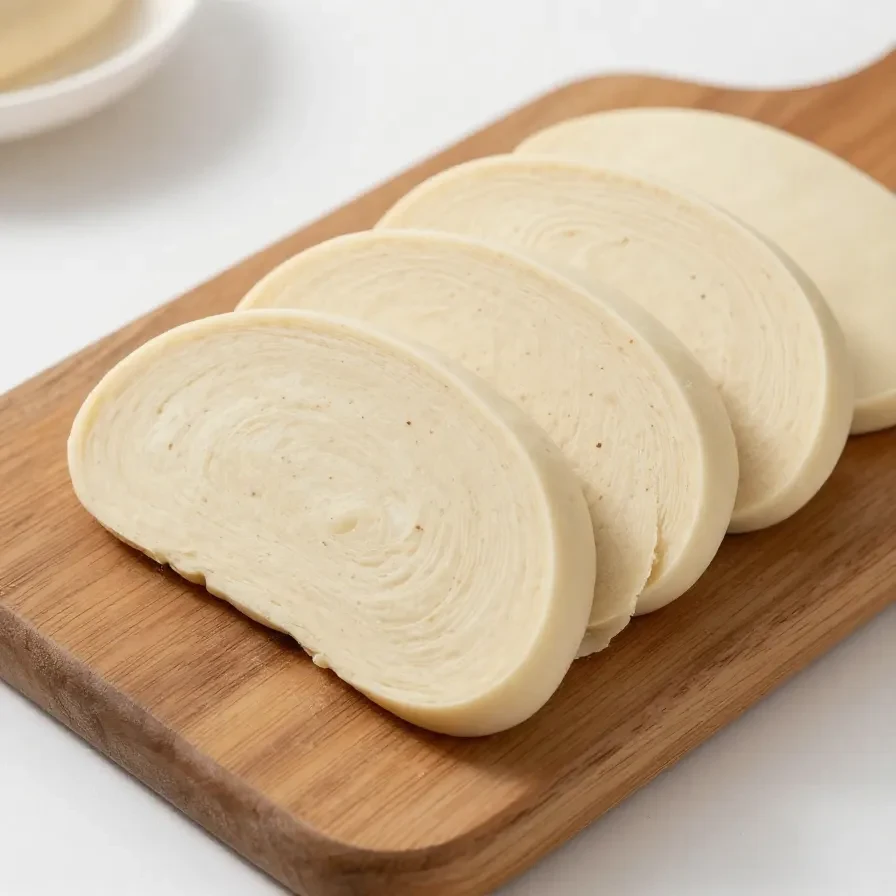
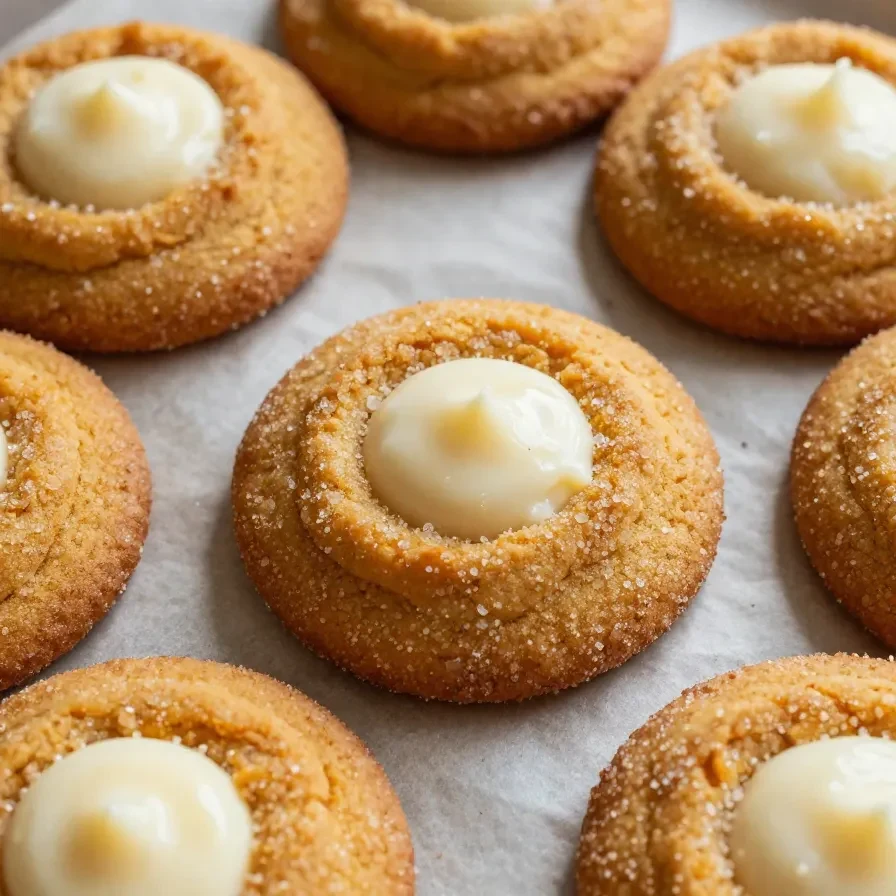
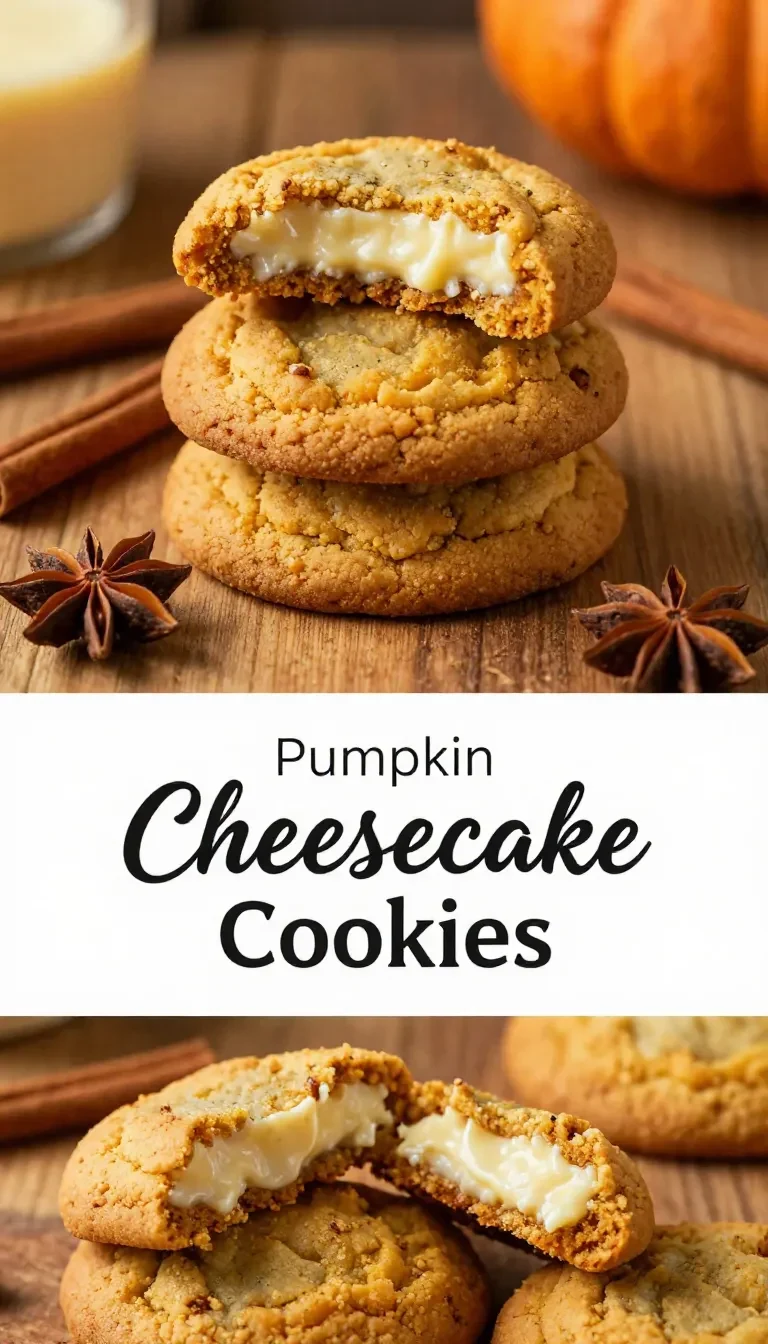
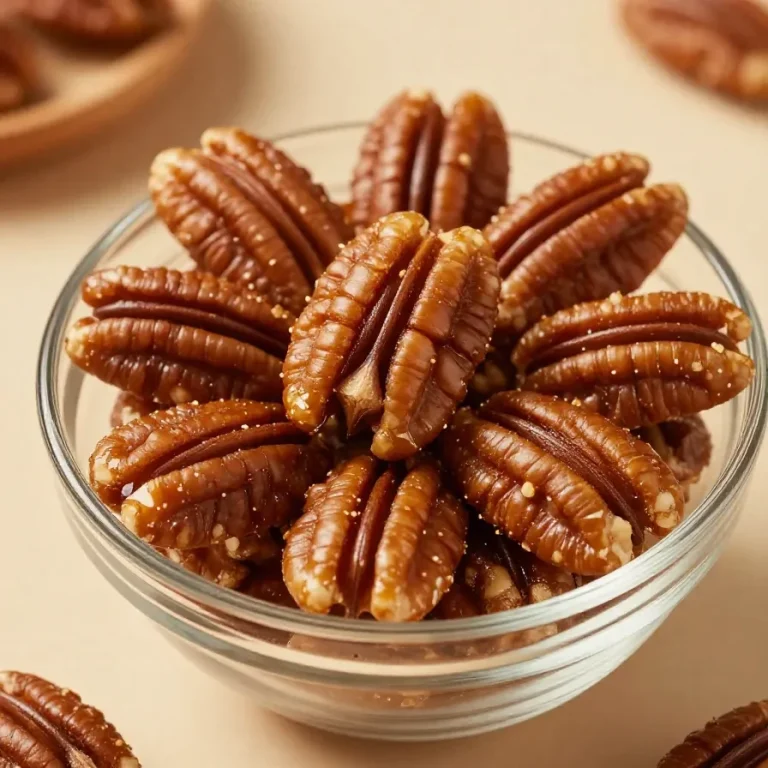
Author

Emily

Browsing

This post contains affiliate links. As an Amazon Associate, I earn from qualifying purchases. This comes at no extra cost to you.

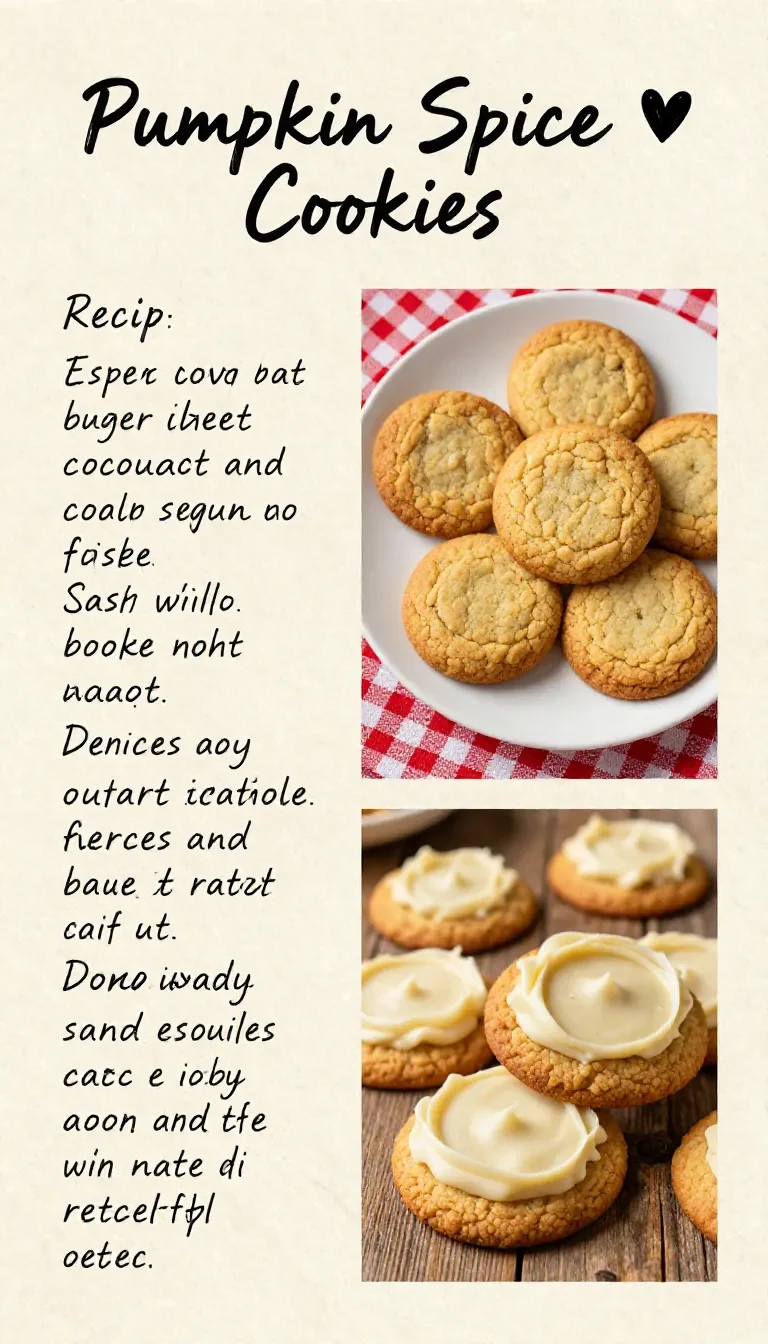
Pumpkin Spice Cookies Recipe

Yummy homemade recipes for Pumpkin Spice Cookies deliver a soft, chewy treat infused with warm spices like cinnamon, ginger, and nutmeg. Made with real pumpkin puree, these cookies are ready in just 30 minutes and yield 24 scrumptious pieces. They’re perfect for autumn gatherings or when you’re craving something sweet with a cozy flavor.

As someone who used to sneak bites of pie filling in my mom’s kitchen, these cookies bring back all the fall feels. The smell of spicy cinnamon and nutmeg wafting through the kitchen is just magic.

Table of Contents

Why are Pumpkin Spice Cookies so popular?

Pumpkin Spice Cookies are popular because they capture the essence of fall in every bite. With warm spices and a soft, chewy texture, they’re the ultimate seasonal comfort food.

  • The combination of spices like cinnamon, nutmeg, and cloves creates a classic autumn flavor.
  • These cookies are quick to make—just 30 minutes from start to finish. Perfect for busy days!
  • They’re versatile: enjoy them plain or add chocolate chips for a hint of indulgence.
  • Homemade cookies make any gathering special, and these are guaranteed to impress.

What ingredients do you need for Pumpkin Spice Cookies?

The key ingredients for Pumpkin Spice Cookies include warm spices, real pumpkin puree, and simple pantry staples. These items come together to make soft, aromatic cookies with perfect fall vibes.

The pumpkin puree is the star ingredient, adding moisture and a subtle sweetness, while the cinnamon provides that unmistakable warm spice kick.

How do you make Pumpkin Spice Cookies step by step?

Making Pumpkin Spice Cookies is simple and rewarding. In just a few steps, you’ll have a batch of golden, chewy cookies packed with autumnal flavors.

Step 1 — Preheat the Oven

Preheat your oven to 350°F (175°C) and line a baking sheet with parchment paper.

You might also enjoy our pumpkin spice dreams: fall-inspired cookies.

Step 2 — Mix the Dry Ingredients

In a medium bowl, whisk together the flour, baking soda, baking powder, cinnamon, ginger, nutmeg, cloves, and salt. Set aside.

Step 3 — Cream the Sugars and Butter

In a large bowl, cream together the softened butter, brown sugar, and granulated sugar until light and fluffy.

Step 4 — Add the Wet Ingredients

Mix in the pumpkin puree, egg, and vanilla extract until well combined with the creamed butter and sugars.

Step 5 — Combine Wet and Dry Ingredients

Gradually add the bowl of dry ingredients to the wet mixture, stirring until just combined. Fold in chocolate chips if using.
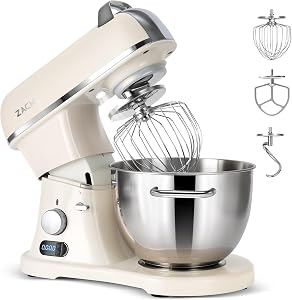
KitchenAid Artisan Stand Mixer

Kitchen ApplianceKitchenAid Artisan Stand Mixer

Makes mixing dough and batters effortless — a kitchen game-changer.

View on Amazon →

Lodge Baking Sheet

Essential CookwareLodge Baking Sheet

A sturdy baking sheet essential for baking cookies evenly.

View on Amazon →

For more ideas, check out our soft pumpkin chocolate chip cookies.

Step 6 — Shape the Cookies

Drop tablespoon-sized balls of dough onto the prepared baking sheet, spacing them about 2 inches apart.

Step 7 — Bake and Cool

Bake for 12-15 minutes, or until the edges are lightly golden and the centers are set. Allow the cookies to cool on the baking sheet for a few minutes before transferring them to a wire rack to cool completely.

Frequently Asked Questions About Pumpkin Spice Cookies

Can I make these cookies ahead of time?

Yes, you can! Store baked cookies in an airtight container for up to 5 days, or freeze the dough for up to 3 months.

What if I don’t have all the spices?

If you’re missing spices, you can use a pre-mixed pumpkin pie spice blend to save time and achieve a similar flavor profile.

Looking for something similar? Try our the best healthy pumpkin chocolate.

Can I use fresh pumpkin instead of canned?

Yes, just ensure the fresh pumpkin is pureed and as smooth as possible for the best texture in your cookies.

Why are my cookies too dry?

Overbaking is often the culprit. Remove the cookies from the oven as soon as the edges are golden and the centers are just set.

Can I make these cookies gluten-free?

Yes, substitute the all-purpose flour with a 1-to-1 gluten-free baking flour for the best results.

What to serve with Pumpkin Spice Cookies?

Pair Pumpkin Spice Cookies with these cozy options:

  • A warm mug of spiced chai for complementary fall flavors.
  • Vanilla ice cream for a creamy, cool contrast.
  • A drizzle of caramel sauce for added sweetness.
  • Hot apple cider to round out the ultimate autumn treat.

Common mistakes to avoid when making Pumpkin Spice Cookies

  • Overmixing the dough: Stir only until the ingredients are combined to avoid dense cookies.
  • Skipping parchment paper: It prevents sticking and ensures even baking.
  • Not measuring spices accurately: Too much or too little can throw off the flavor balance.

Expert tips for making perfect Pumpkin Spice Cookies

  • Chill the dough: If it feels too soft, refrigerate for 15 minutes to make shaping easier.
  • Use room temperature ingredients: This helps them mix evenly, especially the butter and egg.
  • Try browning the butter: Browned butter adds a nutty richness that complements the spices.
  • Add a spice garnish: Sprinkle a pinch of cinnamon sugar on top of each cookie before baking for extra flair.

Pumpkin Spice Cookies

Prep Time 15 minutes
Cook Time 15 minutes
Total Time 30 minutes
Servings 24 servings
Calories 120
Deliciously spiced pumpkin cookies that are soft and chewy, perfect for fall.

Equipment

  • mixing bowl
  • whisk
  • baking sheet
  • oven
  • spatula

Ingredients

Instructions 

  • Preheat your oven to 350°F (175°C) and line a baking sheet with parchment paper.
  • In a medium bowl, whisk together the flour, baking soda, baking powder, cinnamon, ginger, nutmeg, cloves, and salt.
  • In a large bowl, cream together the softened butter, brown sugar, and granulated sugar until light and fluffy.
  • Add the pumpkin puree, egg, and vanilla extract to the butter mixture, and mix until well combined.
  • Gradually add the dry ingredients to the wet ingredients, mixing until just combined.
  • If desired, fold in the chocolate chips.
  • Drop tablespoon-sized balls of dough onto the prepared baking sheet, spacing them about 2 inches apart.
  • Bake for 12-15 minutes, or until the edges are lightly golden and the centers are set.
  • Remove from the oven and allow the cookies to cool on the baking sheet for a few minutes before transferring them to a wire rack to cool completely.

Notes

For a more intense pumpkin flavor, use homemade pumpkin puree.
Calories: 120kcal
Cost: $10
Course: Dessert
Cuisine: American
Keyword: pumpkin cookies

Nutrition

Calories: 120kcal | Carbohydrates: 18g | Protein: 1g | Fat: 5g | Sodium: 50mg
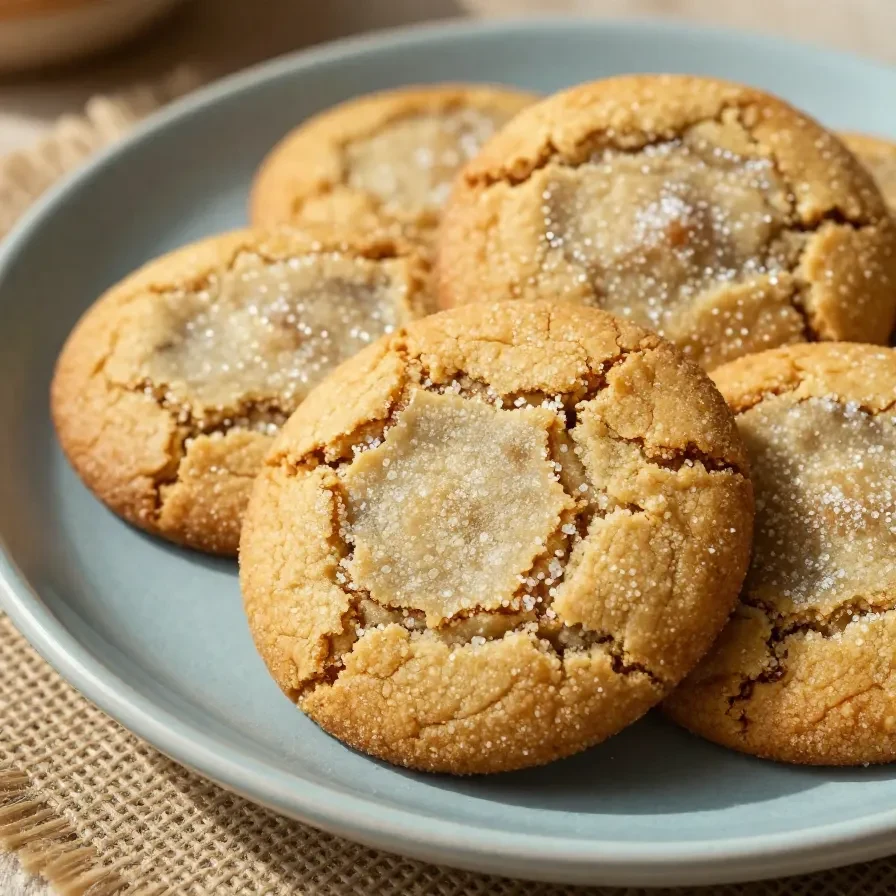
A plate of freshly baked pumpkin spice cookies with a sprinkle of cinnamon on top

Loved this recipe? Save it to your favorite Pinterest board so you can easily find it later! ✨

This post contains affiliate links. As an Amazon Associate, I earn from qualifying purchases. This comes at no extra cost to you.

Easy cinnamon apple bread

Easy cinnamon apple bread is a moist, flavorful loaf made with tender diced apples, warm cinnamon, and nutmeg. Ready in just over an hour, it yields 10 comforting slices perfect for breakfast, a snack, or even dessert. This delightful recipe captures the essence of fall in every bite, and the warming spices will fill your kitchen with a cozy aroma as it bakes.

One of my favorite things about baking this bread is the nostalgic scent of cinnamon wafting through my kitchen—it always reminds me of cozy family weekends, where the smell of freshly baked treats filled the air. Trust me when I say, this loaf is a must-try for anyone who loves the flavors of apples and spices.

Table of Contents

Why is Cinnamon Apple Bread Special?

Cinnamon Apple Bread is special because it combines warm spices and fresh apples for a delicious balance of sweetness and spice. The moist texture and homemade charm make it a go-to recipe for cozy moments or gatherings.

  • Incredibly moist: The combination of applesauce and diced apples ensures every slice stays tender and soft.
  • Easy to make: Simple ingredients and straightforward steps make this recipe approachable for all skill levels.
  • Perfectly spiced: Cinnamon and nutmeg add depth and warmth, capturing the essence of fall.
  • Versatile treat: Ideal for breakfast, a snack, or dessert. It also makes a thoughtful homemade gift.

What Ingredients Do You Need for Cinnamon Apple Bread?

This recipe features pantry staples like flour, baking soda, and sugars, paired with applesauce and fresh apples to create a moist and flavorful loaf. Here’s the full ingredient list:

The combination of spices and apples is what makes this bread truly stand out. The unsweetened applesauce adds natural sweetness and moisture, while diced apples give it pockets of fruity goodness.

How Do You Make Cinnamon Apple Bread Step by Step?

Making Cinnamon Apple Bread is an easy, rewarding process. With just a few simple steps, you’ll have a warm, spiced loaf ready to enjoy.

Step 1 — Preheat the oven

Preheat your oven to 350°F (175°C) and grease a 9×5-inch loaf pan to ensure your bread doesn’t stick.

You might also enjoy our pumpkin cinnamon swirl sourdough bread.

Step 2 — Mix the dry ingredients

In a medium bowl, whisk together the flour, baking soda, salt, cinnamon, and nutmeg. This ensures even distribution of the spices.

Step 3 — Combine wet ingredients

In a large bowl, blend together the granulated sugar, brown sugar, eggs, vegetable oil, and vanilla extract. Stir until the mixture is smooth and well combined.

Step 4 — Add the applesauce

Stir in the unsweetened applesauce until the wet mixture is uniform in texture.

Step 5 — Incorporate dry ingredients

Gradually add the dry ingredient mixture into the wet ingredients. Stir until just combined to avoid overmixing.

KitchenAid Artisan Stand Mixer

Kitchen ApplianceKitchenAid Artisan Stand Mixer

Makes mixing dough and batters effortless — a kitchen game-changer.

View on Amazon →

Pyrex Glass Mixing Bowl Set

Essential CookwarePyrex Glass Mixing Bowl Set

Essential for mixing ingredients — durable and versatile for all your baking needs.

View on Amazon →

For more ideas, check out our warm your heart with this.

Step 6 — Fold in apples and nuts

Gently fold in the diced apples and chopped nuts, if using, to ensure an even distribution throughout the batter.

Step 7 — Bake

Pour the batter into the prepared loaf pan and bake for 55-65 minutes, or until a toothpick inserted in the center comes out clean. Let it cool in the pan for 10 minutes before transferring to a wire rack to cool completely.

Frequently Asked Questions About Cinnamon Apple Bread

What are the best apples to use for this bread?

Firm and slightly tart apples like Granny Smith work well, but you can also use Fuji, Honeycrisp, or Gala for a sweeter flavor.

Can I freeze Cinnamon Apple Bread?

Yes, you can freeze it! Wrap the loaf tightly in plastic wrap, then aluminum foil, and freeze for up to 3 months. Thaw at room temperature before serving.

Looking for something similar? Try our savor the season: the ultimate.

Do I have to peel the apples?

While peeling is recommended for a smoother texture, you can leave the skin on if you prefer a bit of added texture and fiber.

Can I make this bread without nuts?

Absolutely! The nuts are optional and can be omitted without affecting the recipe.

What’s the best way to store this bread?

Store it in an airtight container at room temperature for up to 3 days, or refrigerate for up to a week.

Expert Tips for Perfect Cinnamon Apple Bread

  • Don’t overmix: Once you add the dry ingredients, stir just until combined to keep the bread tender.
  • Use fresh spices: Freshly ground cinnamon and nutmeg provide the best flavor. Check your spice jars for freshness!
  • Let it cool: Allow the bread to cool completely before slicing to prevent it from crumbling.
  • Test for doneness: Insert a toothpick into the center; if it comes out clean, the bread is ready.

What Goes Well with Cinnamon Apple Bread?

  • Hot beverages: Pair it with coffee, tea, or cider for a cozy treat.
  • Whipped cream: Serve a slice with a dollop of whipped cream for added indulgence.
  • Fruit preserves: Add a smear of apple butter or fig jam for an extra layer of sweetness.
  • Ice cream: Warm up a slice and top it with a scoop of vanilla ice cream for a decadent dessert.

Cinnamon Apple Bread

Prep Time 15 minutes
Cook Time 1 hour
Total Time 1 hour 15 minutes
Servings 8 servings
Calories 200
This delicious Cinnamon Apple Bread is a perfect blend of spices and fresh apples, making it a delightful treat for any occasion.

Equipment

  • mixing bowl
  • whisk
  • loaf pan
  • oven
  • measuring cups
  • spatula

Ingredients

Instructions 

  • Preheat your oven to 350°F (175°C) and grease a 9x5-inch loaf pan.
  • In a medium bowl, whisk together the flour, baking soda, salt, cinnamon, and nutmeg.
  • In a large bowl, combine the granulated sugar, brown sugar, eggs, vegetable oil, and vanilla extract. Mix until well combined.
  • Stir in the unsweetened applesauce until the mixture is smooth.
  • Gradually add the dry ingredients to the wet ingredients, mixing until just combined.
  • Fold in the diced apples and chopped nuts, if using.
  • Pour the batter into the prepared loaf pan and spread it evenly.
  • Bake in the preheated oven for 55-65 minutes, or until a toothpick inserted into the center comes out clean.
  • Allow the bread to cool in the pan for about 10 minutes, then transfer it to a wire rack to cool completely.

Notes

For added flavor, consider using a mix of different apples.
Calories: 200kcal
Cost: $10
Course: Dessert
Cuisine: American
Keyword: apple, bread, cinnamon

Nutrition

Calories: 200kcal | Carbohydrates: 32g | Protein: 3g | Fat: 8g | Sodium: 150mg
Freshly baked cinnamon apple bread loaf on a wooden cutting board

Loved this recipe? Save it to your favorite Pinterest board so you can easily find it later! ✨

Fall is here, and you know what that means: it’s officially baking season! I’ve rounded up 40 cozy and easy desserts that’ll make your kitchen smell like cinnamon, maple, and pumpkin spice heaven. Whether you’re a seasoned baker or just looking for something fun to whip up this weekend, there’s a treat on this list for everyone.

Table of Contents

Maple Cookies

Soft, chewy, and bursting with maple flavor, these cookies are basically fall in cookie form. The secret? Pure maple syrup gives them that rich, cozy sweetness! get the recipe.

Pumpkin Bars With Cream Cheese Frosting

These pumpkin bars are like a slice of autumn, topped with tangy cream cheese frosting. Bonus: they’re easy to make in just one pan! see the full recipe.

Pumpkin White Chocolate Chip Cookies

Pumpkin and white chocolate make a dreamy duo in these soft, melt-in-your-mouth cookies. Perfect for sharing—or not! read more.

Cinnamon Cupcakes Recipe with Cream Cheese Frosting

Warm cinnamon spice meets fluffy cupcakes, topped with silky cream cheese frosting. Bake a batch for a cozy tea-time treat! make this dessert.

Pumpkin Cream Cheese Muffins

These muffins are the ultimate fall breakfast: moist pumpkin muffins with a surprise creamy filling. Best served warm with coffee! try the recipe.

Pumpkin Cupcakes with Cream Cheese Frosting

Light, fluffy pumpkin cupcakes topped with the tangy sweetness of cream cheese frosting—just what your fall party needs! get the recipe.

Pumpkin Oreo Balls

Think pumpkin spice meets Oreo magic! These no-bake treats are dipped in white chocolate for an easy, irresistible dessert. see the full recipe.

Soft Pumpkin Cookies with Cream Cheese Frosting

These pillowy-soft cookies are packed with pumpkin flavor and topped with a generous swirl of cream cheese frosting. Perfect for cookie swaps! read more.

Pumpkin Chocolate Chip Cookies

Chocolate chips and pumpkin spice come together in these soft and chewy cookies. Trust me, they’re always a crowd-pleaser! make this dessert.

Acorn Treats

Adorable and fun, these no-bake acorn treats are made with chocolate kisses and mini cookies. Perfect for kids—or the kid in you! try the recipe.

Apple Cider Donuts

These donuts are bursting with the sweet-tart flavor of apple cider and coated in cinnamon sugar. Fall mornings just got better! get the recipe.

Fall Sour Cream Sugar Cookies with Cream Cheese Frosting

Soft, buttery sugar cookies with a tangy cream cheese frosting—perfect for decorating with your favorite fall colors! see the full recipe.

Maple Snickerdoodles

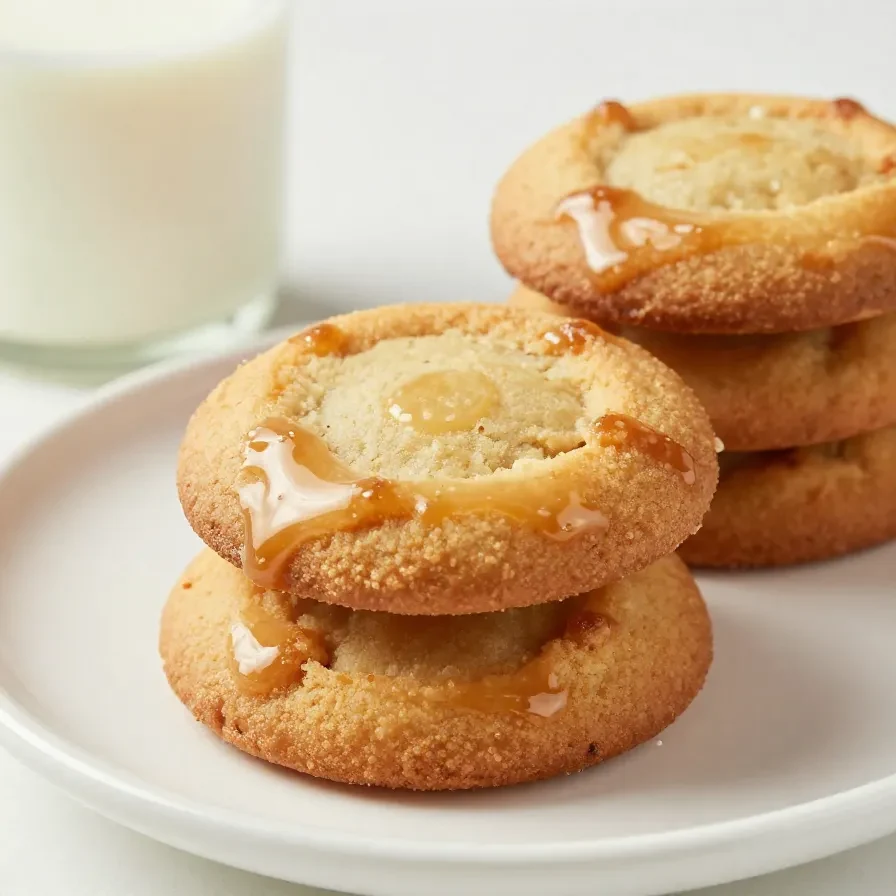
Classic snickerdoodles get a fall makeover with sweet maple syrup. Soft, cinnamon-sugar goodness in every bite! read more.

Acorn Donut Holes (No Bake)

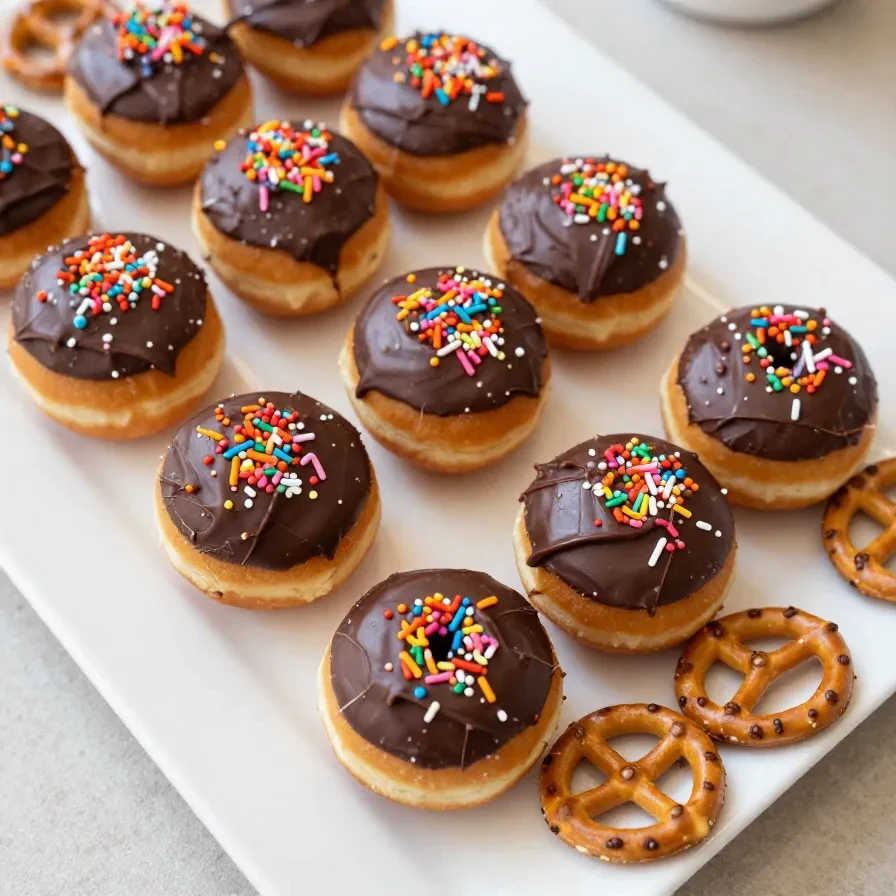
These no-bake acorn treats use donut holes and chocolate to create the cutest fall-themed dessert! get the recipe.

Caramel Apple ‘Nachos’

Thin apple slices drizzled with caramel, chocolate, and all your favorite toppings. A fun twist on caramel apples! read more.

Candy Corn Cupcakes

Bright, festive cupcakes inspired by candy corn, with layers of colorful batter and sweet buttercream frosting. make this dessert.

Pumpkin Cake Balls

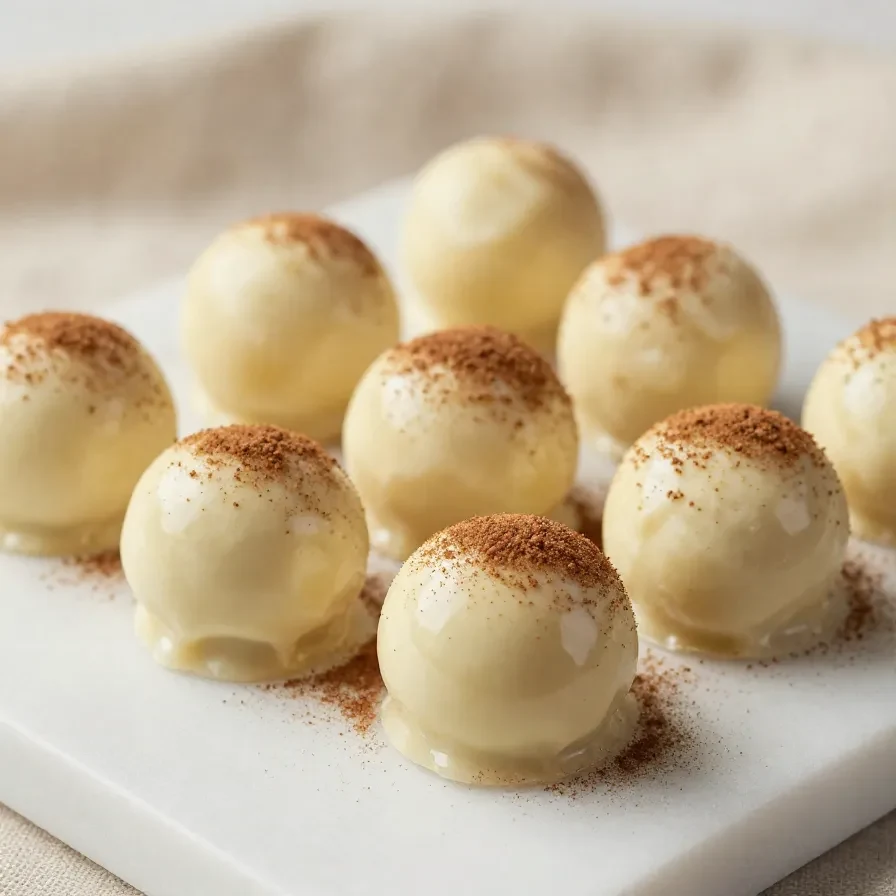
Bite-sized pumpkin cake pops coated in white chocolate—perfect for parties or a quick treat! try the recipe.

Pumpkin Donuts

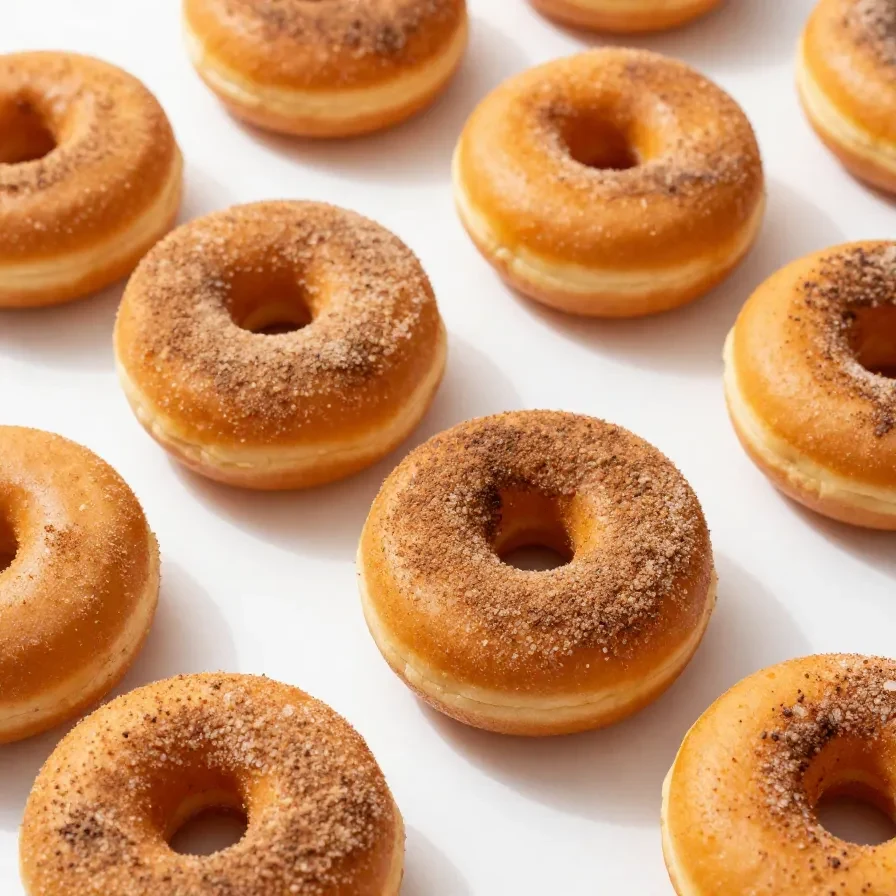
Baked pumpkin donuts coated in cinnamon sugar—so easy to make and impossible to resist! get the recipe.

Pumpkin Fudge

Creamy, melt-in-your-mouth pumpkin fudge with hints of warm spices. Great for gifting or indulging! see the full recipe.

Canadian Butter Tarts

Golden, flaky tarts filled with gooey, caramel-like filling. A Canadian classic perfect for fall! read more.

Pumpkin Oatmeal Cookies with Browned Butter Icing

Chewy oatmeal cookies with pumpkin spice and a rich browned butter icing. Fall flavors, elevated! make this dessert.

Fall Snack Mix

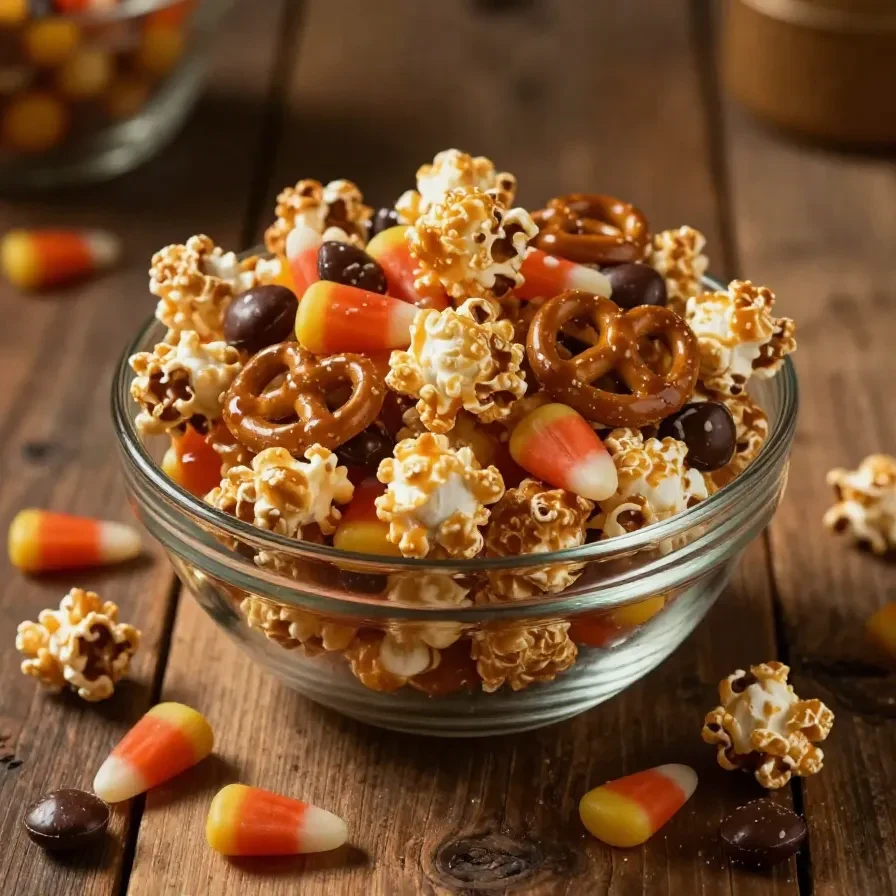
A sweet and salty mix of pretzels, candy, nuts, and more. Perfect for movie nights or snacking on the go! try the recipe.

Pumpkin Snickerdoodles

Pumpkin puree takes these snickerdoodles to the next level, with warm spices and a cinnamon-sugar coating. get the recipe.

Apple Hand Pies

Flaky pastry filled with sweet, spiced apple filling—perfect for handheld autumn comfort! see the full recipe.

Maple Leaf Cookies

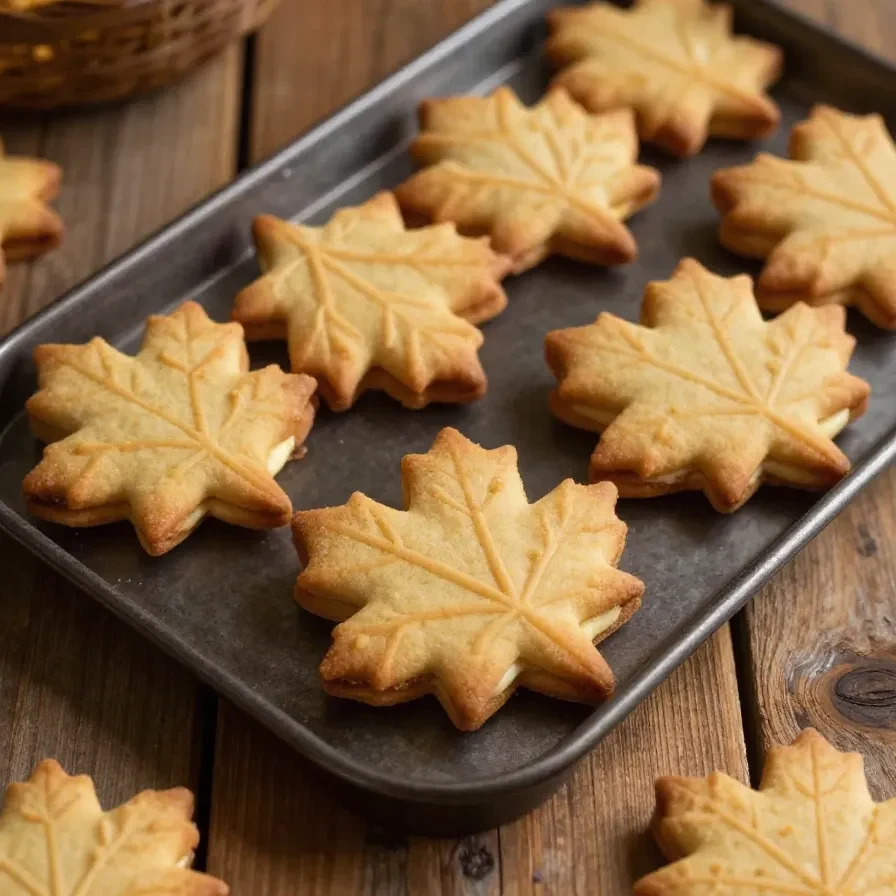
Shaped like fall leaves and flavored with pure maple syrup, these cookies are as pretty as they are delicious. read more.

Cinnamon Brown Sugar Cookies with Salted Buttercream

Soft brown sugar cookies topped with a creamy salted buttercream frosting—sweet with a hint of salty goodness! make this dessert.

Cinnamon Roll Donuts

These donuts are like cinnamon rolls in disguise, complete with gooey icing swirled on top. get the recipe.

Brown Butter Apple Blondies

Rich, chewy blondies with chunks of spiced apples and nutty browned butter. Autumn in every bite! see the full recipe.

Easy Candied Pecans

Sweet, crunchy candied pecans made in just 15 minutes. Perfect for snacking or topping desserts! read more.

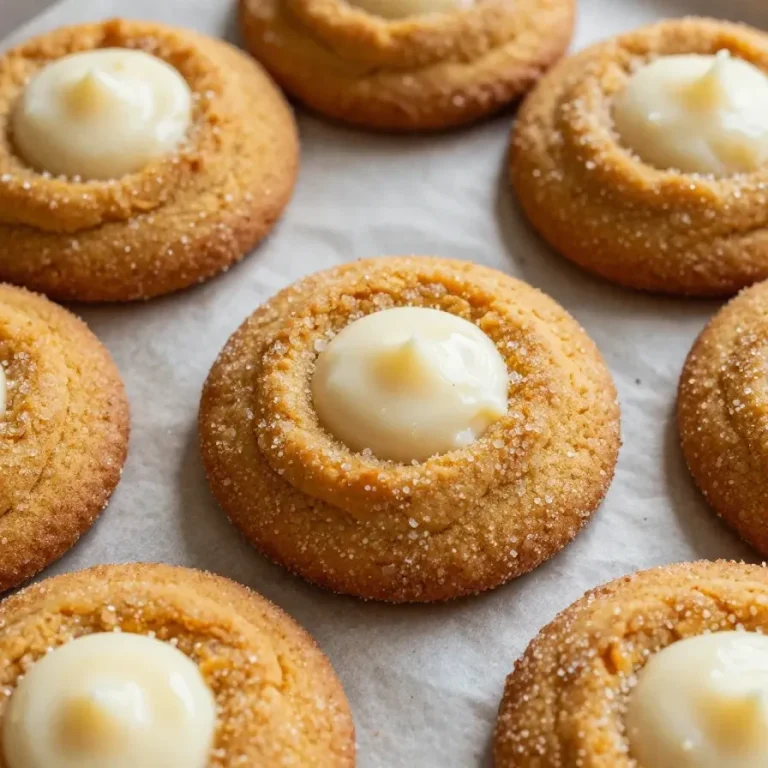
Pumpkin Cheesecake Cookies

Soft pumpkin cookies stuffed with a creamy cheesecake center—like two desserts in one! make this dessert.

Sour Cream Apple Squares

Moist apple squares made with sour cream for extra richness. Perfect with a drizzle of caramel! try the recipe.

Pumpkin Whoopie Pies

Soft pumpkin cakes sandwiched with fluffy cream filling—classic, nostalgic, and oh-so-good! get the recipe.

Cheesecake Stuffed Snickerdoodle Pumpkin Cookies

These pumpkin cookies are stuffed with creamy cheesecake filling and rolled in cinnamon sugar. Worth the extra step! see the full recipe.

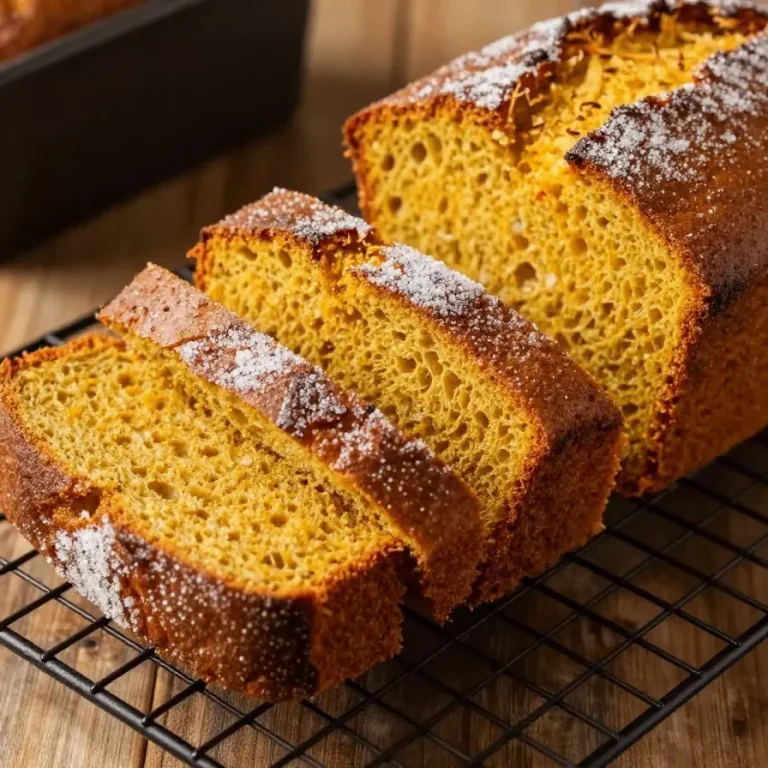
Pumpkin Bread With Cinnamon Sugar Topping

Moist pumpkin bread with a crunchy cinnamon sugar topping. Perfect for gifting—or keeping for yourself! read more.

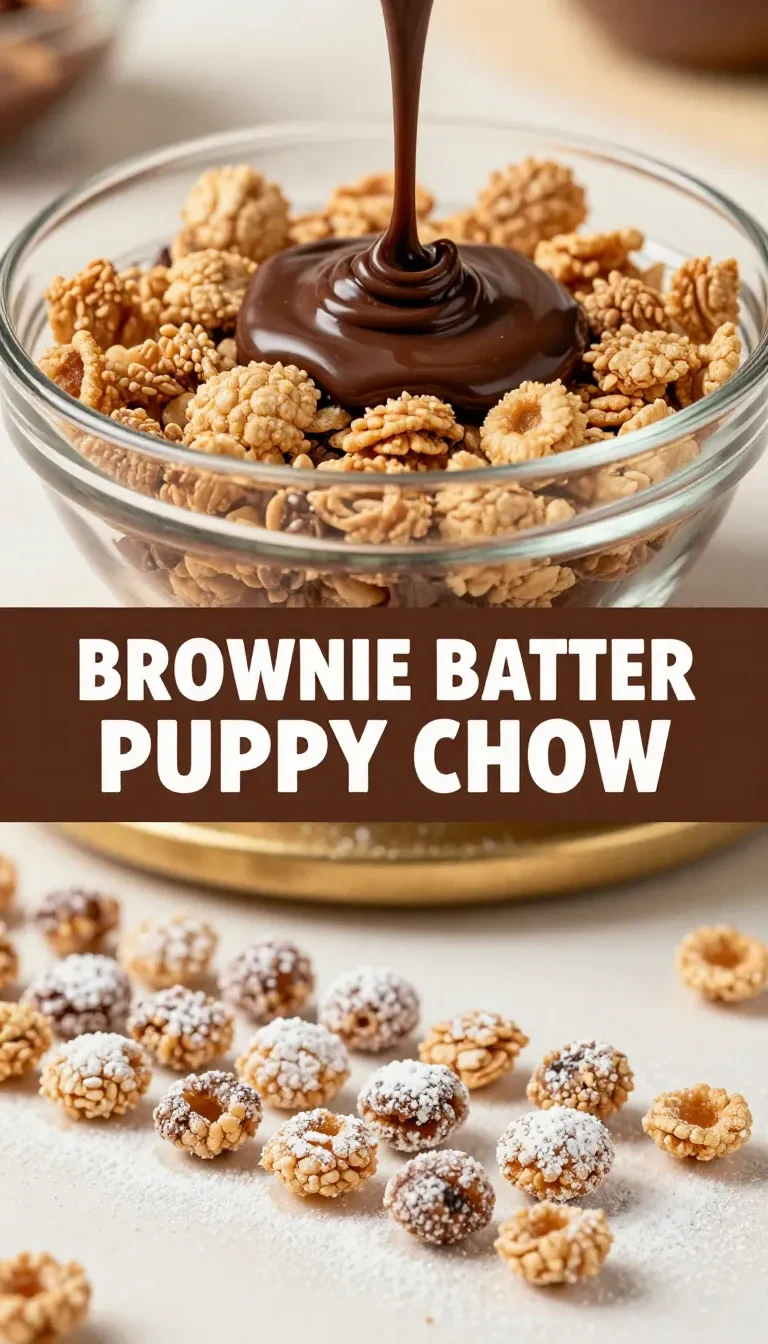
Fall Puppy Chow with Brownie Mix

This snack mix combines chocolatey brownie flavors with powdered sugar and candy-coated extras. A sweet fall twist! try the recipe.

Which one will you make?

With 40 recipes to choose from, there’s a treat for every fall craving. I can’t wait to hear which one you’ll bake first!

A variety of fall desserts including pumpkin pie, apple crisp, and pecan bars displayed on a rustic wooden table.

Loved this recipe? Save it to your favorite Pinterest board so you can easily find it later! ✨

This post contains affiliate links. As an Amazon Associate, I earn from qualifying purchases. This comes at no extra cost to you.

Fall puppy chow with brownie mix is an irresistible snack made with rice cereal, brownie mix, and a combination of peanut butter and chocolate, all coated in cinnamon-spiced powdered sugar. Finished with candy corn, pretzels, mini marshmallows, and autumn-inspired candies, it’s a perfect seasonal indulgence. This easy recipe comes together in just 20 minutes and yields enough for 12 servings—ideal for fall parties or cozy nights on the couch.

The rich, chocolatey aroma of melted peanut butter and chocolate alone is enough to gather everyone in the kitchen. Growing up in Charleston, my mom and I loved experimenting with snacks like these, filling the house with the warm scents of fall. And trust me, this one’s a keeper!

Table of Contents

What makes Fall Puppy Chow with Brownie Mix special?

Fall Puppy Chow with Brownie Mix is special because it combines nostalgic flavors with festive fall twists, creating a snack that’s as delightful to eat as it is to make. It’s the perfect blend of sweet, salty, and spiced goodness.

  • Seasonal flavors: With pumpkin spice and cinnamon, this recipe screams autumn in every bite.
  • Texture variety: The crunch of rice cereal balanced with chewy marshmallows and candy makes it irresistible.
  • Customizable: You can adjust the mix-ins to feature your favorite fall-themed treats.
  • Quick and easy: Ready in under 20 minutes, it’s a go-to snack for busy fall schedules.

What ingredients do you need for Fall Puppy Chow with Brownie Mix?

This recipe features a combination of pantry staples and festive add-ins to deliver its signature flavor. Here’s everything you need:

The mix of pumpkin spice and cinnamon is what transforms this treat into a fall-themed masterpiece. Don’t skip them!

How do you make Fall Puppy Chow with Brownie Mix step by step?

Making this recipe is a simple and enjoyable process that even the kids can help with. Follow these steps for a snack that’s ready in no time:

Step 1 — Prepare the cereal base

In a large mixing bowl, combine the rice cereal and brownie mix, stirring until evenly coated.

You might also enjoy our patriotic muddy buddies aka puppy chow.

Step 2 — Melt the peanut butter and chocolate

In a microwave-safe bowl, combine the peanut butter and chocolate chips. Microwave in 30-second intervals, stirring between each, until melted and smooth.

Step 3 — Coat the cereal

Pour the melted peanut butter and chocolate mixture over the rice cereal and brownie mix. Stir gently until all the cereal is evenly coated.

Step 4 — Add the powdered sugar and spices

In a large zip-top bag, combine the powdered sugar, cinnamon, and pumpkin spice. Add the coated cereal mixture to the bag, seal it, and shake until well coated.

Step 5 — Mix in the add-ins

Transfer the coated cereal to a large serving bowl. Mix in the candy corn, pretzel sticks, mini marshmallows, and M&M’s until evenly distributed.

KitchenAid Artisan Stand Mixer

Kitchen ApplianceKitchenAid Artisan Stand Mixer

Makes mixing dough and batters effortless — a kitchen game-changer.

View on Amazon →

Pyrex Mixing Bowl Set

Essential CookwarePyrex Mixing Bowl Set

Essential for mixing ingredients and easy to clean — perfect for this recipe.

View on Amazon →

For more ideas, check out our cake mix pumpkin chocolate chip.

Step 6 — Serve or store

Enjoy immediately, or store the puppy chow in an airtight container for up to one week.

Frequently Asked Questions About Fall Puppy Chow with Brownie Mix

Can I use different candies?

Yes! Swap in your favorite seasonal candies or chocolate-covered treats for a personal touch.

How should I store this snack?

Store in an airtight container at room temperature for up to one week to retain freshness.

Can I make this recipe dairy-free?

Absolutely. Use dairy-free chocolate chips and a plant-based alternative to peanut butter.

Looking for something similar? Try our decadent brownie bottom cheesecake bites recipe.

What if I don’t have a zip-top bag?

You can mix the powdered sugar and spices in a large bowl and gently stir the coated cereal to achieve the same result.

What’s the best way to serve this at a party?

Serve in autumn-themed bowls and add decorative touches like edible glitter or fall leaves for extra charm.

Serving ideas for this fall puppy chow

  • Movie nights: Serve in individual paper cups for easy snacking during your next family movie night.
  • Fall parties: Pair with warm cider or hot chocolate for a seasonal treat that guests will adore.
  • Gift baskets: Package in festive bags tied with autumn-colored ribbons for a thoughtful hostess gift.
  • Game days: Add this mix to your snack table for a fun and sweet addition to your spread.

Expert tips for a perfect batch

  • Shake well: Ensure the powdered sugar and spices coat every piece by shaking the bag vigorously.
  • Layer flavors: Add a pinch of nutmeg or ginger for extra fall spice.
  • Avoid soggy cereal: Let the melted chocolate cool slightly before pouring it over the cereal to prevent it from losing its crispness.

Easy ingredient swaps and substitutions

If you’re in a pinch, here are some quick substitutions:

  • Replace peanut butter with almond or sunflower seed butter for an allergy-friendly option.
  • Substitute candy corn with chopped dried fruit for a chewy, less-sweet addition.
  • Use crushed graham crackers instead of pretzel sticks for a more dessert-like twist.

Fall Puppy Chow with Brownie Mix

Prep Time 15 minutes
Cook Time 5 minutes
Total Time 20 minutes
Servings 12 servings
Calories 250
This Fall Puppy Chow combines the flavors of brownie mix and seasonal treats for a delicious snack.

Equipment

  • mixing bowl
  • microwave-safe bowl
  • zip-top bag
  • serving bowl

Instructions 

  • In a large mixing bowl, combine the rice cereal and brownie mix, stirring until evenly coated.
  • In a microwave-safe bowl, combine the peanut butter and chocolate chips. Microwave in 30-second intervals, stirring between each, until melted and smooth.
  • Pour the melted peanut butter and chocolate mixture over the rice cereal and brownie mix. Stir gently until all the cereal is evenly coated.
  • In a separate large zip-top bag, combine the powdered sugar, cinnamon, and pumpkin spice.
  • Add the coated cereal mixture to the bag, seal it, and shake until the mixture is well coated with the powdered sugar and spices.
  • Transfer the puppy chow to a large serving bowl and mix in the candy corn, pretzel sticks, mini marshmallows, and M&M's.
  • Serve immediately or store in an airtight container for up to one week.

Notes

Feel free to customize with your favorite candies or nuts.
Calories: 250kcal
Cost: $10
Course: Snack
Cuisine: American
Keyword: puppy chow

Nutrition

Calories: 250kcal | Carbohydrates: 40g | Protein: 5g | Fat: 10g | Sodium: 150mg
A bowl of Fall Puppy Chow made with brownie mix, surrounded by autumn leaves and small pumpkins

Loved this recipe? Save it to your favorite Pinterest board so you can easily find it later! ✨

This post contains affiliate links. As an Amazon Associate, I earn from qualifying purchases. This comes at no extra cost to you.

Pumpkin Bread With Cinnamon Sugar Topping

Pumpkin bread with cinnamon sugar topping is a moist and flavorful quick bread made with warm spices like cinnamon, nutmeg, and ginger, topped with a sweet, crunchy cinnamon sugar layer. Ready in about 70-80 minutes, this recipe yields a single loaf perfect for sharing or enjoying over a few days. The combination of pumpkin and spice makes it perfect for cozy mornings, fall afternoons, or holiday gatherings.

As someone who grew up in Charleston, I’ve always loved the earthy aroma of spiced pumpkin treats filling the kitchen — it feels like the essence of autumn in a loaf.

Table of Contents

This pumpkin bread stands out because of its moist texture, spiced aroma, and irresistibly crunchy cinnamon sugar topping. It’s perfect for busy bakers who want a crowd-pleaser with minimal effort.

  • Easy to make: No special equipment or complex techniques are required — just simple mixing and baking.
  • Distinctive flavors: The combination of pumpkin, cinnamon, nutmeg, and ginger provides a warm, spiced flavor reminiscent of fall.
  • Versatile: Enjoy it as breakfast, a snack, or even dessert. It’s great for sharing too!
  • That topping! The cinnamon sugar layer bakes into a delicate, crunchy crust that elevates every bite.

What ingredients do you need?

This recipe uses simple pantry ingredients to create a richly spiced and perfectly sweet loaf. Here’s what you’ll need:

Key ingredients like pumpkin puree ensure moisture and rich flavor, while the cinnamon sugar topping creates the signature crunch that sets this bread apart.

How do you make it step by step?

This recipe comes together seamlessly with just a few simple steps, making it perfect for bakers of all skill levels.

You might also enjoy our pumpkin cinnamon swirl sourdough bread.

Step 1 — Preheat and Prepare

Preheat your oven to 350°F (175°C). Grease a 9×5-inch loaf pan to ensure the bread releases easily after baking.

Step 2 — Mix the Dry Ingredients

In a medium bowl, whisk together the flour, baking soda, baking powder, salt, cinnamon, nutmeg, and ginger. Set aside.

Step 3 — Combine the Wet Ingredients

In a large mixing bowl, blend the granulated sugar and vegetable oil until well mixed. Add the eggs one at a time, whisking to incorporate each fully.

For more ideas, check out our pumpkin cupcakes with cinnamon cream.

Step 4 — Add Pumpkin Mixture

Stir in the pumpkin puree, water, and vanilla extract until smooth. Gradually fold in the dry ingredient mixture until just combined.

Step 5 — Transfer and Top

Pour the batter into the prepared loaf pan and smooth out the surface. Mix the topping’s sugar and cinnamon in a small bowl, then sprinkle it evenly over the batter.

Step 6 — Bake

Bake for 60-70 minutes or until a toothpick inserted into the center comes out clean. Let the bread cool in the pan for 10 minutes before transferring to a wire rack.

KitchenAid Artisan Stand Mixer

Kitchen ApplianceKitchenAid Artisan Stand Mixer

Makes mixing dough and batters effortless — a kitchen game-changer.

View on Amazon →

Pyrex Mixing Bowl Set

Essential CookwarePyrex Mixing Bowl Set

Durable glass mixing bowls perfect for combining ingredients in this recipe.

View on Amazon →

Looking for something similar? Try our pumpkin bread pudding recipe.

Frequently Asked Questions

Can I use fresh pumpkin puree?

Yes, fresh pumpkin puree works fine as long as it has a similar consistency to canned puree. Strain any excess liquid before using.

How do I store pumpkin bread?

Store in an airtight container at room temperature for up to 3 days. For longer storage, refrigerate or freeze it.

Can I make this recipe gluten-free?

Yes, substitute the all-purpose flour with a 1:1 gluten-free baking flour. The texture may vary slightly.

Why is my topping not crunchy?

Ensure the sugar-to-cinnamon ratio is correct and avoid overmixing. Baking at the right temperature (350°F) is crucial for the topping to caramelize properly.

Expert Tips for Success

  • Don’t overmix: Overmixing can toughen the bread. Stir until just combined for the best texture.
  • Check for doneness: Insert a toothpick into the center; if it comes out clean, the bread is ready.
  • Keep it moist: Avoid overbaking by keeping a close eye during the last 10 minutes.

Common Mistakes to Avoid

  • Skipping the greased pan: Always grease your pan to prevent sticking.
  • Forgetting the topping: The cinnamon sugar topping transforms this bread, so don’t leave it out!

Easy Ingredient Swaps

  • Sugar substitute: Replace granulated sugar with coconut sugar or a granulated sugar substitute for a lower glycemic option.
  • Oil alternatives: Use melted coconut oil or unsweetened applesauce instead of vegetable oil for a slight flavor shift.

Serving Ideas and Pairings

  • With coffee: A warm slice pairs beautifully with a cup of coffee or latte.
  • As dessert: Serve it with a dollop of whipped cream or vanilla ice cream.
  • For brunch: Pair it with scrambled eggs and fresh fruit for a complete fall-inspired meal.

Pumpkin Bread With Cinnamon Sugar Topping

Prep Time 15 minutes
Cook Time 1 hour 10 minutes
Total Time 1 hour 25 minutes
Servings 8 servings
Calories 200
This delicious pumpkin bread is topped with a sweet cinnamon sugar mixture, making it a perfect treat for fall.

Equipment

  • mixing bowl
  • whisk
  • loaf pan
  • oven
  • measuring cups

Instructions 

  • Preheat your oven to 350°F (175°C) and grease a 9x5-inch loaf pan.
  • In a medium bowl, whisk together the flour, baking soda, baking powder, salt, cinnamon, nutmeg, and ginger.
  • In a large mixing bowl, combine the sugar and vegetable oil. Mix until well combined.
  • Add the eggs one at a time, mixing well after each addition.
  • Stir in the pumpkin puree, water, and vanilla extract until smooth.
  • Gradually add the dry ingredient mixture to the wet ingredients, stirring until just combined.
  • Pour the batter into the prepared loaf pan and smooth the top.
  • In a small bowl, mix together the sugar and cinnamon for the topping, then sprinkle it evenly over the batter.
  • Bake in the preheated oven for 60-70 minutes, or until a toothpick inserted into the center comes out clean.
  • Allow the pumpkin bread to cool in the pan for 10 minutes before transferring it to a wire rack to cool completely.

Notes

For a richer flavor, consider adding chopped nuts or chocolate chips to the batter.
Calories: 200kcal
Cost: $10
Course: Dessert
Cuisine: American
Keyword: pumpkin bread

Nutrition

Calories: 200kcal | Carbohydrates: 32g | Protein: 3g | Fat: 8g | Sodium: 150mg
A freshly baked pumpkin bread topped with a sprinkle of cinnamon sugar on a wooden cutting board.

Loved this recipe? Save it to your favorite Pinterest board so you can easily find it later! ✨

This post contains affiliate links. As an Amazon Associate, I earn from qualifying purchases. This comes at no extra cost to you.

Table of Contents

KitchenAid Artisan Stand Mixer

Kitchen ApplianceKitchenAid Artisan Stand Mixer

Makes mixing dough and batters effortless — a kitchen game-changer

View on Amazon →

Lodge Cast Iron Skillet 12-inch

Essential CookwareLodge Cast Iron Skillet 12-inch

Perfect for searing and baking — this recipe needs even heat distribution

View on Amazon →

Cheesecake Stuffed Snickerdoodle Pumpkin Cookies

Prep Time 30 minutes
Cook Time 15 minutes
Total Time 45 minutes
Servings 24 servings
Calories 150
Deliciously soft and chewy cookies filled with a creamy cheesecake center, perfect for fall.

Equipment

  • mixing bowl
  • baking sheet
  • oven
  • whisk
  • measuring cups
  • spatula

Ingredients

Instructions 

  • Preheat your oven to 350°F (175°C) and line a baking sheet with parchment paper.
  • In a large bowl, cream together the softened butter, granulated sugar, and brown sugar until light and fluffy.
  • Add in the egg, vanilla extract, and pumpkin puree, mixing until well combined.
  • In another bowl, whisk together the flour, cornstarch, baking soda, baking powder, cinnamon, nutmeg, ginger, and salt.
  • Gradually add the dry ingredients to the wet mixture, stirring until a dough forms.
  • In a separate bowl, mix the softened cream cheese, powdered sugar, and vanilla extract until smooth to create the cheesecake filling.
  • Scoop out a tablespoon of cookie dough and flatten it in your hand. Place a teaspoon of the cheesecake filling in the center, then wrap the dough around the filling to form a ball.
  • In a small bowl, combine the granulated sugar and ground cinnamon for rolling. Roll each cookie ball in the cinnamon-sugar mixture until fully coated.
  • Place the cookie balls on the prepared baking sheet, spaced about 2 inches apart.
  • Bake in the preheated oven for 12-15 minutes, or until the edges are lightly golden. The centers may look slightly underbaked; this is fine as they will continue to cook after being removed from the oven.
  • Allow the cookies to cool on the baking sheet for 5 minutes before transferring them to a wire rack to cool completely.

Notes

For a richer flavor, consider adding a pinch of cloves to the dough.
Calories: 150kcal
Cost: $15
Course: Dessert
Cuisine: American
Keyword: cheesecake, Cookies, pumpkin

Nutrition

Calories: 150kcal | Carbohydrates: 22g | Protein: 2g | Fat: 7g | Sodium: 100mg
A plate of cheesecake stuffed snickerdoodle pumpkin cookies, showcasing their soft texture and cinnamon sugar coating.

Loved this recipe? Save it to your favorite Pinterest board so you can easily find it later! ✨
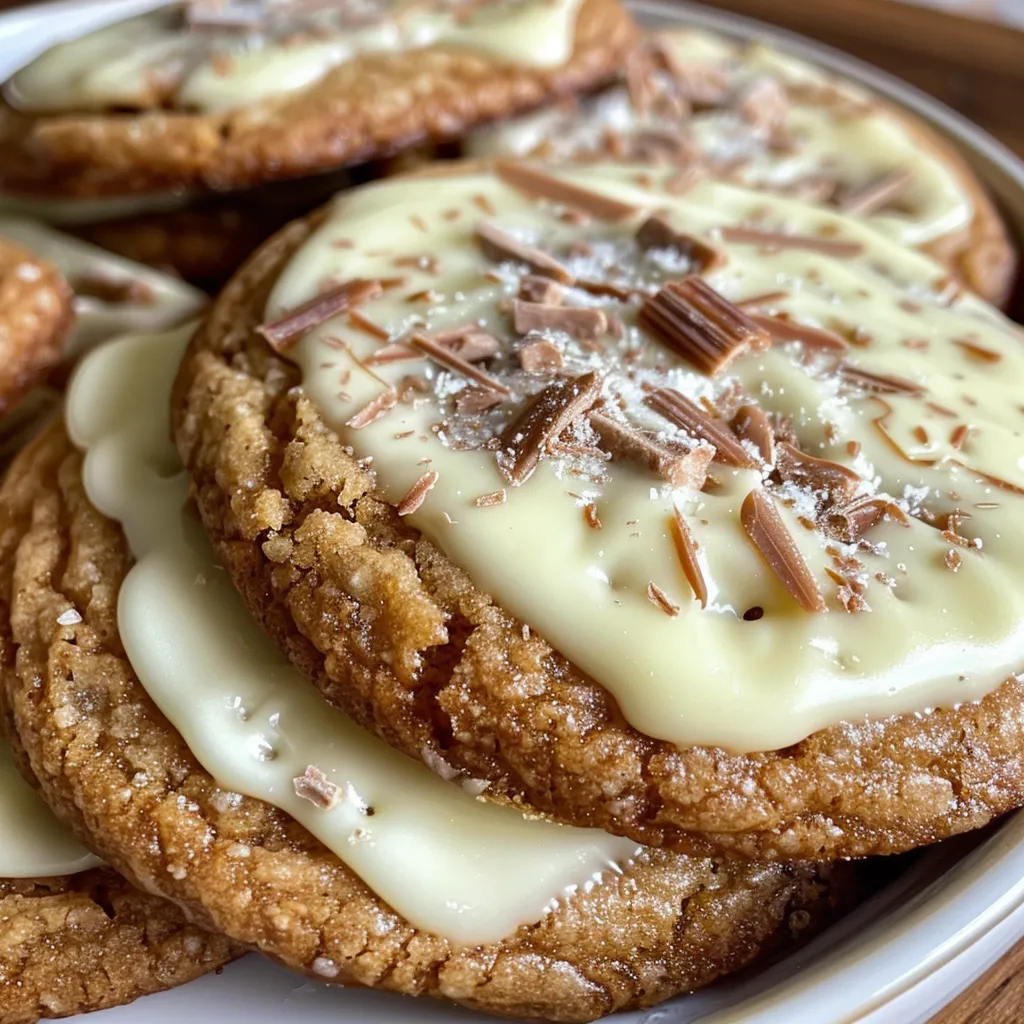
This post contains affiliate links. As an Amazon Associate, I earn from qualifying purchases. This comes at no extra cost to you.

Pumpkin whoopie pies

Pumpkin whoopie pies are soft, cake-like cookies sandwiched with a creamy and tangy cream cheese filling. Made with pumpkin puree and warm spices like cinnamon, ginger, and nutmeg, these fall-inspired treats are ready in just 30 minutes. This recipe makes 12 servings and is perfect for cozy desserts or festive snacks.

The moment these cookies bake, your kitchen fills with the comforting aroma of pumpkin and spices. Sandwiched with a luscious cream cheese filling, each bite is soft, sweet, and slightly tangy. I first made these for a fall gathering, and they were gone before I could grab seconds—it was a proud chef moment!

Table of Contents

What Makes Pumpkin Whoopie Pies Special?

The soft texture of the cookies and the creamy filling make pumpkin whoopie pies an irresistible treat. They’re a perfect balance of sweet, spicy, and tangy flavors, offering a taste of fall in every bite.

  • The pumpkin and spices bring warmth and depth to the cookies, making them perfect for autumn gatherings.
  • The cream cheese filling adds a rich, tangy contrast to the sweetness of the cookies.
  • The recipe is quick and approachable, taking just 30 minutes from start to finish.
  • They’re versatile—you can serve them as a dessert, snack, or festive treat for any fall occasion.

What Ingredients Do You Need for Pumpkin Whoopie Pies?

You’ll need a mix of pantry staples, seasonal spices, and a handful of fresh ingredients to create these flavorful delights. Here’s the full list:

The canned pumpkin puree is the star of the recipe, giving the cookies their distinct flavor and moist, tender texture. Don’t skip the cream cheese either—it’s key to the rich, tangy filling that balances the spices beautifully.

How Do You Make Pumpkin Whoopie Pies Step by Step?

This recipe is straightforward and fun to make. Follow these steps for perfect results:

Step 1 — Prepare the Baking Sheets

Preheat your oven to 350°F (175°C) and line two baking sheets with parchment paper.

You might also enjoy our cake mix pumpkin chocolate chip.

Step 2 — Mix Dry Ingredients

In a medium bowl, whisk together the flour, baking soda, baking powder, cinnamon, ginger, nutmeg, and salt until well combined.

Step 3 — Mix Wet Ingredients

In a large bowl, mix the pumpkin puree, granulated sugar, vegetable oil, egg, and 1 teaspoon of vanilla extract until smooth.

Step 4 — Combine Wet and Dry Ingredients

Gradually add the dry ingredients to the wet mixture, stirring until just combined.

Step 5 — Scoop and Bake

Using a tablespoon, drop rounded mounds of the batter onto the prepared baking sheets, leaving space between each mound. Bake for 12-15 minutes, or until the edges are firm and a toothpick inserted into the center comes out clean.

KitchenAid Artisan Stand Mixer

Kitchen ApplianceKitchenAid Artisan Stand Mixer

Makes mixing dough and batters effortless — a kitchen game-changer.

View on Amazon →

Nordic Ware Natural Aluminum Commercial Baker's Half Sheet

Essential CookwareNordic Ware Natural Aluminum Commercial Baker’s Half Sheet

Durable and perfect for baking cookies evenly — essential for this recipe.

View on Amazon →

For more ideas, check out our soft pumpkin chocolate chip cookies.

Step 6 — Cool the Cookies

Allow the cookies to cool on the baking sheets for 5 minutes, then transfer them to a wire rack to cool completely.

Step 7 — Prepare the Filling and Assemble

In a separate bowl, beat together the cream cheese, softened butter, powdered sugar, and 1 teaspoon of vanilla extract until smooth and creamy. Once the cookies are completely cool, spread the filling on the flat side of one cookie and sandwich with another. Repeat until all cookies are paired, then serve and enjoy!

Frequently Asked Questions About Pumpkin Whoopie Pies

Can I make the cookies ahead of time?

Yes, you can bake the cookies a day in advance and store them in an airtight container. Assemble the pies with the filling just before serving for the freshest taste.

What’s the best way to store pumpkin whoopie pies?

Store them in an airtight container in the refrigerator for up to 3 days. Let them sit at room temperature for 10-15 minutes before serving.

Looking for something similar? Try our the best healthy pumpkin chocolate.

Can I freeze these cookies?

Yes, freeze the unfilled cookies for up to 2 months. Thaw them at room temperature and assemble with fresh filling when ready to serve.

What if I don’t have canned pumpkin puree?

If canned pumpkin puree isn’t available, you can use fresh pumpkin puree made by roasting and blending pumpkin. Make sure to drain any excess liquid for the right consistency.

Can I use a different filling?

Yes, whipped cream or marshmallow fluff can be used as an alternative filling, but the tangy cream cheese adds a unique balance to the sweetness.

Pumpkin Whoopie Pies

Prep Time 20 minutes
Cook Time 15 minutes
Total Time 35 minutes
Servings 12 servings
Calories 200
Deliciously soft and spiced pumpkin whoopie pies filled with creamy frosting.

Equipment

  • mixing bowl
  • whisk
  • baking sheet
  • oven
  • spatula

Ingredients

Instructions 

  • Preheat your oven to 350°F (175°C) and line two baking sheets with parchment paper.
  • In a medium bowl, whisk together the flour, baking soda, baking powder, cinnamon, ginger, nutmeg, and salt until well combined.
  • In a large bowl, mix the pumpkin puree, granulated sugar, vegetable oil, egg, and 1 teaspoon of vanilla extract until smooth.
  • Gradually add the dry ingredients to the wet mixture, stirring until just combined.
  • Using a tablespoon, drop rounded mounds of the batter onto the prepared baking sheets, leaving space between each mound.
  • Bake for 12-15 minutes, or until the edges are firm and a toothpick inserted into the center comes out clean.
  • Allow the cookies to cool on the baking sheets for 5 minutes before transferring them to a wire rack to cool completely.
  • In a separate bowl, beat together the cream cheese, softened butter, powdered sugar, and 1 teaspoon of vanilla extract until smooth and creamy.
  • Once the cookies are completely cool, spread a generous amount of the cream cheese filling on the flat side of one cookie and sandwich it with another cookie.
  • Repeat with the remaining cookies and filling, then serve and enjoy your delicious pumpkin whoopie pies!

Notes

For a spicier flavor, you can add more cinnamon or ginger to the batter.
Calories: 200kcal
Cost: $15
Course: Dessert
Cuisine: American
Keyword: pumpkin whoopie pies

Nutrition

Calories: 200kcal | Carbohydrates: 30g | Protein: 2g | Fat: 8g | Sodium: 150mg
Delicious pumpkin whoopie pies stacked on a rustic wooden table

Loved this recipe? Save it to your favorite Pinterest board so you can easily find it later! ✨
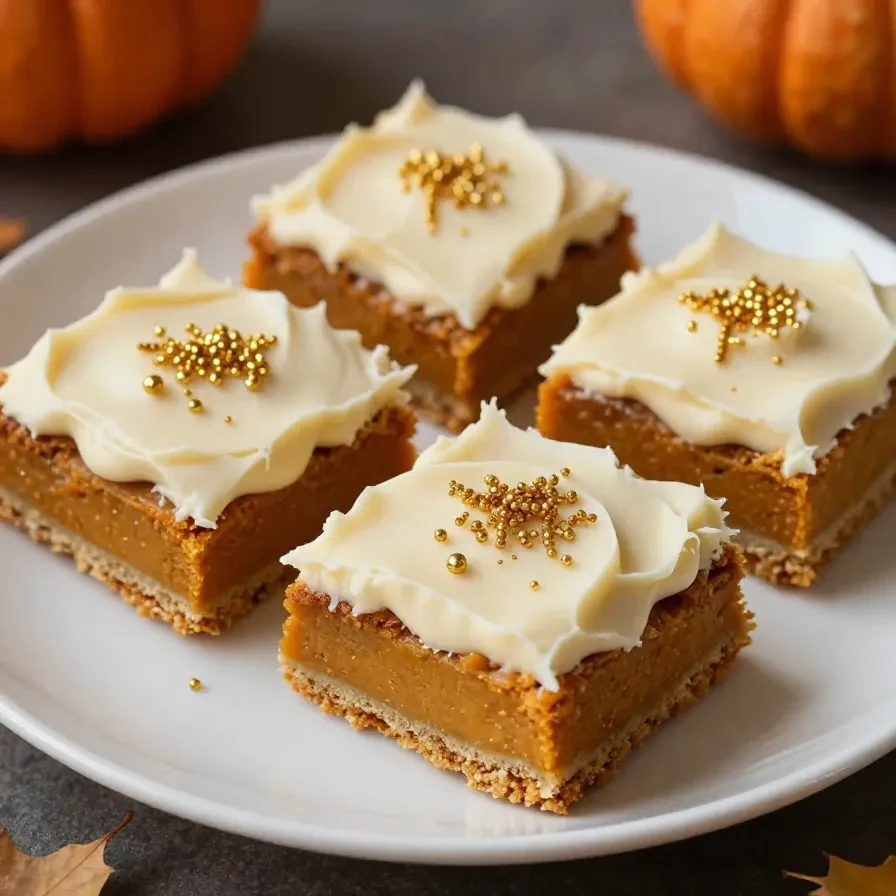
This post contains affiliate links. As an Amazon Associate, I earn from qualifying purchases. This comes at no extra cost to you.

Sour Cream Apple Squares

Sour cream apple squares is a moist, tart dessert featuring chopped apples, sour cream, and warm spices baked into a tender crumb. Ready in about 50 minutes, this recipe yields 12 flavorful squares perfect for gatherings or sweet snacks. The aroma of cinnamon and nutmeg combined with the creamy richness of sour cream makes each bite irresistible.

One of my favorite memories is sharing these apple squares with neighbors after testing seasonal apple varieties in my kitchen—it always created smiles and requests for the recipe. Bring a baking pan full of these squares, and you’re sure to create the same magic.

Table of Contents

Why is this dish a favorite?

Sour cream apple squares are loved for their tender texture and flavorful combination of apples, spices, and sour cream. They’re easy to make, quick to bake, and perfect for sharing.

  • The sour cream keeps the squares moist while balancing the tartness of apples.
  • Warm spices like cinnamon and nutmeg create a comforting, autumn-inspired flavor.
  • The versatile nature means they can be enjoyed as dessert or with an afternoon coffee.
  • Optional nuts add crunch, making it a well-rounded bite.

What ingredients do you need for Sour Cream Apple Squares?

This recipe uses common pantry staples combined with fresh apples for a delightful treat. Below is everything you’ll need:

The sour cream gives the dish its signature creamy texture, while Granny Smith apples bring a tart bite that balances the sweetness perfectly.

How do you make Sour Cream Apple Squares step by step?

Creating sour cream apple squares is straightforward with these simple steps. You’ll have a batch ready in no time.

Step 1 — Prepare the baking pan and preheat the oven

Preheat the oven to 350°F (175°C). Grease a 9×13 inch baking pan to prevent sticking.

Step 2 — Mix the dry ingredients

In a medium bowl, whisk together the flour, baking powder, baking soda, and salt. Set this mixture aside.

Step 3 — Cream butter and sugar

In a large mixing bowl, cream the softened butter and granulated sugar until light and fluffy for an airy batter.

Step 4 — Incorporate wet ingredients

Beat in the egg and vanilla extract until well combined. Then, mix in the sour cream until smooth.

Step 5 — Combine wet and dry ingredients

Gradually add the dry ingredient mixture to the wet ingredients, stirring until just combined. Avoid overmixing.

Step 6 — Fold in apples, spices, and optional nuts

Gently stir in the chopped apples, cinnamon, nutmeg, and nuts (if using) for added texture and flavor.

KitchenAid Artisan Stand Mixer

Kitchen ApplianceKitchenAid Artisan Stand Mixer

Makes mixing dough and batters effortless — a kitchen game-changer

View on Amazon →

Pyrex Glass Mixing Bowl Set

Essential CookwarePyrex Glass Mixing Bowl Set

Essential for mixing ingredients and easy to clean, perfect for this recipe.

View on Amazon →

Step 7 — Bake and cool

Spread the batter evenly in the prepared pan. Bake for 30-35 minutes or until a toothpick inserted in the center comes out clean. Cool completely before cutting into squares.

Step 8 — Add finishing touches

Dust the squares with powdered sugar before serving for a light, sweet touch.

Frequently Asked Questions About Sour Cream Apple Squares

Can you freeze sour cream apple squares?

Yes, sour cream apple squares freeze well. Wrap them tightly to prevent freezer burn, and store for up to 3 months.

What type of apples work best?

Granny Smith and Honeycrisp apples are ideal. Their tartness and firm texture hold up well during baking.

How long do they stay fresh?

Stored in an airtight container, sour cream apple squares stay fresh for up to 4 days at room temperature.

Can I make them gluten-free?

Yes, substitute the all-purpose flour with a 1:1 gluten-free baking mix to accommodate dietary needs.

Should I peel the apples?

Yes, peeling the apples ensures a smoother texture without tough skin interfering with the tender crumb.

Expert tips for perfect results

  • Use room-temperature butter for easier creaming and fluffier batter.
  • Toss the apples with a bit of flour before folding them in to prevent sinking during baking.
  • Line the pan with parchment paper for effortless removal and clean edges.
  • Don’t overmix the batter; it can make the squares dense rather than tender.

Common mistakes to avoid

  • Skipping the sour cream—it’s essential for moist squares.
  • Leaving the apples unevenly chopped, which can lead to inconsistent baking.
  • Overbaking the squares, resulting in a dry texture.

Serving ideas and pairings

  • Pair these squares with vanilla ice cream for an indulgent dessert.
  • Serve with a cup of hot spiced tea for a cozy afternoon treat.
  • Add a drizzle of caramel sauce for extra decadence.
  • Enjoy them alongside our easiest apple crisp for an apple-themed dessert table.

Sour Cream Apple Squares

Prep Time 15 minutes
Cook Time 35 minutes
Total Time 50 minutes
Servings 12 servings
Calories 250
Deliciously moist and flavorful apple squares made with sour cream, perfect for dessert or a sweet snack.

Equipment

  • mixing bowl
  • whisk
  • baking pan
  • oven
  • spatula

Ingredients

Instructions 

  • Preheat the oven to 350°F (175°C). Grease a 9x13 inch baking pan.
  • In a medium bowl, whisk together the flour, baking powder, baking soda, and salt. Set aside.
  • In a large mixing bowl, cream the softened butter and granulated sugar until light and fluffy.
  • Beat in the egg and vanilla extract until well combined.
  • Add the sour cream and mix until smooth.
  • Gradually add the dry ingredients to the wet mixture, stirring until just combined.
  • Fold in the chopped apples, cinnamon, nutmeg, and nuts (if using).
  • Spread the batter evenly in the prepared baking pan.
  • Bake for 30-35 minutes, or until a toothpick inserted into the center comes out clean.
  • Allow to cool in the pan before cutting into squares. Dust with powdered sugar if desired.

Notes

For a richer flavor, use a mix of different apple varieties.
Calories: 250kcal
Cost: $15
Course: Dessert
Cuisine: American
Keyword: apple squares

Nutrition

Calories: 250kcal | Carbohydrates: 40g | Protein: 3g | Fat: 10g | Sodium: 150mg
Delicious sour cream apple squares on a wooden table

Loved this recipe? Save it to your favorite Pinterest board so you can easily find it later! ✨
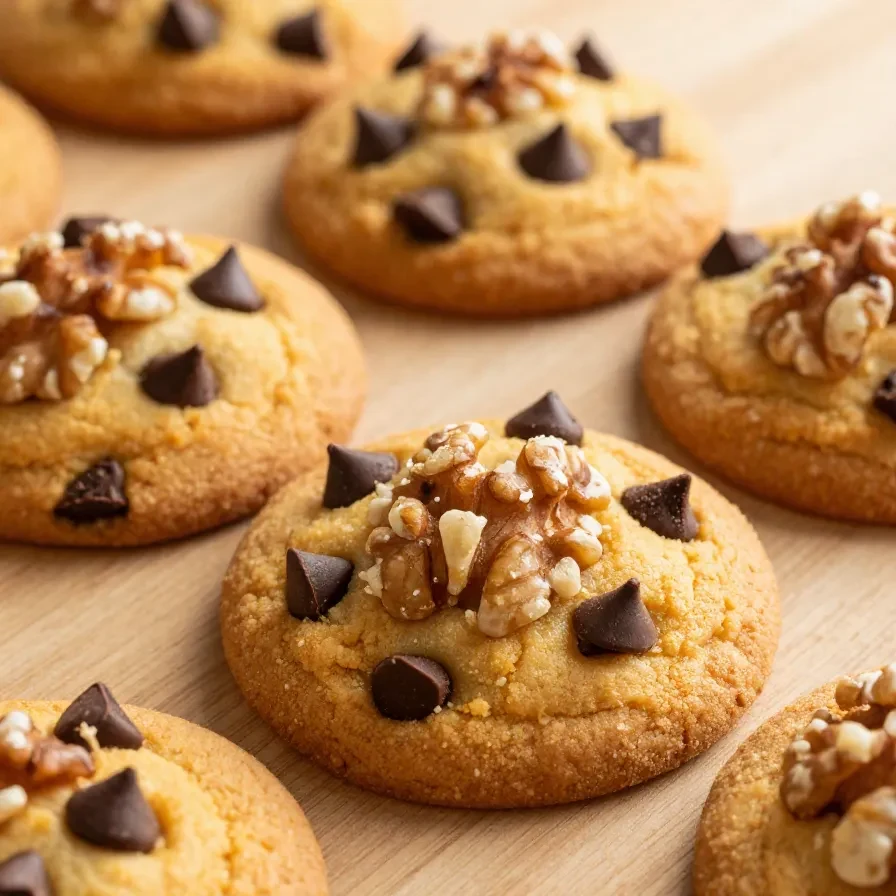
This post contains affiliate links. As an Amazon Associate, I earn from qualifying purchases. This comes at no extra cost to you.

Table of Contents

Why Are Pumpkin Cheesecake Cookies Special?

Pumpkin cheesecake cookies are the ultimate fall dessert with their blend of spiced pumpkin and creamy cheesecake filling. The unique combination creates a cookie that’s both indulgent and comforting.

  • Unique flavor pairing: Warm spices like cinnamon and nutmeg complement the sweetness of pumpkin and tangy cheesecake.
  • Rich, creamy center: A dollop of cream cheese filling adds surprising texture and flavor balance.
  • Simple yet impressive: This recipe turns pantry staples into a dessert that feels like a professional confection.
  • Perfect for gatherings: Each batch makes 24 cookies, ideal for sharing with friends and family.

What Ingredients Do You Need for Pumpkin Cheesecake Cookies?

This recipe uses simple ingredients that come together for maximum flavor. The combination of spices, pumpkin puree, and cream cheese creates the ideal fall treat.

The canned pumpkin puree provides moisture and rich flavor, while the cream cheese delivers the signature tangy filling.

How Do You Make Pumpkin Cheesecake Cookies Step by Step?

Creating pumpkin cheesecake cookies is a straightforward process of mixing, filling, and baking. Follow these steps for perfect results.

Step 1 — Prepare Your Baking Sheet

Preheat the oven to 350°F (175°C) and line a baking sheet with parchment paper to prevent sticking.

Step 2 — Mix Dry Ingredients

In a medium bowl, whisk together the flour, baking soda, baking powder, salt, cinnamon, nutmeg, and ginger until combined.

Step 3 — Cream the Butter and Sugars

In a large bowl, cream together softened butter, granulated sugar, and brown sugar until the mixture is light and fluffy.

Step 4 — Incorporate the Wet Ingredients

Beat in the egg and vanilla extract, then stir in the pumpkin puree until well mixed.

You might also enjoy our soft pumpkin chocolate chip cookies.

Step 5 — Combine Wet and Dry Ingredients

Gradually fold the dry ingredients into the wet mixture, stirring until just combined. Do not overmix.

KitchenAid Artisan Stand Mixer

Kitchen ApplianceKitchenAid Artisan Stand Mixer

Makes mixing dough and batters effortless — a kitchen game-changer.

View on Amazon →

Nordic Ware Natural Aluminum Commercial Baker's Half Sheet

Essential CookwareNordic Ware Natural Aluminum Commercial Baker’s Half Sheet

Durable and versatile baking sheet perfect for cookies — essential for this recipe.

View on Amazon →

Step 6 — Prepare the Cheesecake Filling

In a separate bowl, beat softened cream cheese with powdered sugar and vanilla extract until smooth and creamy.

Step 7 — Assemble the Cookies

Scoop out tablespoons of cookie dough and flatten slightly on the prepared baking sheet. Add a dollop of cream cheese filling to the center of each cookie, cover with another scoop of dough, and seal the edges.

Step 8 — Bake and Cool

Bake the cookies in the preheated oven for 12-15 minutes, or until the edges turn golden. Allow them to cool on the baking sheet for a few minutes before transferring to a wire rack.

Frequently Asked Questions About Pumpkin Cheesecake Cookies

How long do pumpkin cheesecake cookies stay fresh?

When stored in an airtight container, they stay fresh for up to 5 days at room temperature and up to 2 weeks in the fridge.

Can I freeze pumpkin cheesecake cookies?

Yes, you can freeze these cookies! Store them in an airtight container or freezer bag for up to 3 months.

For more ideas, check out our the best healthy pumpkin chocolate.

Do I have to use canned pumpkin puree?

No, homemade pumpkin puree works great, too. Just make sure it has the same consistency as canned puree for optimal results.

What’s the best way to tell if they are done baking?

The edges should be lightly golden brown, while the tops remain soft but set.

Can I make the cheesecake filling ahead of time?

Absolutely! Prepare the filling and store it in the fridge for up to 2 days before using.

Easy Ingredient Swaps for Pumpkin Cheesecake Cookies

Running low on ingredients? Try these simple substitutions without sacrificing texture or flavor.

  • Brown sugar: Swap with coconut sugar for a slightly deeper flavor.
  • Canned pumpkin: Use mashed sweet potato as an alternative—it has a similar moisture content.
  • Nutmeg: Replace with allspice for a slightly spicier twist.

Expert Tips for Perfect Pumpkin Cheesecake Cookies

Make the process seamless and delicious with these helpful tricks.

  • Chill your cookie dough: Refrigerating for 30 minutes makes it easier to handle and shape.
  • Avoid overmixing: Overworking the batter leads to dense cookies, so mix until just combined.
  • Use a cookie scoop: It ensures consistent portion sizes, helping cookies bake evenly.

Common Mistakes to Avoid When Making Pumpkin Cheesecake Cookies

Avoid these pitfalls for the best batch every time.

Looking for something similar? Try our pumpkin chocolate chip cookies (soft batch).

  • Skipping parchment paper: Without it, cookies may stick or spread too much.
  • Using cold cream cheese: Softened cream cheese blends more smoothly into the filling.
  • Overbaking: Watch closely and remove cookies as soon as edges are golden for a soft texture.

How to Store and Reheat Pumpkin Cheesecake Cookies

Keep cookies tasting fresh with proper storage methods.

Room temperature: Store in an airtight container for up to 5 days.

Fridge: Keep in a sealed container for up to 2 weeks. Ensure they’re completely cool before refrigerating.

Freezer: Freeze cookies on a tray until solid, then transfer to freezer bags for up to 3 months. Thaw in the fridge overnight.

Reheating: Warm cookies in the microwave for 10-15 seconds or in the oven at 300°F for 5 minutes.

Pumpkin Cheesecake Cookies

Prep Time 20 minutes
Cook Time 15 minutes
Total Time 35 minutes
Servings 24 servings
Calories 150
Deliciously soft and chewy cookies filled with a creamy pumpkin cheesecake center, perfect for fall.

Equipment

  • mixing bowl
  • whisk
  • baking sheet
  • oven
  • spatula

Ingredients

Instructions 

  • Preheat the oven to 350°F (175°C) and line a baking sheet with parchment paper.
  • In a medium bowl, whisk together the all-purpose flour, baking soda, baking powder, salt, cinnamon, nutmeg, and ginger.
  • In a large bowl, cream together the softened butter, granulated sugar, and brown sugar until light and fluffy.
  • Beat in the egg and vanilla extract until well combined, then stir in the pumpkin puree.
  • Gradually add the dry ingredients to the wet ingredients, mixing until just combined.
  • In a separate bowl, beat together the softened cream cheese, powdered sugar, and additional vanilla extract until smooth.
  • Using a tablespoon, scoop out cookie dough and flatten slightly on the prepared baking sheet.
  • Place a small dollop of the cream cheese filling in the center of each cookie, then cover with another scoop of cookie dough, sealing the edges.
  • Bake in the preheated oven for 12-15 minutes, or until the edges are lightly golden.
  • Allow the cookies to cool on the baking sheet for a few minutes before transferring them to a wire rack to cool completely.

Notes

For a richer flavor, use fresh pumpkin puree instead of canned.
Calories: 150kcal
Cost: $10
Course: Dessert
Cuisine: American
Keyword: cheesecake, Cookies, pumpkin

Nutrition

Calories: 150kcal | Carbohydrates: 20g | Protein: 2g | Fat: 7g | Sodium: 100mg
A plate of freshly baked pumpkin cheesecake cookies with a creamy filling

Loved this recipe? Save it to your favorite Pinterest board so you can easily find it later! ✨

This post contains affiliate links. As an Amazon Associate, I earn from qualifying purchases. This comes at no extra cost to you.

Easy candied pecans is a sweet and crunchy snack made with pecan halves, sugar, water, vanilla extract, cinnamon, and salt, cooked on the stovetop. Ready in just 20 minutes, this recipe yields four servings perfect for topping salads, enhancing desserts, or enjoying on their own. Using simple ingredients and a quick cooking method, these candied pecans are easy to prepare and full of flavor.

Growing up in Charleston, South Carolina, we always had pecans on hand. This recipe reminds me of snacking on them straight from the tree while dreaming up ways to make them even better.

Table of Contents

Why Make Easy Candied Pecans?

Easy candied pecans are one of the simplest ways to add a touch of sweetness and crunch to your favorite dishes. This recipe uses pantry staples, making it accessible for all skill levels and occasions.

  • Quick to prepare: Ready in just 20 minutes, these candied pecans are perfect for last-minute guests or impromptu snacking.
  • Versatile: They pair wonderfully with salads, desserts, or even as a garnish for cocktails.
  • Nutritious and delicious: Pecans provide healthy fats and a satisfying crunch without the need for complex preparation.
  • Customizable: Add a pinch of spice or swap out sweeteners for your personal touch.

What Ingredients Do You Need for Easy Candied Pecans?

This recipe calls for six simple ingredients that create a perfect balance of sweetness and spice. Each one plays a key role in achieving the desired flavor and texture.

Pecan halves provide the main crunchy texture, while cinnamon and vanilla enhance the warm, sweet flavor profile. The sugar and water create a caramel-like coating that binds everything together.

How Do You Make Easy Candied Pecans Step by Step?

This stovetop recipe requires only a few basic steps to create perfectly candied pecans. Follow each step to achieve that ideal balance of sweetness and crunch.

Step 1 — Combine Ingredients

In a medium saucepan, mix the sugar, water, vanilla extract, cinnamon, and salt over medium heat. Stir until the sugar completely dissolves and the mixture becomes smooth.

Step 2 — Add Pecans

Carefully add the pecan halves to the saucepan, stirring to coat them evenly with the syrup.

Step 3 — Cook and Coat

Continue cooking for 5-7 minutes, stirring frequently. The syrup will thicken and adhere to the pecans, giving them their signature glossy coating.

Step 4 — Spread Pecans

Remove the saucepan from heat. Spread the pecans in a single layer on a baking sheet lined with parchment paper to prevent sticking.

Lodge Cast Iron Skillet 12-inch

Essential CookwareLodge Cast Iron Skillet 12-inch

Perfect for searing and baking — this recipe needs even heat distribution

View on Amazon →

Step 5 — Cool and Store

Let the pecans cool completely. If they stick together, gently break them apart. Once cooled, transfer them to an airtight container for storage.

Frequently Asked Questions About Easy Candied Pecans

Why are my candied pecans sticky?

Sticky pecans result from undercooked syrup. Cook the mixture longer until it thickens and sticks to the nuts without leaving a sticky residue.

Can I use a different sweetener?

Yes, you can substitute granulated sugar with honey or maple syrup, though they may slightly alter the flavor and texture.

How long do candied pecans last?

Stored in an airtight container, they can last up to two weeks at room temperature or longer in the fridge.

Can I make candied pecans ahead of time?

Absolutely. Prepare them up to a week in advance and store them in an airtight container to preserve freshness.

What’s the best way to reheat candied pecans?

Reheat them in a 250°F oven for 5 minutes to restore their crispness without overcooking.

Expert Tips for Perfect Candied Pecans

Follow these tips to ensure your candied pecans come out flawless every time.

  • Don’t rush the syrup: Ensure the sugar fully dissolves before adding the pecans to achieve a smooth coating.
  • Stir consistently: This prevents the syrup from burning and ensures even coating on all pecans.
  • Use fresh pecans: Fresh pecans yield better flavor and texture compared to older nuts.
  • Cool completely: Allow the pecans to cool fully so the coating sets and they don’t stick together.

How to Store and Keep Candied Pecans Fresh

Proper storage ensures your candied pecans stay crunchy and flavorful for longer periods. Here’s how:

Keep them in an airtight container at room temperature for up to two weeks. Alternatively, store them in the refrigerator for up to a month to maintain freshness.

If you plan to store them longer, freeze the pecans for up to three months. Thaw them at room temperature and reheat briefly in the oven if they lose their crunch.

Serving Ideas for Candied Pecans

Candied pecans can elevate a variety of dishes and occasions. Here are some creative serving ideas:

  • Sprinkle over a green salad for added crunch and a hint of sweetness.
  • Use them as a topping for ice cream or yogurt to create a delightful dessert.
  • Add them to charcuterie boards for a flavorful contrast to cheese and cured meats.
  • Enjoy them as a standalone snack during parties or movie nights.

Easy Candied Pecans

Prep Time 10 minutes
Cook Time 7 minutes
Total Time 17 minutes
Servings 4 servings
Calories 200
These easy candied pecans are a sweet and crunchy treat perfect for snacking or as a topping for salads and desserts.

Equipment

  • medium saucepan
  • baking sheet
  • parchment paper
  • spoon
  • measuring cups

Ingredients

Instructions 

  • In a medium saucepan, combine the sugar, water, vanilla extract, cinnamon, and salt over medium heat.
  • Stir the mixture until the sugar has completely dissolved.
  • Add the pecan halves to the saucepan, stirring to coat them evenly with the syrup.
  • Continue to cook for about 5-7 minutes, stirring frequently, until the mixture thickens and the pecans are well coated.
  • Remove the saucepan from heat and spread the pecans in a single layer on a baking sheet lined with parchment paper.
  • Allow the pecans to cool completely before breaking them apart if they stick together.
  • Once cooled, store the candied pecans in an airtight container.

Notes

These candied pecans can be stored in an airtight container for up to two weeks.
Calories: 200kcal
Cost: $8
Course: Snack
Cuisine: American
Keyword: candied pecans

Nutrition

Calories: 200kcal | Carbohydrates: 28g | Protein: 2g | Fat: 10g | Sodium: 50mg
A close-up of golden brown candied pecans sprinkled with sugar and spices

Loved this recipe? Save it to your favorite Pinterest board so you can easily find it later! ✨