Author

Emily

Browsing

This post contains affiliate links. As an Amazon Associate, I earn from qualifying purchases. This comes at no extra cost to you.

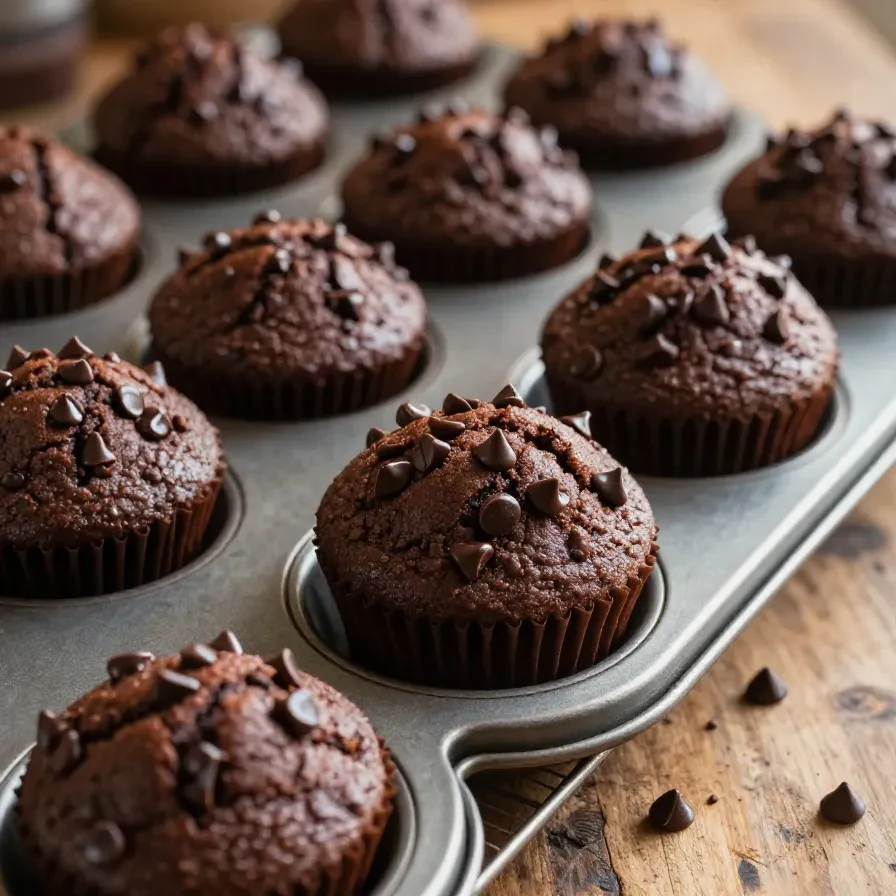
Best pumpkin crumb muffin recipe is a delightful fall treat made with canned pumpkin puree, warm spices like cinnamon and nutmeg, and topped with a luscious maple icing. Ready in just 35 minutes, this recipe yields 12 moist and flavorful muffins perfect for morning coffee or an afternoon pick-me-up. These muffins combine the sweetness of pumpkin with the rich, earthy flavor of maple, creating a harmonious balance of fall flavors.

Baking these muffins always reminds me of autumn mornings in Charleston, when the first cool breeze rolled in and we’d fill the kitchen with the scent of pumpkin spice. There’s just something about that aroma that feels like a warm invitation to slow down and savor the moment.

Table of Contents

Why Are These Muffins So Popular?

These Irresistible Pumpkin Muffins with Maple Icing stand out for their moist texture, warm spices, and the rich, sweet maple drizzle that takes them over the top. It’s the perfect combination of flavors for the fall season.

  • Perfectly balanced flavors: The pumpkin adds a natural sweetness and moisture, complemented by spices like cinnamon and nutmeg for a cozy autumn vibe.
  • Quick to make: With just 15 minutes of prep time, they’re ideal for busy schedules or last-minute cravings.
  • Customizable: Add chopped walnuts or pecans for extra texture, or leave them out for a nut-free option.
  • Aesthetic appeal: The maple icing drizzle not only adds flavor but also makes these muffins look bakery-worthy.

What Ingredients Do You Need?

This recipe uses pantry staples and fall-inspired ingredients to create a batch of 12 muffins. Here’s everything you’ll need:

The canned pumpkin puree provides both moisture and flavor, while the warm spices bring depth and richness to the muffins. The maple syrup in the icing adds a sweet, earthy note that pairs beautifully with the pumpkin.

How Do You Make Them Step by Step?

Making these muffins is straightforward and fun. Just follow the easy steps below for perfect results every time:

Step 1 — Preheat the Oven

Preheat your oven to 350°F (175°C) and line a muffin tin with paper liners.

Step 2 — Mix Wet Ingredients

In a large bowl, whisk together the pumpkin puree, vegetable oil, brown sugar, granulated sugar, eggs, and vanilla extract until well combined.

You might also enjoy our swirled pumpkin cream cheese muffins.

Step 3 — Combine Dry Ingredients

In a separate bowl, sift together the all-purpose flour, baking powder, baking soda, cinnamon, nutmeg, ginger, and salt.

Step 4 — Create the Batter

Gradually add the dry ingredients to the wet mixture, stirring until just combined. Be careful not to overmix. If you’re adding nuts, fold them in at this stage.

Step 5 — Fill the Muffin Tin

Spoon the batter into the prepared muffin tin, filling each cup about two-thirds full.
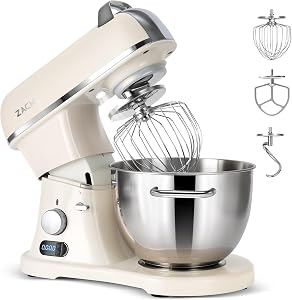
KitchenAid Artisan Stand Mixer

Kitchen ApplianceKitchenAid Artisan Stand Mixer

Makes mixing dough and batters effortless — a kitchen game-changer

View on Amazon →

Lodge Cast Iron Skillet 12-inch

Essential CookwareLodge Cast Iron Skillet 12-inch

Perfect for searing and baking — this recipe needs even heat distribution

View on Amazon →

Step 6 — Bake

Bake for 18-20 minutes, or until a toothpick inserted into the center of a muffin comes out clean.

Step 7 — Make the Maple Icing

While the muffins cool, whisk together the powdered sugar, maple syrup, and milk to create a smooth icing. Adjust the milk for your desired consistency.

For more ideas, check out our pumpkin cream cheese swirl muffins.

Step 8 — Cool and Ice

Let the muffins cool completely before drizzling the maple icing over each one. Then, serve and enjoy!

Frequently Asked Questions About Irresistible Pumpkin Muffins with Maple Icing

Can I use fresh pumpkin instead of canned?

Yes, you can use fresh pumpkin puree, but make sure to cook and puree it until smooth. Canned pumpkin tends to be more consistent in texture.

How should I store these muffins?

Store the muffins in an airtight container at room temperature for up to 3 days or in the refrigerator for up to a week.

Can I freeze these muffins?

Yes, these muffins freeze well. Wrap them individually in plastic wrap, then store in a freezer-safe bag for up to 3 months.

Is there a substitute for the maple syrup in the icing?

You can use honey or agave syrup as a substitute, but the flavor will differ slightly from the original recipe.

Looking for something similar? Try our pumpkin cream cheese muffins.

What can I use instead of vegetable oil?

You can substitute vegetable oil with melted coconut oil or unsweetened applesauce for a lighter option.

Easy Ingredient Swaps

If you’re missing some ingredients, here are a few simple swaps to keep this recipe on track:

  • No vegetable oil? Replace it with melted butter or coconut oil for a slightly richer flavor.
  • Out of maple syrup? Use honey, agave, or even brown sugar mixed with water as an alternative.

Serving Ideas for These Muffins

These muffins pair beautifully with:

  • Hot coffee: The bold flavors of coffee enhance the warm spices in the muffins.
  • Chai tea: A spiced tea complements the pumpkin and cinnamon perfectly.
  • Vanilla yogurt: Serve a muffin with a dollop of yogurt for a balanced breakfast.
  • Whipped cream: Add a touch of indulgence for a dessert-like experience.

Storage and Reheating Tips

To keep your muffins fresh, store them in an airtight container at room temperature for up to 3 days. If refrigerated, they’ll last up to a week.

For longer storage, wrap each muffin in plastic wrap and freeze them for up to 3 months. Reheat frozen muffins in the microwave for 20-30 seconds or in a 350°F oven for 5-10 minutes.

Expert Tips for Perfect Muffins

  • Don’t overmix: Overmixing can lead to dense muffins. Stir just until combined.
  • Use room-temperature eggs: This helps create a smoother batter and better texture.
  • Cool fully before icing: If the muffins are warm, the icing will melt and run off.
  • Sift the powdered sugar: This ensures a smooth, lump-free icing.

Irresistible Pumpkin Muffins with Maple Icing

Prep Time 15 minutes
Cook Time 20 minutes
Total Time 35 minutes
Servings 12 servings
Calories 200
These delightful pumpkin muffins are moist and flavorful, topped with a sweet maple icing that makes them irresistible.

Equipment

  • mixing bowl
  • muffin tin
  • whisk
  • sifter
  • measuring cups
  • spatula

Ingredients

Instructions 

  • Preheat your oven to 350°F (175°C) and line a muffin tin with paper liners.
  • In a large bowl, whisk together the pumpkin puree, vegetable oil, brown sugar, granulated sugar, eggs, and vanilla extract until well combined.
  • In another bowl, sift together the all-purpose flour, baking powder, baking soda, cinnamon, nutmeg, ginger, and salt.
  • Gradually add the dry ingredients to the wet mixture, stirring until just combined. Do not overmix. If using, fold in the chopped walnuts or pecans.
  • Spoon the batter into the prepared muffin tin, filling each cup about two-thirds full.
  • Bake for 18-20 minutes, or until a toothpick inserted into the center of a muffin comes out clean.
  • While the muffins are baking, prepare the maple icing by whisking together the powdered sugar, maple syrup, and milk in a small bowl until smooth. Adjust the milk as needed to achieve your desired consistency.
  • Allow the muffins to cool for a few minutes in the tin before transferring them to a wire rack to cool completely.
  • Once the muffins are cooled, drizzle the maple icing over the top of each muffin. Serve and enjoy!

Notes

For a richer flavor, consider adding chocolate chips or dried cranberries to the batter.
Calories: 200kcal
Cost: $10
Course: Breakfast
Cuisine: American
Keyword: pumpkin muffins

Nutrition

Calories: 200kcal | Carbohydrates: 30g | Protein: 3g | Fat: 8g | Sodium: 150mg
Freshly baked pumpkin muffins topped with creamy maple icing on a rustic wooden table

Loved this recipe? Save it to your favorite Pinterest board so you can easily find it later! ✨

This post contains affiliate links. As an Amazon Associate, I earn from qualifying purchases. This comes at no extra cost to you.

The Best Keto Chocolate Zucchini Bread Recipe

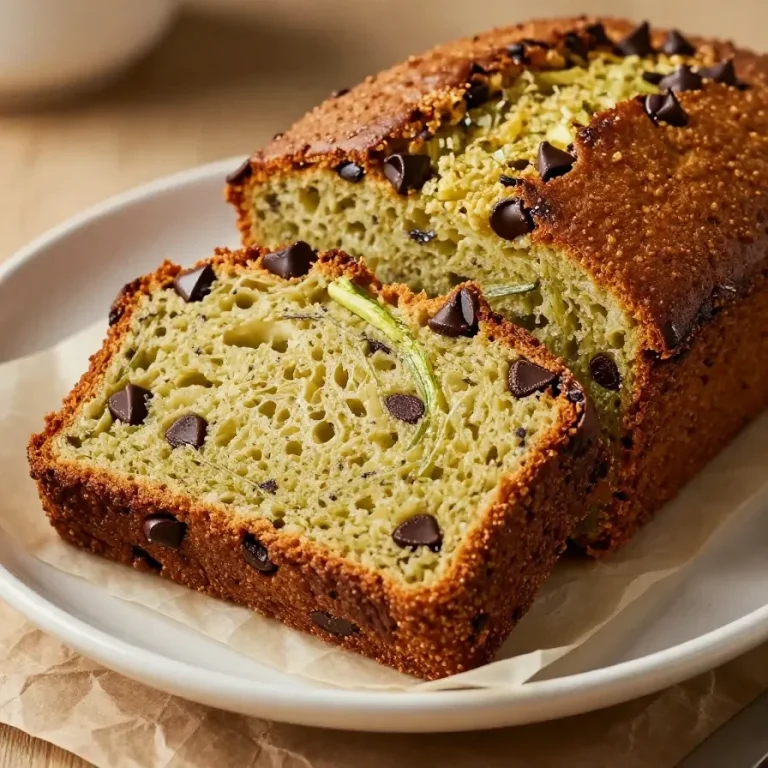
Keto zuchini baking recipes are low-carb, sugar-free treats made with almond flour, unsweetened cocoa, and grated zucchini, yielding a moist and chocolatey loaf. This recipe takes about 15 minutes of prep time and 60 minutes to bake, producing 10 hearty slices. Perfect for breakfast, a snack, or a guilt-free dessert, it combines rich flavor with nutritious simplicity.

The irresistible aroma of chocolate and the sneaky health boost from zucchini make this bread a favorite in my kitchen. I still remember the first time I experimented with zucchini in dessert—it was like a lightbulb moment for combining indulgence with health!

Table of Contents

Why is The Best Keto Chocolate Zucchini Bread Recipe so special?

This recipe balances rich chocolate decadence with keto-friendly ingredients, creating a moist, guilt-free loaf perfect for low-carb diets. It’s easy to make and versatile enough for breakfast, snacks, or dessert.

  • Moist texture: Grated zucchini ensures the loaf stays soft and moist without being oily.
  • Rich chocolate flavor: Unsweetened cocoa powder and optional sugar-free chocolate chips make every bite indulgent.
  • Low-carb and keto-friendly: Made with almond flour and erythritol, it skips the sugar and carbs.
  • Quick and simple: Just one bowl for the dry ingredients, another for the wet, and it’s ready for the oven!

What ingredients do you need for The Best Keto Chocolate Zucchini Bread Recipe?

To make this keto chocolate zucchini bread, you’ll need simple low-carb ingredients that come together for a perfectly moist and chocolatey loaf. Here’s the complete list:

The grated zucchini is the star here, adding both moisture and a subtle sweetness. Almond flour keeps the texture fluffy but not heavy, while erythritol provides sweetness without the carbs.

How do you make The Best Keto Chocolate Zucchini Bread Recipe step by step?

This easy recipe only requires a few steps to create a perfectly moist and chocolatey loaf. Here’s how to make it:

Step 1 — Prepare your oven and loaf pan

Preheat your oven to 350°F (175°C). Grease a 9×5 inch loaf pan to prevent sticking and ensure easy removal. Set the pan aside.

You might also enjoy our healthy lemon zucchini olive oil bread.

Step 2 — Combine dry ingredients

In a large bowl, mix the grated zucchini, almond flour, unsweetened cocoa powder, erythritol, baking soda, baking powder, and salt. Stir until evenly combined.

Step 3 — Mix wet ingredients

In another bowl, whisk together the eggs, melted coconut oil (or unsalted butter), and vanilla extract until smooth. Make sure the oil or butter is well incorporated.

Step 4 — Combine wet and dry ingredients

Gradually pour the wet ingredients into the dry ingredients, stirring gently until just combined. If desired, gently fold in the sugar-free chocolate chips for an extra chocolate boost.

Step 5 — Transfer to the pan

Pour the batter into the prepared loaf pan. Use a spatula to smooth the top for even baking.

KitchenAid Artisan Stand Mixer

Kitchen ApplianceKitchenAid Artisan Stand Mixer

Makes mixing dough and batters effortless — a kitchen game-changer

View on Amazon →

Pyrex Mixing Bowl Set

Essential CookwarePyrex Mixing Bowl Set

Essential for mixing ingredients, this set includes various sizes for all your baking needs.

View on Amazon →

For more ideas, check out our gluten free lemon zucchini bread.

Step 6 — Bake the bread

Bake in the preheated oven for 50-60 minutes, or until a toothpick inserted into the center comes out clean. The surface should be set but not over-browned.

Step 7 — Allow to cool

Let the bread cool in the pan for 10 minutes, then transfer it to a wire rack. Cool completely before slicing.

Frequently Asked Questions About The Best Keto Chocolate Zucchini Bread Recipe

Can I use a different sweetener?

Yes, you can substitute erythritol with other keto-friendly sweeteners like monk fruit or Swerve. Just ensure the sweetness level matches your taste preference.

Do I need to peel the zucchini?

No, the skin of the zucchini is edible and adds color and nutrients to the bread. Simply wash the zucchini before grating.

Looking for something similar? Try our the best lemon zucchini bread.

How can I tell if the bread is done?

Insert a toothpick into the center of the loaf. If it comes out clean or with a few crumbs, the bread is ready to come out of the oven.

Can I make this recipe dairy-free?

Yes, swap the butter with melted coconut oil for a completely dairy-free version of this bread.

How long does this bread stay fresh?

Store the bread in an airtight container at room temperature for up to 3 days. For longer storage, refrigerate for up to a week or freeze for up to 3 months.

Expert Tips and Pro Shortcuts

  • Don’t overmix: Overmixing can make the bread dense. Stir just until combined.
  • Grate the zucchini finely: Finely grated zucchini integrates better into the batter, ensuring a smoother texture.
  • Use parchment paper: Lining your loaf pan with parchment paper makes it even easier to remove the bread after baking.

Serving Ideas for This Chocolate Zucchini Bread

  • Pair a slice with a dollop of whipped cream for a treat that feels like dessert but is still keto-friendly.
  • Serve with a cup of coffee or tea for a peaceful breakfast or afternoon snack.
  • Top with a scoop of sugar-free ice cream for a decadent dessert.

How to Store and Reheat The Best Keto Chocolate Zucchini Bread

Store your cooled bread in an airtight container at room temperature for up to three days. For longer shelf life, refrigerate it for up to one week.

If you’d like to store it longer, wrap the bread in plastic wrap and aluminum foil, then freeze for up to three months. Thaw overnight in the fridge before enjoying.

To reheat, warm slices in the microwave for 10-15 seconds or in the oven at 300°F (150°C) for a few minutes.

Simple Ingredient Swaps for This Recipe

  • Nut-free option: Replace almond flour with sunflower seed flour for a nut-free alternative while keeping the recipe low-carb.
  • Sweetener substitution: Use an equal amount of allulose or stevia-based sweeteners in place of erythritol to customize sweetness.
  • Oil swap: Use avocado oil instead of coconut oil or butter for a neutral-tasting, heart-healthy fat option.

The Best Keto Chocolate Zucchini Bread Recipe

Prep Time 15 minutes
Cook Time 1 hour
Total Time 1 hour 15 minutes
Servings 8 servings
Calories 150
This delicious keto chocolate zucchini bread is moist, rich, and perfect for a low-carb diet.

Equipment

  • mixing bowl
  • whisk
  • loaf pan
  • spatula
  • oven

Ingredients

Instructions 

  • Preheat your oven to 350°F (175°C) and grease a 9x5 inch loaf pan.
  • In a large bowl, combine the grated zucchini with the almond flour, cocoa powder, erythritol, baking soda, baking powder, and salt. Mix well.
  • In another bowl, whisk together the eggs, melted coconut oil (or butter), and vanilla extract until smooth.
  • Pour the wet ingredients into the dry ingredients and stir until just combined. If using, fold in the sugar-free chocolate chips.
  • Transfer the batter into the prepared loaf pan and smooth the top with a spatula.
  • Bake in the preheated oven for 50-60 minutes, or until a toothpick inserted into the center comes out clean.
  • Allow the bread to cool in the pan for about 10 minutes before transferring it to a wire rack to cool completely.
  • Slice and enjoy your delicious keto chocolate zucchini bread!

Notes

You can substitute almond flour with coconut flour, but adjust the quantity as coconut flour absorbs more moisture.
Calories: 150kcal
Cost: $10
Course: Dessert
Cuisine: American
Keyword: chocolate, Keto, zucchini bread

Nutrition

Calories: 150kcal | Carbohydrates: 8g | Protein: 5g | Fat: 10g | Sodium: 200mg
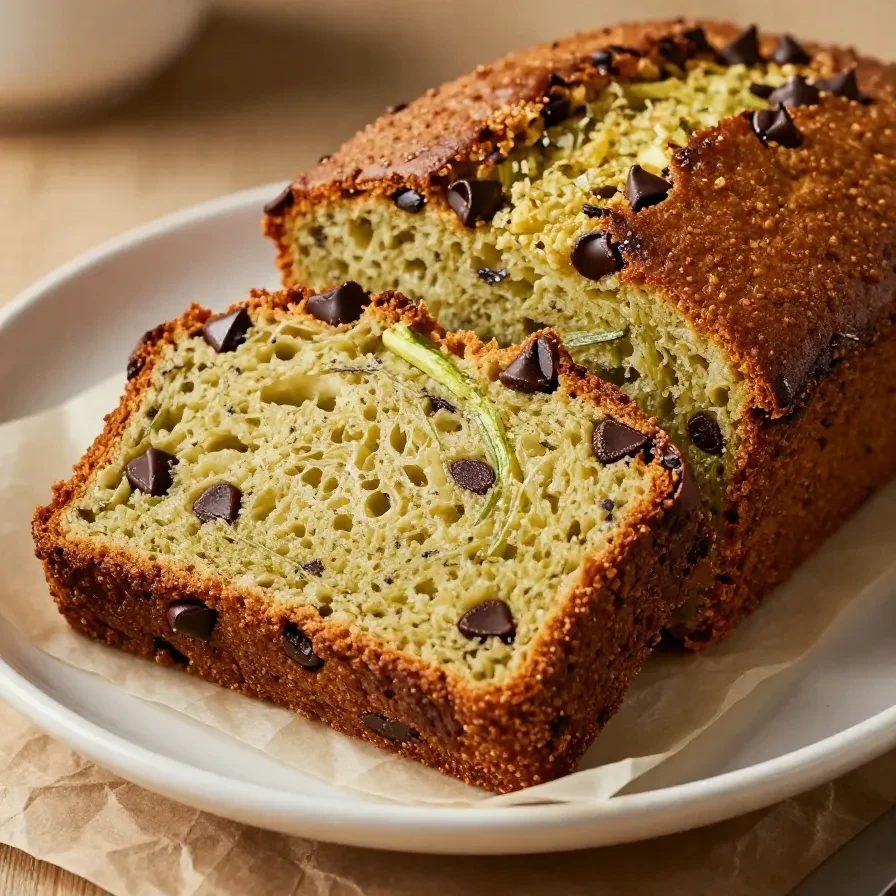
A slice of keto chocolate zucchini bread on a wooden cutting board with chocolate chips scattered around

Loved this recipe? Save it to your favorite Pinterest board so you can easily find it later! ✨

This post contains affiliate links. As an Amazon Associate, I earn from qualifying purchases. This comes at no extra cost to you.

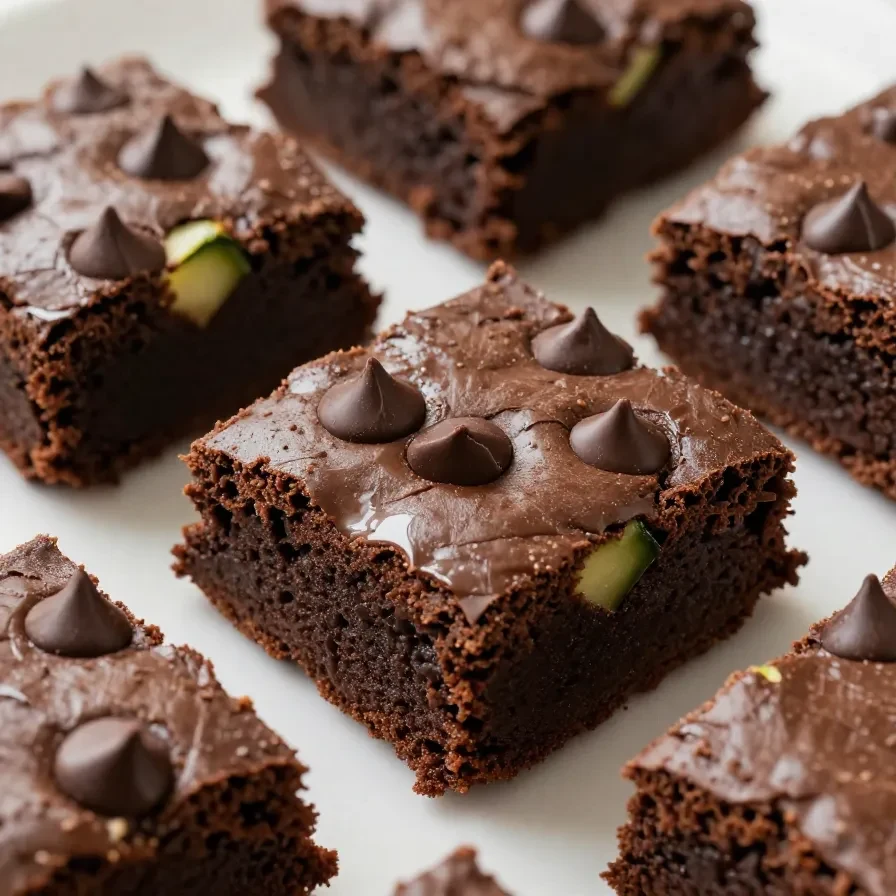
Zucchini baking creates moist and fudgy brownies thanks to the grated zucchini blended with cocoa powder, sugar, and flour. This easy recipe is ready in just 45 minutes and yields 16 indulgent squares. Perfect for dessert or sneaking veggies into your day!

When I first tested this Zucchini Brownies Recipe, I was stunned by how the zucchini melts into the batter, adding moisture without overpowering the chocolate flavor. These brownies quickly became a go-to in my kitchen when I needed an easy and delicious treat.

Table of Contents

Zucchini Brownies Recipe is popular because it pairs rich chocolate flavor with hidden vegetable benefits. The zucchini adds a moist texture, making these brownies indulgent yet slightly healthier.

  • The zucchini keeps the texture moist and fudgy without the need for extra butter or oil.
  • This recipe is easy to make, taking just 45 minutes from start to finish.
  • It’s a wonderful way to use up surplus zucchini from your garden or farmers’ market.
  • The addition of optional chocolate chips makes it even more decadent.

What ingredients do you need for Zucchini Brownies Recipe?

The Zucchini Brownies Recipe relies on common pantry staples like cocoa powder, sugar, and flour, combined with fresh grated zucchini for perfect texture.

The grated zucchini is the star ingredient, adding moisture and structure to the brownies without overpowering the chocolate flavor.

How do you make Zucchini Brownies Recipe step by step?

This Zucchini Brownies Recipe comes together in less than an hour, making it perfect for both novice and experienced bakers.

Step 1 — Prepare your pan and oven

Preheat your oven to 350°F (175°C) and grease a 9×9 inch baking pan.

Step 2 — Mix the wet ingredients

In a large bowl, combine the grated zucchini, vegetable oil, granulated sugar, brown sugar, eggs, and vanilla extract. Mix until well combined.

You might also enjoy our fudgy football brownies recipe.

Step 3 — Combine the dry ingredients

In another bowl, whisk together the flour, cocoa powder, baking soda, salt, and ground cinnamon (if using).

Step 4 — Incorporate dry into wet

Gradually add the dry ingredients to the wet mixture, stirring gently until just combined. Avoid overmixing to maintain a light texture.

Step 5 — Fold in chocolate chips

Gently fold in the chocolate chips, if using, for added richness and texture.

KitchenAid Artisan Stand Mixer

Kitchen ApplianceKitchenAid Artisan Stand Mixer

Makes mixing dough and batters effortless — a kitchen game-changer.

View on Amazon →

Pyrex Glass Mixing Bowl Set

Essential CookwarePyrex Glass Mixing Bowl Set

Durable and versatile mixing bowls perfect for combining ingredients.

View on Amazon →

Step 6 — Pour and bake

Transfer the batter into the prepared baking pan, spreading it evenly. Bake for 25-30 minutes or until a toothpick inserted into the center comes out mostly clean.

Step 7 — Cool and serve

Allow the brownies to cool completely in the pan before slicing into squares and serving.

For more ideas, check out our healthy lemon zucchini olive oil bread.

Frequently Asked Questions About Zucchini Brownies Recipe

Does the zucchini affect the flavor?

No, the zucchini adds moisture but doesn’t impact the chocolate flavor, making it perfect for those who aren’t fans of vegetables.

Can I make these brownies vegan?

Yes, substitute eggs with flax eggs and use a plant-based oil like coconut oil to create a vegan-friendly version.

Do I need to peel the zucchini first?

No, the peel softens during baking and blends seamlessly into the batter without altering the texture.

How should I store these brownies?

Store them in an airtight container at room temperature for up to 3 days or in the fridge for a week.

Can these be frozen?

Yes, wrap the brownies individually in plastic wrap, then store them in a freezer bag for up to 3 months.

Looking for something similar? Try our gluten free lemon zucchini bread.

What are easy ingredient swaps for Zucchini Brownies Recipe?

You can make simple swaps in this Zucchini Brownies Recipe without compromising the taste and texture.

  • Replace vegetable oil with an equal amount of unsweetened applesauce to reduce fat content.
  • Use whole-wheat flour for a nuttier flavor and higher fiber content.

How do you store and reheat Zucchini Brownies?

Zucchini brownies are easy to store and reheat, helping you enjoy them fresh for days.

Keep the brownies in an airtight container at room temperature to maintain texture for up to 3 days. For longer storage, refrigerate them for up to a week or freeze for up to 3 months.

To reheat refrigerated brownies, microwave them for 10 seconds to restore their fudgy texture. Frozen brownies should thaw at room temperature or be microwaved in 20-second bursts.

What are common mistakes when making Zucchini Brownies?

To ensure your Zucchini Brownies Recipe turns out perfectly, avoid these common mistakes.

  • Not squeezing out zucchini moisture: Excess water in the zucchini can make the batter too runny, resulting in dense and gummy brownies.
  • Overmixing the batter: Stirring too much activates the gluten in the flour, leading to tough, chewy brownies instead of soft and tender ones.
  • Skipping the cooling step: Cutting the brownies while they’re hot can cause them to crumble. Let them cool completely before serving.

Zucchini Brownies Recipe

Prep Time 15 minutes
Cook Time 30 minutes
Total Time 45 minutes
Servings 12 servings
Calories 150
These delicious zucchini brownies are a perfect blend of rich chocolate flavor and healthy zucchini, making them a guilt-free treat.

Equipment

  • mixing bowl
  • whisk
  • baking pan
  • oven
  • spatula

Ingredients

Instructions 

  • Preheat your oven to 350°F (175°C) and grease a 9x9 inch baking pan.
  • In a large bowl, combine the grated zucchini, vegetable oil, granulated sugar, brown sugar, eggs, and vanilla extract. Mix until well combined.
  • In another bowl, whisk together the flour, cocoa powder, baking soda, salt, and ground cinnamon (if using).
  • Gradually add the dry ingredients to the wet ingredients, stirring until just combined. Be careful not to overmix.
  • Fold in the chocolate chips, if using.
  • Pour the brownie batter into the prepared baking pan and spread it evenly.
  • Bake in the preheated oven for 25-30 minutes, or until a toothpick inserted into the center comes out mostly clean.
  • Allow the brownies to cool in the pan before cutting them into squares and serving.

Notes

You can substitute the granulated sugar with a sugar alternative for a healthier option.
Calories: 150kcal
Cost: $10
Course: Dessert
Cuisine: American
Keyword: brownies, zucchini

Nutrition

Calories: 150kcal | Carbohydrates: 22g | Protein: 2g | Fat: 7g | Sodium: 150mg
Delicious zucchini brownies topped with chocolate frosting on a wooden table

Loved this recipe? Save it to your favorite Pinterest board so you can easily find it later! ✨

This post contains affiliate links. As an Amazon Associate, I earn from qualifying purchases. This comes at no extra cost to you.

The Best Gluten-Free Zucchini Bread Recipe

Gluten free zucchini bread with almond flour is a moist, spiced loaf made with fresh zucchini, gluten-free flour, and warming spices like cinnamon and nutmeg. This easy recipe takes just 15 minutes of prep and bakes in about an hour, yielding 8-10 slices perfect for breakfast or a snack. With optional add-ins like nuts or chocolate chips, it’s a versatile treat you’ll love to bake again and again.

This loaf reminds me of the joyful messes I’d make in my mom’s kitchen as a kid, sneaking bites of baking batter—it’s the kind of recipe that brings kitchen fun full circle, whether you’re preparing it solo or sharing the joy with loved ones.

Table of Contents

The Best Gluten-Free Zucchini Bread Recipe is loved for its moist texture, warming spices, and versatility. It works beautifully as breakfast, a snack, or even dessert.

  • Grated zucchini keeps each bite soft and moist without adding heaviness.
  • Ideal for those with dietary restrictions without sacrificing flavor.
  • Cinnamon and nutmeg infuse each slice with comforting aromas.
  • Nuts, raisins, or chocolate chips make this loaf an adaptable favorite.

What ingredients do you need for The Best Gluten-Free Zucchini Bread Recipe?

To make The Best Gluten-Free Zucchini Bread Recipe, you’ll need a mix of fresh zucchini, gluten-free flour, and pantry staples. Optional add-ins can enhance its flavor and texture further.

Fresh zucchini provides moisture while gluten-free flour ensures a fluffy, light texture that’s perfect for pairing with warm spices.

How do you make The Best Gluten-Free Zucchini Bread Recipe step by step?

Follow these simple steps to make The Best Gluten-Free Zucchini Bread Recipe in just over an hour. Each stage is straightforward, making this dish approachable for bakers of all levels.

Step 1 — Preheat the oven

Preheat your oven to 350°F (175°C). Grease a 9×5-inch loaf pan or line it with parchment paper.

You might also enjoy our gluten free lemon zucchini bread.

Step 2 — Mix dry ingredients

In a large bowl, combine the grated zucchini with gluten-free flour, baking powder, baking soda, salt, cinnamon, and nutmeg. Stir until well mixed.

Step 3 — Prepare wet ingredients

In another bowl, whisk together the granulated sugar, brown sugar, vegetable oil, eggs, and vanilla extract until smooth and well combined.

Step 4 — Combine wet and dry mixtures

Pour the wet ingredients into the dry ingredients and stir until just combined. Be careful not to overmix the batter.

Step 5 — Add optional mix-ins

Fold in the walnuts or pecans and raisins or chocolate chips if using. Mix gently to distribute evenly.

KitchenAid Artisan Stand Mixer

Kitchen ApplianceKitchenAid Artisan Stand Mixer

Makes mixing dough and batters effortless — a kitchen game-changer.

View on Amazon →

Pyrex Mixing Bowl Set

Essential CookwarePyrex Mixing Bowl Set

Essential for mixing ingredients and easy to clean — perfect for this recipe.

View on Amazon →

For more ideas, check out our easiest apple crisp (gluten free.

Step 6 — Transfer to pan

Pour the batter into the prepared loaf pan, spreading it evenly to ensure uniform baking.

Step 7 — Bake

Bake in the preheated oven for 50-60 minutes or until a toothpick inserted into the center comes out clean.

Step 8 — Cool and slice

Allow the bread to cool in the pan for 10 minutes before transferring it to a wire rack to cool completely. Slice and serve.

Frequently Asked Questions About The Best Gluten-Free Zucchini Bread Recipe

Can I use frozen zucchini?

Yes, but thaw and drain it thoroughly to remove excess water before use. Fresh zucchini is preferred for better texture.

Looking for something similar? Try our healthy lemon zucchini olive oil bread.

How do I store this bread?

Store zucchini bread in an airtight container at room temperature for up to 2 days or in the refrigerator for up to a week.

Can I freeze zucchini bread?

Yes, wrap individual slices or the entire loaf in plastic wrap, then place in a freezer-safe bag. Freeze for up to 3 months.

Why is my bread dry?

Overmixing or baking too long can lead to dryness. Ensure accurate measurements and check your oven temperature.

Are there dairy-free options?

Yes, replace vegetable oil with melted coconut oil for a dairy-free alternative. This will retain moisture and flavor.

The Best Gluten-Free Zucchini Bread Recipe

Prep Time 15 minutes
Cook Time 1 hour
Total Time 1 hour 15 minutes
Servings 8 servings
Calories 200
This delicious gluten-free zucchini bread is moist, flavorful, and perfect for breakfast or a snack.

Equipment

  • mixing bowl
  • whisk
  • loaf pan
  • oven
  • spatula

Ingredients

Instructions 

  • Preheat your oven to 350°F (175°C). Grease a 9x5-inch loaf pan or line it with parchment paper.
  • In a large bowl, combine the grated zucchini with the gluten-free flour, baking powder, baking soda, salt, cinnamon, and nutmeg. Stir until well mixed.
  • In another bowl, whisk together the granulated sugar, brown sugar, vegetable oil, eggs, and vanilla extract until smooth and well combined.
  • Pour the wet ingredients into the dry ingredients and stir until just combined. Be careful not to overmix.
  • Fold in the walnuts or pecans and raisins or chocolate chips if using.
  • Pour the batter into the prepared loaf pan and spread it evenly.
  • Bake in the preheated oven for 50-60 minutes or until a toothpick inserted into the center comes out clean.
  • Allow the zucchini bread to cool in the pan for about 10 minutes before transferring it to a wire rack to cool completely.
  • Slice and serve. Enjoy your delicious gluten-free zucchini bread!

Notes

You can substitute the sugars with alternatives like coconut sugar for a healthier option.
Calories: 200kcal
Cost: $10
Course: Breakfast
Cuisine: American
Keyword: gluten-free, zucchini bread

Nutrition

Calories: 200kcal | Carbohydrates: 30g | Protein: 3g | Fat: 8g | Sodium: 150mg
A freshly baked loaf of gluten-free zucchini bread on a wooden cutting board

Loved this recipe? Save it to your favorite Pinterest board so you can easily find it later! ✨

This post contains affiliate links. As an Amazon Associate, I earn from qualifying purchases. This comes at no extra cost to you.

Best Loaded Soft and Chewy Zucchini Chocolate Chip Cookies

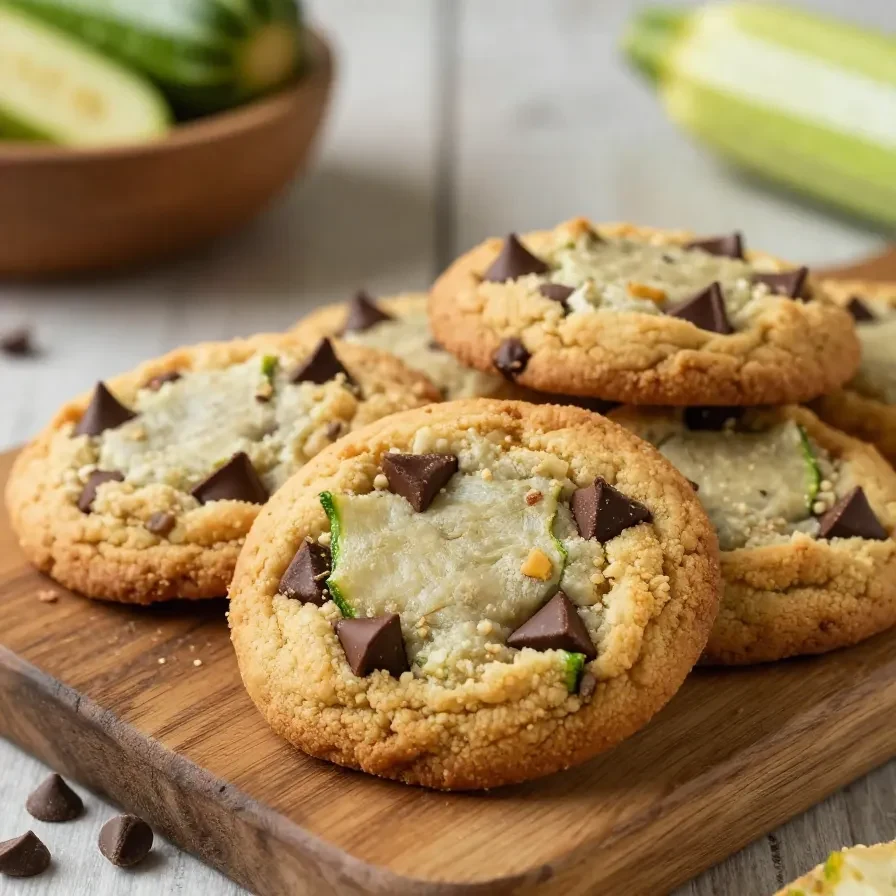
Cookies made with zucchini are a delightful combination of soft, chewy textures and rich, chocolatey sweetness. Featuring grated zucchini for moisture and semi-sweet chocolate chips for indulgence, this recipe creates 12 absolutely delicious cookies in less than 30 minutes. Perfect for when you want a unique twist on a classic dessert, these cookies balance wholesome ingredients with satisfying flavor.

Growing up in Charleston, I loved recipes that added a little creativity to traditional treats—just like this one. The grated zucchini brings moisture while staying subtle enough that even skeptical eaters won’t know it’s there!

Table of Contents

Why are these cookies special?

These cookies are special because they’re incredibly moist, loaded with chocolate, and sneak in zucchini without compromising texture or flavor. They elevate the classic chocolate chip cookie with a creative twist that’s both fun and functional.

  • Moist and soft texture: The grated zucchini adds natural moisture, giving each bite a soft, chewy feel.
  • Rich chocolate flavor: With semi-sweet chocolate chips, these cookies deliver the perfect balance of sweetness and richness.
  • Nutty crunch: Optional walnuts or pecans provide a delightful textural contrast.
  • Subtly spiced: A touch of cinnamon (if used) offers a warm depth to the flavor profile.

What ingredients do you need for Best Loaded Soft and Chewy Zucchini Chocolate Chip Cookies?

You’ll need a mix of simple baking pantry staples, fresh zucchini, and optional add-ins to create these flavorful cookies. Make sure to follow the exact measurements for the best results!

The key is squeezing out the excess moisture from the zucchini. Too much water can make the cookies soggy instead of chewy and soft.

How do you make Best Loaded Soft and Chewy Zucchini Chocolate Chip Cookies step by step?

This recipe comes together quickly and easily with just a few steps. Here’s how to make your cookies soft, chewy, and perfectly baked.

Step 1 — Prepare the oven and baking sheet

Preheat your oven to 350°F (175°C) and line a baking sheet with parchment paper. This prevents sticking and ensures even baking.

You might also enjoy our soft, chewy, and absolutely irresistible:.

Step 2 — Mix the dry ingredients

In a medium bowl, whisk together the all-purpose flour, baking soda, baking powder, salt, and ground cinnamon (if using). Set aside.

Step 3 — Cream the butter and sugars

In a large mixing bowl, use a hand or stand mixer to cream together the softened butter, brown sugar, and granulated sugar until light and fluffy. This step creates the base for your cookies’ chewy texture.

Step 4 — Add the egg and vanilla extract

Beat in the egg and vanilla extract to the creamed mixture until everything is well combined. This step ensures a smooth and cohesive batter.

Step 5 — Combine wet and dry ingredients

Gradually add the dry ingredients to the wet mixture, stirring until just combined. Avoid overmixing to keep the cookies tender.

KitchenAid Artisan Stand Mixer

Kitchen ApplianceKitchenAid Artisan Stand Mixer

Makes mixing dough and batters effortless — a kitchen game-changer.

View on Amazon →

Nordic Ware Natural Aluminum Commercial Baker's Half Sheet

Essential CookwareNordic Ware Natural Aluminum Commercial Baker’s Half Sheet

Durable and perfect for baking cookies evenly — essential for this recipe.

View on Amazon →

For more ideas, check out our soft and chewy delights: your.

Step 6 — Fold in zucchini, chocolate, and nuts

Gently fold in the grated zucchini, chocolate chips, and nuts (if using) until evenly distributed throughout the dough.

Step 7 — Bake

Using a cookie scoop or tablespoon, drop rounded balls of dough onto the prepared baking sheet, spacing them about 2 inches apart. Bake for 10-12 minutes, or until edges are golden and centers are slightly underbaked.

Step 8 — Cool

Let the cookies cool on the baking sheet for 5 minutes, then transfer them to a wire rack to cool completely. Enjoy warm or at room temperature!

Frequently Asked Questions About Best Loaded Soft and Chewy Zucchini Chocolate Chip Cookies

Can you taste the zucchini in these cookies?

No, the zucchini is virtually flavorless in this recipe. It adds moisture and a soft texture without altering the classic chocolate chip taste.

Looking for something similar? Try our heavenly bites: soft & chewy.

Do I have to peel the zucchini?

No, you don’t need to peel the zucchini. The skin softens during baking and is unnoticeable in the finished cookies.

How do I squeeze out moisture from zucchini?

Place the grated zucchini in a clean kitchen towel or paper towel. Squeeze it over the sink until most of the liquid is removed.

Can these cookies be frozen?

Yes, these zucchini chocolate chip cookies freeze well. Store them in an airtight container for up to 3 months.

How do you store zucchini chocolate chip cookies?

To maintain their soft, chewy texture, store these cookies in an airtight container at room temperature for up to 5 days. For longer storage, freeze them in a sealed container for up to 3 months.

If frozen, thaw cookies at room temperature for 1 hour or warm them in the microwave for 10 seconds for a fresh-out-of-the-oven feel.

Can you swap ingredients in this recipe?

Yes, a few easy swaps can adapt this recipe for different needs while retaining its signature softness and flavor:

  • Gluten-free: Replace all-purpose flour with a 1:1 gluten-free baking mix. The texture may be slightly denser but equally enjoyable.
  • Dairy-free: Use coconut oil or a dairy-free butter alternative for a similar creamy texture.

Expert tips for making the best cookies

  • Squeeze out zucchini thoroughly: Excess moisture can cause the cookies to spread too much and turn out soggy.
  • Chill the dough if needed: If your dough feels too sticky, a quick 15-minute chill in the fridge can help.
  • Don’t overmix: Overmixing the dough can lead to tough cookies. Mix just until the ingredients are combined.
  • Underbake slightly: Removing the cookies when the centers are barely set ensures that they stay soft and chewy.

Best Loaded Soft and Chewy Zucchini Chocolate Chip Cookies

Prep Time 15 minutes
Cook Time 12 minutes
Total Time 27 minutes
Servings 24 servings
Calories 150
These cookies are soft, chewy, and loaded with chocolate chips and zucchini for a delicious treat.

Equipment

  • mixing bowl
  • whisk
  • baking sheet
  • oven
  • cookie scoop

Ingredients

Instructions 

  • Preheat your oven to 350°F (175°C) and line a baking sheet with parchment paper.
  • In a medium bowl, whisk together the flour, baking soda, baking powder, salt, and cinnamon (if using). Set aside.
  • In a large mixing bowl, cream together the softened butter, brown sugar, and granulated sugar until light and fluffy.
  • Add the egg and vanilla extract to the butter mixture, and beat until well combined.
  • Gradually add the dry ingredients to the wet ingredients, mixing until just combined.
  • Fold in the grated zucchini, chocolate chips, and nuts (if using) until evenly distributed.
  • Using a cookie scoop or tablespoon, drop rounded balls of dough onto the prepared baking sheet, spacing them about 2 inches apart.
  • Bake in the preheated oven for 10-12 minutes, or until the edges are lightly golden and the centers look slightly underbaked.
  • Remove from the oven and let the cookies cool on the baking sheet for 5 minutes before transferring them to a wire rack to cool completely.

Notes

For a healthier option, you can substitute half of the butter with applesauce.
Calories: 150kcal
Cost: $10
Course: Dessert
Cuisine: American
Keyword: Cookies

Nutrition

Calories: 150kcal | Carbohydrates: 22g | Protein: 2g | Fat: 7g | Sodium: 100mg
A plate of soft and chewy zucchini chocolate chip cookies, freshly baked and golden brown

Loved this recipe? Save it to your favorite Pinterest board so you can easily find it later! ✨
This post contains affiliate links. As an Amazon Associate, I earn from qualifying purchases. This comes at no extra cost to you.

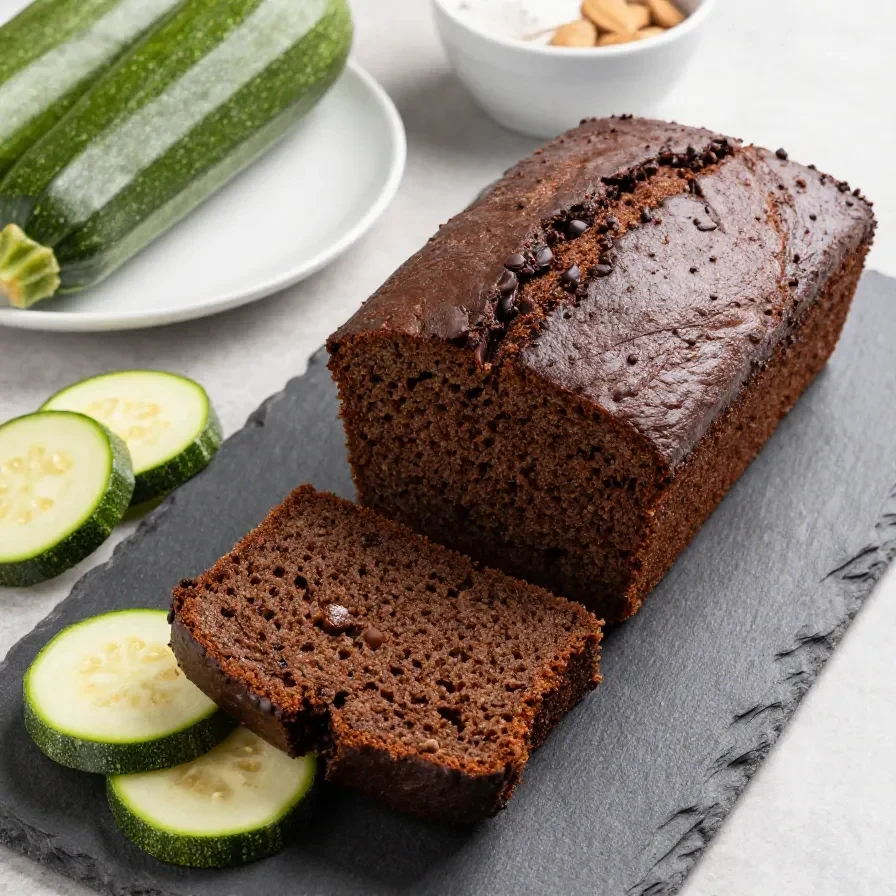
Low sugar chocolate zucchini muffins are a rich, moist treat made with grated zucchini, cocoa powder, and chocolate chips, ready in just 35 minutes. This recipe makes 12 perfectly portioned muffins that combine deep chocolate flavor with a hidden veggie twist. Ideal for breakfast or an afternoon snack, they’re a great way to sneak in extra nutrients while satisfying your sweet tooth.

I first tried mixing zucchini into baked goods when experimenting in my tiny Charleston kitchen—I was skeptical, but these muffins proved veggies can be fun and delicious! Let’s dive into this foolproof recipe that’s guaranteed to impress.

Table of Contents

Why Are These Muffins Special?

Double Chocolate Zucchini Muffins stand out because they fuse indulgent chocolate with the subtle sweetness of zucchini, creating moist, flavorful pastries that are hard to resist. They’re also quick to make and nutrient-packed.

  • Moist texture: The grated zucchini guarantees each bite is perfectly soft and tender.
  • Rich chocolate flavor: Cocoa powder and chocolate chips combine for a decadent experience.
  • Easy prep: Simple ingredients and one bowl mixing make this recipe beginner-friendly.
  • Hidden veggies: Great for sneaking nutrition into sweet treats without sacrificing taste.

What Ingredients Do You Need for Double Chocolate Zucchini Muffins?

To make these muffins, you’ll need a handful of pantry staples plus fresh zucchini for that moist texture. Here’s the full list of ingredients:

The grated zucchini ensures an irresistibly moist texture while the cocoa powder adds depth to the chocolate flavor. Walnuts are optional but add a delightful crunch for those who love texture in their baked goods.

How Do You Make Double Chocolate Zucchini Muffins Step by Step?

This recipe is straightforward and comes together in under 35 minutes. Follow these simple steps for flawless results:

Step 1 — Preheat the Oven

Preheat your oven to 350°F (175°C) and line a muffin tin with paper liners or grease it with a non-stick spray.

Step 2 — Mix the Wet Ingredients

In a medium bowl, combine the grated zucchini, vegetable oil, eggs, and vanilla extract. Mix well until fully combined.

You might also enjoy our cake mix pumpkin chocolate chip.

Step 3 — Combine the Dry Ingredients

In a separate large bowl, whisk together the all-purpose flour, cocoa powder, baking soda, baking powder, salt, granulated sugar, and brown sugar.

Step 4 — Combine Wet and Dry Ingredients

Pour the wet ingredients into the dry ingredients and stir until just combined. Avoid overmixing to keep the muffins tender.

Step 5 — Add Mix-Ins

Fold in the semi-sweet chocolate chips and chopped walnuts, if using.

KitchenAid Artisan Stand Mixer

Kitchen ApplianceKitchenAid Artisan Stand Mixer

Makes mixing dough and batters effortless — a kitchen game-changer.

View on Amazon →

Pyrex Mixing Bowl Set

Essential CookwarePyrex Mixing Bowl Set

Essential for mixing ingredients — includes various sizes for all your baking needs.

View on Amazon →

Step 6 — Scoop and Bake

Scoop the batter into the prepared muffin tin, filling each cup about 3/4 full. Bake for 18-20 minutes, or until a toothpick inserted into the center comes out clean.

Step 7 — Cool the Muffins

Allow the muffins to cool in the pan for 5 minutes before transferring them to a wire rack to cool completely.

For more ideas, check out our soft pumpkin chocolate chip cookies.

Frequently Asked Questions About Double Chocolate Zucchini Muffins

Can these muffins be made gluten-free?

Yes, you can substitute the all-purpose flour with a gluten-free flour blend. Make sure it’s one with a 1:1 substitution ratio.

Can I make these muffins vegan?

Yes, replace the eggs with flax eggs (1 tablespoon ground flaxseed + 2 1/2 tablespoons water per egg) and use dairy-free chocolate chips.

How do I store these muffins?

Store them in an airtight container at room temperature for up to 3 days or in the refrigerator for up to a week.

What if I don’t have chocolate chips?

You can skip the chips or replace them with chopped chocolate bars for a similar effect.

How Can You Store and Reheat These Muffins?

Proper storage ensures your muffins stay fresh and tasty for longer. Here’s how:

Looking for something similar? Try our the best healthy pumpkin chocolate.

Refrigerator: Place cooled muffins in an airtight container and refrigerate for up to one week.

Freezer: Wrap each muffin in plastic wrap, then store in a freezer-safe bag for up to 3 months. Thaw at room temperature before enjoying.

Reheating: Warm muffins in a microwave for 15-20 seconds for a fresh-from-the-oven feel.

What Are Some Ingredient Swaps You Can Use?

Missing an ingredient? Here are a few swaps to try:

  • Zucchini: Swap with grated carrot or even mashed banana for a different flavor profile.
  • Vegetable oil: Use melted coconut oil or unsweetened applesauce to reduce fat content.
  • Brown sugar: Swap for coconut sugar for a minimally processed alternative.

Each substitution may slightly alter the texture or sweetness, but the muffins will still be a hit!

Double Chocolate Zucchini Muffins

Prep Time 15 minutes
Cook Time 20 minutes
Total Time 35 minutes
Servings 12 servings
Calories 180
Deliciously moist and rich chocolate muffins made with zucchini for added texture and nutrition.

Equipment

  • mixing bowl
  • muffin tin
  • whisk
  • oven
  • spatula

Ingredients

Instructions 

  • Preheat your oven to 350°F (175°C) and line a muffin tin with paper liners or grease it with non-stick spray.
  • In a medium bowl, combine the grated zucchini, vegetable oil, eggs, and vanilla extract. Mix well until fully combined.
  • In a separate large bowl, whisk together the all-purpose flour, cocoa powder, baking soda, baking powder, salt, granulated sugar, and brown sugar.
  • Pour the wet ingredients into the dry ingredients and stir until just combined. Avoid overmixing.
  • Fold in the semi-sweet chocolate chips and chopped walnuts, if using.
  • Scoop the batter into the prepared muffin tin, filling each cup about 3/4 full.
  • Bake for 18-20 minutes, or until a toothpick inserted into the center comes out clean.
  • Allow the muffins to cool in the pan for 5 minutes before transferring them to a wire rack to cool completely.

Notes

You can substitute applesauce for the vegetable oil for a healthier option.
Calories: 180kcal
Cost: $10
Course: Breakfast
Cuisine: American
Keyword: chocolate, Muffins, zucchini

Nutrition

Calories: 180kcal | Carbohydrates: 28g | Protein: 3g | Fat: 7g | Sodium: 150mg
Freshly baked double chocolate zucchini muffins on a cooling rack

Loved this recipe? Save it to your favorite Pinterest board so you can easily find it later! ✨

This post contains affiliate links. As an Amazon Associate, I earn from qualifying purchases. This comes at no extra cost to you.

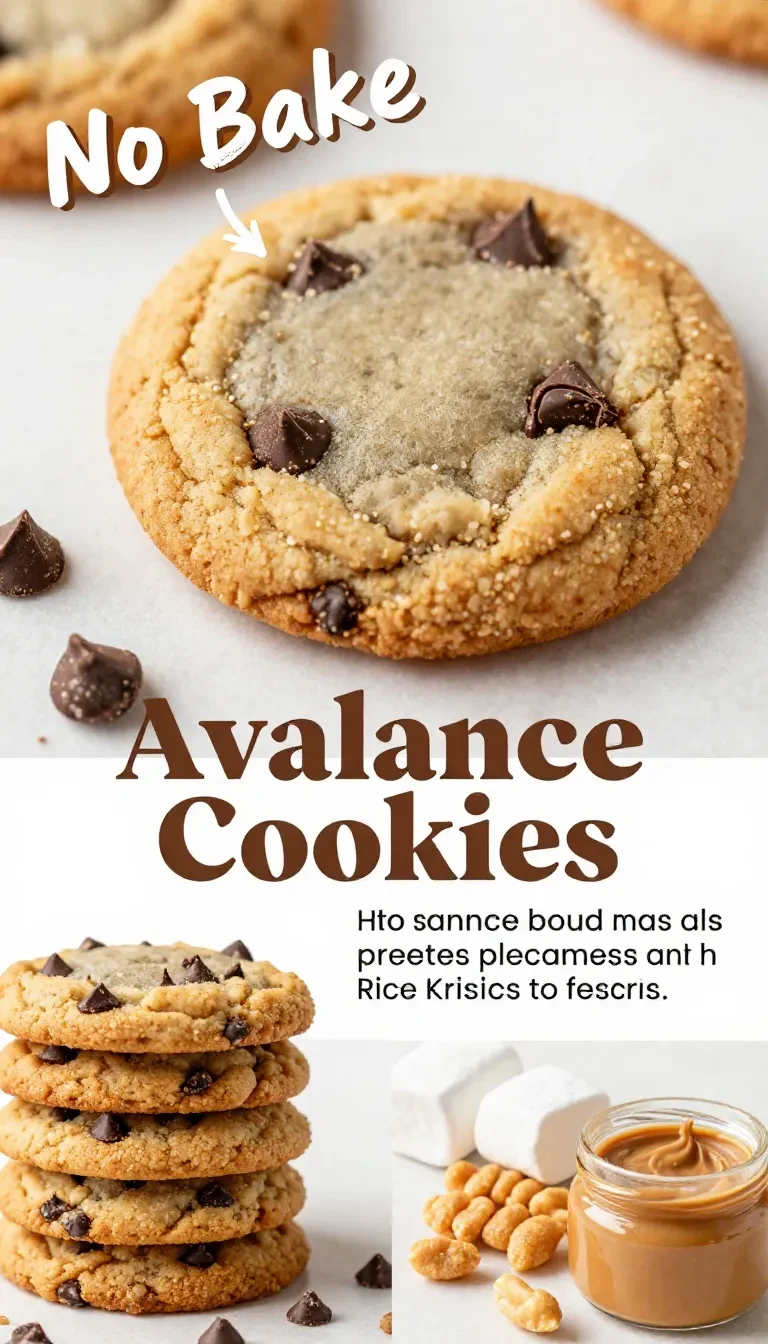
No Bake Avalanche Cookies Recipe

Peanut butter avalanche cookies are the perfect no-bake treat made with crunchy rice cereal, creamy peanut butter, and sweet chocolate chips. Ready in just 15 minutes, they combine irresistible textures of gooey marshmallows and a chocolatey crunch. Perfect for busy days or holiday gatherings, this recipe will have everyone reaching for more.

I first fell in love with these when I realized how quickly they could be made, even with little hands helping in the kitchen. Now, they’re my go-to for moments when I need something fun and delicious without turning on the oven.

Table of Contents

No bake avalanche cookies are popular because they’re quick, easy, and satisfy every sweet craving. Combining creamy, crunchy, and chocolatey textures, they’re perfect for any occasion.

  • Zero baking required: No need to heat up the oven, making them ideal for hot days or last-minute treats.
  • Kid-friendly fun: Simple to make with ingredients most kitchens already have, they’re perfect for little helpers.
  • Customizable: Easily adapt the recipe with add-ins like nuts or sprinkles for a personal touch.
  • Portable and shareable: These bars hold up well, making them great for potlucks, picnics, or holiday parties.

What Ingredients Do You Need for No Bake Avalanche Cookies Recipe?

This recipe requires just a handful of easy-to-find ingredients to create the perfect no-bake treat. Each one is essential for the texture and flavor.

The creamy peanut butter offers richness and binds the cookies together, while the addition of cocoa powder adds a deeper chocolatey flavor that balances the sweetness perfectly.

How Do You Make No Bake Avalanche Cookies Recipe Step by Step?

This recipe comes together quickly with just a few simple steps. Follow these instructions to make your no-bake cookies with ease.

Step 1 — Mix Dry Ingredients

In a large mixing bowl, combine the rice cereal and cocoa powder, mixing well to combine.

You might also enjoy our whimsical delights: bake your own.

Step 2 — Melt Wet Ingredients

In a saucepan over low heat, melt together the creamy peanut butter and honey, stirring until smooth.

Step 3 — Add Vanilla

Remove the saucepan from the heat and stir in the vanilla extract.

Step 4 — Combine Dry and Wet Mixtures

Pour the peanut butter mixture over the rice cereal and cocoa powder, and mix until all the cereal is evenly coated.

Step 5 — Fold in Mix-Ins

Fold in the mini marshmallows and both types of chocolate chips until evenly distributed.

KitchenAid Artisan Stand Mixer

Kitchen ApplianceKitchenAid Artisan Stand Mixer

Makes mixing dough and batters effortless — a kitchen game-changer.

View on Amazon →

Pyrex Glass Mixing Bowl Set

Essential CookwarePyrex Glass Mixing Bowl Set

Essential for mixing ingredients — durable and easy to clean.

View on Amazon →

For more ideas, check out our whimsical wonders: bake your way.

Step 6 — Press Mixture Into Dish

Line a baking dish with parchment paper and press the mixture firmly into the dish.

Step 7 — Refrigerate

Refrigerate for at least 30 minutes to set.

Step 8 — Slice and Serve

Once set, cut into squares or bars and serve.

Frequently Asked Questions About No Bake Avalanche Cookies Recipe

Can I use crunchy peanut butter instead of creamy?

Yes, but the cookies will have a more textured bite due to the peanut pieces. For a smoother consistency, creamy peanut butter works best.

How long do these cookies last?

Stored in an airtight container in the fridge, they can last up to 7 days. They can also be frozen for up to 3 months.

Why do my cookies crumble?

They may crumble if the wet ingredients weren’t thoroughly mixed, or if the mixture wasn’t pressed firmly into the dish before chilling.

Looking for something similar? Try our twinkling treats: the most delightful.

Can I make these nut-free?

Yes, substitute the peanut butter with sun butter or another nut-free alternative. Keep in mind this may slightly alter the flavor.

Do I need to toast the rice cereal?

No, the rice cereal is used as is. Its crispy texture is perfect for this no-bake recipe without any extra steps.

What Are Some Serving Ideas for These Cookies?

  • Pair with hot cocoa for a cozy winter treat.
  • Serve alongside fresh berries for a light and colorful addition.
  • Top them with a drizzle of melted chocolate for a fancy finish.
  • Wrap individually for a thoughtful gift or party favor.

Expert Tips and Pro Shortcuts

  • Use parchment paper: It makes removing the cookies from the dish effortless.
  • Chill faster: If pressed for time, place the dish in the freezer for 15 minutes instead.
  • Measure carefully: Too much rice cereal can make the cookies dry and crumbly.
  • Experiment with mix-ins: Try adding chopped nuts, shredded coconut, or sprinkles for variety.

Ingredient Swaps and Substitutions

If you’re out of certain ingredients, don’t worry! Here are a few simple swaps.

  • Honey → Maple syrup: A 1:1 swap works well for a slightly different sweetness.
  • Rice cereal → Cornflakes: For a crunchier texture, crushed cornflakes are a great substitute.
  • Peanut butter → Almond butter: It provides a nuttier flavor while maintaining the creamy consistency.

Meal Prep, Storage, and Shelf Life

To store these no-bake cookies, place them in an airtight container. They’ll last up to a week in the fridge.

If freezing, separate layers with parchment paper to prevent sticking. They can be frozen for up to 3 months and thawed in the fridge overnight.

Avoid reheating as it may melt the chocolate chips and soften the texture. Serve chilled or at room temperature for the best experience.

No Bake Avalanche Cookies Recipe

Prep Time 15 minutes
Cook Time 5 minutes
Total Time 30 minutes
Servings 12 servings
Calories 150
These No Bake Avalanche Cookies are a delicious and easy treat made with rice cereal, peanut butter, and chocolate. Perfect for satisfying your sweet tooth without turning on the oven!

Equipment

  • mixing bowl
  • saucepan
  • baking dish
  • spatula
  • parchment paper

Instructions 

  • In a large mixing bowl, combine the rice cereal and cocoa powder, mixing well to combine.
  • In a saucepan over low heat, melt together the creamy peanut butter and honey, stirring until smooth.
  • Remove the saucepan from the heat and stir in the vanilla extract.
  • Pour the peanut butter mixture over the rice cereal and cocoa powder, and mix until all the cereal is evenly coated.
  • Fold in the mini marshmallows and both types of chocolate chips until evenly distributed.
  • Line a baking dish with parchment paper and press the mixture firmly into the dish.
  • Refrigerate for at least 30 minutes to set.
  • Once set, cut into squares or bars and serve.

Notes

You can substitute almond butter for peanut butter for a different flavor.
Calories: 150kcal
Cost: $10
Course: Dessert
Cuisine: American
Keyword: no bake cookies

Nutrition

Calories: 150kcal | Carbohydrates: 20g | Protein: 3g | Fat: 7g | Sodium: 50mg
A plate of delicious no bake avalanche cookies topped with chocolate and white chocolate chips

Loved this recipe? Save it to your favorite Pinterest board so you can easily find it later! ✨

This post contains affiliate links. As an Amazon Associate, I earn from qualifying purchases. This comes at no extra cost to you.

Almond bark ideas is a cookie recipe that combines chopped almond bark, crunchy almonds, and a buttery dough to create a sweet, nutty treat. Ready in under 30 minutes, these cookies are soft, chewy, and filled with delightful pops of almond flavor. This batch yields 24 perfectly golden cookies, making them ideal for sharing or savoring solo.

Growing up in Charleston, I always marveled at the way my mom turned simple pantry staples into something magical. These cookies remind me of sneaking bites of dough during baking marathons, and now I love that they bring the same joy into my kitchen.

Table of Contents

Almond Bark Drop Cookies are beloved for their satisfying texture and rich almond flavor. Their quick prep time and versatility make them a go-to for busy bakers looking for an easy dessert or snack.

  • Perfect balance of flavor: The sweetness from almond bark pairs beautifully with the nuttiness of chopped almonds.
  • No complicated techniques: The recipe is beginner-friendly and doesn’t require fancy equipment.
  • Fast preparation: With under 15 minutes of prep time, it’s great for last-minute baking.
  • Great for sharing: This recipe makes 24 cookies, ideal for parties or family gatherings.

What ingredients do you need for Almond Bark Drop Cookies?

This recipe uses simple pantry staples combined with almond bark and chopped almonds to create a unique cookie. Below is the list of all needed ingredients.

The almond bark provides rich sweetness and a creamy texture that gives these cookies their signature flavor. Chopped almonds add crunch and nuttiness in every bite.

How do you make Almond Bark Drop Cookies step by step?

The process for making these cookies is straightforward and enjoyable, with minimal cleanup. Follow these easy steps to whip up a fresh batch!

Step 1 — Preheat the oven

Preheat your oven to 350°F (175°C). This ensures even baking and perfectly golden edges.

Step 2 — Cream butter and sugars

In a large mixing bowl, cream together the softened butter, brown sugar, and granulated sugar until light and fluffy. This step creates the base for your cookie dough.

You might also enjoy our whimsical treats: raspberry almond snowball.

Step 3 — Add eggs and vanilla

Mix in the eggs one at a time, ensuring each is fully incorporated. Stir in the vanilla extract to enhance the flavor.

KitchenAid Artisan Stand Mixer

Kitchen ApplianceKitchenAid Artisan Stand Mixer

Makes mixing dough and batters effortless — a kitchen game-changer.

View on Amazon →

Nordic Ware Natural Aluminum Commercial Baker's Half Sheet

Essential CookwareNordic Ware Natural Aluminum Commercial Baker’s Half Sheet

Durable and perfect for baking cookies evenly — essential for this recipe.

View on Amazon →

Step 4 — Combine dry ingredients

In a separate bowl, whisk together the flour, baking soda, and salt. This ensures the leavening agents are evenly distributed.

Step 5 — Blend wet and dry ingredients

Gradually add the dry ingredients to the wet mixture, stirring until just combined. Avoid overmixing to maintain the cookies’ tenderness.

Step 6 — Fold in almond bark and almonds

Gently fold the chopped almond bark and almonds into the dough. This step ensures every cookie has a pop of flavor and crunch.

Step 7 — Portion and bake

Drop tablespoon-sized portions of dough onto ungreased baking sheets, spacing them about 2 inches apart. Bake for 10-12 minutes, or until the edges are lightly golden.

For more ideas, check out our whisking up warmth: delightful almond.

Step 8 — Cool and serve

Remove cookies from the oven and let them cool on baking sheets for a few minutes before transferring to wire racks. Serve warm or let cool completely for later enjoyment.

Frequently Asked Questions About Almond Bark Drop Cookies

Can you substitute almond bark with another ingredient?

Yes, white chocolate chips can be used in place of almond bark. They provide similar sweetness and texture.

How do you keep the cookies soft after baking?

Store them in an airtight container at room temperature with a slice of bread. The bread helps retain moisture in the cookies.

Can you freeze Almond Bark Drop Cookies?

Yes, you can freeze these cookies for up to 3 months. Store them in an airtight container or freezer bag and thaw before serving.

What’s the best way to reheat these cookies?

Reheat them in a 300°F oven for 3-5 minutes to regain their warm and soft texture.

Looking for something similar? Try our soft pumpkin chocolate chip cookies.

Can you use salted butter instead of unsalted?

Yes, but omit the added salt in the recipe to balance the flavors.

Common mistakes to avoid when making Almond Bark Drop Cookies

To ensure success, keep these common mistakes in mind during your baking process:

  • Overmixing the dough can lead to tough cookies. Mix just until combined for the best texture.
  • Skipping the cooling step may lead to fragile cookies. Let them cool on the baking sheet for better structure.
  • Using cold butter will result in uneven mixing. Ensure the butter is softened for a smooth dough.

What are the best serving ideas for Almond Bark Drop Cookies?

These cookies are versatile and pair well with a variety of drinks and desserts:

  • Coffee or tea: Pair these cookies with a hot cup of coffee for a satisfying afternoon snack.
  • Milk: Classic and comforting, a glass of cold milk complements the cookies perfectly.
  • Ice cream: Crumble cookies over vanilla ice cream for a crunchy, sweet topping.
  • Hot cocoa: Serve with a warm mug of cocoa for a festive holiday treat.

How should you store and reheat Almond Bark Drop Cookies?

Store these cookies correctly to maintain their flavor and texture:

At room temperature, keep them in an airtight container for up to 5 days. For longer storage, freeze cookies in a sealed bag for up to 3 months. Reheat thawed cookies in a 300°F oven for 3-5 minutes to revive their soft texture.

Almond Bark Drop Cookies

Prep Time 15 minutes
Cook Time 12 minutes
Total Time 27 minutes
Servings 24 servings
Calories 150
Deliciously sweet and crunchy cookies made with almond bark and chopped almonds.

Equipment

  • mixing bowl
  • whisk
  • baking sheet
  • oven
  • spatula

Instructions 

  • Preheat your oven to 350°F (175°C).
  • In a large mixing bowl, cream together the softened butter, brown sugar, and granulated sugar until light and fluffy.
  • Add the eggs one at a time, mixing well after each addition, then stir in the vanilla extract.
  • In a separate bowl, whisk together the flour, baking soda, and salt.
  • Gradually add the dry ingredients to the wet ingredients, mixing until just combined.
  • Fold in the chopped almond bark and chopped almonds until evenly distributed.
  • Drop tablespoon-sized portions of dough onto ungreased baking sheets, spacing them about 2 inches apart.
  • Bake in the preheated oven for 10-12 minutes, or until the edges are lightly golden.
  • Remove from the oven and let the cookies cool on the baking sheets for a few minutes before transferring them to wire racks to cool completely.

Notes

For a variation, you can add chocolate chips or dried fruit.
Calories: 150kcal
Cost: $10
Course: Dessert
Cuisine: American
Keyword: Cookies

Nutrition

Calories: 150kcal | Carbohydrates: 20g | Protein: 2g | Fat: 8g | Sodium: 100mg
A plate of freshly baked almond bark drop cookies with chocolate chunks

Loved this recipe? Save it to your favorite Pinterest board so you can easily find it later! ✨

This post contains affiliate links. As an Amazon Associate, I earn from qualifying purchases. This comes at no extra cost to you.

No-Bake Avalanche Cookies: Peanut Butter and White Chocolate Delight

Peanut butter avalanche cookies are a blissful no-bake treat crafted with creamy peanut butter, sweet white chocolate, and a delightful mix of rolled oats, mini marshmallows, and chopped nuts. Ready in just 15 minutes, this simple recipe yields 12 satisfying cookies that are crisp, chewy, and bursting with flavor. Growing up in Charleston, I always loved a sweet treat that didn’t require breaking a sweat in the southern heat, and these no-bake cookies were my perfect match.

Table of Contents

No-Bake Avalanche Cookies are loved for their easy preparation, perfect balance of flavors, and irresistible texture. They’re a lifesaver for busy days when you crave something sweet but don’t want to turn on the oven.

  • No baking required: Skip the oven and come out with perfect cookies every single time. It’s a simple way to make a sweet treat, even in the middle of summer.
  • Incredible texture: The combination of rolled oats, creamy peanut butter, and the crunch of chopped nuts creates a cookie that’s both chewy and satisfying.
  • Customizable sweetness: You can use honey or maple syrup to suit your taste, and the white chocolate chips and mini marshmallows add just the right amount of indulgence.
  • Quick and convenient: These cookies take just 15 minutes to prepare, and with no cooling racks or long baking times, they’re ready to eat in no time!

What ingredients do you need for No-Bake Avalanche Cookies?

The ingredients for No-Bake Avalanche Cookies are simple and easy to find, making this a practical recipe for any occasion. Here’s everything you’ll need to whip up these delicious treats:

The rolled oats provide a hearty base, while the creamy peanut butter adds richness. White chocolate chips and marshmallows contribute a hint of sweet decadence.

How do you make No-Bake Avalanche Cookies step by step?

Making these no-bake cookies is incredibly straightforward and stress-free! Follow these steps to create a batch of delectable No-Bake Avalanche Cookies in just 15 minutes.

Step 1 — Mix oats and salt

In a large mixing bowl, combine the rolled oats and a pinch of salt to ensure even distribution throughout the mixture.

Step 2 — Warm peanut butter and sweetener

In a separate microwave-safe bowl, mix the creamy peanut butter and honey or maple syrup. Microwave for about 30 seconds until warm and easy to stir.

You might also enjoy our warm and chewy: the ultimate.

Step 3 — Add vanilla

Stir the vanilla extract into the warm peanut butter mixture until fully blended, enhancing the aroma and flavor.

Step 4 — Coat the oats

Pour the peanut butter mixture over the oats and use a spatula to mix until all the oats are evenly coated.

Step 5 — Mix in add-ins

Gently fold in the white chocolate chips, mini marshmallows, and chopped nuts, ensuring they are evenly distributed for a consistent bite.

KitchenAid Artisan Stand Mixer

Kitchen ApplianceKitchenAid Artisan Stand Mixer

Makes mixing dough and batters effortless — a kitchen game-changer.

View on Amazon →

Pyrex Mixing Bowl Set

Essential CookwarePyrex Mixing Bowl Set

Essential for mixing ingredients — durable and easy to clean.

View on Amazon →

Step 6 — Form the cookies

Line a baking sheet with parchment paper. Drop tablespoon-sized portions of the mixture onto the sheet, forming cookie shapes.

For more ideas, check out our wholesome indulgence: peanut butter chocolate.

Step 7 — Set in the fridge

Refrigerate the cookies for at least 30 minutes to set. Once firm, they’re ready to enjoy!

Frequently Asked Questions About No-Bake Avalanche Cookies: Peanut Butter and White Chocolate Delight

Can I use dark chocolate instead of white chocolate?

Yes, you can swap white chocolate chips for dark chocolate. It will add a richer, less sweet flavor to the cookies.

How can I make these cookies vegan?

Substitute the honey with maple syrup and use dairy-free white chocolate chips and vegan marshmallows for a vegan-friendly version.

How long do these cookies take to set?

The cookies usually set within 30 minutes in the refrigerator. To speed up the process, you can place them in the freezer for 15 minutes.

Looking for something similar? Try our sweet nothings: the irresistible charm.

Can I make these without nuts?

Yes, you can omit the chopped nuts entirely or replace them with seeds, like sunflower or pumpkin seeds, for a nut-free version.

How should I store leftover cookies?

Store leftovers in an airtight container in the refrigerator for up to a week or in the freezer for up to a month.

Tips for perfect No-Bake Avalanche Cookies

Here are some quick tips to elevate your cookie game:

  • Use fresh oats: Old oats can affect the texture. Fresh, rolled oats give the best chewiness.
  • Don’t overheat: Avoid overheating the peanut butter mixture as it can scorch and lose its creamy consistency.
  • Control sweetness: Adjust the honey or maple syrup for a more personalized flavor profile.
  • Chill properly: Make sure you give the cookies enough time to set in the refrigerator for a firm texture.

What to serve with these cookies

Pair these cookies with:

  • A cold glass of milk: The creamy, cool milk complements the sweetness of the cookies.
  • Hot coffee or tea: The rich flavors in these beverages balance out the sweetness.
  • Vanilla ice cream: Serve the cookies alongside a scoop of ice cream for a simple yet indulgent dessert.
  • Fresh fruit: Berries or sliced apples add a refreshing, tart contrast to the decadent cookies.

How to store, prepare, and reheat your cookies

To store these cookies, place them in an airtight container and refrigerate for up to one week. For longer storage, freeze them in a single layer on a baking sheet until solid, then transfer to a freezer-safe bag for up to one month.

If you prefer your cookies at room temperature, let them sit out for 10-15 minutes before serving. While these no-bake cookies don’t technically require reheating, you can warm one briefly in the microwave for a softer texture.

No-Bake Avalanche Cookies: Peanut Butter and White Chocolate Delight

Prep Time 15 minutes
Total Time 30 minutes
Servings 12 servings
Calories 150
These no-bake avalanche cookies are a delightful combination of peanut butter, white chocolate, and marshmallows, perfect for a quick and easy treat.

Equipment

  • mixing bowl
  • microwave-safe bowl
  • baking sheet
  • spoon
  • parchment paper

Instructions 

  • In a large mixing bowl, combine the rolled oats and a pinch of salt.
  • In a separate microwave-safe bowl, mix the peanut butter and honey (or maple syrup). Microwave for about 30 seconds until warm and easy to stir.
  • Add the vanilla extract to the peanut butter mixture and stir until well combined.
  • Pour the peanut butter mixture over the oats and mix until all the oats are evenly coated.
  • Gently fold in the white chocolate chips, mini marshmallows, and chopped nuts until evenly distributed.
  • Line a baking sheet with parchment paper. Using a spoon, drop tablespoon-sized portions of the mixture onto the parchment paper, forming cookies.
  • Refrigerate the cookies for at least 30 minutes to set.
  • Once set, remove from the refrigerator and enjoy your no-bake avalanche cookies!

Notes

You can substitute the nuts with your favorite type or omit them for a nut-free version.
Calories: 150kcal
Cost: $10
Course: Dessert
Cuisine: American
Keyword: no bake cookies

Nutrition

Calories: 150kcal | Carbohydrates: 20g | Protein: 4g | Fat: 7g | Sodium: 50mg
A plate of no-bake avalanche cookies topped with white chocolate and peanut butter

Loved this recipe? Save it to your favorite Pinterest board so you can easily find it later! ✨
This post contains affiliate links. As an Amazon Associate, I earn from qualifying purchases. This comes at no extra cost to you.

Avalanche Cookies Recipe

Avalanche cookies with white chocolate chips are an indulgent, chewy treat made with semi-sweet chocolate chips, white chocolate chips, butterscotch chips, and shredded coconut. Ready in just 27 minutes, this recipe yields 24 cookies brimming with texture and flavor. Perfect for sharing or enjoying with a cup of tea!

As a self-proclaimed cookie enthusiast, these are the kind of treats I love to whip up when friends come over—they’re easy to make but taste like you spent hours in the kitchen.

Table of Contents

Why Should You Try This Avalanche Cookies Recipe?

This recipe is packed with rich flavors and a variety of textures, making it stand out among classic cookie recipes. It’s quick to make and the perfect balance of sweet, chewy, and slightly crunchy.

  • Quick and easy: Just 27 minutes from start to finish, making it perfect for busy schedules.
  • Flavor-packed: With three types of chips and coconut, every bite is a burst of sweetness.
  • Perfect texture: The mix of chewy oats and shredded coconut combined with melted chocolate creates a delightful mouthfeel.
  • Shareable joy: With 24 cookies, there’s plenty to go around for family gatherings or parties.

What Ingredients Do You Need for Avalanche Cookies Recipe?

The key ingredients for these cookies are a trio of chocolate and butterscotch chips, rolled oats, and shredded coconut, all brought together with a buttery dough. Here’s the complete list:

The combination of semi-sweet, white, and butterscotch chips ensures rich, layered sweetness in every bite, while the shredded coconut adds a tropical twist and a chewy texture.

How Do You Make Avalanche Cookies Recipe Step by Step?

This recipe is simple and beginner-friendly, but the result is a batch of bakery-worthy cookies. Just follow these easy steps:

Step 1 — Preheat the oven

Preheat your oven to 350°F (175°C) and line a baking sheet with parchment paper to prevent sticking.

You might also enjoy our soft pumpkin chocolate chip cookies.

Step 2 — Cream the butter and sugars

In a large mixing bowl, cream together the softened butter, brown sugar, and granulated sugar until light and fluffy. This step helps create a soft and chewy cookie texture.

Step 3 — Add eggs and vanilla

Add the eggs one at a time, mixing well after each addition. Then stir in the vanilla extract for flavor.

Step 4 — Prepare the dry ingredients

In a separate bowl, whisk together the flour, oats, baking soda, and salt until thoroughly combined.

Step 5 — Combine wet and dry ingredients

Gradually add the dry ingredients to the wet ingredients, mixing until just combined. Be careful not to overmix for the best texture.

KitchenAid Artisan Stand Mixer

Kitchen ApplianceKitchenAid Artisan Stand Mixer

Makes mixing dough and batters effortless — a kitchen game-changer.

View on Amazon →

Nordic Ware Natural Aluminum Commercial Baker's Half Sheet

Essential CookwareNordic Ware Natural Aluminum Commercial Baker’s Half Sheet

Durable baking sheet perfect for cookies — essential for even baking.

View on Amazon →

For more ideas, check out our the best healthy pumpkin chocolate.

Step 6 — Add the mix-ins

Fold in the semi-sweet chocolate chips, white chocolate chips, butterscotch chips, and shredded coconut. Make sure they are evenly distributed throughout the dough.

Step 7 — Bake the cookies

Drop tablespoon-sized portions of dough onto the prepared baking sheet, spacing them about 2 inches apart. Bake in the preheated oven for 10-12 minutes, or until the edges are lightly golden.

Step 8 — Cool the cookies

Remove the cookies from the oven and let them cool on the baking sheet for 5 minutes. Then transfer to a wire rack to cool completely before enjoying.

Frequently Asked Questions About Avalanche Cookies Recipe

Can I make these cookies without coconut?

Yes, you can omit the shredded coconut if you prefer. However, keep in mind that it adds a unique texture and flavor that enhances the cookies.

Looking for something similar? Try our pumpkin chocolate chip cookies (soft batch).

Can I freeze the dough for later?

Yes, the dough freezes well. Scoop it into portioned balls, freeze them on a baking sheet, and then transfer to a freezer bag for up to 3 months.

What type of oats should I use?

Rolled oats are best for this recipe as they provide a chewy texture. Avoid using instant oats, which can make the cookies too soft.

Can I use dark chocolate chips instead of semi-sweet?

Yes, dark chocolate chips are a great substitution if you prefer a slightly less sweet cookie with a richer chocolate flavor.

How should I store these cookies?

Store the cookies in an airtight container at room temperature for up to 5 days. For longer storage, freeze them for up to 3 months.

What Can You Serve with These Cookies?

These cookies are perfect on their own, but here are a few ideas for pairing them:

  • A glass of milk: The classic pairing for cookies, milk balances the sweetness perfectly.
  • Hot cocoa: Pair these cookies with hot cocoa for an indulgent treat on a chilly day.
  • Ice cream sandwich: Place a scoop of vanilla or caramel ice cream between two cookies for a decadent dessert.

Common Mistakes to Avoid

Avoid these pitfalls to ensure your cookies turn out perfectly every time:

  • Overmixing the dough: Overmixing can make the cookies dense instead of soft and chewy. Mix until just combined.
  • Skipping the parchment paper: Without parchment paper, the cookies may stick to the baking sheet, making cleanup harder.
  • Overbaking: The cookies should be lightly golden at the edges. Overbaking will make them dry and brittle.

Avalanche Cookies Recipe

Prep Time 15 minutes
Cook Time 12 minutes
Total Time 27 minutes
Servings 24 servings
Calories 150
These Avalanche Cookies are a delightful combination of chocolate, butterscotch, and coconut, creating a chewy and sweet treat perfect for any occasion.

Equipment

  • mixing bowl
  • baking sheet
  • oven
  • whisk
  • spatula

Ingredients

Instructions 

  • Preheat your oven to 350°F (175°C) and line a baking sheet with parchment paper.
  • In a large mixing bowl, cream together the softened butter, brown sugar, and granulated sugar until light and fluffy.
  • Add the eggs one at a time, mixing well after each addition, then stir in the vanilla extract.
  • In a separate bowl, whisk together the flour, oats, baking soda, and salt.
  • Gradually add the dry ingredients to the wet ingredients, mixing until just combined.
  • Fold in the semi-sweet chocolate chips, white chocolate chips, butterscotch chips, and shredded coconut until evenly distributed.
  • Drop tablespoon-sized portions of dough onto the prepared baking sheet, spacing them about 2 inches apart.
  • Bake in the preheated oven for 10-12 minutes or until the edges are lightly golden.
  • Remove from the oven and let the cookies cool on the baking sheet for 5 minutes before transferring them to a wire rack to cool completely.

Notes

For a variation, you can add nuts or substitute different types of chocolate chips.
Calories: 150kcal
Cost: $15
Course: Dessert
Cuisine: American
Keyword: Cookies

Nutrition

Calories: 150kcal | Carbohydrates: 22g | Protein: 2g | Fat: 7g | Sodium: 100mg
A plate of freshly baked Avalanche Cookies with chocolate chips and white chocolate chunks

Loved this recipe? Save it to your favorite Pinterest board so you can easily find it later! ✨