Author

Emily

Browsing

This post contains affiliate links. As an Amazon Associate, I earn from qualifying purchases. This comes at no extra cost to you.

Easy & Addictive Avalanche Cookies – No Bake Recipe

Christmas avalanche cookies are a no-bake treat combining creamy peanut butter, sweet honey, quick oats, mini chocolate chips, and crunchy nuts. This easy recipe is ready in just 40 minutes, including chill time, and yields 12–15 cookies. It’s the perfect mix of chewy, crunchy, and chocolaty goodness for your next dessert craving.

I first made these cookies after dashing through a busy week, craving something sweet but not wanting to turn on the oven. They’ve since become a favorite in my kitchen when I need a quick and satisfying dessert.

Table of Contents

This recipe is a hit because it’s quick, simple, and packed with addictive flavors like peanut butter, chocolate, and coconut. Its no-bake nature makes it perfect for busy days or hot weather.

  • Quick and easy: You only need minimal prep time and no oven.
  • Perfect texture: The cookies are a delightful mix of chewy oats and crunchy nuts.
  • Customizable: Swap out the nuts or use dairy-free chocolate for dietary preferences.
  • Kid-friendly: A fun recipe to make with little helpers in the kitchen.

What ingredients do you need for Easy & Addictive Avalanche Cookies – No Bake Recipe?

To make these cookies, you’ll need pantry staples like oats, peanut butter, and honey, along with a few tasty add-ins like chocolate chips and nuts for texture.

The creamy peanut butter helps bind the ingredients together, while the honey adds natural sweetness and a hint of floral flavor.

How do you make Easy & Addictive Avalanche Cookies – No Bake Recipe step by step?

Making these cookies is as simple as mixing, shaping, and chilling. Follow these steps for a perfect batch every time.

You might also enjoy our whimsical delights: bake your own.

Step 1 — Mix peanut butter and honey

In a large mixing bowl, combine the peanut butter and honey until smooth and well blended.

Step 2 — Add vanilla and salt

Stir in the vanilla extract and salt to enhance the overall flavor of the mixture.

Step 3 — Mix dry ingredients

Add the quick oats, shredded coconut, mini chocolate chips, and chopped nuts to the bowl. Stir until everything is evenly coated.

For more ideas, check out our whimsical wonders: bake your way.

Step 4 — Shape the cookies

Using your hands or a spoon, scoop out tablespoon-sized portions of the mixture and roll them into balls.
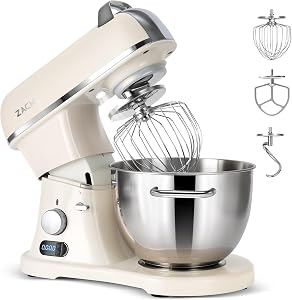
KitchenAid Artisan Stand Mixer

Kitchen ApplianceKitchenAid Artisan Stand Mixer

Makes mixing dough and batters effortless — a kitchen game-changer.

View on Amazon →

Pyrex Glass Mixing Bowl Set

Essential CookwarePyrex Glass Mixing Bowl Set

Essential for mixing ingredients and easy to clean — perfect for this no-bake recipe.

View on Amazon →

Step 5 — Flatten and chill

Place the cookie balls onto a parchment-lined baking sheet, pressing them slightly to flatten. Refrigerate for at least 30 minutes to set.

Step 6 — Serve and enjoy

Once the cookies are set, they’re ready to enjoy. Store any extras in the fridge to keep them fresh.

Looking for something similar? Try our twinkling treats: the most delightful.

Frequently Asked Questions About Easy & Addictive Avalanche Cookies – No Bake Recipe

Can I use old-fashioned oats instead of quick oats?

Yes, but the texture will be chewier as old-fashioned oats don’t absorb as much moisture as quick oats.

What can I substitute for peanut butter?

Use almond butter, sunflower seed butter, or any nut-free butter for a similar creamy texture and taste.

Can I skip the shredded coconut?

Yes, you can omit it or replace it with additional oats or more nuts to maintain the consistency.

How should I store these cookies?

Store them in an airtight container in the refrigerator for up to one week or freeze for longer storage.

Top tips to make perfect no-bake avalanche cookies

  • Use fresh, soft honey: This makes mixing easier and ensures a smooth consistency.
  • Chill the dough: If the mixture feels sticky, refrigerate it for 10 minutes before shaping.
  • Line your baking sheet: Use parchment paper to prevent sticking and make cleanup a breeze.
  • Double the batch: These cookies disappear quickly, so make extra if you’re serving a group.

What to serve with your avalanche cookies

Pair these cookies with a warm drink or serve as part of a dessert spread.

  • Hot cocoa: The rich chocolate pairs beautifully with these cookies’ nutty flavor.
  • Fresh fruit: Add some sliced strawberries or bananas for a refreshing contrast.
  • Milk: A classic pairing that balances the sweetness perfectly.
  • Ice cream: Crumble the cookies over vanilla or chocolate ice cream for a decadent treat.

Can you make ingredient swaps?

  • Replace honey with maple syrup: This adds a slightly different sweetness and makes the recipe vegan-friendly.
  • Substitute nuts with seeds: Use pumpkin or sunflower seeds for a nut-free version.
  • Try dark chocolate chips: These provide a richer taste and reduce overall sweetness.
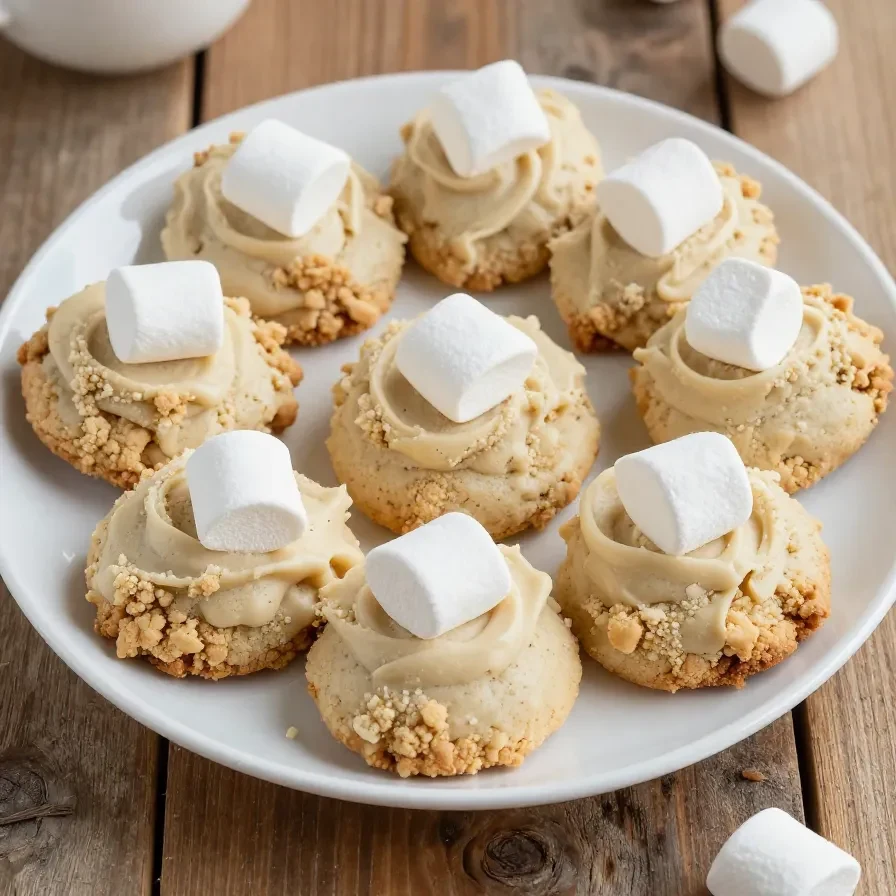
Easy & Addictive Avalanche Cookies - No Bake Recipe

Prep Time 15 minutes
Total Time 45 minutes
Servings 12 servings
Calories 150
These no-bake avalanche cookies are a delicious and easy treat made with oats, peanut butter, and chocolate chips.

Equipment

  • mixing bowl
  • baking sheet
  • parchment paper
  • spoon
  • refrigerator

Instructions 

  • In a large mixing bowl, combine the peanut butter and honey until smooth.
  • Add the vanilla extract and salt to the peanut butter mixture, stirring until well incorporated.
  • Mix in the quick oats, shredded coconut, chopped nuts, and mini chocolate chips until everything is evenly coated.
  • Using your hands or a spoon, scoop out tablespoon-sized portions of the mixture and roll them into balls.
  • Place the cookie balls onto a parchment-lined baking sheet, pressing them slightly to flatten.
  • Refrigerate the cookies for at least 30 minutes to set.
  • Once set, enjoy your delicious no-bake avalanche cookies!

Notes

You can substitute the nuts with your favorite mix-ins like dried fruit or seeds.
Calories: 150kcal
Cost: $10
Course: Dessert
Cuisine: American
Keyword: no bake cookies

Nutrition

Calories: 150kcal | Carbohydrates: 20g | Protein: 4g | Fat: 7g | Sodium: 50mg
A plate of delicious no-bake avalanche cookies topped with chocolate and peanut butter

Loved this recipe? Save it to your favorite Pinterest board so you can easily find it later! ✨
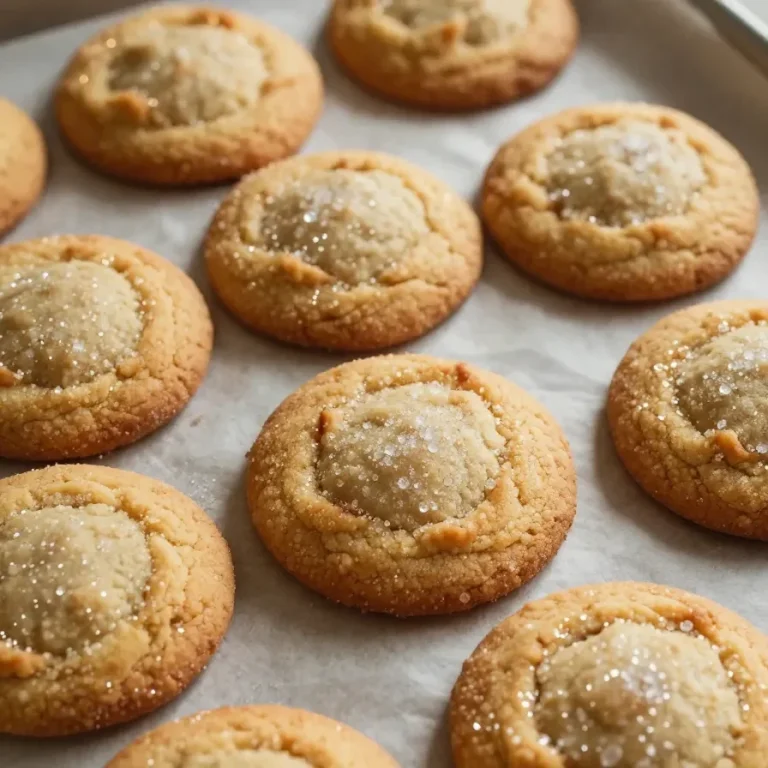
This post contains affiliate links. As an Amazon Associate, I earn from qualifying purchases. This comes at no extra cost to you.

Chewy fall cookies are the perfect seasonal treat made with pumpkin puree, warm spices, and a touch of maple syrup for sweetness. This easy recipe takes only 27 minutes from start to finish and yields 24 irresistibly soft, chewy cookies. The balance of rich pumpkin flavor and subtle maple notes ensures every bite feels like autumn.

Standing in my mom’s kitchen as a kid, I learned to love the smell of cinnamon and nutmeg filling the air—these Chewy Maple Pumpkin Cookies bring back those same nostalgic aromas while being the ultimate comfort food snack.

Table of Contents

Why are these cookies so popular?

Chewy Maple Pumpkin Cookies are loved for their soft texture, warm flavors, and quick prep time. Their chewy bite and rich pumpkin spice profile make them ideal for fall gatherings or cozy afternoons.

  • Perfect for autumn: Loaded with pumpkin puree and maple syrup, these cookies embody the season’s essence.
  • No complicated steps: Ready in under 30 minutes, they’re simple enough for beginner bakers.
  • Flexible recipe: Add chocolate chips or leave them plain to suit your preferences.
  • Make-ahead friendly: Store or freeze these cookies easily without sacrificing texture.

What ingredients do you need for Chewy Maple Pumpkin Cookies?

This recipe uses pantry staples and seasonal ingredients to create chewy, flavorful cookies loaded with fall spices.

The pumpkin puree adds moisture and a deep orange color, while the maple syrup gives a hint of caramel-like sweetness that rounds out the spices perfectly.

How do you make Chewy Maple Pumpkin Cookies step by step?

Making these cookies is incredibly straightforward, combining wet and dry ingredients before baking to chewy perfection.

Step 1 — Prepare your baking sheet

Preheat your oven to 350°F (175°C) and line a baking sheet with parchment paper.

Step 2 — Cream the butter and sugars

In a large mixing bowl, cream together the softened butter, brown sugar, and granulated sugar until light and fluffy.

You might also enjoy our sweeten your holidays: chewy maple.

Step 3 — Add wet ingredients

Add the pumpkin puree, maple syrup, egg, and vanilla extract to the butter mixture, mixing until well combined.

Step 4 — Mix dry ingredients

In a separate bowl, whisk together the flour, baking soda, baking powder, salt, cinnamon, ginger, nutmeg, and cloves.

Step 5 — Combine wet and dry mixes

Gradually add the dry ingredients to the wet ingredients, mixing until just combined. Do not overmix.

Step 6 — Fold in optional chocolate chips

If desired, fold in the chocolate chips to the dough for bursts of sweetness.

KitchenAid Artisan Stand Mixer

Kitchen ApplianceKitchenAid Artisan Stand Mixer

Makes mixing dough and batters effortless — a kitchen game-changer.

View on Amazon →

Nordic Ware Natural Aluminum Commercial Baker's Half Sheet

Essential CookwareNordic Ware Natural Aluminum Commercial Baker’s Half Sheet

Durable and perfect for baking cookies evenly, essential for this recipe.

View on Amazon →

Step 7 — Scoop and bake

Using a cookie scoop or tablespoon, drop dough onto the prepared baking sheet, spacing them about 2 inches apart. Bake for 10-12 minutes, or until the edges are set but the centers are still soft.

For more ideas, check out our soft pumpkin chocolate chip cookies.

Step 8 — Cool and enjoy

Allow the cookies to cool on the baking sheet for 5 minutes before transferring them to a wire rack to cool completely.

Frequently Asked Questions About Chewy Maple Pumpkin Cookies

Can I use fresh pumpkin instead of canned?

Yes, but ensure it is thoroughly cooked and pureed to match the texture of canned pumpkin.

How do I make these cookies gluten-free?

Substitute all-purpose flour with a 1:1 gluten-free baking mix for similar results.

Do the cookies freeze well?

Absolutely! Freeze them in a single layer before storing them in an airtight container for up to 2 months.

Can I omit the chocolate chips?

Yes, the cookies are delicious even without chocolate chips, letting the pumpkin and maple shine.

Looking for something similar? Try our the best healthy pumpkin chocolate.

What’s the best way to reheat frozen cookies?

Reheat frozen cookies in the oven at 300°F (150°C) for about 5 minutes or until warm.

Expert Tips for Perfect Results

  • Don’t overmix: Overmixing can lead to tough cookies; mix just until combined.
  • Use room-temperature butter: Softened butter helps incorporate air for a lighter texture.
  • Measure spices carefully: Balance is key; too much spice can overpower the maple and pumpkin flavors.
  • Cool thoroughly: Letting cookies cool completely enhances their chewy texture.

Serving Ideas and Pairings

  • Pair with spiced apple cider: The sweet, warm notes of cider complement the pumpkin spice flavor.
  • Enjoy with chai tea: The bold spices in chai harmonize with the cookie’s profile.
  • Serve with vanilla ice cream: Turn these cookies into a delectable dessert by sandwiching ice cream between two cookies.
  • Snack alongside a pumpkin latte: Double down on the pumpkin theme for a cozy autumn treat.

How to Store and Reheat These Cookies

To store, keep the cookies in an airtight container at room temperature for up to 5 days. For longer storage, freeze them.

To freeze, arrange cookies in a single layer so they don’t stick together. Move them to freezer bags or containers, and enjoy within 2 months.

Reheat frozen cookies in the oven at 300°F (150°C) for 5 minutes or until they feel fresh and warm again.

Chewy Maple Pumpkin Cookies

Prep Time 15 minutes
Cook Time 12 minutes
Total Time 27 minutes
Servings 24 servings
Calories 150
These chewy maple pumpkin cookies are a delightful treat, perfect for fall. They are soft, flavorful, and can be made with or without chocolate chips.

Equipment

  • mixing bowl
  • baking sheet
  • oven
  • whisk
  • cookie scoop

Ingredients

Instructions 

  • Preheat your oven to 350°F (175°C) and line a baking sheet with parchment paper.
  • In a large mixing bowl, cream together the softened butter, brown sugar, and granulated sugar until light and fluffy.
  • Add the pumpkin puree, maple syrup, egg, and vanilla extract to the butter mixture, mixing until well combined.
  • In a separate bowl, whisk together the flour, baking soda, baking powder, salt, cinnamon, ginger, nutmeg, and cloves.
  • Gradually add the dry ingredients to the wet ingredients, mixing until just combined. Do not overmix.
  • If desired, fold in the chocolate chips.
  • Using a cookie scoop or tablespoon, drop dough onto the prepared baking sheet, spacing them about 2 inches apart.
  • Bake in the preheated oven for 10-12 minutes, or until the edges are set but the centers are still soft.
  • Allow the cookies to cool on the baking sheet for 5 minutes before transferring them to a wire rack to cool completely.

Notes

For a variation, you can add nuts or dried fruit to the dough.
Calories: 150kcal
Cost: $10
Course: Dessert
Cuisine: American
Keyword: pumpkin cookies

Nutrition

Calories: 150kcal | Carbohydrates: 24g | Protein: 2g | Fat: 6g | Sodium: 100mg
A plate of chewy maple pumpkin cookies with a drizzle of maple icing on top

Loved this recipe? Save it to your favorite Pinterest board so you can easily find it later! ✨

This post contains affiliate links. As an Amazon Associate, I earn from qualifying purchases. This comes at no extra cost to you.

Avalanche cookies are a delightful blend of semi-sweet chocolate chips, white chocolate chips, and shredded coconut, all baked into a chewy and flavorful treat. Ready in just under 30 minutes, this recipe yields 24 cookies perfect for sharing or savoring with a hot cup of tea or coffee. With a sweet aroma wafting through your kitchen as they bake, these cookies are as fun to make as they are to eat. I first whipped up a batch of these when craving something sweet, and they turned out to be an irresistible hit at our house!

Table of Contents

Why is Avalanche Cookies Recipe so special?

Avalanche Cookies Recipe is special because it combines the sweet and slightly bitter notes of chocolate with the nutty texture of oats and the tropical flair of coconut. Each bite offers a perfect mix of chewy and crispy textures that’s crowd-pleasing yet unique.

  • Quick and easy: Only 15 minutes of prep and 12 minutes in the oven mean you’ll be enjoying these treats in no time.
  • Customizable: You can swap semi-sweet chocolate chips with dark chocolate for a richer flavor, or add nuts for extra crunch.
  • Perfect balance: The combination of oats, chocolate, and coconut creates a texture and flavor harmony in every bite.
  • Ideal for sharing: The recipe makes 24 cookies, making it perfect for gatherings or to stock up for the week.

What ingredients do you need for Avalanche Cookies Recipe?

To make Avalanche Cookies Recipe, you’ll need a variety of pantry staples like flour, butter, and sugar, along with delicious mix-ins like semi-sweet and white chocolate chips and shredded coconut. Here’s the full list:

The combination of semi-sweet chocolate and white chocolate chips creates a delightful contrast of flavors, while the oats and coconut add texture and a touch of nutty sweetness.

How do you make Avalanche Cookies Recipe step by step?

Making Avalanche Cookies is simple and takes just nine easy steps. Here’s exactly how to do it:

Step 1 — Preheat your oven

Preheat your oven to 350°F (175°C) and line baking sheets with parchment paper. This ensures your cookies won’t stick and bake evenly.

Step 2 — Cream the butter and sugars

In a large mixing bowl, cream together the softened butter, brown sugar, and granulated sugar until light and fluffy. This helps create that soft, melt-in-your-mouth texture in the final cookies.

Step 3 — Add eggs and vanilla

Beat in the eggs one at a time, ensuring each is fully incorporated before adding the next. Stir in the vanilla extract for added flavor.

You might also enjoy our soft pumpkin chocolate chip cookies.

Step 4 — Combine dry ingredients

In a separate bowl, whisk together the all-purpose flour, rolled oats, baking soda, and salt. This helps evenly distribute the leavening agents for consistent baking.

Step 5 — Mix wet and dry ingredients

Gradually add the dry mixture to the wet ingredients, mixing until just combined. Avoid overmixing to keep the cookies tender.

KitchenAid Artisan Stand Mixer

Kitchen ApplianceKitchenAid Artisan Stand Mixer

Makes mixing dough and batters effortless — a kitchen game-changer

View on Amazon →

Baking Sheet Set

Essential CookwareBaking Sheet Set

Essential for baking cookies evenly and preventing sticking.

View on Amazon →

Step 6 — Fold in mix-ins

Gently fold in the semi-sweet chocolate chips, white chocolate chips, and shredded coconut. Make sure they’re evenly distributed for flavor in every bite.

Step 7 — Drop dough onto baking sheets

Scoop rounded tablespoons of dough and place them on the prepared baking sheets, spacing them about 2 inches apart to allow for spreading.

Step 8 — Bake

Bake in the preheated oven for 10-12 minutes, or until the edges are lightly golden. The centers may look slightly soft, but they’ll firm up as they cool.

For more ideas, check out our the best healthy pumpkin chocolate.

Step 9 — Cool and enjoy

Allow the cookies to cool on the baking sheets for a few minutes before transferring them to a wire rack. This ensures they set properly and are ready to enjoy.

Frequently Asked Questions About Avalanche Cookies Recipe

How do I make these cookies gluten-free?

For a gluten-free version, substitute the all-purpose flour with a 1:1 gluten-free baking flour blend and ensure your oats are certified gluten-free.

Can I freeze Avalanche cookies?

Yes, you can freeze these cookies for up to 3 months. Let them cool completely, then store in an airtight freezer bag or container.

Why is my cookie dough too sticky?

Sticky dough might result from butter that’s too warm. Chill the dough for 30 minutes before scooping and baking to make it easier to handle.

Can I use other mix-ins?

Yes, you can customize the recipe with other mix-ins like nuts, dried cranberries, or caramel chunks to suit your taste.

Looking for something similar? Try our pumpkin chocolate chip cookies (soft batch).

How should I store the cookies?

Store them in an airtight container at room temperature for up to a week, or in the freezer for longer freshness.

What are common mistakes to avoid?

One common mistake is overmixing the dough, which can make the cookies too dense or tough. Mix just until the ingredients are combined.

Avoid overbaking by removing the cookies when the edges are golden but the centers are still soft. They’ll continue to cook as they cool.

How do you store these cookies?

To keep these cookies fresh, store them in an airtight container at room temperature for up to seven days. Make sure they are completely cool before storing to retain their texture.

If freezing, place the cookies in a single layer on a baking sheet first, then transfer them to a resealable freezer bag. To enjoy, thaw at room temperature or warm briefly in the microwave for a fresh-baked taste.

Avalanche Cookies Recipe

Prep Time 15 minutes
Cook Time 12 minutes
Total Time 27 minutes
Servings 24 servings
Calories 150
These Avalanche Cookies are a delicious blend of chocolate, coconut, and oats, perfect for any cookie lover.

Equipment

  • mixing bowl
  • baking sheet
  • oven
  • whisk
  • spatula

Instructions 

  • Preheat your oven to 350°F (175°C) and line baking sheets with parchment paper.
  • In a large mixing bowl, cream together the softened butter, brown sugar, and granulated sugar until light and fluffy.
  • Add the eggs one at a time, mixing well after each addition, then stir in the vanilla extract.
  • In a separate bowl, whisk together the flour, rolled oats, baking soda, and salt.
  • Gradually add the dry mixture to the wet ingredients, stirring until just combined.
  • Fold in the semi-sweet chocolate chips, white chocolate chips, and shredded coconut until evenly distributed.
  • Drop rounded tablespoons of dough onto the prepared baking sheets, spacing them about 2 inches apart.
  • Bake in the preheated oven for 10-12 minutes, or until the edges are lightly golden.
  • Allow the cookies to cool on the baking sheets for a few minutes before transferring them to wire racks to cool completely.

Notes

For a variation, you can add nuts or dried fruits to the cookie dough.
Calories: 150kcal
Cost: $15
Course: Dessert
Cuisine: American
Keyword: Cookies

Nutrition

Calories: 150kcal | Carbohydrates: 22g | Protein: 2g | Fat: 7g | Sodium: 100mg
A plate of freshly baked Avalanche Cookies with chocolate chips and white chocolate drizzles

Loved this recipe? Save it to your favorite Pinterest board so you can easily find it later! ✨

This post contains affiliate links. As an Amazon Associate, I earn from qualifying purchases. This comes at no extra cost to you.

Pumpkin Bars Sheet Pan

Pumpkin bars sheet pan is a moist and spiced dessert made with canned pumpkin puree, warm fall spices, and topped with a luscious cream cheese frosting. This straightforward recipe is ready in just 45 minutes and serves 12 delicious squares. Perfect for cozy gatherings or when pumpkin season calls for a sweet treat!

These pumpkin bars instantly remind me of fall evenings in Charleston when the smell of cinnamon and nutmeg would fill the kitchen. It was the ultimate signal that the season had officially arrived.

Table of Contents

Why Is Pumpkin Bars with Cream Cheese Frosting Special?

Pumpkin Bars with Cream Cheese Frosting stand out for their perfect blend of moist, spiced cake and rich, creamy frosting. Each bite delivers a cozy balance of pumpkin’s earthy sweetness and warm spices like cinnamon and nutmeg. It’s an effortless dessert that feels indulgent and festive.

  • Perfect for gatherings: This recipe yields 12 bars, making it great for potlucks or holiday events.
  • Simple and quick: With only 45 minutes from start to finish, these bars are a low-stress treat for busy cooks.
  • Ultimate fall dessert: The flavors of pumpkin, cinnamon, and cream cheese make it a seasonal classic.
  • Irresistible texture: Moist, fluffy bars paired with a smooth, tangy frosting create an unbeatable combination.

What Ingredients Do You Need for Pumpkin Bars with Cream Cheese Frosting?

This recipe combines pantry staples like flour and sugar with the rich flavors of pumpkin puree and warm spices. Each ingredient plays an essential role in creating the perfect balance of sweetness and spice. Below is the full list of what you’ll need:

The richness of the cream cheese frosting pairs beautifully with the warm, spiced undertones of pumpkin and cinnamon, creating a dessert that’s perfect for cooler months.

How Do You Make Pumpkin Bars with Cream Cheese Frosting Step by Step?

Making these pumpkin bars is surprisingly simple and requires minimal effort. With just a little mixing, baking, and spreading, you’ll have a delicious dessert in no time. Follow these steps to ensure perfect results:

Step 1 — Prepare the Baking Pan

Preheat your oven to 350°F (175°C). Grease a 9×13 inch baking pan to prevent sticking and ensure easy release of the bars.

Step 2 — Mix the Pumpkin Base

In a large mixing bowl, combine the pumpkin puree, granulated sugar, vegetable oil, eggs, and 1 teaspoon of vanilla extract. Mix until the ingredients are smooth and well combined.

You might also enjoy our soft pumpkin cookies with cream.

Step 3 — Combine Dry Ingredients

In another bowl, whisk the flour, baking powder, baking soda, cinnamon, nutmeg, ginger, and salt together. This ensures the spices and leaveners are evenly distributed throughout the batter.

Step 4 — Blend the Mixtures

Gradually add the dry ingredients to the wet pumpkin mixture, stirring just enough to combine. Avoid overmixing to keep the bars tender and fluffy.

Step 5 — Bake the Bars

Pour the batter into the prepared baking pan, spreading it evenly. Bake for 25-30 minutes, or until a toothpick inserted into the center comes out clean.

KitchenAid Artisan Stand Mixer

Kitchen ApplianceKitchenAid Artisan Stand Mixer

Makes mixing dough and batters effortless — a kitchen game-changer.

View on Amazon →

Nordic Ware Natural Aluminum Commercial Baker's Half Sheet

Essential CookwareNordic Ware Natural Aluminum Commercial Baker’s Half Sheet

Durable and perfect for baking pumpkin bars evenly.

View on Amazon →

Step 6 — Prepare the Cream Cheese Frosting

While the bars bake, beat the softened cream cheese and butter in a mixing bowl until smooth. Gradually add the powdered sugar and 1 teaspoon of vanilla extract, beating until the frosting reaches a fluffy consistency.

Step 7 — Cool and Frost

Remove the bars from the oven and let them cool completely in the pan on a wire rack. Once cooled, spread the cream cheese frosting evenly across the top before cutting into squares and serving.

For more ideas, check out our pumpkin cupcakes with cinnamon cream.

Frequently Asked Questions About Pumpkin Bars with Cream Cheese Frosting

Can you make these ahead of time?

Yes, you can prepare the bars and frosting up to 2 days in advance. Store the bars in an airtight container and frost them just before serving.

What’s the best way to store leftovers?

Store leftover pumpkin bars in an airtight container in the refrigerator for up to 5 days to keep the frosting fresh.

Can I freeze Pumpkin Bars with Cream Cheese Frosting?

Yes, these bars freeze well! Wrap them tightly and freeze for up to 3 months. Thaw in the refrigerator overnight before serving.

How do I avoid overmixing the batter?

Fold the dry ingredients into the wet ingredients gently, just until combined. Overmixing can lead to dense bars.

Can I use fresh pumpkin instead of canned?

Yes, you can substitute fresh pumpkin puree for the canned version. Make sure to cook and puree the pumpkin until it’s smooth, and remove any excess liquid before mixing.

Looking for something similar? Try our swirled pumpkin cream cheese muffins.

Can You Make Ingredient Swaps for This Recipe?

Yes, a few simple swaps can work for this recipe without compromising flavor. Here are some ideas:

  • Vegetable oil: Swap it with melted coconut oil or unsweetened applesauce for a slightly lighter texture.
  • All-purpose flour: Substitute with a 1-to-1 gluten-free flour blend for a gluten-free version.

Keep in mind that these swaps may slightly alter the texture, but the flavors will still shine.

What Are Common Mistakes to Avoid with This Recipe?

To ensure your Pumpkin Bars with Cream Cheese Frosting turn out perfect, keep these tips in mind:

  • Overmixing the batter: Too much mixing can result in tough bars. Mix until just combined for a tender crumb.
  • Skipping the cooling step: Frosting the bars while they’re warm will cause the cream cheese to melt. Always wait for them to cool completely.
  • Using cold cream cheese or butter: Ensure both are fully softened to achieve a smooth, creamy frosting.

How to Store and Reheat Pumpkin Bars with Cream Cheese Frosting?

To keep your pumpkin bars fresh, store them in an airtight container in the refrigerator. They will stay delicious for up to 5 days. If you need to store them longer, freezing is an excellent option.

For freezing, wrap individual bars in plastic wrap, then place them in an airtight bag or container. They can be frozen for up to 3 months.

When ready to enjoy, thaw them in the fridge overnight. If desired, bring them to room temperature or reheat briefly in the microwave for a warm treat.

Pumpkin Bars with Cream Cheese Frosting

Prep Time 15 minutes
Cook Time 30 minutes
Total Time 45 minutes
Servings 12 servings
Calories 200
Deliciously moist pumpkin bars topped with creamy frosting, perfect for fall gatherings.

Equipment

  • mixing bowl
  • whisk
  • baking pan
  • oven
  • spatula

Instructions 

  • Preheat the oven to 350°F (175°C). Grease a 9x13 inch baking pan.
  • In a large mixing bowl, combine the pumpkin puree, granulated sugar, vegetable oil, eggs, and 1 teaspoon of vanilla extract. Mix until well combined.
  • In another bowl, whisk together the flour, baking powder, baking soda, cinnamon, nutmeg, ginger, and salt.
  • Gradually add the dry ingredients to the pumpkin mixture, stirring until just combined.
  • Pour the batter into the prepared baking pan and spread it evenly.
  • Bake in the preheated oven for 25-30 minutes, or until a toothpick inserted in the center comes out clean.
  • While the bars are baking, prepare the cream cheese frosting. In a mixing bowl, beat the softened cream cheese and unsalted butter together until smooth.
  • Gradually add the powdered sugar and 1 teaspoon of vanilla extract, and continue to beat until fluffy and well combined.
  • Once the pumpkin bars are baked, remove them from the oven and let them cool completely in the pan on a wire rack.
  • After the bars have cooled, spread the cream cheese frosting evenly over the top.
  • Cut into squares and serve.

Notes

For a spicier flavor, add more cinnamon or nutmeg to the batter.
Calories: 200kcal
Cost: $15
Course: Dessert
Cuisine: American
Keyword: pumpkin bars

Nutrition

Calories: 200kcal | Carbohydrates: 32g | Protein: 2g | Fat: 8g | Sodium: 150mg
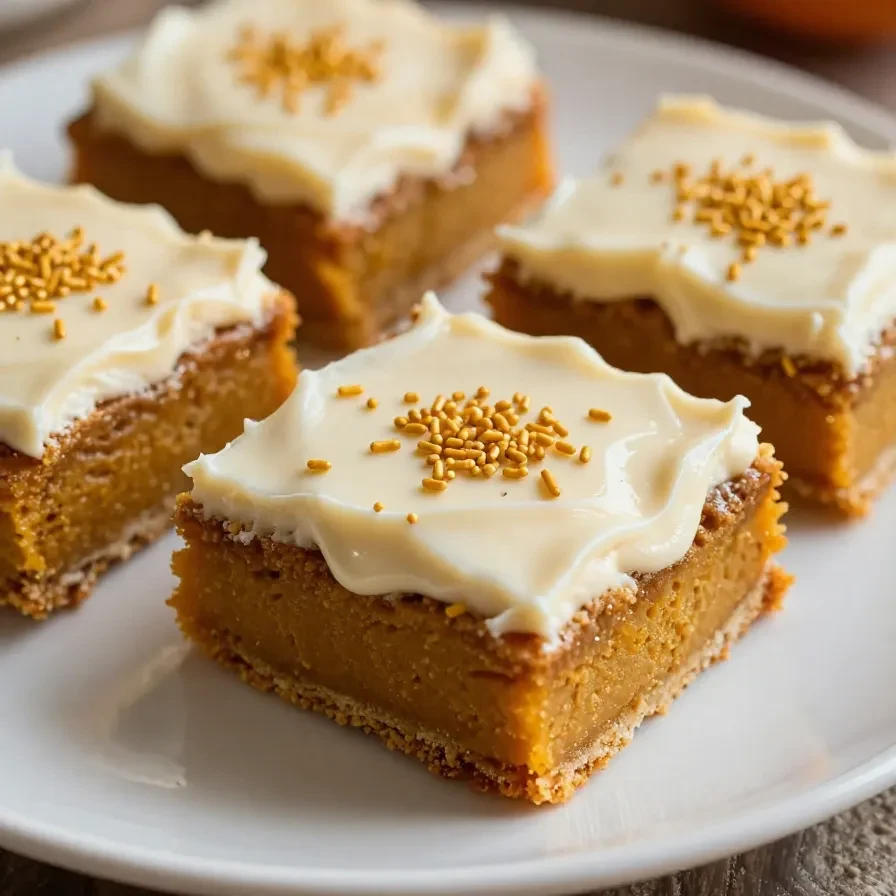
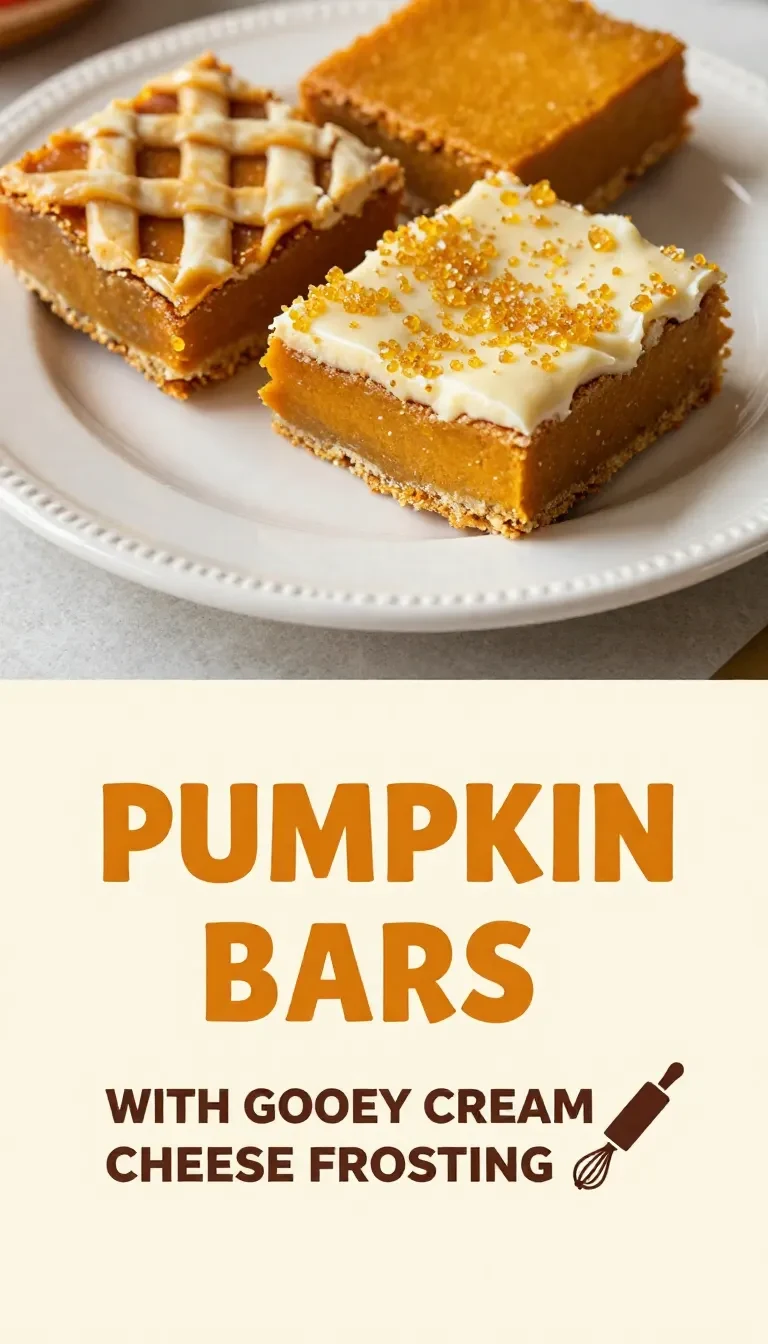
Delicious pumpkin bars topped with creamy cream cheese frosting on a rustic wooden table

Loved this recipe? Save it to your favorite Pinterest board so you can easily find it later! ✨

This post contains affiliate links. As an Amazon Associate, I earn from qualifying purchases. This comes at no extra cost to you.

Oreo fall treats are a delightful combination of pumpkin spice Oreo cookies, cream cheese, pumpkin puree, and spices, dipped in creamy white chocolate. This no-bake recipe is ready in just 50 minutes and yields 24 bite-sized desserts. Each Pumpkin Oreo Ball is a sweet, spiced treat, perfect for fall gatherings or a cozy snack.

The first time I made these, I was testing fall recipes for a family get-together and was blown away by how quickly they disappeared. Ever since, they’ve been a go-to treat in my kitchen whenever pumpkin season comes around.

Table of Contents

Why make these pumpkin Oreo balls?

Pumpkin Oreo Balls are the ultimate fall dessert, combining the flavors of pumpkin spice and Oreos into a single, indulgent bite. Not only are they easy to prepare, but their creamy texture and white chocolate coating make them a standout treat at autumn gatherings.

  • **No-bake delight**: Skip the oven; these are refrigerator-set and stress-free to make.
  • **Perfectly portioned**: Bite-sized for easy snacking, whether for parties or as a personal treat.
  • **Customizable decorations**: Add sprinkles, crushed Oreos, or little designs to suit any fall event or theme.
  • **Kiddie-approved**: Fun to make with kids, and they’ll love decorating their own mini masterpieces.

What ingredients do you need for Pumpkin Oreo Balls?

This recipe requires just a few simple ingredients that you can easily find at your local store. They come together to create the perfect blend of creamy, spiced, and sweet flavors.

The pumpkin spice Oreo cookies are the star ingredient here, providing a warm seasonal flavor that ties the whole treat together.

How do you make Pumpkin Oreo Balls step by step?

This easy, no-bake recipe comes together in just a few steps. Simply mix, roll, freeze, coat, and enjoy these perfectly spiced Pumpkin Oreo Balls!

Step 1 — Make Oreo crumbs

In a food processor, blend the pumpkin spice Oreo cookies until they are fine crumbs. This will serve as the base for your pumpkin mixture.

You might also enjoy our 4th of july oreo cream.

Step 2 — Mix ingredients

In a large mixing bowl, combine the Oreo crumbs, softened cream cheese, pumpkin puree, vanilla extract, and pumpkin pie spice. Mix everything until the texture is smooth and evenly combined.

Step 3 — Shape into balls

Using your hands, roll the mixture into small balls, about 1 inch in diameter. Place the balls on a baking sheet lined with parchment paper.

Step 4 — Freeze the balls

Put the tray of Oreo balls in the freezer for about 30 minutes. This step helps the balls firm up for easy dipping.

Step 5 — Melt the white chocolate

While the balls are chilling, melt the white chocolate chips and coconut oil in a microwave-safe bowl. Heat in 30-second intervals, stirring in between until smooth and fully melted.

Cuisinart Food Processor 14-Cup

Kitchen ApplianceCuisinart Food Processor 14-Cup

Ideal for quickly blending the Oreo cookies into crumbs for your recipe.

View on Amazon →

Baking Sheet Set by USA Pan

Essential CookwareBaking Sheet Set by USA Pan

Durable and non-stick, perfect for baking and cooling your Pumpkin Oreo Balls.

View on Amazon →

For more ideas, check out our oreo balls.

Step 6 — Dip the balls

Once the balls are firm, dip each one into the melted white chocolate. Let any excess chocolate drip off and place the coated balls back on the parchment paper.

Step 7 — Decorate and chill

While the chocolate is still wet, sprinkle the balls with decorations like sprinkles or crushed Oreo cookies. Refrigerate them for at least 30 minutes to allow the chocolate to fully set.

Frequently Asked Questions About Pumpkin Oreo Balls

How long can you store Pumpkin Oreo Balls?

You can store these treats in an airtight container in the refrigerator for up to a week. For longer storage, freeze them for up to one month.

Do I need to use pumpkin spice Oreos?

To get the signature fall flavor, pumpkin spice Oreos are best. If unavailable, you can use regular Oreos and add extra pumpkin pie spice for a similar taste.

Looking for something similar? Try our 4th of july oreo balls.

Can I make this recipe ahead of time?

Yes, these treats can be made ahead of time. Just store them in the refrigerator until you’re ready to serve.

How do I prevent the white chocolate from clumping while melting?

Adding coconut oil while melting the white chocolate will help it achieve a smooth and glossy texture. Make sure to stir after each interval when microwaving.

Do I have to freeze the balls before coating them?

Yes, freezing helps the balls hold their shape and makes it easier to dip them in the melted white chocolate.

Can you make ingredient swaps for these treats?

If you need easy swaps, you can adjust the recipe without losing flavor. Here are a few ideas for substitutions.

  • Use gluten-free Oreos for a gluten-free version of this recipe.
  • Swap coconut oil with vegetable shortening if coconut flavor isn’t preferred.

What are some expert tips for making Pumpkin Oreo Balls?

  • **Chill your tools**: Keeping your hands and mixing tools cold prevents the mixture from sticking.
  • **Work in batches**: Only take small portions out of the freezer at a time for dipping.
  • **Use a fork for dipping**: A fork helps excess chocolate drip off evenly without smudging.

How do you store and serve Pumpkin Oreo Balls?

Store these Oreo Pumpkin Balls in an airtight container in your fridge for up to seven days. Stack them in layers separated by parchment paper to avoid sticking. For longer storage, freeze for up to one month.

When serving at parties, place them on a decorative platter or arrange them in mini cupcake liners for easy grabbing. They’re sure to be the centerpiece at any fall gathering!

Pumpkin Oreo Balls

Prep Time 30 minutes
Total Time 1 hour
Servings 24 servings
Calories 120
Delicious and easy-to-make Pumpkin Oreo Balls are a perfect treat for fall. These no-bake desserts combine the flavors of pumpkin and Oreo cookies, coated in white chocolate.

Equipment

  • food processor
  • mixing bowl
  • baking sheet
  • microwave-safe bowl
  • parchment paper

Ingredients

Instructions 

  • In a food processor, blend the pumpkin spice Oreo cookies until they are fine crumbs.
  • In a large mixing bowl, combine the Oreo crumbs, softened cream cheese, pumpkin puree, vanilla extract, and pumpkin pie spice. Mix until well combined and smooth.
  • Using your hands, roll the mixture into small balls, about 1 inch in diameter, and place them on a baking sheet lined with parchment paper.
  • Freeze the balls for about 30 minutes until they are firm.
  • While the balls are freezing, melt the white chocolate chips and coconut oil together in a microwave-safe bowl in 30-second intervals, stirring in between until smooth.
  • Once the balls are firm, dip each one into the melted white chocolate, letting any excess chocolate drip off.
  • Return the dipped balls to the parchment paper and sprinkle with decorations if desired.
  • Refrigerate the Oreo balls for at least 30 minutes to set the chocolate before serving.

Notes

For a fun twist, try using different flavored Oreos or adding nuts to the mixture.
Calories: 120kcal
Cost: $10
Course: Dessert
Cuisine: American
Keyword: No Bake, Oreo, pumpkin

Nutrition

Calories: 120kcal | Carbohydrates: 14g | Protein: 2g | Fat: 7g | Sodium: 50mg
A plate of pumpkin Oreo balls decorated with orange sprinkles

Loved this recipe? Save it to your favorite Pinterest board so you can easily find it later! ✨

This post contains affiliate links. As an Amazon Associate, I earn from qualifying purchases. This comes at no extra cost to you.

Vegan bake: What are Chewy Vegan Apple Pie Cookies?

Vegan bake is a dessert featuring plant-based ingredients like unsweetened applesauce, oats, and diced apples, baked to soft, chewy perfection. These Chewy Vegan Apple Pie Cookies are ready in just 27 minutes and combine the comforting flavors of cinnamon, nutmeg, and fresh apples. This small-batch recipe makes 12 cookies, perfect for snacks or dessert!

The aroma of warm apples and spices filling your kitchen is like a little slice of autumn joy. The first time I made these cookies, I couldn’t resist the nostalgia of my Southern roots and their love for all things apple. Let’s dive into making this delightful treat together.

Table of Contents

Why make these cookies?

Chewy Vegan Apple Pie Cookies bring the comforting taste of classic apple pie into a convenient cookie form. They’re ideal for anyone craving a nostalgic dessert that’s quick, guilt-free, and plant-based.

  • Wholesome ingredients: These cookies feature rolled oats, fresh apples, and coconut sugar, making them a feel-good treat.
  • Quick to prepare: With only 15 minutes of prep time, they’re perfect for busy weeknights.
  • Customizable options: Add walnuts for crunch or raisins for extra chewiness.
  • Perfect for any season: While great in autumn, these cookies can be enjoyed year-round with stored pantry staples.

What ingredients do you need for Chewy Vegan Apple Pie Cookies?

To make these vegan cookies, you’ll need a mix of pantry staples and fresh ingredients. Here’s the full list:

The unsweetened applesauce is key, adding natural moisture and sweetness while keeping things vegan. Don’t skip the cinnamon—it’s what brings these cookies their warm, apple pie-like charm!

How do you make Chewy Vegan Apple Pie Cookies step by step?

These cookies come together in a few simple steps. Here’s how to make them:

Step 1 — Preheat the oven

Preheat your oven to 350°F (175°C) and line a baking sheet with parchment paper to ensure the cookies don’t stick.

Step 2 — Mix the wet ingredients

In a large bowl, combine the applesauce, coconut sugar, maple syrup, melted coconut oil, and vanilla extract. Stir until fully blended.

Step 3 — Prepare the dry ingredients

In a separate bowl, whisk together the all-purpose flour, baking soda, ground cinnamon, ground nutmeg, and salt. Mix until evenly combined.

Step 4 — Combine wet and dry ingredients

Gradually add the dry ingredients to the wet mixture, stirring just until combined. Overmixing can make the cookies dense.

Step 5 — Add the final mix-ins

Fold in the rolled oats, diced apples, and raisins or walnuts (if using). This step distributes the chunky ingredients evenly.

Step 6 — Shape the cookies

Using a tablespoon, scoop the dough onto the parchment-lined baking sheet. Leave about 2 inches of space between each scoop to allow for spreading.

Step 7 — Bake the cookies

Bake for 10-12 minutes, or until the edges turn lightly golden and the centers are set. Let the cookies cool on the baking sheet for 5 minutes before transferring them to a wire rack to cool completely.

Frequently Asked Questions About Chewy Vegan Apple Pie Cookies

Can I make these cookies gluten-free?

Yes, substitute the all-purpose flour with a 1:1 gluten-free flour blend. Ensure the oats are certified gluten-free as well.

KitchenAid Artisan Stand Mixer

Kitchen ApplianceKitchenAid Artisan Stand Mixer

Makes mixing dough and batters effortless — a kitchen game-changer.

View on Amazon →

Baking Sheet Set

Essential CookwareBaking Sheet Set

Essential for baking cookies evenly — perfect for this recipe.

View on Amazon →

Do these cookies freeze well?

Absolutely! Place the baked cookies in an airtight container or freezer bag, and they’ll keep for up to 3 months in the freezer.

What type of apples work best?

Firmer apples like Granny Smith or Honeycrisp are ideal as they hold their shape during baking.

Can I use a sweetener substitute?

Yes, you can replace coconut sugar with brown sugar or reduce the maple syrup for less sweetness.

How long do these cookies last?

Stored in an airtight container at room temperature, they stay fresh for about 3-5 days.

Expert tips and pro shortcuts

  • Dice apples finely: This ensures they cook evenly and blend seamlessly into the cookies.
  • Chill the dough (optional): For a slightly firmer texture, refrigerate the dough for 15-20 minutes before baking.
  • Use a cookie scoop: It keeps your cookies uniform in size, ensuring even baking.

How to store and reheat your cookies

Store these cookies in an airtight container at room temperature for up to 5 days. For extended storage, freeze them in a single layer, then transfer to a freezer-safe bag for up to 3 months.

To reheat, pop a cookie in the microwave for 10-15 seconds or warm them in a 300°F (150°C) oven for 5 minutes for that freshly baked feel.

Serving ideas for these cookies

Pair these cookies with a warm beverage like spiced tea or mulled apple cider for a cozy treat. They’re also delightful alongside our easiest apple crisp (gluten-free and vegan) for a complete fall dessert spread!

Chewy Vegan Apple Pie Cookies

Prep Time 15 minutes
Cook Time 12 minutes
Total Time 27 minutes
Servings 12 servings
Calories 150
These chewy vegan apple pie cookies are a delightful treat, combining the flavors of apples and spices in a wholesome, plant-based cookie.

Equipment

  • mixing bowl
  • whisk
  • baking sheet
  • oven
  • parchment paper

Ingredients

Instructions 

  • Preheat your oven to 350°F (175°C) and line a baking sheet with parchment paper.
  • In a large mixing bowl, combine the unsweetened applesauce, coconut sugar, maple syrup, melted coconut oil, and vanilla extract. Mix well until fully combined.
  • In a separate bowl, whisk together the all-purpose flour, baking soda, ground cinnamon, ground nutmeg, and salt.
  • Gradually add the dry ingredients to the wet ingredients, stirring until just combined.
  • Fold in the rolled oats, diced apples, and raisins or walnuts (if using) until evenly distributed.
  • Using a tablespoon, scoop the dough onto the prepared baking sheet, spacing them about 2 inches apart.
  • Bake in the preheated oven for 10-12 minutes, or until the edges are lightly golden and the centers are set.
  • Remove from the oven and let the cookies cool on the baking sheet for 5 minutes before transferring them to a wire rack to cool completely.

Notes

For added flavor, consider using different types of apples or adding a pinch of nutmeg.
Calories: 150kcal
Cost: $10
Course: Dessert
Cuisine: American
Keyword: vegan cookies

Nutrition

Calories: 150kcal | Carbohydrates: 25g | Protein: 2g | Fat: 5g | Sodium: 100mg
A plate of chewy vegan apple pie cookies with a sprinkle of cinnamon on top

Loved this recipe? Save it to your favorite Pinterest board so you can easily find it later! ✨
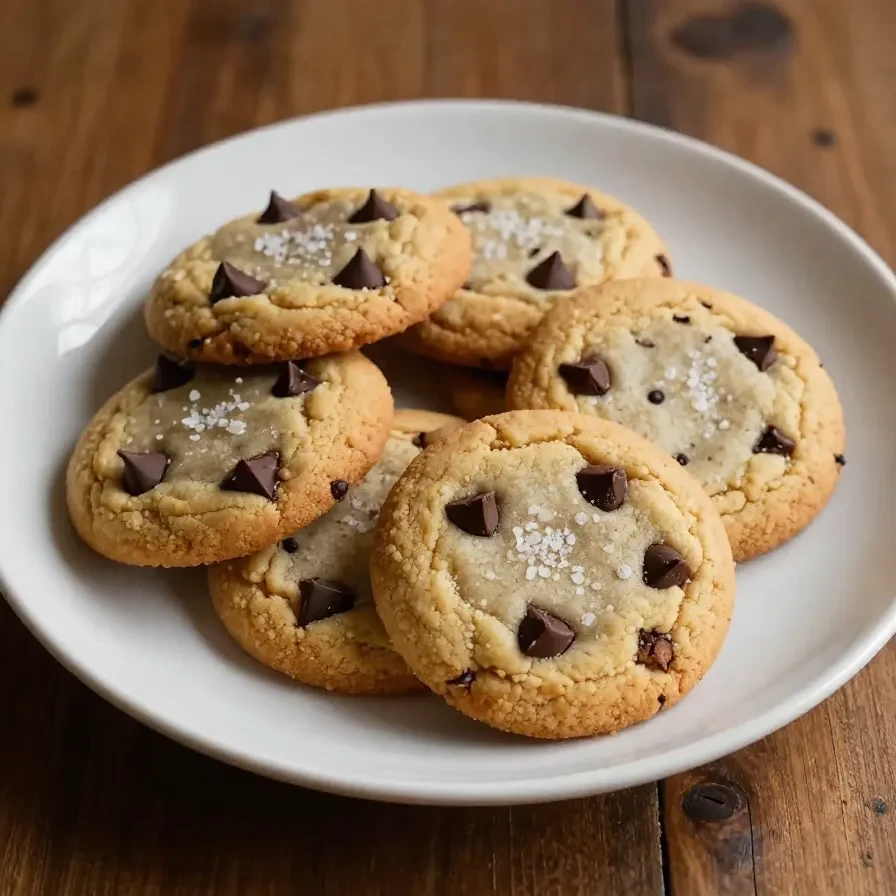
This post contains affiliate links. As an Amazon Associate, I earn from qualifying purchases. This comes at no extra cost to you.

Whole Wheat Carrot Cake Oatmeal Cookies

Healthy carrot desserts are soft, chewy treats made with whole wheat flour, grated carrots, oats, and warm spices, ready in just 30 minutes. This simple recipe yields 12 cookies that balance natural flavors with a wholesome texture. They’re the perfect combination of carrot cake and oatmeal cookies, creating a nutritious snack or dessert that feels indulgent yet guilt-free. I first made these when I wanted something that reminded me of carrot cake but could fit into a busy weekday routine, and they’ve been a hit ever since.

Table of Contents

Why make these cookies?

Whole Wheat Carrot Cake Oatmeal Cookies are a healthier dessert option that doesn’t sacrifice flavor or texture. These cookies combine natural sweetness with wholesome ingredients for a delightful treat.

  • Perfect for busy days. These cookies only take 30 minutes from start to finish, making them ideal for meal prep or last-minute baking.
  • Wholesome nutrition. Made with whole wheat flour, oats, and carrots, they’re packed with fiber and nutrients—not just empty calories.
  • Satisfies your sweet tooth. The combination of brown sugar, cinnamon, and nutmeg offers a cozy, spiced flavor that reminds you of a classic carrot cake.
  • Customizable. Add nuts or skip them, or adjust the sweetness to your liking with alternative sweeteners.

What ingredients do you need for Whole Wheat Carrot Cake Oatmeal Cookies?

These cookies require simple, wholesome ingredients that you likely already have in your pantry. The mix of oats, whole wheat flour, and carrots creates a perfect balance of taste and health.

Carrots are the star ingredient here, providing natural sweetness and moisture. Whole wheat flour and oats add fiber, making these cookies both satisfying and nutritious.

How do you make Whole Wheat Carrot Cake Oatmeal Cookies step by step?

Making these cookies is simple and straightforward, with minimal prep and cleanup. Follow these easy steps for perfect results every time.

Step 1 — Preheat the oven

Preheat your oven to 350°F (175°C) and line a baking sheet with parchment paper.

Step 2 — Mix the dry ingredients

In a large bowl, combine the whole wheat flour, rolled oats, baking soda, cinnamon, nutmeg, and salt. Mix thoroughly to distribute the ingredients evenly.

You might also enjoy our wholesome indulgence: irresistible whole wheat.

Step 3 — Prepare the wet mixture

In another bowl, whisk together the brown sugar, granulated sugar, applesauce, vegetable oil, and vanilla extract until smooth and well-combined.

Step 4 — Combine wet and dry ingredients

Gradually add the wet ingredients to the dry ingredients, stirring until just combined to avoid overmixing.

Step 5 — Incorporate the carrots and extras

Fold in the grated carrots, raisins, and chopped nuts (if using) for added texture and flavor.

KitchenAid Artisan Stand Mixer

Kitchen ApplianceKitchenAid Artisan Stand Mixer

Makes mixing dough and batters effortless — a kitchen game-changer.

View on Amazon →

Nordic Ware Natural Aluminum Commercial Baker's Half Sheet

Essential CookwareNordic Ware Natural Aluminum Commercial Baker’s Half Sheet

Durable and versatile baking sheet perfect for cookies and more.

View on Amazon →

Step 6 — Form the cookies

Drop tablespoons of the cookie dough onto the prepared baking sheet, spacing them about 2 inches apart to allow for spreading.

For more ideas, check out our the best ever moist classic.

Step 7 — Bake and cool

Bake for 12-15 minutes, or until the edges are lightly golden. Allow the cookies to cool on the baking sheet for a few minutes before transferring them to a wire rack to cool completely.

Frequently Asked Questions About Whole Wheat Carrot Cake Oatmeal Cookies

Can I use quick oats instead of rolled oats?

Yes, you can use quick oats, but the texture may be softer and less chewy than with rolled oats.

How should I store these cookies to keep them fresh?

Store the cookies in an airtight container at room temperature for up to 3 days, or refrigerate for up to a week.

Are these cookies suitable for freezing?

Yes, you can freeze these cookies for up to 3 months. Simply thaw at room temperature before enjoying.

Looking for something similar? Try our moist homemade carrot cake recipe.

Can I replace the granulated sugar with a sugar-free alternative?

Yes, you can use a sugar-free substitute like stevia or erythritol, but it may slightly alter the taste and texture.

Do I have to add the nuts?

No, the nuts are optional and can be omitted if you prefer or if there are allergy concerns.

What are the best serving ideas for these cookies?

These cookies are perfect on their own, but pairing can elevate the experience. Here are some suggestions:

  • Enjoy with a cup of chai or spiced tea for complementary flavors.
  • Serve with Greek yogurt for a protein-packed snack.
  • Pair with a warm glass of almond milk for a cozy treat.
  • Crush and sprinkle over vanilla ice cream for a fun twist on dessert.

What easy ingredient swaps can you make?

If you’re out of a particular ingredient, don’t worry! Here are some easy swaps:

  • Replace the vegetable oil with melted coconut oil for a slight tropical flavor.
  • Substitute raisins with dried cranberries or chopped dates for a different fruity kick.
  • Use almond flour instead of whole wheat flour for a gluten-free option, though the texture may be a bit more delicate.

Common mistakes to avoid when making these cookies

To ensure success, steer clear of these common pitfalls:

  • Overmixing the dough. This can lead to tough cookies, so mix just until combined.
  • Skipping the parchment paper. Without it, the cookies may stick to the baking sheet.
  • Using pre-shredded carrots. Freshly grated carrots provide better moisture and texture for the cookies.

Whole Wheat Carrot Cake Oatmeal Cookies

Prep Time 15 minutes
Cook Time 15 minutes
Total Time 30 minutes
Servings 24 servings
Calories 120
These wholesome cookies combine the goodness of whole wheat flour, oats, and carrots for a delicious treat.

Equipment

  • mixing bowl
  • whisk
  • baking sheet
  • oven
  • parchment paper

Ingredients

Instructions 

  • Preheat your oven to 350°F (175°C) and line a baking sheet with parchment paper.
  • In a large bowl, combine the whole wheat flour, rolled oats, baking soda, cinnamon, nutmeg, and salt. Mix well.
  • In another bowl, whisk together the brown sugar, granulated sugar, applesauce, vegetable oil, and vanilla extract until smooth.
  • Gradually add the wet ingredients to the dry ingredients, stirring until just combined.
  • Fold in the grated carrots, raisins, and nuts if using.
  • Drop tablespoons of the cookie dough onto the prepared baking sheet, spacing them about 2 inches apart.
  • Bake for 12-15 minutes or until the edges are lightly golden. Allow the cookies to cool on the baking sheet for a few minutes before transferring them to a wire rack to cool completely.

Notes

You can substitute the nuts with chocolate chips for a different flavor.
Calories: 120kcal
Cost: $10
Course: Dessert
Cuisine: American
Keyword: Cookies

Nutrition

Calories: 120kcal | Carbohydrates: 20g | Protein: 2g | Fat: 4g | Sodium: 100mg
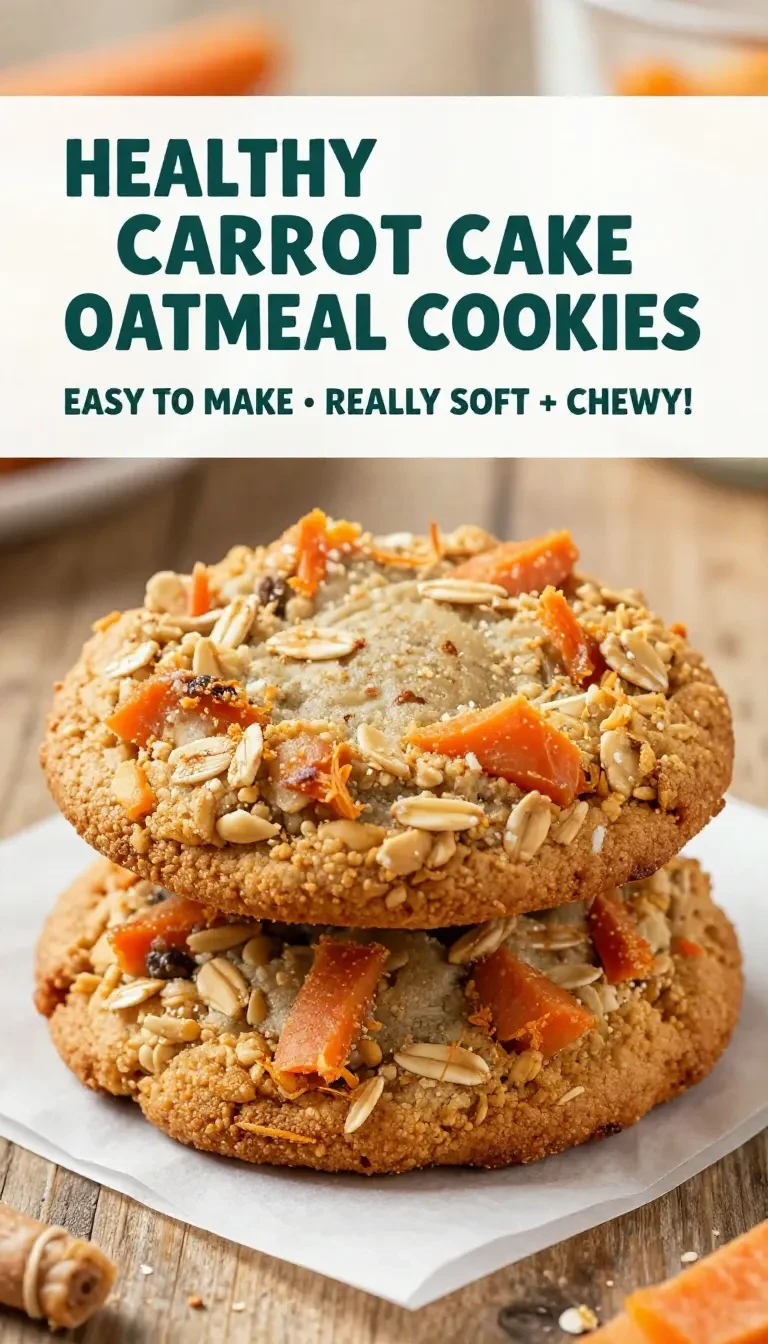
Freshly baked whole wheat carrot cake oatmeal cookies on a wooden table

Loved this recipe? Save it to your favorite Pinterest board so you can easily find it later! ✨
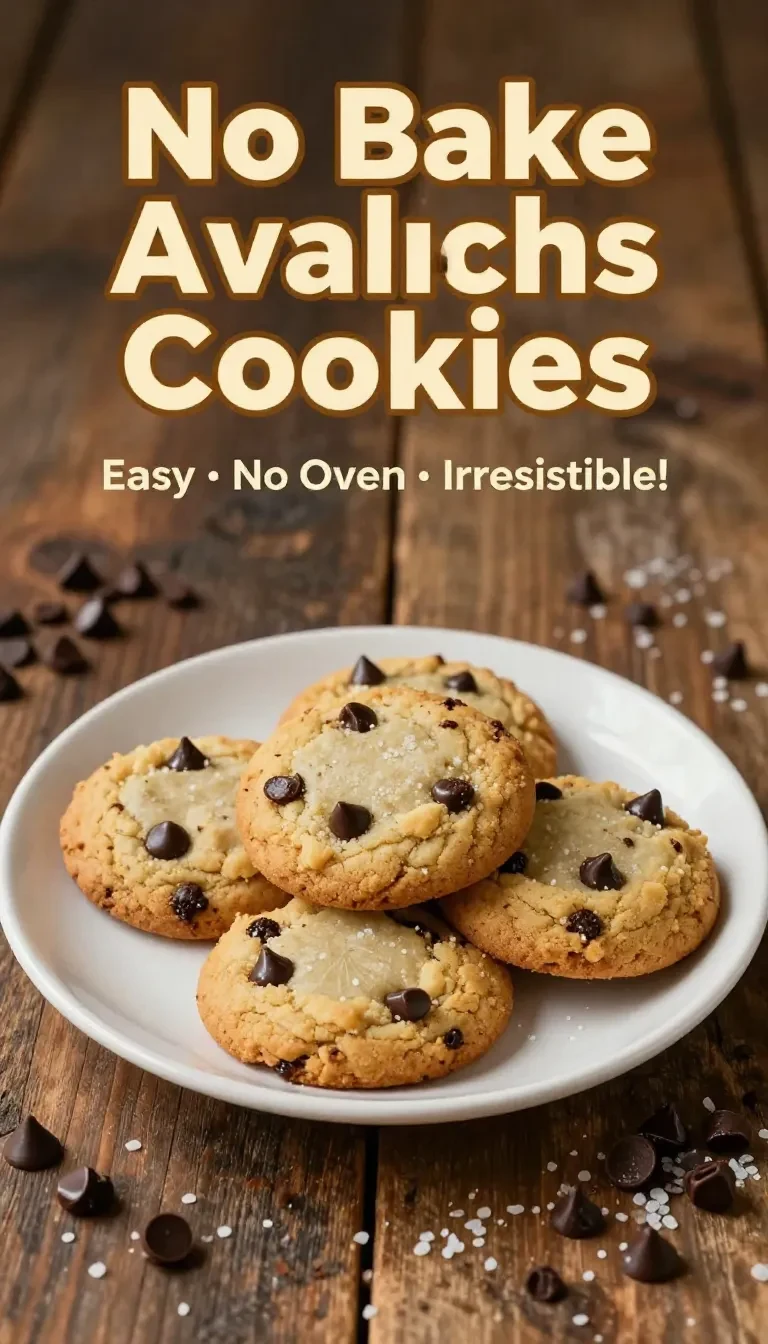
This post contains affiliate links. As an Amazon Associate, I earn from qualifying purchases. This comes at no extra cost to you.

Starbucks Pumpkin Cream Cheese Muffins Copycat Recipe

Pumpkin muffin starbucks is a moist, spiced pumpkin treat filled with a creamy cheese swirl, inspired by the famous Starbucks recipe. Made with canned pumpkin, warm spices, and a luscious cream cheese center, this recipe takes just 40 minutes from start to finish. Yielding 12 muffins, these are perfect for fall gatherings or cozy mornings.

As someone who always sneaked tastes of batter in my mom’s kitchen, these muffins remind me of the magic that happens when creamy and spicy flavors come together. Trust me, this one’s worth every moment in the kitchen!

Table of Contents

Why is Starbucks Pumpkin Cream Cheese Muffins Copycat Recipe so special?

This recipe combines the warm flavors of pumpkin and spices with a rich, creamy cheesecake filling, creating a bakery-style treat at home. Each bite gives you the perfect balance of sweetness and fall-inspired spice.

  • Authentic flavor: The use of cinnamon, nutmeg, ginger, and cloves perfectly mirrors Starbucks’ seasonal classic.
  • Homemade goodness: These muffins are fresher and less expensive than buying them at your local coffee shop.
  • Customizable: Add nuts or skip them, depending on your preference.
  • Quick to make: With only 15 minutes of prep time, they fit into any busy schedule.

What ingredients do you need for Starbucks Pumpkin Cream Cheese Muffins Copycat Recipe?

The ingredients for this recipe are simple and likely already in your pantry, making it easy to whip up these muffins anytime.

The canned pumpkin puree brings moisture and authentic pumpkin flavor, while the cream cheese filling adds that signature creamy swirl.

How do you make Starbucks Pumpkin Cream Cheese Muffins Copycat Recipe step by step?

This recipe is simple! You’ll mix the dry ingredients, combine the wet ones, and layer the batter with cream cheese filling to create the perfect swirl.

Step 1 — Prep your oven

Preheat your oven to 350°F (175°C) and line a muffin tin with paper liners.

You might also enjoy our swirled pumpkin cream cheese muffins.

Step 2 — Mix the dry ingredients

In a large bowl, whisk together the all-purpose flour, whole wheat flour, baking powder, baking soda, cinnamon, nutmeg, ginger, cloves, and salt.

Step 3 — Blend the wet ingredients

In another bowl, mix the granulated sugar, brown sugar, pumpkin puree, vegetable oil, eggs, and vanilla extract until well combined.

Step 4 — Combine the mixtures

Gradually add the dry ingredients to the wet ingredients, mixing until just combined. Do not overmix.

Step 5 — Prepare the cream cheese filling

In a separate bowl, beat together the softened cream cheese, powdered sugar, and vanilla extract until smooth.

KitchenAid Artisan Stand Mixer

Kitchen ApplianceKitchenAid Artisan Stand Mixer

Makes mixing dough and batters effortless — a kitchen game-changer

View on Amazon →

Pyrex Mixing Bowl Set

Essential CookwarePyrex Mixing Bowl Set

A versatile set of mixing bowls for all your baking needs.

View on Amazon →

For more ideas, check out our pumpkin cream cheese swirl muffins.

Step 6 — Layer the batter

Spoon a tablespoon of the muffin batter into each muffin cup, followed by a dollop of the cream cheese mixture. Then top with another tablespoon of batter to cover the cream cheese.

Step 7 — Add toppings and bake

If using, sprinkle chopped pecans or walnuts on top of each muffin. Bake in the preheated oven for 20-25 minutes or until a toothpick inserted into the center comes out clean. Allow the muffins to cool in the pan for 5 minutes before transferring them to a wire rack to cool completely.

Frequently Asked Questions About Starbucks Pumpkin Cream Cheese Muffins Copycat Recipe

Can I make these muffins gluten-free?

Yes, substitute the all-purpose and whole wheat flour with a 1:1 gluten-free baking blend for best results.

How should I store these muffins?

Store them in an airtight container in the refrigerator for up to 5 days. Let them come to room temperature before serving.

Looking for something similar? Try our pumpkin cream cheese muffins.

Can I freeze these muffins?

Absolutely! Place cooled muffins in a freezer-safe container or bag and freeze for up to 3 months.

Do I have to use the nuts?

No, the nuts are optional! Skip them if you prefer a nut-free version.

What should I do if my cream cheese sinks?

Avoid overloading the cream cheese filling. Ensure it’s a small dollop in the center and not too heavy.

What pairs well with Starbucks Pumpkin Cream Cheese Muffins Copycat Recipe?

These muffins are delicious alongside a hot cup of coffee or tea. Pair them with:

  • A pumpkin spice latte for the ultimate fall combo.
  • Chamomile or herbal tea for a cozy evening snack.
  • A dollop of whipped cream for an indulgent dessert.
  • Fresh fruit to balance the sweetness.

Expert tips for making the best pumpkin cream cheese muffins

  • Do not overmix: Gently fold the wet and dry ingredients to keep the muffins light and fluffy.
  • Use softened cream cheese: This ensures a smooth filling without lumps.
  • Room temperature ingredients: Bring eggs and cream cheese to room temperature to help them mix evenly.
  • Don’t overfill: Leave a little space in your muffin liners to avoid overflowing while baking.

Starbucks Pumpkin Cream Cheese Muffins Copycat Recipe

Prep Time 15 minutes
Cook Time 25 minutes
Total Time 40 minutes
Servings 12 servings
Calories 250
Deliciously moist pumpkin muffins filled with a creamy cheese center, perfect for fall.

Equipment

  • mixing bowl
  • whisk
  • muffin tin
  • spatula
  • oven

Ingredients

Instructions 

  • Preheat your oven to 350°F (175°C) and line a muffin tin with paper liners.
  • In a large bowl, whisk together the all-purpose flour, whole wheat flour, baking powder, baking soda, spices (cinnamon, nutmeg, ginger, cloves), and salt.
  • In another bowl, mix the granulated sugar, brown sugar, pumpkin puree, vegetable oil, eggs, and vanilla extract until well combined.
  • Gradually add the dry ingredients to the wet ingredients, mixing until just combined. Do not overmix.
  • In a separate bowl, beat together the softened cream cheese, powdered sugar, and vanilla extract until smooth.
  • Spoon a tablespoon of the muffin batter into each muffin cup, followed by a dollop of the cream cheese mixture, then top with another tablespoon of batter to cover the cream cheese.
  • If using, sprinkle chopped pecans or walnuts on top of each muffin.
  • Bake in the preheated oven for 20-25 minutes or until a toothpick inserted into the center comes out clean.
  • Allow the muffins to cool in the pan for 5 minutes before transferring them to a wire rack to cool completely.

Notes

For a sweeter muffin, increase the sugar. You can also substitute the cream cheese with Greek yogurt for a lighter filling.
Calories: 250kcal
Cost: $15
Course: Breakfast
Cuisine: American
Keyword: pumpkin muffins

Nutrition

Calories: 250kcal | Carbohydrates: 38g | Protein: 4g | Fat: 10g | Sodium: 200mg
Delicious Starbucks-style pumpkin cream cheese muffins on a rustic wooden table

Loved this recipe? Save it to your favorite Pinterest board so you can easily find it later! ✨

This post contains affiliate links. As an Amazon Associate, I earn from qualifying purchases. This comes at no extra cost to you.

Easy cinnamon apple bread is a delightful baked treat featuring diced apples, ground cinnamon, and a touch of vanilla baked into a tender loaf. Made with simple ingredients like yogurt and butter, this recipe creates a moist, flavorful bread perfect for breakfast or snacking. Ready in just over an hour, this homemade apple bread loaf is easy to make and effortlessly comforting.

This bread reminds me of the crisp autumn afternoons I spent in Charleston, seeing the leaves turn golden and dreaming of warm, spiced desserts like this one. There’s something truly satisfying about folding fragrant cinnamon into a batter laced with juicy apples—it feels like home.

Table of Contents

Why is Moist and Tender Cinnamon Apple Bread so special?

Moist and Tender Cinnamon Apple Bread stands out for its irresistible combination of tender texture and the warm sweetness of apples and cinnamon. This recipe delivers consistent results, making it perfect for both novice and experienced bakers alike.

  • Perfectly Moist Texture: The use of yogurt and softened butter keeps this loaf incredibly soft and tender.
  • Balanced Sweetness: Diced apples and cinnamon-sugar topping create just the right level of sweetness without overwhelming the palate.
  • Simple Ingredients: This recipe relies on pantry staples, making it easy to whip up without a special grocery trip.
  • Versatility: Ideal whether you’re enjoying it freshly baked or toasted with butter, it pairs wonderfully with coffee, tea, or cider.

What ingredients do you need for Moist and Tender Cinnamon Apple Bread?

To craft this moist cinnamon apple bread, you’ll need simple ingredients that blend together into a flavorful loaf. Here’s the complete list:

The combination of plain yogurt and softened butter ensures a moist texture, while the diced apples bring bursts of fresh sweetness to every bite.

How do you make Moist and Tender Cinnamon Apple Bread step by step?

Making this cinnamon apple bread involves simple steps to create a loaf that’s packed with flavor. Follow this straightforward method:

Step 1 — Prep Your Oven and Pan

Preheat your oven to 350°F (175°C) and grease a 9×5 inch loaf pan. This ensures even baking and easy removal of the bread later.

You might also enjoy our pumpkin cinnamon swirl sourdough bread.

Step 2 — Combine Dry Ingredients

In a medium-sized bowl, whisk together the flour, baking powder, baking soda, ground cinnamon, and salt. Set this mixture aside.

Step 3 — Cream Butter and Sugar

In a large mixing bowl, cream the softened butter and granulated sugar until light and fluffy. This step adds air to the batter, contributing to a soft texture.

Step 4 — Incorporate Eggs and Vanilla

Mix in the eggs one at a time, ensuring each is well incorporated before adding the next. Stir in the vanilla extract for its delicious aroma.

Step 5 — Add Yogurt and Dry Mixture

Blend the plain yogurt into the wet mixture until smooth, then gradually add the dry ingredients. Mix until just combined to avoid overworking the batter.

For more ideas, check out our moist lemon zucchini bread with.

Step 6 — Fold in Apples and Nuts

Gently fold in the diced apples and optional chopped nuts, ensuring they’re evenly distributed throughout the batter.

KitchenAid Artisan Stand Mixer

Kitchen ApplianceKitchenAid Artisan Stand Mixer

Makes mixing dough and batters effortless — a kitchen game-changer.

View on Amazon →

Pyrex Mixing Bowl Set

Essential CookwarePyrex Mixing Bowl Set

Essential for mixing ingredients — durable and easy to clean.

View on Amazon →

Step 7 — Top and Bake

Pour the batter into your prepared loaf pan. Combine the brown sugar and ground cinnamon in a small bowl, then sprinkle this mixture over the top of the batter. Bake for 55-65 minutes, or until a toothpick inserted in the center comes out clean.

Step 8 — Cool and Serve

Allow the bread to cool in the pan for 10 minutes before transferring it to a wire rack to cool completely. Slice and enjoy!

Frequently Asked Questions About Moist and Tender Cinnamon Apple Bread

What are the best apples for cinnamon apple bread?

Granny Smith and Honeycrisp apples work best due to their balance of tartness and sweetness. They hold their shape well during baking.

Looking for something similar? Try our lemon zucchini bread with greek.

Can I freeze leftover cinnamon apple bread?

Yes, wrap the cooled bread tightly in plastic wrap and store in a freezer-safe bag for up to 3 months. Thaw at room temperature before serving.

Can I replace the yogurt with something else?

Yes, you can use sour cream as a substitute for yogurt. It offers a similar tangy flavor and ensures moisture in the bread.

How should I store this bread?

Store the bread in an airtight container at room temperature for up to 3 days. Refrigerate for extended freshness, lasting up to a week.

Why is my bread not rising properly?

Overmixing the batter or expired leavening agents like baking powder may cause the bread to lack rise. Fresh ingredients and gentle mixing help.

Moist and Tender Cinnamon Apple Bread

Prep Time 15 minutes
Cook Time 1 hour
Total Time 1 hour 15 minutes
Servings 8 servings
Calories 250
This delicious cinnamon apple bread is moist and tender, perfect for breakfast or a snack.

Equipment

  • mixing bowl
  • whisk
  • loaf pan
  • oven
  • measuring cups
  • spatula

Ingredients

Instructions 

  • Preheat your oven to 350°F (175°C) and grease a 9x5 inch loaf pan.
  • In a medium bowl, whisk together the flour, baking powder, baking soda, ground cinnamon, and salt. Set aside.
  • In a large mixing bowl, cream the softened butter and granulated sugar together until light and fluffy.
  • Add the eggs one at a time, mixing well after each addition. Stir in the vanilla extract.
  • Mix in the plain yogurt until fully incorporated.
  • Gradually add the dry ingredients to the wet ingredients, mixing until just combined. Do not overmix.
  • Fold in the diced apples and chopped nuts (if using).
  • In a small bowl, combine the brown sugar and ground cinnamon for the topping.
  • Pour the batter into the prepared loaf pan and sprinkle the cinnamon-sugar mixture on top.
  • Bake in the preheated oven for 55-65 minutes, or until a toothpick inserted into the center comes out clean.
  • Allow the bread to cool in the pan for 10 minutes before transferring it to a wire rack to cool completely.

Notes

For extra flavor, you can add a pinch of nutmeg or use different types of apples.
Calories: 250kcal
Cost: $10
Course: Breakfast
Cuisine: American
Keyword: apple bread

Nutrition

Calories: 250kcal | Carbohydrates: 40g | Protein: 3g | Fat: 10g | Sodium: 200mg
A freshly baked loaf of cinnamon apple bread with a golden crust and chunks of apple peeking through

Loved this recipe? Save it to your favorite Pinterest board so you can easily find it later! ✨

This post contains affiliate links. As an Amazon Associate, I earn from qualifying purchases. This comes at no extra cost to you.

Pumpkin Cream Cheese Swirl Muffins

Pumpkin muffin recipes with cream cheese is a delightful baked treat made with canned pumpkin puree, warm spices like cinnamon and nutmeg, and a creamy swirl of sweetened cream cheese. This recipe is quick to prepare, taking only 15 minutes of prep time and 20 minutes of baking, yielding 12 moist and tender muffins. The warm pumpkin flavors perfectly balance the rich cream cheese filling, making them a cozy fall favorite.

Baking these muffins reminded me of sneaking tastes of batter while helping in the kitchen back in Charleston—it’s a little indulgence that makes the results even sweeter.

Table of Contents

Why are Pumpkin Cream Cheese Swirl Muffins special?

Pumpkin Cream Cheese Swirl Muffins are special because they combine the hearty flavor of spiced pumpkin with the creamy richness of sweetened cream cheese. The result is a muffin that feels indulgent yet approachable for any skill level.

  • The swirl of cream cheese adds visual appeal and a burst of creamy texture to every bite.
  • Pumpkin puree keeps the muffins moist while imparting a warm, earthy flavor.
  • The balance of spices like cinnamon and nutmeg creates a nostalgic, fall-inspired taste.
  • The recipe is simple and uses pantry staples, making it accessible for everyday baking.

What ingredients do you need for Pumpkin Cream Cheese Swirl Muffins?

The key ingredients for Pumpkin Cream Cheese Swirl Muffins include a blend of dry and wet ingredients, along with a creamy filling. Here’s what you’ll need:

The pumpkin puree is what keeps the muffins moist and flavorful, while the cream cheese creates the signature swirl that sets these muffins apart.

How do you make Pumpkin Cream Cheese Swirl Muffins step by step?

Making Pumpkin Cream Cheese Swirl Muffins is a straightforward process that involves mixing the batter, preparing the cream cheese filling, and swirling them for a beautiful finish. Here’s how to do it:

Step 1 — Preheat Your Oven

Preheat your oven to 350°F (175°C) and line a muffin tin with paper liners. This will ensure the muffins bake evenly and come out cleanly.

You might also enjoy our swirled pumpkin cream cheese muffins.

Step 2 — Mix Dry Ingredients

In a large bowl, whisk together the flour, sugar, baking powder, baking soda, cinnamon, nutmeg, and salt. This helps evenly distribute the spices and leavening agents.

Step 3 — Combine Wet Ingredients

In another bowl, mix the pumpkin puree, vegetable oil, egg, and vanilla extract until well combined. This mixture will bind the batter together.

Step 4 — Make the Batter

Pour the pumpkin mixture into the dry ingredients and stir until just combined. Be careful not to overmix, as this can make the muffins dense.

Step 5 — Prepare Cream Cheese Swirl

In a separate bowl, beat the softened cream cheese with powdered sugar and the additional vanilla extract until smooth. This will be your creamy filling.

KitchenAid Artisan Stand Mixer

Kitchen ApplianceKitchenAid Artisan Stand Mixer

Makes mixing dough and batters effortless — a kitchen game-changer.

View on Amazon →

Wilton Easy-Flex Silicone Baking Mat

Essential CookwareWilton Easy-Flex Silicone Baking Mat

A non-stick surface for baking that ensures even heat distribution and easy cleanup.

View on Amazon →

For more ideas, check out our pumpkin cream cheese muffins.

Step 6 — Assemble Muffins

Spoon a tablespoon of muffin batter into each muffin cup, followed by a dollop of cream cheese mixture. Top with another tablespoon of batter and swirl gently with a toothpick to create a marble effect.

Step 7 — Bake and Cool

Bake in the preheated oven for 18-20 minutes, or until a toothpick inserted in the center comes out clean. Let the muffins cool in the tin for 5 minutes, then transfer to a wire rack to cool completely.

Frequently Asked Questions About Pumpkin Cream Cheese Swirl Muffins

Can I use fresh pumpkin instead of canned?

Yes, but make sure to puree it until smooth and strain any excess liquid for the best texture.

How do I prevent the cream cheese from sinking?

Keep the cream cheese mixture thick and add it in small dollops to create an even layer.

Looking for something similar? Try our soft pumpkin cookies with cream.

How long do these muffins stay fresh?

These muffins stay fresh for up to 3 days in an airtight container at room temperature or up to a week in the refrigerator.

Can I freeze Pumpkin Cream Cheese Swirl Muffins?

Yes, wrap them individually in plastic wrap and store in a freezer-safe bag for up to 3 months.

What to serve with Pumpkin Cream Cheese Swirl Muffins?

These muffins pair well with a warm cup of spiced chai or a creamy latte for a cozy breakfast. For an afternoon treat, serve them with a dollop of whipped cream and a sprinkle of cinnamon. They also complement savory dishes like a fall harvest soup for a well-rounded meal.

How to store and reheat Pumpkin Cream Cheese Swirl Muffins?

To store, place the muffins in an airtight container on the counter for up to 3 days or in the refrigerator for up to a week. For freezing, wrap each muffin in plastic wrap and place it in a freezer bag for up to 3 months.

To reheat, let frozen muffins thaw at room temperature, then warm them in the microwave for 15-20 seconds. Alternatively, you can heat them in an oven at 325°F for 5-10 minutes for a freshly baked feel.

Pumpkin Cream Cheese Swirl Muffins

Prep Time 15 minutes
Cook Time 20 minutes
Total Time 35 minutes
Servings 12 servings
Calories 180
Deliciously moist muffins swirled with a creamy pumpkin and cream cheese mixture, perfect for fall.

Equipment

  • mixing bowl
  • muffin tin
  • whisk
  • toothpick
  • oven

Ingredients

Instructions 

  • Preheat your oven to 350°F (175°C) and line a muffin tin with paper liners.
  • In a large bowl, whisk together the flour, sugar, baking powder, baking soda, cinnamon, nutmeg, and salt.
  • In another bowl, mix the pumpkin puree, vegetable oil, egg, and vanilla extract until well combined.
  • Pour the pumpkin mixture into the dry ingredients and stir until just combined; do not overmix.
  • In a separate bowl, beat the softened cream cheese with powdered sugar and additional vanilla extract until smooth.
  • Spoon a tablespoon of the muffin batter into each muffin cup, followed by a dollop of the cream cheese mixture. Top with another tablespoon of muffin batter and swirl gently with a toothpick to create a marble effect.
  • Bake in the preheated oven for 18-20 minutes, or until a toothpick inserted into the center comes out clean.
  • Allow the muffins to cool in the tin for 5 minutes before transferring to a wire rack to cool completely.

Notes

For a sweeter muffin, add more sugar to the batter.
Calories: 180kcal
Cost: $10
Course: Breakfast
Cuisine: American
Keyword: Muffins

Nutrition

Calories: 180kcal | Carbohydrates: 28g | Protein: 3g | Fat: 7g | Sodium: 150mg
Delicious pumpkin cream cheese swirl muffins on a wooden table

Loved this recipe? Save it to your favorite Pinterest board so you can easily find it later! ✨