Author

Emily

Browsing

Whimsical Wonders: Baking Shortbread Cookies Fit for Wonderland

Welcome back to my cozy corner of the internet, friends! Today, we’re diving into a delightful recipe that’s as enchanting as a storybook—shortbread cookies that are perfect for any occasion, but especially if you want to add a touch of whimsy to your holiday festivities. Whether you’re a seasoned baker or just stepping into the kitchen for the first time, these melt-in-your-mouth cookies are sure to charm everyone at your table. Let’s roll up our sleeves and embark on this sweet adventure together!

Why Shortbread Cookies?

Shortbread cookies have a rich history that dates back to Scotland, where they were often enjoyed during special occasions and holidays. The beauty of these cookies lies in their simplicity. With just a handful of ingredients—mainly butter, sugar, and flour—they come together to create a buttery, crumbly texture that is utterly irresistible. Plus, they’re incredibly versatile! You can dress them up with decorations, or enjoy them as they are, accompanied by a cup of tea or coffee. Is there anything more comforting? I think not!

Shortbread Cookie Recipe {& Alice in Wonderland Cookies}

A delicious, freshly baked shortbread cookie, showcasing its golden color and smooth surface in warm natural light.

Now, let’s get into the nitty-gritty of our recipe. Here’s what you’ll need to whip up these whimsical wonders:

  • Ingredients:
  • 1 cup unsalted butter, softened
  • 1/2 cup powdered sugar
  • 2 cups all-purpose flour
  • 1 cup cornstarch
  • 1 teaspoon vanilla extract (optional, but I highly recommend it for extra flavor!)

Steps:

  1. Preheat your oven to 350°F (175°C). Line a baking sheet with parchment paper. This will prevent the cookies from sticking and make clean-up a breeze!

  2. In a large mixing bowl, cream together the softened butter and powdered sugar until the mixture is light and fluffy. This step is crucial as it incorporates air into the dough, giving your cookies that delightful texture.

  3. Slowly add in the all-purpose flour and cornstarch, mixing until just combined. Be careful not to overwork the dough! It should be soft and slightly crumbly.

  4. If you’re using vanilla extract, stir it in now. The aroma will transport you straight to a cozy café in Wonderland!

  5. Turn the dough out onto a lightly floured surface and gently knead it a few times until it comes together. Roll it out to about 1/4-inch thickness.

  6. Using your favorite cookie cutters, cut out shapes and transfer them to the prepared baking sheet. If you want to add whimsy, consider using fun shapes like stars, hearts, or even little teacups!

  7. Bake for 10-12 minutes, or until the edges are just starting to turn golden. Keep an eye on them, as they can go from perfectly baked to overdone in a flash!

  8. Remove from the oven and let the cookies cool on the baking sheet for a few minutes before transferring them to a wire rack to cool completely.

Cookie Decorating Basics

Now that you have a batch of perfectly baked shortbread cookies, it’s time to channel your inner artist! Decorating cookies can be a fun way to express your creativity, especially when you think of the whimsical characters from Alice in Wonderland. Here are some basics to get you started:

Royal Icing

For decorating, royal icing is a fantastic choice as it dries hard and creates a smooth surface. Here’s a simple recipe:

  • Ingredients:
  • 2 egg whites (or 1/2 cup meringue powder mixed with 1/2 cup water)
  • 3-4 cups powdered sugar
  • 1 teaspoon lemon juice (optional)
  1. In a mixing bowl, combine egg whites and lemon juice. Gradually add the powdered sugar until you reach a thick, spreadable consistency.

  2. Divide the icing into bowls if you want to color them. Use gel food coloring for vibrant hues.

  3. Use piping bags with different tips to create intricate designs. Practice on parchment paper if you’re unsure at first!

Tips for Success

Here are some handy tips to ensure your shortbread cookies turn out perfectly:

  • Temperature Matters: Make sure your butter is softened but not melted. Room temperature butter will create a better texture.
  • Chill the Dough: If you have time, chill the dough for 30 minutes before rolling it out. This helps prevent the cookies from spreading too much while baking.
  • Don’t Rush the Cooling: Let the cookies cool completely before decorating. If they’re warm, your icing will melt!
  • Experiment with Flavors: Try adding lemon zest, almond extract, or even a hint of lavender for a unique twist.

Storage & Freezing

After enjoying your whimsical shortbread cookies, you might find yourself with some leftovers (if you’re lucky!). Here’s how to store and freeze them:

  • Room Temperature: Store your cookies in an airtight container at room temperature for up to a week. They’ll stay fresh and delicious!
  • Freezing: To freeze, place the cookies in a single layer in a freezer-safe container, separating layers with parchment paper. They can be frozen for up to 3 months. When you’re ready to enjoy them, simply thaw at room temperature.

FAQs

How to make shortbread cookies more flavorful?

Experiment with different extracts like almond or lemon, or mix in finely chopped nuts or chocolate chips for added texture and flavor.

Can I substitute the cornstarch?

If you don’t have cornstarch, you can replace it with an equal amount of all-purpose flour, though the texture may be slightly different.

What’s the best way to decorate cookies?

Using royal icing is a classic method, but don’t shy away from using colored sprinkles, edible glitter, or even chocolate drizzle for a fun touch!

Can I use margarine instead of butter?

You can, but the flavor and texture will differ. For the best results, stick with real butter!

Conclusion

And there you have it, my dear friends! With just a few simple ingredients and a sprinkle of creativity, you can create these enchanting shortbread cookies that are sure to bring smiles to the faces of your loved ones. Whether you’re celebrating a holiday, a special occasion, or just a cozy day at home, these cookies are the perfect treat. So gather your ingredients, invite some friends over, and let’s make some sweet memories in the kitchen together. Happy baking, and may your cookies always be delightful and whimsical!

As you embark on your baking journey, don’t forget to explore more recipes like my Pecan Snowball Cookies, or maybe you’d like to try your hand at Gingerbread Men Cookies for some decorating fun! The kitchen is a magical place, and I can’t wait to hear about your adventures. Until next time!

Shortbread Cookie Recipe {& Alice in Wonderland Cookies}

Prep Time 15 minutes
Cook Time 20 minutes
Total Time 35 minutes
Servings 24 cookies
Calories 150
Delight in these melt-in-your-mouth, buttery shortbread cookies inspired by Alice in Wonderland.

Ingredients

Dough

  • 1 cup butter (softened)
  • 2 cups cornstarch (for a tender texture)

Instructions 

  • Cream the butter until smooth.
  • Mix in the cornstarch until combined.
  • Roll out the dough and cut into shapes.
  • Bake at 350°F (175°C) for 20 minutes until golden.
  • Let cool before serving.

Notes

Chill the dough for easier handling.
Calories: 150kcal
Cost: $5
Course: Dessert
Cuisine: British
Keyword: butter

Nutrition

Calories: 150kcal | Carbohydrates: 15g | Protein: 2g | Fat: 10g | Sodium: 50mg

Loved this recipe? Save it to your favorite Pinterest board so you can easily find it later! It’s the perfect way to keep all your sweet ideas in one place. ✨

Eye-level image of a tempting shortbread cookie, highlighting its buttery texture and soft shadows against a blurred background.

Whisking Up Winter Cheer: Delightful Gingerbread Men Cookies to Decorate and Devour! ☃️🍪

Ah, the holiday season! A time of warmth, joy, and, of course, the delightful aroma of gingerbread wafting through the air. There’s something utterly enchanting about baking gingerbread cookies, and when it comes to festive cheer, nothing beats the classic Gingerbread Men Cookies. These adorable, spiced treats not only taste divine but also provide a canvas for your decorating creativity. Join me in creating these delightful cookies that are sure to warm hearts and homes this holiday season!

Why Gingerbread Cookies Are a Holiday Favorite

Gingerbread cookies are more than just a seasonal snack; they’re a cherished tradition that brings families together. The very act of mixing the dough, cutting out shapes, and decorating them is a celebration in itself. As a child, I remember the joy of rolling out the dough and the laughter that filled the kitchen as we tried to create the most whimsical gingerbread men. The sweet, spicy scent of ginger and cinnamon in the oven was like an invitation to gather around the table, sharing stories and sweets.

These cookies come with a rich history, dating back centuries, where they were crafted for good luck and to mark the festive season. Whether you’re baking them for a holiday party, gifting them to friends, or simply enjoying them with a cup of hot cocoa, these cookies will undoubtedly evoke memories and create new ones.

Key Ingredients for Perfect Gingerbread Cookies

A beautifully arranged plate of gingerbread men cookies, capturing their spiced texture and festive decorations.

The Gingerbread Dough

The magic of gingerbread cookies lies in their perfect blend of spices and textures. Here’s what you’ll need:

  • 3 cups all-purpose flour
  • 1 teaspoon baking soda
  • 1 tablespoon ground ginger
  • 1 tablespoon ground cinnamon
  • 1/2 teaspoon ground cloves
  • 1/4 teaspoon salt
  • 1/2 cup unsalted butter, softened
  • 1/2 cup brown sugar, packed
  • 1/2 cup molasses
  • 1 large egg
  • 1 teaspoon vanilla extract

The Icing for Decorating

To make your gingerbread men truly come alive, you’ll also need a simple icing mixture. A classic royal icing works wonders, as it sets beautifully and can be easily piped into decorative designs. Mix together:

  • 2 cups powdered sugar
  • 1 egg white (or 1 tablespoon meringue powder mixed with 2 tablespoons water)
  • 1 teaspoon vanilla extract

Step-by-Step: Crafting Your Gingerbread Cookies

1. Mixing the Dough

Let’s get our hands a bit floury! In a medium bowl, whisk together the all-purpose flour, baking soda, ginger, cinnamon, cloves, and salt. This fragrant mix is the foundation of your gingerbread men.

In a large mixing bowl, cream together the softened butter and brown sugar until smooth. The butter should be soft enough to blend seamlessly, creating a light and fluffy mixture. Add the molasses, egg, and vanilla extract, mixing until well combined. The molasses gives the cookies their characteristic deep flavor and color, while the vanilla adds a lovely aromatic touch.

2. Rolling and Cutting the Dough

Now, gradually add the dry ingredient mixture to the wet one, mixing until a dough forms. You’ll notice the dough is a bit sticky; that’s just perfect! Cover the dough with plastic wrap and refrigerate for at least 1 hour. This step is crucial as it allows the flavors to meld and makes the dough easier to work with.

3. Baking

Once your dough has chilled, preheat your oven to 350°F (175°C) and line your baking sheets with parchment paper. On a floured surface, roll out the dough to about 1/4-inch thickness. This is where the fun really begins! Use cookie cutters to cut out gingerbread men shapes and place them on the prepared baking sheets, leaving some space between each cookie to allow for spreading.

Bake for 8-10 minutes, or until the edges are firm and the centers are set. The aroma that fills your kitchen will be nothing short of heavenly! Remove from the oven and let them cool on the baking sheets for a few minutes before transferring them to a wire rack to cool completely.

4. Decorating with Icing

Once the cookies are completely cool, it’s time to unleash your inner artist! Prepare your icing by mixing the powdered sugar, egg white, and vanilla until smooth and thick but pipeable. Transfer the icing into a piping bag fitted with a small round tip. Now, decorate your gingerbread men with icing, adding candies for buttons, eyes, and whatever whimsical designs you can think of. Allow the icing to set for about 30 minutes to harden before serving.

Bonus Tips for Gingerbread Cookie Success

Here are some extra tips to ensure your gingerbread cookie experience is delightful:

  • Chill the dough: Don’t skip the chilling step! It helps the cookies maintain their shape and prevents excessive spreading during baking.
  • Use quality spices: Fresh spices can make a world of difference in flavor. If your spices have been sitting in the pantry for a while, consider replacing them for a more aromatic experience.
  • Experiment with shapes: While gingerbread men are classic, feel free to use different cookie cutters! Stars, trees, or even festive animals can add a fun twist.
  • Store properly: Keep your cookies in an airtight container to maintain their freshness. They can last for up to a week at room temperature.

Storage & Freezing

If you want to prepare your cookies in advance, you can freeze the dough! Simply wrap it tightly in plastic wrap and place it in an airtight container. The dough can be frozen for up to three months. When you’re ready to bake, let it thaw in the refrigerator overnight before rolling it out.

Baked cookies can also be frozen. Layer them between parchment paper in an airtight container and freeze for up to three months. Just remember to let them cool completely before freezing!

Variations and Substitutions

Want to make this recipe your own? Here are some variations and substitutions you can try:

  • Vegan Gingerbread Cookies: Substitute the butter with coconut oil and the egg with a flaxseed meal or applesauce for a vegan-friendly version.
  • Gluten-Free Option: Use a gluten-free flour blend instead of all-purpose flour. Make sure to check that the baking soda is gluten-free as well.
  • Spice Variations: Feel free to add other spices like nutmeg or cardamom for a unique flavor profile. Experimenting is part of the fun!

FAQs

Can I make the dough ahead of time?

Absolutely! You can prepare the dough a few days in advance and keep it refrigerated until you’re ready to bake.

What’s the best way to decorate gingerbread cookies?

The best way to decorate is to let your creativity shine! Use a piping bag for fine details and add colorful sprinkles or candies for a festive touch.

How can I ensure my cookies don’t spread too much while baking?

Make sure to chill the dough thoroughly and keep your baking sheets cold. If you notice they spread too much, consider adding a bit more flour to the dough next time.

Wrapping Up

Baking gingerbread men cookies is not just about creating delicious treats; it’s about making memories and sharing joy with loved ones. Whether you’re decorating with your family, gifting them to friends, or simply enjoying them with a hot cup of tea, these cookies are sure to bring warmth and happiness to your home. So roll up your sleeves, gather your loved ones, and let’s create some delightful Classic Gingerbread Men Cookies that will spread cheer this holiday season! Don’t forget to check out my other holiday recipes, like my Gingerbread Crinkle Cookies and Gingerbread Cheesecake Cookies for more festive fun. Happy baking!”} } } }

Classic Gingerbread Men Cookies – Adorable, Spiced & Perfect for Decorating! ☃️🍪

Prep Time 20 minutes
Cook Time 10 minutes
Total Time 30 minutes
Servings 24 cookies
Calories 150
Enjoy these festive gingerbread men cookies that are perfect for decorating and sharing during the holidays.

Ingredients

Dough

  • 3 cups all-purpose flour
  • 1 teaspoon baking soda
  • 1 tablespoon ground ginger
  • 1 tablespoon ground cinnamon
  • 1/2 teaspoon ground cloves
  • 1/4 teaspoon salt
  • 1/2 cup unsalted butter, softened
  • 1/2 cup brown sugar, packed
  • 1/2 cup molasses
  • 1 large egg
  • 1 teaspoon vanilla extract

Instructions 

  • Mix dry ingredients in a bowl.
  • Cream butter and sugar until smooth.
  • Add molasses, egg, vanilla; mix well.
  • Gradually add dry ingredients; form dough.
  • Refrigerate dough for 1 hour.
  • Roll out, cut shapes, bake at 350°F (175°C) for 8-10 mins.

Notes

Chill the dough thoroughly for best results.
Calories: 150kcal
Cost: $15
Course: Dessert
Cuisine: American
Keyword: gingerbread

Nutrition

Calories: 150kcal | Carbohydrates: 25g | Protein: 2g | Fat: 6g | Sodium: 80mg

Loved this recipe? Save it to your favorite Pinterest board so you can easily find it later! It’s the perfect way to keep all your sweet ideas in one place. ✨

An eye-level view of gingerbread men cookies with a soft focus background, emphasizing their delightful shape and details.

Quick & Colorful: A Chicken Stir Fry Recipe to Brighten Your Weeknight

There’s something magical about a weeknight dinner that comes together in a flash, isn’t there? After a long day, the thought of a vibrant, delicious meal is enough to make anyone’s heart sing. Today, I’m thrilled to share my Quick & Colorful Chicken Stir Fry Recipe—a dish that’s as easy to make as it is fun to eat! This recipe is not only a feast for the eyes but also a great way to sneak in those colorful veggies we sometimes forget about. So, let’s roll up our sleeves and get cooking!

Why You’ll Love This Chicken Stir Fry

This dish is a true weeknight hero. It’s quick to whip up, colorful, and packed with flavor! Imagine tender pieces of chicken sizzling in a hot pan, surrounded by a rainbow of fresh vegetables. The garlic and ginger create an aromatic backdrop that will have your family flocking to the kitchen. Plus, it’s a fantastic way to use up those veggies languishing in your fridge. Let’s dive into the nitty-gritty of making this delightful dish.

Ingredients You’ll Need

Eye-level shot of a delicious chicken stir fry, showcasing glossy chicken and fresh veggies.
  • 1 pound chicken breast, sliced into thin strips
  • 2 tablespoons vegetable oil
  • 1 bell pepper, sliced (any color you love!)
  • 1 cup broccoli florets
  • 1 carrot, julienned
  • 1 cup snap peas
  • 3 cloves garlic, minced
  • 1 tablespoon fresh ginger, grated
  • 1/4 cup soy sauce
  • 1 tablespoon honey or maple syrup
  • 1 teaspoon cornstarch mixed with 2 tablespoons water (for thickening)
  • Cooked rice or noodles, for serving

How to Make This Quick & Colorful Chicken Stir Fry

Alright, let’s get into the cooking! This is where the magic happens. Follow these simple steps to create a dish that will brighten your weeknight dinner:

  1. Prepare Your Ingredients: Start by prepping all your veggies and chicken. Slice the chicken into thin strips to ensure even cooking. Chop the veggies into bite-sized pieces—this not only makes them easier to eat but also allows them to cook quickly.
  2. Heat the Oil: In a large skillet or wok, heat the vegetable oil over medium-high heat. You want it hot enough that the chicken sizzles when it hits the pan—this is key for that lovely sear!
  3. Cook the Chicken: Add the sliced chicken breast to the hot skillet. Stir-fry for about 5-7 minutes until it’s golden brown and cooked through. Don’t be afraid to let it sit a moment in the pan to develop a nice crust!
  4. Add Aromatics: Toss in the minced garlic and grated ginger, stirring constantly for about 30 seconds until fragrant. This will fill your kitchen with an irresistible aroma.
  5. Introduce the Veggies: Next, add the bell pepper, broccoli, carrot, and snap peas to the skillet. Stir everything together and cook for another 3-4 minutes. You want the veggies to be vibrant and crisp-tender—no mushy stir fry here!
  6. Create the Sauce: In a small bowl, mix together the soy sauce, honey (or maple syrup), and the cornstarch slurry. Pour this mixture over the chicken and veggies, stirring to coat everything evenly. Cook for another minute until the sauce thickens slightly and clings to the ingredients beautifully.
  7. Serve It Up: Remove the skillet from the heat and serve your colorful stir fry over a bed of fluffy rice or noodles. Garnish with sesame seeds or sliced green onions if you’re feeling fancy!

Tips for the Perfect Stir Fry

  • Prep Ahead: For a super quick dinner, chop your veggies and chicken ahead of time. Store them in the fridge until you’re ready to cook!
  • High Heat is Key: Make sure your pan is hot before adding the chicken. This will help achieve that coveted stir-fry texture.
  • Don’t Crowd the Pan: If you have a lot of ingredients, consider cooking them in batches. Crowding the pan can lead to steaming instead of stir-frying.

Variations to Try

This recipe is incredibly versatile! Here are a few fun variations to keep things exciting:

  • Protein Options: Swap out the chicken for beef, shrimp, or tofu for a different protein kick.
  • Veggie Swap: Use any veggies you have on hand—zucchini, asparagus, or even mushrooms work beautifully!
  • Spice It Up: For a little heat, add some red pepper flakes or a splash of sriracha to the sauce.

Substitutions You Can Make

Cooking should be fun and adaptable! Here are some substitutions you might consider:

  • Soy Sauce: If you’re looking for a gluten-free option, tamari works great as a substitute.
  • Honey: Maple syrup or agave nectar is a fantastic alternative for a vegan version.
  • Vegetable Oil: Feel free to use olive oil, sesame oil, or even coconut oil for cooking.

Equipment You’ll Need

To make your stir fry, you’ll want to have these essentials on hand:

  • A large skillet or wok for cooking
  • A sharp knife and cutting board for prepping ingredients
  • A spatula or wooden spoon for stirring
  • A small bowl for mixing the sauce

Storage & Freezing Tips

Got leftovers? No problem! Here’s how to store and reheat your delicious stir fry:

  • Refrigerator: Store any leftover stir fry in an airtight container in the refrigerator for up to 3 days.
  • Freezing: You can freeze the stir fry for up to 2 months. Just make sure to cool it completely before transferring it to a freezer-safe container.
  • Reheating: Reheat in a skillet over medium heat until warmed through. If it seems dry, add a splash of water or soy sauce to bring it back to life!

FAQs About Chicken Stir Fry

Can I make this stir fry without soy sauce?

Absolutely! You can substitute the soy sauce with coconut aminos or a homemade sauce using broth and spices.

What can I serve with stir fry?

This dish pairs beautifully with steamed rice, noodles, or even quinoa for a healthy twist. Feel free to add some fresh herbs or chopped nuts for extra flavor!

How do I make it more saucy?

If you prefer a saucier stir fry, simply double the sauce ingredients and adjust to your liking! Just remember to cook it a little longer to thicken.

Conclusion: Let’s Create Memories Together!

Cooking is not just about making meals; it’s about creating memories and sharing joy with those you love. I hope this Quick & Colorful Chicken Stir Fry Recipe brings a little light to your weeknight dinners. Remember, cooking should be a delightful adventure filled with laughter, experimentation, and, most importantly, delicious food! So gather your ingredients, invite your loved ones into the kitchen, and let’s make some magic happen. Don’t forget to share your creations with me—I can’t wait to see what you whip up! Happy cooking, friends!

Classic Spaghetti Carbonara

Prep Time 10 minutes
Cook Time 15 minutes
Total Time 25 minutes
Servings 4 servings
Calories 550
A quick and creamy Italian pasta dish made with eggs, cheese, pancetta, and pepper.

Ingredients

Pasta

  • 400 grams spaghetti
  • 150 grams pancetta (diced)
  • 3 large eggs
  • 50 grams Parmesan cheese (grated)
  • 1 tsp black pepper (freshly ground)

Other

  • 1 tbsp olive oil

Instructions 

  • Cook spaghetti in boiling salted water until al dente.
  • Fry pancetta in olive oil until crispy.
  • Beat eggs with grated Parmesan and pepper.
  • Drain pasta and mix with pancetta and egg mixture off heat.
  • Serve immediately with extra cheese and pepper.

Notes

Use freshly grated Parmesan for best flavor.
Calories: 550kcal
Cost: $12
Course: Main Course
Cuisine: Italian
Keyword: Pasta

Nutrition

Calories: 550kcal | Carbohydrates: 70g | Protein: 20g | Fat: 20g | Sodium: 600mg

Loved this recipe? Save it to your favorite Pinterest board so you can easily find it later! It’s the perfect way to keep all your sweet ideas in one place. ✨

Detailed close-up of a stir fry featuring tender chicken pieces and assorted vegetables in a bowl.

Tiny Treats, Big Smiles: The Ultimate Mini Sugar Cookies Recipe

Welcome to Emily’s Must-Try Kitchen, where we embrace the delightful chaos of cooking and the joy of sharing good food with loved ones! Today, I’m thrilled to share a recipe that’s as sweet as it is simple: Mini Sugar Cookies. These adorable little bites are perfect for any occasion, whether it’s a festive holiday gathering or just a cozy afternoon at home. Let’s dive into the world of these tiny treats that promise to bring big smiles!

What Sets This Recipe Apart

These mini sugar cookies are not just your ordinary cookies; they’re a delightful blend of buttery goodness and a melt-in-your-mouth texture. The secret lies in the combination of unsalted butter and a touch of vanilla extract, creating a cookie that’s both rich and flavorful. Unlike traditional sugar cookies that can be a bit chewy, these little gems are crispy on the edges and soft in the center—perfect for nibbling! Plus, they’re incredibly versatile; you can dress them up with colorful sprinkles for a festive flair or keep them simple for a classic treat.

Key Ingredients

A plate of mini sugar cookies with colorful sprinkles, captured with soft natural light and blurred background.

Let’s gather our ingredients and get ready to make some magic in the kitchen! Here’s what you’ll need:

  • 1 cup unsalted butter, softened – The heart of our cookies, adding that rich, creamy flavor.
  • 1 cup granulated sugar – Sweetness is key, and this will also help create that lovely texture.
  • 1 large egg – Acts as a binding agent, keeping everything together.
  • 1 teaspoon vanilla extract – A dash of this will elevate our cookies to bakery-level deliciousness.
  • 2 1/2 cups all-purpose flour – The base of our dough, giving it structure.
  • 1 teaspoon baking powder – Helps our cookies rise and achieve that perfect softness.
  • 1/2 teaspoon salt – Balances the sweetness and enhances flavors.
  • Sprinkles or colored sugar (optional) – Because a little color makes everything better!

Visual Recipe Overview

Let’s take a moment to visualize the process of creating these delightful mini sugar cookies. Picture the creamy butter and sugar being whipped together into a fluffy cloud, the vibrant yellow of the egg blending in, and the soft, powdery flour gradually transforming into a smooth dough. As you roll the dough into tiny balls and sprinkle them with colorful sugar, you can almost hear the excitement in the kitchen! And finally, the mouthwatering aroma wafting through your home as they bake—pure bliss.

Make the Cookie Dough

Start by preheating your oven to 350°F (175°C). This step is crucial; we want our cookies to bake perfectly, so let’s make sure our oven is nice and warm! In a large mixing bowl, cream together the softened unsalted butter and granulated sugar until the mixture is light and fluffy. This should take about 2-3 minutes with an electric mixer. Don’t rush this step—the fluffier your butter and sugar mixture, the better your cookies will turn out!

Next, beat in the egg and vanilla extract until everything is well combined. The vanilla will fill your kitchen with a warm, inviting scent that makes you feel at home. In a separate bowl, whisk together the all-purpose flour, baking powder, and salt. Gradually add the dry ingredients to the wet ingredients, mixing until just combined. Be careful not to overmix; we want to keep that tender texture.

Roll in Sugar

Now comes the fun part! Scoop small amounts of dough—about 1 tablespoon each—and roll them into balls. You’ll find that this dough is wonderfully soft and easy to handle. If you’re feeling fancy, you can roll the balls in granulated sugar or sprinkles for a little extra sweetness and color. This step is optional, but trust me, your cookies will look even more inviting with a little sparkle!

Flatten

Place the dough balls on a baking sheet lined with parchment paper, spacing them about 2 inches apart. This will give them room to spread as they bake. To flatten the cookies, gently press down on each ball with the bottom of a glass or a cookie stamp. This is a great way to add a decorative touch, and it makes them look oh-so-cute!

Bake

Pop the baking sheet into your preheated oven and bake for 8-10 minutes, or until the edges are lightly golden. Keep an eye on them—every oven is different, and we don’t want to overbake these beauties! The moment you take them out, the delightful aroma will fill your home, making it hard to resist nibbling before they cool. Allow the cookies to cool on the baking sheet for a few minutes before transferring them to a wire rack to cool completely.

Storage and Freezing

Now that you have a batch of these scrumptious mini sugar cookies, it’s important to know how to store them properly. If you manage to have any leftovers (which is unlikely, but we can hope!), store the cookies in an airtight container at room temperature for up to 3 days. If you want to keep them longer, they can be refrigerated for up to 5 days or frozen for up to 2 months. Just make sure to layer them between parchment paper to prevent sticking!

Tips for Perfect Cookies

  • Chill the Dough: If the dough is too soft to handle, try chilling it in the refrigerator for about 30 minutes. This will make rolling easier and help the cookies retain their shape.
  • Experiment with Flavors: Feel free to substitute the vanilla extract with almond extract for a delicious twist. Almond-flavored cookies are a holiday favorite!
  • Get Creative with Toppings: Use colored sugar or sprinkles to match the occasion—red and green for Christmas, pastels for Easter, or vibrant colors for a birthday party!

Variations and Substitutions

One of the beautiful things about baking is that you can easily customize recipes to suit your taste or dietary needs. Here are some variations to consider:

  • Gluten-Free: Substitute the all-purpose flour with a gluten-free flour blend. Make sure it contains xanthan gum for the best texture.
  • Dairy-Free: Use a vegan butter substitute and a flax egg (1 tablespoon of ground flaxseed mixed with 3 tablespoons of water) in place of the egg.
  • Flavor Infusions: Add lemon zest or orange zest to the dough for a refreshing citrus twist.

Frequently Asked Questions (FAQs)

How do I make these cookies chewy instead of crispy?

To achieve a chewier texture, you can experiment with adding an extra egg yolk or reducing the baking time slightly. This will keep them softer in the center!

Can I use margarine instead of butter?

Yes, you can use margarine, but the flavor and texture may differ slightly. Unsalted butter is recommended for the best results.

What can I do if my dough is too crumbly?

If your dough seems too crumbly, try adding a teaspoon of milk or water, one teaspoon at a time, until it comes together.

Conclusion

And there you have it! A delightful recipe for Mini Sugar Cookies that’s sure to become a favorite in your home. These little treats are perfect for sharing with friends and family, spreading joy and sweetness wherever they go. Whether you’re making them for a holiday celebration or just because, I hope they bring big smiles to your loved ones’ faces. Thank you for joining me in the kitchen today! I can’t wait to hear how your baking adventure goes—don’t forget to share your cookie creations with me. Happy baking, and until next time, let’s keep spreading the joy of cooking together!

Mini Sugar Cookies

Prep Time 15 minutes
Cook Time 10 minutes
Total Time 25 minutes
Servings 24 cookies
Calories 80
Delight in these simple, sweet mini sugar cookies perfect for any occasion.

Ingredients

Dough

  • 1 cup unsalted butter, softened
  • 1 cup granulated sugar
  • 1 large egg
  • 1 teaspoon vanilla extract
  • 2.5 cups all-purpose flour
  • 1 teaspoon baking powder
  • 0.5 teaspoon salt
  • sprinkles or colored sugar sprinkles or colored sugar (optional) (for decoration)

Instructions 

  • Preheat oven to 350°F (175°C).
  • Cream butter and sugar until fluffy, then mix in egg and vanilla.
  • Whisk flour, baking powder, and salt; gradually add to wet mixture.
  • Form dough into small balls, place on baking sheet, and add sprinkles if desired.
  • Bake for 8-10 minutes until edges are golden. Cool before serving.

Notes

For best results, do not overbake.
Calories: 80kcal
Cost: $10
Course: Dessert
Keyword: sugar cookies

Nutrition

Calories: 80kcal | Carbohydrates: 10g | Protein: 1g | Fat: 4g | Sodium: 50mg

Loved this recipe? Save it to your favorite Pinterest board so you can easily find it later! It’s the perfect way to keep all your sweet ideas in one place. ✨

Delightful mini sugar cookies, perfectly baked and arranged, illuminated by warm, inviting light.

Introducing White Chocolate Peppermint Cookies

Ah, the holiday season! A magical time filled with twinkling lights, joyous gatherings, and the most delightful treats. Today, I’m thrilled to share a recipe that embodies all the warmth and festivity of this special time: White Chocolate Peppermint Cookies. These cookies are soft, chewy, and generously loaded with sweet white chocolate and refreshing bursts of peppermint. They are not just cookies; they are little bites of holiday cheer that will have your family and friends coming back for seconds (and thirds!).

Why You’ll Love These Cookies

Let’s be honest: cookies are a holiday staple, and every baker has their go-to recipe. But what makes these White Chocolate Peppermint Cookies so special? First, the combination of creamy white chocolate and crunchy peppermint creates a perfect harmony of flavors. Each bite delivers a satisfying texture contrast that’s as enjoyable to eat as it is to share with loved ones.

Moreover, baking these cookies fills your home with the irresistible aroma of sweet vanilla and mint, instantly putting everyone in the holiday spirit. So, grab your mixing bowl, and let’s get started on this festive journey!

Gather Your Ingredients

Detailed shot highlighting the various components of Cloudflare Services, lit softly.

Before we dive into the baking, let’s make sure you have everything you need. Here’s what you’ll need to whip up these delicious cookies:

  • 2 1/4 cups all-purpose flour
  • 1 teaspoon baking soda
  • 1/2 teaspoon salt
  • 1 cup unsalted butter, softened
  • 3/4 cup granulated sugar
  • 3/4 cup packed brown sugar
  • 1 teaspoon vanilla extract
  • 2 large eggs
  • 1 cup white chocolate chips
  • 1/2 cup crushed peppermint candies
  • Optional: additional crushed peppermint for garnish

Let’s Make White Chocolate Peppermint Cookies!

Now that we have our ingredients lined up, it’s time to get into the kitchen. Just imagine the wonderful scents wafting through your home as these cookies bake. Ready? Let’s do this!

Step-by-Step Instructions

  1. Preheat the Oven: First, preheat your oven to 350°F (175°C). This is an essential step to ensure your cookies bake evenly.
  2. Mix the Dry Ingredients: In a medium bowl, whisk together the flour, baking soda, and salt. Set it aside for later.
  3. Cream the Butter and Sugars: In a large mixing bowl, beat the softened butter, granulated sugar, and brown sugar together until the mixture is light and fluffy. This usually takes about 2-3 minutes with an electric mixer.
  4. Add Vanilla and Eggs: Mix in the vanilla extract, followed by the eggs, one at a time. Ensure everything is well combined.
  5. Combine the Wet and Dry Ingredients: Gradually add the flour mixture to the wet ingredients, mixing just until combined. Be careful not to overmix!
  6. Fold in the Goodies: Gently fold in the white chocolate chips and crushed peppermint candies. This is where the magic happens! Each cookie will be bursting with sweet and minty flavor.
  7. Shape the Cookies: Using a cookie scoop or a tablespoon, drop rounded balls of dough onto a baking sheet lined with parchment paper, spacing them about 2 inches apart. If you want to be extra festive, press a few extra crushed peppermint candies on top of each cookie.
  8. Bake: Pop the cookies in the oven and bake for 10-12 minutes, or until the edges are lightly golden. The centers may look slightly underbaked, but they will continue to firm up as they cool.
  9. Cool and Enjoy: Let the cookies cool on the baking sheet for 5 minutes before transferring them to a wire rack to cool completely. Enjoy your warm cookies with a glass of milk or hot cocoa!

Tips for Baking the Perfect Cookies

To ensure your White Chocolate Peppermint Cookies turn out perfect every time, consider these handy tips:

  • Room Temperature Ingredients: Make sure your butter and eggs are at room temperature for a smoother batter.
  • Don’t Overmix: When combining the wet and dry ingredients, mix just until incorporated to keep the cookies tender.
  • Chill the Dough: If you have time, chill the cookie dough for about 30 minutes before baking. This helps the cookies maintain their shape and enhances the flavor.
  • Check for Doneness: Keep an eye on your cookies as they bake. Every oven is different, so yours may take slightly more or less time.

Storage & Freezing

Wondering how to keep your cookies fresh? Here are some storage tips:

  • Room Temperature: Store cookies in an airtight container at room temperature for up to a week.
  • Refrigeration: You can refrigerate them to prolong freshness, but they might lose some of their chewy texture.
  • Freezing: To freeze, place the cooled cookies in a freezer-safe container for up to 3 months. Thaw them at room temperature when you’re ready to enjoy.
  • Dough Freezing: You can also freeze cookie dough! Roll it into balls and freeze them on a baking sheet before transferring to a ziplock bag. Whenever you’re in the mood for fresh cookies, just bake them straight from the freezer, adding a couple of extra minutes to the baking time.

FAQs About White Chocolate Peppermint Cookies

Got questions? Here are some answers to common queries:

  • Can I substitute white chocolate chips? Absolutely! You can use semi-sweet chocolate chips for a richer flavor or even dark chocolate for a twist.
  • What if I don’t have peppermint candies? No worries! You can use peppermint extract for flavor instead; about 1 teaspoon should do the trick.
  • Are these cookies suitable for gifting? Yes! They make a wonderful gift, especially when packaged in a decorative box or jar.
  • How can I make these cookies less sweet? You can reduce the sugar slightly or use a combination of dark and white chocolate to balance the sweetness.

Other Fun Holiday Treats

If you love these cookies, you might also enjoy making other festive treats! Here are a few of my favorites:

Final Thoughts

Baking White Chocolate Peppermint Cookies is not just about creating delicious treats; it’s about sharing joy, love, and holiday spirit with your family and friends. As you gather around the kitchen, surrounded by the sweet scent of cookies baking, remember that the best memories are often made in the kitchen. So, roll up your sleeves, embrace the process, and have fun with it! I can’t wait to hear how your cookies turn out—happy baking, and may your holidays be filled with warmth and laughter!

Cloudflare Services

Prep Time 10 minutes
Cook Time 20 minutes
Total Time 30 minutes
Servings 1 service
Leverage Cloudflare's comprehensive suite of security and performance tools to protect and optimize your online presence.

Ingredients

Cloudflare Services

  • 1 package connectivity cloud
  • 1 plan enterprise plans
  • 1 plan small business plans
  • 1 plan individual plans
  • 1 unit workspace security
  • 1 unit zero trust network access
  • 1 unit secure web gateway
  • 1 unit email security
  • 1 unit cloud access security broker
  • 1 unit application security
  • 1 unit l7 ddos protection
  • 1 unit web application firewall
  • 1 unit api security
  • 1 unit bot management
  • 1 unit application performance
  • 1 unit cdn
  • 1 unit dns
  • 1 unit smart routing
  • 1 unit load balancing
  • 1 unit networking and sase
  • 1 unit l3/4 ddos protection
  • 1 unit naas / sd-wan
  • 1 unit firewall-as-a-service
  • 1 unit network interconnect
  • 1 unit domain registration
  • 1 unit 1.1.1.1 free dns resolver

Instructions 

  • Connect users, apps, clouds, and networks using Cloudflare's suite.
  • Enable security features to protect your assets from threats.
  • Optimize application performance and reliability with CDN and smart routing.
  • Implement bot management and DDoS protections in real time.
  • Build serverless and AI applications, and utilize object storage for data.

Notes

Ensure all security features are properly configured for optimal protection.
Cost: $15
Course: IT Services
Cuisine: Cloud
Keyword: Performance, Security

Loved this recipe? Save it to your favorite Pinterest board so you can easily find it later! It’s the perfect way to keep all your sweet ideas in one place. ✨

Eye-level view of Cloudflare Services ingredients with a blurred cozy background.

Ginger Spice Meets Sweet Elegance: Festive White Chocolate Dipped Cookies

When the holiday season rolls around, the air fills with the unmistakable aroma of spices—think cinnamon, nutmeg, and that zesty kick of ginger. It’s a time for warmth, laughter, and delicious treats that bring people together. Today, I’m thrilled to share a recipe that perfectly encapsulates the spirit of the season: White Chocolate Dipped Ginger Cookies. These festive delights combine the spiciness of ginger with the creamy sweetness of white chocolate, creating an irresistible treat that’s not just delicious but also visually stunning. So, grab your apron, and let’s embark on a delightful baking adventure!

Why You’ll Love This Recipe

These White Chocolate Dipped Ginger Cookies are more than just cookies; they’re a joyful celebration of holiday flavors. Here’s why you’ll adore them:

  • Irresistible Flavor: The combination of spicy ginger, rich molasses, and sweet white chocolate creates a flavor explosion that dances on your taste buds.
  • Easy to Make: With straightforward steps, this recipe is perfect for bakers of all levels—from novices to seasoned pros.
  • Perfect for Gifting: These cookies make delightful gifts for friends and family, beautifully packaged with a festive bow.
  • Customizable: Add your favorite toppings or tweak the ingredients to make these cookies uniquely yours!

Essential Ingredients for White Chocolate Dipped Ginger Cookies

Delicious ginger cookies coated in white chocolate, showcasing texture and warm lighting.

Before we dive into the baking process, let’s gather our ingredients. Here’s what you’ll need:

  • 1 cup unsalted butter, softened
  • 1 cup brown sugar, packed
  • 1/2 cup granulated sugar
  • 1/4 cup molasses
  • 1 large egg
  • 2 cups all-purpose flour
  • 2 teaspoons ground ginger
  • 1 teaspoon ground cinnamon
  • 1 teaspoon baking soda
  • 1/2 teaspoon salt
  • 1 cup white chocolate chips
  • Sprinkles or crushed nuts for decoration (optional)

How to Prepare the Perfect White Chocolate Dipped Ginger Cookies: Step-by-Step Guide

Prepping and Baking the Cookies

Let’s get those delicious cookies baking! Follow these simple steps:

  1. Preheat Your Oven: Start by preheating your oven to 350°F (175°C). This ensures that your cookies bake evenly and come out perfectly golden.
  2. Prepare Your Baking Sheet: Line a baking sheet with parchment paper. This not only prevents sticking but also makes cleanup a breeze.
  3. Cream the Butter and Sugars: In a large mixing bowl, cream together the softened butter, brown sugar, and granulated sugar until the mixture is light and fluffy. This step is crucial as it incorporates air into the dough, resulting in soft and chewy cookies.
  4. Add Molasses and Egg: Beat in the molasses and egg until well combined. The molasses adds depth and moisture, while the egg helps bind everything together.
  5. Mix the Dry Ingredients: In another bowl, whisk together the flour, ground ginger, ground cinnamon, baking soda, and salt. This mix of dry ingredients is essential for the perfect cookie texture.
  6. Combine Wet and Dry Ingredients: Gradually add the dry ingredients to the wet ingredients, mixing until just combined. Be careful not to overmix, as this can lead to tough cookies.
  7. Scoop and Shape the Dough: Using a tablespoon, scoop portions of dough onto the prepared baking sheet, spacing them about 2 inches apart. This allows room for spreading.
  8. Bake: Bake for 10-12 minutes or until the edges are lightly golden. The centers may look slightly underbaked, but they’ll firm up as they cool.
  9. Cool the Cookies: Allow the cookies to cool on the baking sheet for a few minutes before transferring them to a wire rack to cool completely. This helps them maintain their soft, chewy texture.

Melting White Chocolate for Dipping

Now that your cookies are cooled and ready, it’s time to prepare the white chocolate for dipping:

  1. Melt the White Chocolate: In a microwave-safe bowl, melt the white chocolate chips. Heat in 30-second intervals, stirring after each interval until smooth. Be patient—burnt chocolate is a baking disaster!
  2. Dip the Cookies: Once the chocolate is melted and smooth, dip each cooled cookie halfway into the white chocolate. Allow any excess chocolate to drip off before placing them on parchment paper to set.
  3. Add Decorations: If you like, sprinkle the dipped cookies with festive decorations like sprinkles or crushed nuts before the chocolate hardens. This adds a delightful crunch and festive flair!

Mastering White Chocolate Dipped Ginger Cookies: Tips and Variations

Tips for Success

Here are some tips to ensure your cookies turn out perfectly:

  • Chill the Dough: For better texture and to prevent spreading, consider chilling the dough for about 30 minutes before baking.
  • Quality Chocolate: Use high-quality white chocolate for dipping. It melts better and results in a smoother finish.
  • Mix Up the Spices: Feel free to experiment with spices! Adding a pinch of nutmeg or cardamom can elevate the flavor profile.

Variations to Try

Want to make these cookies your own? Here are some fun variations:

  • Vegan Version: Substitute the butter with coconut oil and the egg with a flax egg (1 tablespoon of flaxseed meal mixed with 3 tablespoons of water).
  • Gluten-Free: Use a gluten-free flour blend instead of all-purpose flour.
  • Flavor Infusions: Add a teaspoon of orange zest to the dough for a citrusy twist.

How to Store White Chocolate Dipped Ginger Cookies: Best Practices

It’s always a good idea to store your cookies properly to maintain their freshness. Here’s how:

  • Room Temperature: Store the cookies in an airtight container at room temperature for up to 5 days. This keeps them chewy and delicious.
  • Freezing: For longer storage, freeze the cookies in a single layer on a baking sheet, then transfer them to a freezer-safe bag for up to 3 months. Thaw at room temperature before enjoying.

FAQs: Frequently Asked Questions About White Chocolate Dipped Ginger Cookies

How do I make white chocolate dipped ginger cookies at home?

Follow the step-by-step guide above to create these delightful cookies from scratch. It’s as simple as mixing, baking, and dipping!

What type of white chocolate is best for dipping ginger cookies?

Opt for high-quality white chocolate that contains cocoa butter for a smooth melt and a beautiful finish.

How can I store white chocolate dipped ginger cookies to keep them fresh?

Store them in an airtight container at room temperature or freeze them for longer shelf life.

Can I add toppings to white chocolate dipped ginger cookies?

Absolutely! Get creative with toppings like crushed candy canes, chopped nuts, or festive sprinkles for added fun.

Are white chocolate dipped ginger cookies suitable for people with dietary restrictions?

Yes! With a few simple substitutions, you can make these cookies vegan or gluten-free.

Conclusion

These White Chocolate Dipped Ginger Cookies are sure to become a holiday favorite in your home. With their delightful balance of spice and sweetness, they’re perfect for sharing at parties, gifting to loved ones, or simply enjoying with a cup of tea on a cozy evening. So, gather your ingredients, roll up your sleeves, and let the magic of baking fill your kitchen with warmth and joy. Happy baking, friends! If you enjoyed this recipe, don’t forget to check out my other festive treats like gingerbread men cookies or gingerbread crinkle cookies for more holiday inspiration!

White Chocolate Dipped Ginger Cookies Recipe for Festive Treats

Prep Time 15 minutes
Cook Time 12 minutes
Total Time 27 minutes
Servings 24 cookies
Calories 150
Enjoy these delicious ginger cookies dipped in smooth white chocolate, perfect for festive occasions.

Ingredients

Dough

  • 1 cup unsalted butter, softened
  • 1 cup brown sugar, packed
  • 1/2 cup granulated sugar
  • 1/4 cup molasses
  • 1 large egg
  • 2 cups all-purpose flour
  • 2 teaspoons ground ginger
  • 1 teaspoon ground cinnamon
  • 1 teaspoon baking soda
  • 1/2 teaspoon salt
  • 1 cup white chocolate chips

Decoration

  • optional sprinkles or crushed nuts (for decoration)

Instructions 

  • Preheat oven to 350°F (175°C) and line baking sheet with parchment.
  • Cream butter, brown sugar, and granulated sugar until fluffy. Mix in molasses and egg.
  • Whisk flour, ginger, cinnamon, baking soda, and salt. Gradually add to wet mixture.
  • Shape dough into tablespoon-sized balls, place on sheet, and bake 10-12 minutes. Cool.
  • Melt white chocolate chips, dip cookies halfway, add decorations, and let set.

Notes

Ensure cookies are fully cooled before dipping in chocolate for best results.
Calories: 150kcal
Cost: $15
Course: Dessert
Cuisine: American
Keyword: Cookies, ginger, white chocolate

Nutrition

Calories: 150kcal | Carbohydrates: 20g | Protein: 2g | Fat: 8g | Sodium: 70mg

Loved this recipe? Save it to your favorite Pinterest board so you can easily find it later! It’s the perfect way to keep all your sweet ideas in one place. ✨

Rich, white chocolate ginger cookies highlighted by natural light, with a cozy backdrop.

Festive Fun in Every Bite: Whipping Up Chocolate Gingerbread Men Cookies

As the holiday season approaches, the air fills with a sense of warmth and joy, and what better way to celebrate than with a batch of Chocolate Gingerbread Men Cookies? These delightful little treats are not only a feast for the eyes but also a scrumptious blend of flavors that will have everyone singing your praises. The combination of rich chocolate and traditional gingerbread spices creates a festive twist that’s perfect for holiday gatherings, cookie swaps, or simply enjoying with a cup of hot cocoa.

Join me in my cozy kitchen as we embark on a baking adventure that’s sure to spread cheer and create lasting memories. Grab your apron, and let’s get started!

Why This Recipe Works

These Chocolate Gingerbread Men Cookies are a delightful balance of soft and chewy centers with just the right amount of crispness on the edges. The unsweetened cocoa powder gives them a rich chocolate flavor that pairs beautifully with the warm spices of ginger, cinnamon, and cloves. Plus, the use of brown sugar and molasses not only sweetens the cookies but also adds depth and moisture, ensuring each bite is as satisfying as the last.

Ingredients You’ll Need

A plate of Chocolate Gingerbread Men Cookies featuring soft shadows and a cozy background.

Let’s gather our ingredients!

  • 3 cups all-purpose flour
  • 1/2 cup unsweetened cocoa powder
  • 1 teaspoon baking soda
  • 1 teaspoon ground ginger
  • 1 teaspoon ground cinnamon
  • 1/2 teaspoon ground cloves
  • 1/4 teaspoon salt
  • 1/2 cup unsalted butter, softened
  • 1 cup brown sugar, packed
  • 1/2 cup molasses
  • 1 large egg
  • 1 teaspoon vanilla extract
  • Optional: royal icing or melted chocolate for decorating

Step-by-Step Instructions

How to Make Chocolate Gingerbread Men Cookies

Now that we have everything ready, let’s dive into the baking process!

  1. In a large mixing bowl, whisk together the all-purpose flour, unsweetened cocoa powder, baking soda, ground ginger, ground cinnamon, ground cloves, and salt. This aromatic blend is the foundation of our cookies, so take a moment to appreciate the spice symphony!
  2. In another mixing bowl, cream together the softened unsalted butter and packed brown sugar until the mixture is light and fluffy. This step is crucial as it introduces air into the dough, giving your cookies their delightful texture.
  3. Add the molasses, large egg, and vanilla extract to the butter mixture, mixing until well combined. You’ll notice the batter becoming darker and richer—this is where the magic happens!
  4. Gradually add the dry ingredient mixture to the wet ingredients, mixing until a dough forms. Don’t be afraid to get your hands in there for a thorough mix! The dough should be soft but not sticky.
  5. Divide the dough in half, wrap each half in plastic wrap, and refrigerate for at least 2 hours or until firm. This chilling step is essential for easier rolling and cutting later on.
  6. Preheat your oven to 350°F (175°C) and line baking sheets with parchment paper, creating a non-stick surface for our cookies.
  7. On a lightly floured surface, roll out one portion of the chilled dough to about 1/4 inch thickness. Roll gently to maintain an even thickness for uniform baking.
  8. Use gingerbread men cookie cutters to cut out shapes and place them on the prepared baking sheets, ensuring they aren’t too close together to allow for spreading.
  9. Bake for 8-10 minutes or until the edges are firm. The aroma wafting from your oven will be heavenly! Allow cookies to cool on the baking sheets for a few minutes before transferring them to wire racks to cool completely.
  10. Once cooled, it’s time to unleash your creativity! Decorate with royal icing or melted chocolate to add a festive touch. Let the decorating fun begin!

Expert Tips for Success

  • Chill the Dough: Don’t skip the refrigeration step! Chilling the dough not only makes it easier to roll out but also helps the cookies maintain their shape during baking.
  • Use Quality Ingredients: For the best flavor, opt for high-quality unsweetened cocoa powder and molasses. Unsulphured molasses works best as it adds sweetness without the bitterness.
  • Check for Doneness: Since ovens can vary, keep an eye on your cookies as they bake. The edges should be firm while the centers may appear slightly soft—they’ll firm up as they cool.

Variations to Try

If you’re looking to switch things up, here are a few fun variations to consider:

  • Chocolate Chip Gingerbread: Add a cup of chocolate chips to the dough for an extra chocolatey treat!
  • Spiced Up: Experiment with additional spices such as nutmeg or cardamom for a unique flavor twist.
  • Decorating Alternatives: Instead of royal icing, try using colored fondant or sprinkles for a festive look.

Substitutions and FAQs

Can I substitute the flour?

Absolutely! You can use whole wheat flour for a heartier texture or gluten-free flour blends for a gluten-free version. Just make sure to adjust the quantity as needed.

What if I can’t find molasses?

If molasses isn’t available, you can substitute it with dark corn syrup or honey, though the flavor will slightly differ.

What’s the best way to store these cookies?

Store your Chocolate Gingerbread Men Cookies in an airtight container at room temperature for up to a week. For longer storage, consider freezing them.

Storage & Freezing

If you want to make these cookies ahead of time, they freeze beautifully! Here’s how:

  • Once the cookies are completely cooled, layer them between sheets of parchment paper in an airtight container.
  • Freeze for up to three months. When you’re ready to enjoy, simply thaw at room temperature. If decorated, you may want to add the icing fresh after thawing.

More Holiday Recipes to Try

If you’re in the mood for some more festive baking, don’t miss these delightful recipes:

Conclusion

There you have it—your very own batch of Chocolate Gingerbread Men Cookies that are sure to bring smiles and joy to everyone who takes a bite! Baking these cookies not only fills your home with the most wonderful aroma but also creates a delightful holiday tradition that you can share with family and friends. So, roll up your sleeves, let your creativity flow, and enjoy the process of baking these festive treats. Happy holidays, and may your kitchen be filled with laughter and love!

Chocolate Gingerbread Men Cookies | Also The Crumbs Please

Prep Time 20 minutes
Cook Time 10 minutes
Total Time 30 minutes
Servings 24 cookies
Calories 150
Enjoy festive, spiced gingerbread cookies with a rich chocolate twist, perfect for holiday baking and decorating.

Ingredients

Dry ingredients

  • 3 cups all-purpose flour
  • 1/2 cup unsweetened cocoa powder
  • 1 teaspoon baking soda
  • 1 teaspoon ground ginger
  • 1 teaspoon ground cinnamon
  • 1/2 teaspoon ground cloves
  • 1/4 teaspoon salt

Wet ingredients

  • 1/2 cup unsalted butter, softened
  • 1 cup brown sugar, packed
  • 1/2 cup molasses
  • 1 large egg
  • 1 teaspoon vanilla extract

Optional for decorating

  • royal icing or chocolate (for decorating)

Instructions 

  • Mix dry ingredients in a bowl and set aside.
  • Cream butter and brown sugar until fluffy.
  • Add molasses, egg, vanilla; mix well.
  • Combine dry and wet ingredients to form dough, chill for 2 hours.
  • Roll out dough, cut shapes, and bake at 350°F for 8-10 minutes.
  • Cool cookies and decorate as desired.

Notes

Chill the dough thoroughly for best results and decorate once cooled.
Calories: 150kcal
Cost: $15
Course: Dessert
Cuisine: American
Keyword: chocolate, Cookies, gingerbread

Nutrition

Calories: 150kcal | Carbohydrates: 25g | Protein: 2g | Fat: 7g | Sodium: 80mg

Loved this recipe? Save it to your favorite Pinterest board so you can easily find it later! It’s the perfect way to keep all your sweet ideas in one place. ✨

Eye-level shot of inviting Chocolate Gingerbread Men Cookies, showcasing their intricate decorations.

Heartwarming Home Cooking: My Go-To Easy Comfort Foods

Welcome back to Emily’s Must-Try Kitchen, where we celebrate the joy of cooking with heart and flavor! Today, we’re diving into a collection of my favorite easy comfort foods that bring warmth and joy to your kitchen. These dishes are perfect for busy weeknights or cozy weekends, and they’ll make everyone feel right at home!

Good Eating eBook: A Journey Through Flavor

Imagine walking into a kitchen filled with the tantalizing aroma of roasted vegetables mingling with savory spices. It’s the kind of warmth that wraps around you like a favorite blanket on a chilly evening. That’s exactly what you’ll experience with the recipes in my “Good Eating eBook.” This collection is designed to create delicious, well-balanced meals that are as satisfying to make as they are to eat.

Ingredients That Shine

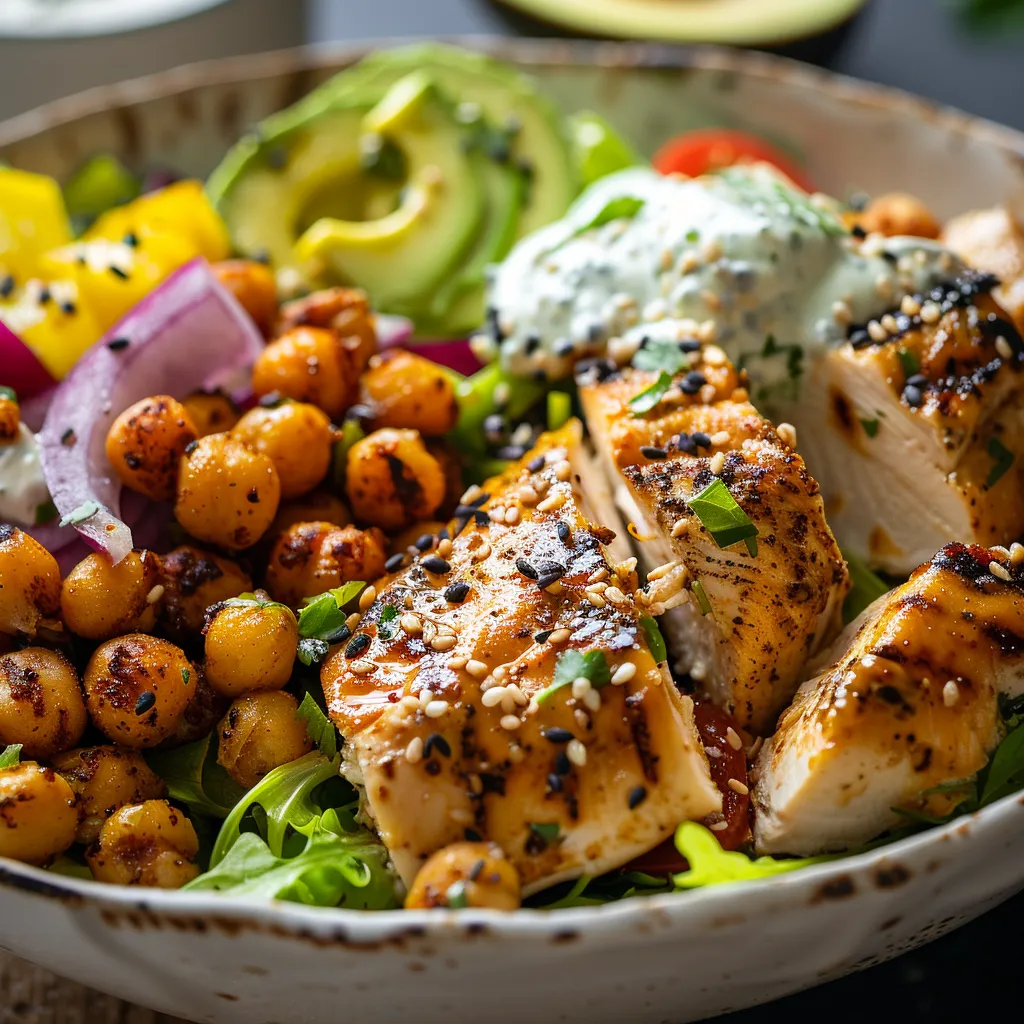
An artistic presentation of a chicken burrito bowl featuring colorful ingredients, captured in soft natural light.

Let’s talk about the star players in our comfort food lineup. Each recipe features high-quality proteins, colorful vegetables, and nutrient-dense ingredients that not only taste great but also support a healthy lifestyle. Here’s a sneak peek at what you can expect:

  • Greek Chicken Bowl: Juicy chicken marinated in Mediterranean spices, served with a generous helping of fresh vegetables.
  • Chicken Burrito Bowl: A fiesta in a bowl with perfectly seasoned chicken, black beans, and all your favorite toppings.
  • Maple Dijon Salmon Bowl: Tender salmon glazed with a sweet and tangy sauce, paired with vibrant veggies.
  • Mediterranean Chickpea Salad: A refreshing mix of chickpeas, cucumber, tomatoes, and olives, all dressed in a light vinaigrette.
  • Avocado Caprese Salad: Creamy avocado slices layered with fresh mozzarella and juicy tomatoes, drizzled with balsamic glaze.
  • Green Goddess Salad: Crisp greens topped with a luscious and herby dressing that’s simply irresistible!
  • Cilantro Lime Sauce: A zesty sauce that elevates any dish with its fresh, bright flavor.
  • Tzatziki Sauce: A creamy cucumber sauce that’s the perfect accompaniment to any meal.
  • Roasted Baby Potatoes: Golden, crispy potatoes seasoned to perfection.
  • Lemon Tahini Kale Bowl with Chicken: Nutty tahini dressing drizzled over tender kale and juicy chicken.
  • Air Fryer Salmon Bowl with Purple Crunch Slaw: A quick and delightful dish bursting with flavor and texture.
  • Cilantro Lime Fish Taco Bowl with Mango Salsa: Flaky fish topped with a refreshing mango salsa for a tropical twist.
  • Rustic Roasted Eggplant Salad: Smoky roasted eggplant mixed with fresh herbs and a splash of lemon.
  • Crispy Chickpeas: An addictive snack that’s perfect for adding crunch to salads or enjoying on their own.

Creating Comfort: Step-by-Step to Deliciousness

Now, let’s get into the nitty-gritty of how to bring these comforting recipes to life:

  1. Create Delicious, Well-Balanced Meals: Start by choosing your base, whether it’s quinoa, rice, or leafy greens. This will set the stage for a satisfying meal.
  2. Bring Together High-Quality Proteins: Select your protein source—be it chicken, fish, or chickpeas. Marinate or season them well to enhance their flavor.
  3. Incorporate Colorful Vegetables: Aim for a rainbow on your plate! Mix and match seasonal veggies for a pop of color and nutrients.
  4. Enjoy Variety of Flavors and Textures: Don’t shy away from experimenting with different flavor profiles. Sweet, savory, tangy—go wild!
  5. Find Complementary Sides and Sauces: Elevate your bowl with delicious sauces like my Cilantro Lime Sauce or Tzatziki. They add an extra layer of flavor that ties everything together.
  6. Stay Full and Satisfied: Adjust the portion sizes to meet your needs—whether you’re trying to maintain your weight or simply eat cleaner, these dishes are versatile!

Tips for Perfecting Your Comfort Food Bowls

Cooking is as much about joy as it is about technique. Here are a few tips to keep in mind:

  • Prep Ahead: Chop your veggies and marinate your proteins ahead of time. This makes weeknight cooking a breeze!
  • Experiment with Herbs and Spices: Don’t be afraid to throw in a pinch of this or a dash of that. Fresh herbs can elevate your dish significantly.
  • Let Ingredients Shine: Sometimes, simplicity is best. Let the natural flavors of fresh ingredients take center stage.

Variations to Explore

One of the beautiful things about cooking is that there’s always room for creativity. Here are some variations to try:

  • Swap Proteins: If chicken isn’t your thing, try tofu, shrimp, or even a hearty veggie like tempeh.
  • Change Up the Grains: Quinoa, farro, or couscous can be delightful alternatives to rice.
  • Summer vs. Winter Veggies: Adapt your ingredients based on the season. Think roasted butternut squash in the fall versus fresh zucchini in the summer.

Storage & Freezing: Making It Last

Cooking for the week? Here’s how to store and freeze your creations:

  • Refrigeration: Most of these bowls can be stored in airtight containers in the fridge for up to 4 days.
  • Freezing: If you want to prep ahead for those busy weeks, consider freezing individual components. Cooked proteins and grains freeze well, but dressings should be added fresh.
  • Thawing: When you’re ready to eat, simply thaw overnight in the fridge and reheat gently on the stove or in the microwave.

FAQs: Your Comfort Food Questions Answered

How to make a flavorful bowl?

Start with a base, add your favorite protein, load up on colorful veggies, and drizzle with a delicious sauce. Don’t forget to season everything well!

Best way to store leftovers?

Use airtight containers for the best results. Keep sauces separate until you’re ready to eat to maintain texture.

Can I substitute ingredients?

Absolutely! If you have allergies or preferences, feel free to swap out ingredients with similar types. Just keep in mind the flavor balance!

Embrace the Joy of Cooking

Cooking is more than just a task; it’s an opportunity to express love, creativity, and joy. So roll up your sleeves, gather your ingredients, and let’s make these heartwarming meals together. Remember, it’s all about the journey, not just the destination. I hope you find comfort in these recipes as much as I do!

Thank you for joining me in my kitchen today. Don’t forget to explore more delightful recipes like Whisking Up Holiday Cheer: Delightful Gingerbread Men Cookies for Decorating Fun, Spice Up Your Holiday: Delightful Gingerbread Crinkle Cookies for the Cookie Swap, and Joyful Bites: Crafting Delightful Christmas Thumbprint Cookies. Let’s keep the spirit of cooking alive and share the joy of our culinary adventures together!

Good Eating eBook

Prep Time 15 minutes
Cook Time 20 minutes
Total Time 35 minutes
Servings 4 servings
Calories 550
A collection of nutritious and flavorful bowls designed to support a healthy lifestyle with minimal effort.

Ingredients

Protein

  • 1 lb Greek chicken (Marinated and grilled)
  • 1 cup quinoa (Cooked)
  • 1 cup chickpeas (Roasted)
  • 1 avocado Avocado (Sliced)
  • 1 cup chopped vegetables (Mixed greens, cucumbers, tomatoes)

Sauces & Condiments

  • 0.25 cup cilantro lime sauce
  • 0.25 cup tzatziki sauce
  • 1 pound roasted baby potatoes (Halved and roasted)

Instructions 

  • Cook quinoa and roast chickpeas and potatoes.
  • Grill or cook the marinated chicken until done.
  • Assemble bowls with cooked grains, proteins, vegetables, and sides.
  • Add sauces and garnish as desired.
  • Serve immediately and enjoy a balanced, flavorful meal.

Notes

Use fresh ingredients for best flavor and nutrition.
Calories: 550kcal
Cost: $15
Course: Main Course
Cuisine: Various
Keyword: Bowl, healthy, Meal

Nutrition

Calories: 550kcal | Carbohydrates: 65g | Protein: 40g | Fat: 15g | Sodium: 800mg

Loved this recipe? Save it to your favorite Pinterest board so you can easily find it later! It’s the perfect way to keep all your sweet ideas in one place. ✨

A detailed shot of a maple dijon salmon bowl, showcasing fresh greens, salmon, and a creamy sauce against a blurred background.

Minty Magic: Whip Up These Easy Christmas Peppermint Sugar Cookies

Ah, the holiday season! A time for twinkling lights, festive gatherings, and the irresistible aroma of freshly baked cookies wafting through the air. If you’re looking to capture the essence of Christmas in a cookie, then look no further than these Easy Christmas Peppermint Sugar Cookies. With their delightful minty flavor and a sprinkle of crushed peppermint candies, these cookies are perfect for sharing with loved ones or savoring all to yourself. Trust me, you’ll want to make a double batch!

As I roll up my sleeves and gather my ingredients, I can’t help but reminisce about the holiday traditions of my childhood. The kitchen would become a flurry of activity, filled with laughter and the clinking of mixing bowls. Baking was always a family affair, and I remember standing on a stool, just like my little one does now, eager to sneak a taste of cookie dough. Today, I invite you into my kitchen to create these minty delights together!

Ingredients You’ll Need

Before we dive into the baking process, let’s gather our ingredients:

  • 1 cup unsalted butter, softened
  • 1 cup granulated sugar
  • 1 large egg
  • 1 teaspoon vanilla extract
  • 1 teaspoon peppermint extract
  • 2 3/4 cups all-purpose flour
  • 1 teaspoon baking powder
  • 1/2 teaspoon salt
  • 1/2 cup crushed peppermint candies or candy canes
  • Optional: powdered sugar for dusting

Step 1: Preheat the Oven

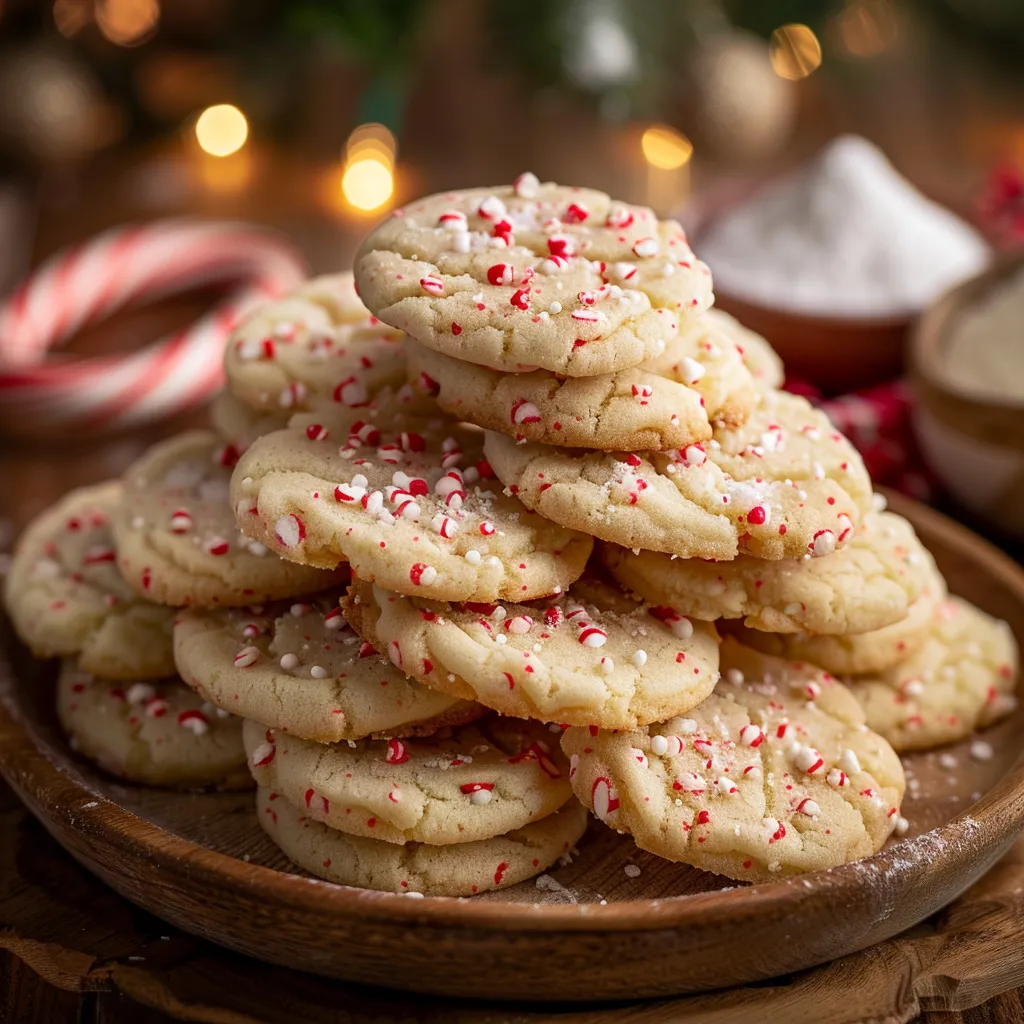
Eye-level shot of Christmas-themed sugar cookies decorated with peppermint pieces, surrounded by soft, blurred holiday decor.

First things first! Preheat your oven to 350°F (175°C). This ensures that our cookies bake evenly right from the start. While the oven warms up, let’s get our mixing bowls ready.

Step 2: Cream the Butter and Sugar

In a large mixing bowl, cream together the softened butter and granulated sugar using a hand mixer or stand mixer. Beat them together until the mixture is light and fluffy, which should take about 2-3 minutes. The fluffy texture is crucial; it incorporates air, giving our cookies that delightful lift!

Step 3: Add the Egg and Extracts

Now, it’s time to introduce our wet ingredients. Beat in the egg, vanilla extract, and peppermint extract until everything is well combined. The peppermint extract adds that festive flavor that will transport you straight to a winter wonderland!

Step 4: Combine the Dry Ingredients

In a separate bowl, whisk together the all-purpose flour, baking powder, and salt. This step helps to evenly distribute the leavening agent, ensuring that every bite of cookie rises perfectly. Gradually add the dry ingredients to the wet mixture, mixing until just combined. Remember, overmixing can lead to tough cookies, and we want them to be melt-in-your-mouth soft!

Step 5: Fold in the Peppermint Candies

Now comes the fun part—fold in the crushed peppermint candies! This not only adds a delightful crunch but gives our cookies that signature holiday look and taste. If you’re feeling extra festive, you can reserve a few pieces to sprinkle on top of the cookies before baking.

Step 6: Shape the Cookies

Using your hands, roll the dough into 1-inch balls and place them on a baking sheet lined with parchment paper, leaving about 2 inches between each ball. You can flatten each ball slightly with the bottom of a glass or your hand to give them a nice, even shape. This will help them bake more evenly.

Step 7: Bake the Cookies

Pop the baking sheet into your preheated oven and bake for 10-12 minutes, or until the edges are lightly golden. Your kitchen will be filled with the sweet scent of peppermint and sugar—pure bliss! Once done, allow the cookies to cool on the baking sheet for a few minutes before transferring them to a wire rack to cool completely.

Step 8: Optional Dusting

If you’re feeling a bit fancy, dust the cooled cookies with powdered sugar before serving. It adds a beautiful snowy finish that’s perfect for the holiday season!

Tips for Baking Success

  • Use Room Temperature Ingredients: Ensure your butter and egg are at room temperature for better mixing and texture.
  • Don’t Skip the Chilling: If your dough feels too sticky, chill it in the refrigerator for about 30 minutes before rolling.
  • Check for Doneness: The cookies should be lightly golden at the edges but soft in the center; they will firm up as they cool.

Variations to Try

These peppermint sugar cookies are incredibly versatile. Here are a few fun variations you can try:

  • Chocolate Peppermint: Add 1/2 cup of cocoa powder to the dry ingredients for a chocolate twist.
  • Frosted Cookies: Top with peppermint frosting for a sweet finishing touch.
  • Nutty Crunch: Mix in 1/2 cup of chopped nuts for added texture.

Ingredient Substitutions

Need to make some adjustments? Here are a few substitutions you can consider:

  • Butter: Vegan butter or coconut oil can be used in place of unsalted butter.
  • Flour: For gluten-free cookies, substitute with a 1:1 gluten-free flour blend.
  • Sugar: Coconut sugar can replace granulated sugar for a lower glycemic option.

Storage & Freezing

These cookies can be stored in an airtight container at room temperature for up to a week. If you want to make them ahead of time, you can freeze the baked cookies for up to three months. Just ensure they are completely cooled before placing them in a freezer-safe container. To enjoy, simply thaw them at room temperature or pop them in the microwave for a few seconds.

FAQs

Can I use other extracts?

Absolutely! If you’re not a fan of peppermint, feel free to use almond or vanilla extract for a different flavor profile.

How do I know when the cookies are done?

Look for lightly golden edges and a soft center. They will continue to bake a little while cooling on the sheet.

Can I decorate these cookies?

Definitely! They make a great base for all sorts of decorations, from frosting to sprinkles.

Conclusion

There you have it, my friends! These Easy Christmas Peppermint Sugar Cookies are sure to become a cherished part of your holiday traditions. They’re simple to make, irresistibly delicious, and perfect for spreading cheer. So gather your loved ones, turn on your favorite holiday tunes, and get baking! Remember, cooking is all about joy and connection, and every batch of cookies tells a story. Happy baking, and may your holiday season be filled with warmth, love, and of course, plenty of cookies!

Easy Christmas Peppermint Sugar Cookies

Prep Time 15 minutes
Cook Time 12 minutes
Total Time 27 minutes
Servings 24 cookies
Calories 150
Celebrate the holidays with these festive peppermint sugar cookies, perfect for sharing and decorating.

Ingredients

Dough

  • 1 cup unsalted butter, softened
  • 1 cup granulated sugar
  • 1 large egg
  • 1 teaspoon vanilla extract
  • 1 teaspoon peppermint extract
  • 2 3/4 cups all-purpose flour
  • 1 teaspoon baking powder
  • 1/2 teaspoon salt
  • 1/2 cup crushed peppermint candies or candy canes
  • optional powdered sugar for dusting (for dusting (optional))

Instructions 

  • Preheat oven to 350°F (175°C).
  • Cream butter and sugar, add egg and extracts.
  • Mix in dry ingredients, fold in peppermint candies.
  • Form dough balls, flatten, and bake 10-12 minutes.
  • Cool cookies and dust with powdered sugar if desired.

Notes

Store cookies in an airtight container for freshness.
Calories: 150kcal
Cost: $15
Course: Dessert
Cuisine: American
Keyword: Peppermint

Nutrition

Calories: 150kcal | Carbohydrates: 22g | Protein: 2g | Fat: 7g | Sodium: 80mg

Loved this recipe? Save it to your favorite Pinterest board so you can easily find it later! It’s the perfect way to keep all your sweet ideas in one place. ✨

Warmly lit presentation of soft peppermint sugar cookies, showcasing their texture and festive spirit.

Whimsical Delights: Dive into My Chocolate Marshmallow Swirl Cookies

Welcome back to Emily’s Must-Try Kitchen, where we turn ordinary ingredients into extraordinary memories! Today, we’re embarking on a delightful journey into the world of cookies with my irresistible Chocolate Marshmallow Swirl Cookies Recipe. If you’re anything like me, the combination of rich chocolate and fluffy marshmallows is nothing short of a magical experience. These cookies are perfect for cozy gatherings, celebrations, or a sweet escape on a quiet evening. So, roll up your sleeves and let’s dive into this delicious adventure!

Why You’ll Love This Recipe

These cookies are more than just a treat; they are a delightful experience for your senses. Imagine biting into a soft, chewy cookie that bursts with gooey marshmallow and rich chocolate flavors. The textures are a symphony, with the crisp edges giving way to a soft, luscious center. Whether you’re baking for yourself or sharing with friends and family, these cookies are sure to bring smiles all around. Plus, they are easy to make, making them a great option for bakers of all skill levels!

Ingredients You’ll Need

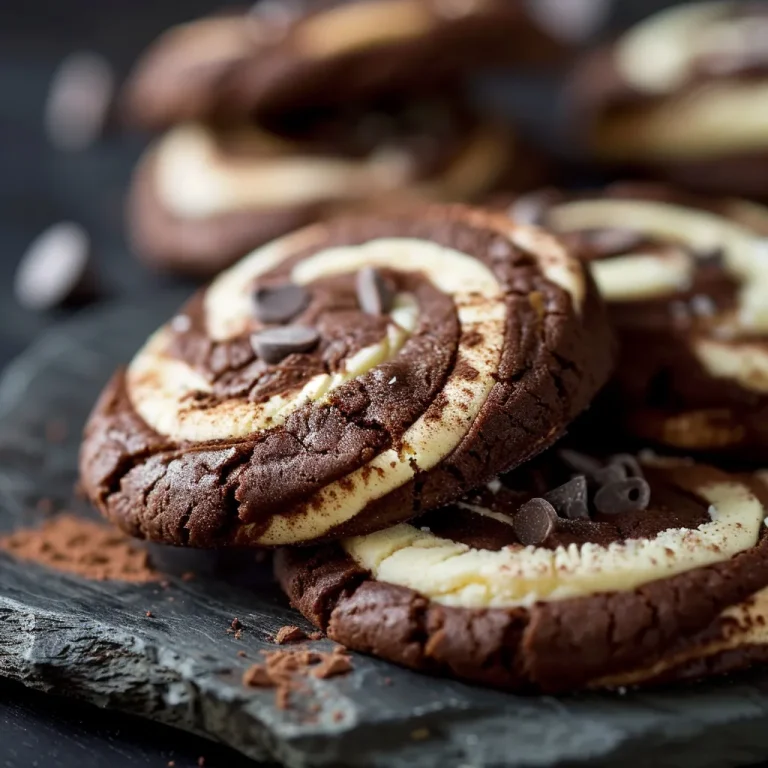
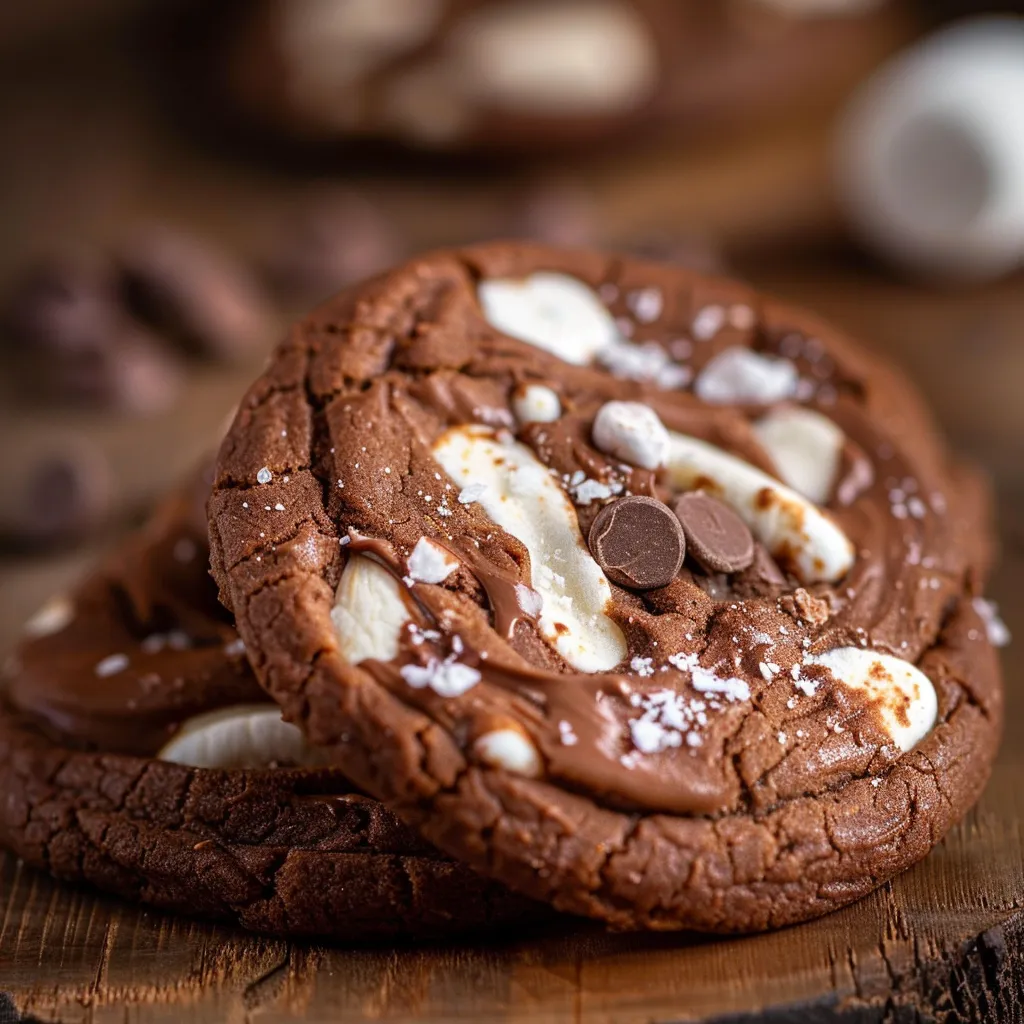
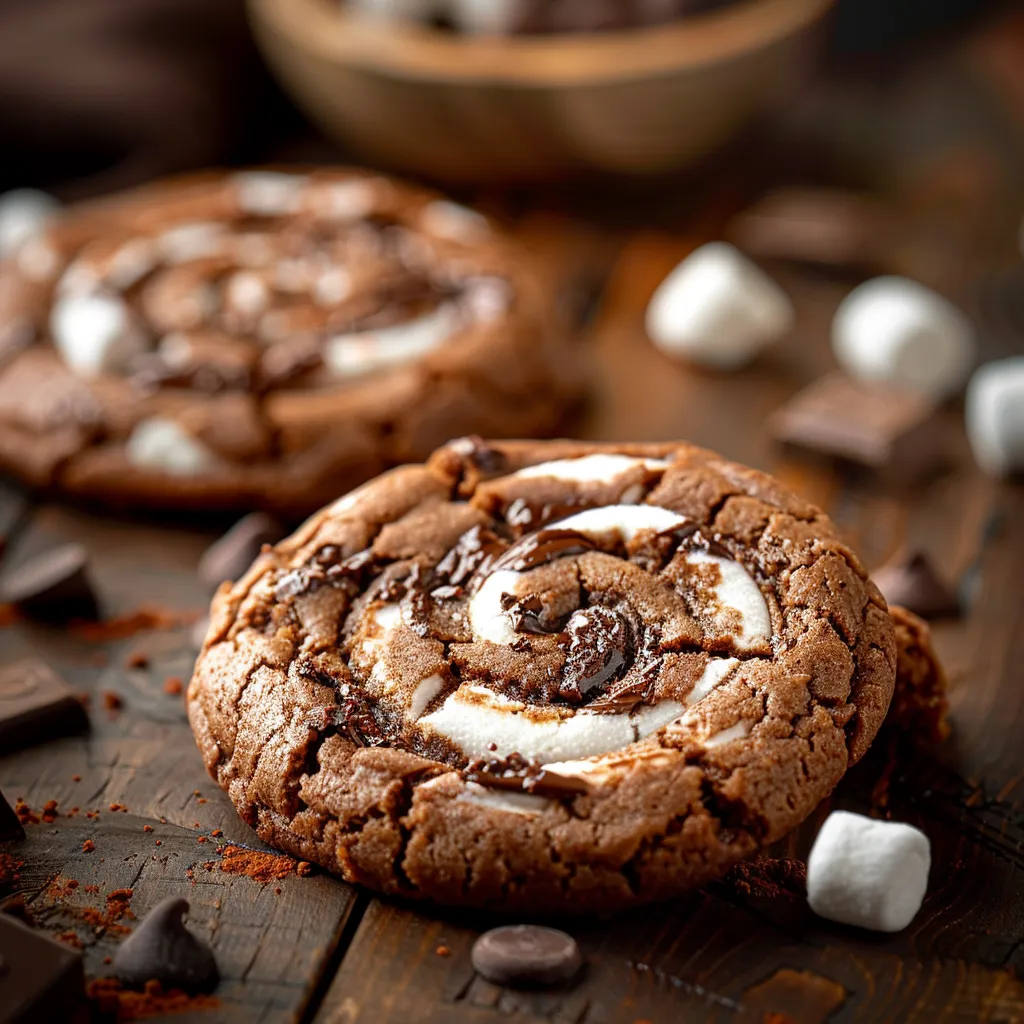
Delicious chocolate marbled cookies with mini marshmallows, shown in natural light.

Here’s what you’ll need to whip up these sweet delights:

  • 1 cup unsalted butter, softened
  • 1 cup granulated sugar
  • 1 cup packed brown sugar
  • 2 large eggs
  • 1 teaspoon vanilla extract
  • 2 cups all-purpose flour
  • 1/2 cup cocoa powder
  • 1 teaspoon baking soda
  • 1/2 teaspoon salt
  • 1 cup chocolate chips
  • 1 cup mini marshmallows

Special Equipment

Before we get started, gather your tools! Here’s what you’ll need:

  • Mixing bowls
  • Electric mixer (hand or stand)
  • Measuring cups and spoons
  • Baking sheets
  • Parchment paper or silicone baking mats
  • Cookie scoop or tablespoon

Step-by-Step Instructions

Now, let’s make some magic happen in the kitchen! Follow these steps for perfectly swirled cookies:

  1. Preheat your oven: Start by preheating your oven to 350°F (175°C). This ensures that your cookies bake evenly.
  2. Prepare your baking sheets: Line your baking sheets with parchment paper or silicone baking mats to prevent sticking.
  3. Cream the butter and sugars: In a large mixing bowl, cream together the softened butter, granulated sugar, and brown sugar until the mixture is light and fluffy. This should take about 3-4 minutes with an electric mixer.
  4. Add the eggs and vanilla: Incorporate the eggs one at a time, mixing well after each addition. Then, stir in the vanilla extract for that lovely aroma.
  5. Mix the dry ingredients: In a separate bowl, whisk together the flour, cocoa powder, baking soda, and salt. This step helps to evenly distribute the cocoa powder and ensure a smooth texture.
  6. Combine wet and dry ingredients: Gradually add the dry mixture to the wet mixture, mixing until just combined. Be careful not to overmix, as this can lead to tough cookies.
  7. Fold in the chocolate chips and marshmallows: Gently fold in the chocolate chips and mini marshmallows until evenly distributed throughout the dough. This is where the magic swirl happens!
  8. Form the cookies: Using a cookie scoop or tablespoon, drop rounded portions of dough onto the prepared baking sheets, leaving about 2 inches of space between each cookie to allow for spreading.
  9. Bake: Place the baking sheets in the preheated oven and bake for 10-12 minutes, or until the edges are set, but the centers are still slightly soft. The marshmallows will puff up and may caramelize a bit—this is a good thing!
  10. Cool: Allow the cookies to cool on the baking sheet for about 5 minutes before transferring them to a wire rack to cool completely. This helps them firm up without breaking apart.

Variations and Substitutions

If you want to mix things up a bit, here are some fun variations and substitutions you can try:

  • Nutty Delight: Add 1/2 cup of chopped nuts like walnuts or pecans for extra crunch.
  • Different Chocolate: Switch out the semi-sweet chocolate chips for milk chocolate or dark chocolate for a different flavor profile.
  • Marshmallow Fluff: For an even gooier cookie, add dollops of marshmallow fluff to the dough along with the mini marshmallows.
  • Gluten-Free Option: Substitute all-purpose flour with a gluten-free flour blend for a gluten-free version of these cookies.

Storage and Freezing

Want to save some cookies for later? Here’s how to properly store and freeze your Chocolate Marshmallow Swirl Cookies:

  • Room Temperature: Store cooled cookies in an airtight container at room temperature for up to one week.
  • Freezing: To freeze, place unbaked cookie dough balls on a baking sheet and freeze until firm. Transfer to a freezer-safe bag and store for up to 3 months. When you’re ready to bake, just add a couple of extra minutes to the baking time.

Nutritional Information (Per Cookie)

While I believe in enjoying treats in moderation, here’s a quick nutritional breakdown to keep in mind:

  • Calories: Approximately 150
  • Fat: 7g
  • Carbohydrates: 20g
  • Protein: 2g

Tips for Perfect Cookies

Here are some extra tips to ensure your cookies come out perfect every time:

  • Don’t overmix: Mix until just combined to keep your cookies tender.
  • Use room temperature ingredients: This helps everything mix together smoothly.
  • Chill the dough: If you find your dough is too soft to scoop, chill it in the refrigerator for 30 minutes before baking.

Beverage Pairings

Wondering what to pair with your Chocolate Marshmallow Swirl Cookies? Here are a few ideas:

  • Milk: The classic pairing! A tall glass of cold milk complements the richness of the cookies perfectly.
  • Coffee: Enjoy these cookies with a warm cup of coffee or espresso for a delightful afternoon treat.
  • Hot Chocolate: For an indulgent experience, pair them with a steaming cup of hot chocolate topped with whipped cream.

Final Thoughts

There you have it, my friends! A fun and delicious way to indulge your sweet tooth with my Chocolate Marshmallow Swirl Cookies. Whether you’re enjoying them with loved ones or savoring them solo with a good book, these cookies are sure to bring joy to your day. Remember, cooking is all about experimenting and having fun—don’t be afraid to put your own twist on this recipe! If you decide to give these cookies a try, I’d love to hear how they turn out. Share your thoughts in the comments below, and let’s celebrate the joy of baking together!

Chocolate Marshmallow Swirl Cookies Recipe for a Sweet Treat

Prep Time 15 minutes
Cook Time 12 minutes
Total Time 27 minutes
Servings 24 cookies
Calories 150
Indulge in these rich chocolate cookies with gooey marshmallows, perfect for satisfying your sweet tooth.

Ingredients

Dough

  • 1 cup unsalted butter, softened
  • 1 cup granulated sugar
  • 1 cup packed brown sugar
  • 2 large eggs
  • 1 teaspoon vanilla extract
  • 2 cups all-purpose flour
  • 1/2 cup cocoa powder
  • 1 teaspoon baking soda
  • 1/2 teaspoon salt
  • 1 cup chocolate chips
  • 1 cup mini marshmallows

Instructions 

  • Preheat oven to 350°F (175°C) and line a baking sheet with parchment.
  • Cream butter, granulated sugar, and brown sugar until fluffy.
  • Add eggs one at a time, then vanilla; mix well.
  • Mix dry ingredients; combine with wet mixture.
  • Fold in chocolate chips and marshmallows; drop onto baking sheet.
  • Bake for 10-12 minutes; cool before serving.

Notes

For softer cookies, slightly underbake and let cool on the sheet.
Calories: 150kcal
Cost: $15
Course: Dessert
Keyword: chocolate, Cookies, marshmallow

Nutrition

Calories: 150kcal | Carbohydrates: 20g | Protein: 2g | Fat: 8g | Sodium: 50mg

Loved this recipe? Save it to your favorite Pinterest board so you can easily find it later! It’s the perfect way to keep all your sweet ideas in one place. ✨

Detailed view of freshly baked chocolate cookies with a swirl of marshmallows.