Author

Emily

Browsing

Ah, the holiday season! A time when the air is filled with the sweet scent of baking and the joy of gathering with loved ones. I can still remember those childhood days in Charleston, standing on my mom’s kitchen stool, sneaking tastes of cookie dough while she prepared our family’s festive treats. It was in those moments that I learned cooking is more than just a necessity—it’s a way to create memories that last a lifetime. One of my favorite holiday traditions is baking Candy Cane Cookies, and I can’t wait to share this delightful recipe with you!

These cookies are not only fun to make, but they also fill your home with that magical holiday spirit. With their beautiful red and white swirls and a burst of peppermint flavor, they are sure to become a beloved tradition in your kitchen as well. So, let’s roll up our sleeves and dive into this enchanting cookie adventure!

Why You’ll Absolutely Love Bake These Candy Cane Cookies Once… and You’ll Make Them Every Year ❤️🍪

These Candy Cane Cookies are truly special, and here’s why:

  • They bring a festive touch to your holiday gatherings and will impress your friends and family.
  • With a delightful peppermint flavor and a soft, chewy texture, they are utterly irresistible.
  • Kids will love helping twist the dough into candy cane shapes, making it a perfect family activity.
  • They make for a wonderful gift! Pack them up in a cute box to share the holiday cheer.

Ingredients You’ll Need

To create these scrumptious Candy Cane Cookies, you’ll need some simple yet essential ingredients that you likely already have in your pantry. Here’s what you’ll gather:

  • 1 cup unsalted butter, softened: This is the base for your cookies, providing that rich, buttery flavor.
  • 1 cup granulated sugar: Sweetness is key, and sugar helps achieve that perfect chewy texture.
  • 1 egg: This binds the ingredients together, adding moisture for a deliciously soft cookie.
  • 1 teaspoon vanilla extract: A classic flavor that complements the peppermint beautifully.
  • 1/2 teaspoon peppermint extract: This is where the magic happens! It gives your cookies that unmistakable candy cane flavor.
  • 2 1/2 cups all-purpose flour: The backbone of your cookie dough, providing structure.
  • 1 teaspoon baking powder: This helps your cookies rise to a lovely, soft texture.
  • 1/2 teaspoon salt: Just a pinch to balance out the sweetness.
  • 1/2 cup crushed candy canes: For that festive crunch and extra peppermint flair!
  • 1/2 cup powdered sugar (for dusting): A snowy finish that adds a touch of holiday magic.

You’ll find the full ingredient list with measurements in the recipe card below!

How to Make Bake These Candy Cane Cookies Once… and You’ll Make Them Every Year ❤️🍪, Step-by-Step

Let’s get baking! Follow these simple steps to create your Candy Cane Cookies:

  1. Preheat your oven to 350°F (175°C). Get that oven warmed up so your cookies can bake perfectly!
  2. In a large bowl, cream together the softened butter and granulated sugar until light and fluffy. This step is crucial for achieving that melt-in-your-mouth texture.
  3. Beat in the egg, vanilla extract, and peppermint extract until well combined. The mixture should be smooth and fragrant.
  4. In another bowl, whisk together the flour, baking powder, and salt. This helps ensure everything is evenly distributed.
  5. Gradually add the dry ingredients to the wet mixture, stirring until just combined. Don’t overmix; you want to keep your cookies tender!
  6. Fold in the crushed candy canes. This is where the fun begins—those little bits of crunch will make your cookies pop!
  7. Divide the dough into two equal portions. Roll each portion into a rope about 6 inches long.
  8. Twist the ropes together to form a candy cane shape. This is a great spot to let the kids help!
  9. Place the shaped cookies on a parchment-lined baking sheet. Give them some space; they’ll spread a bit while baking.
  10. Bake in the preheated oven for 10-12 minutes, or until the edges are lightly golden. Your kitchen will smell heavenly!
  11. Remove from the oven and let cool on the baking sheet for a few minutes before transferring to a wire rack. Patience is key; they’ll firm up as they cool.
  12. Dust the cooled cookies with powdered sugar before serving. This gives them that snowy, festive touch.
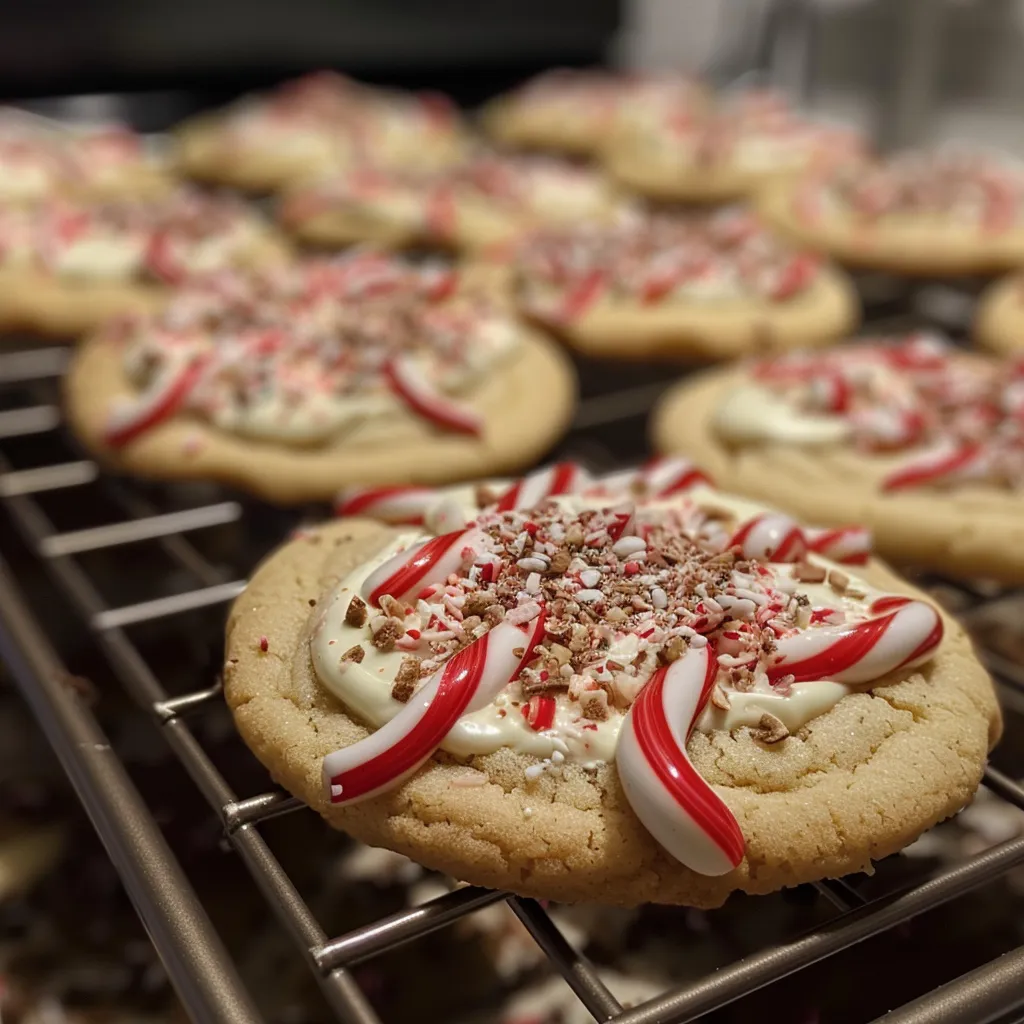
Bake These Candy Cane Cookies Once… and You’ll Make Them Every Year ❤️🍪

Pro Tips for the Best Results

Here are a few of my go-to tips to ensure your Candy Cane Cookies are a hit:

  • Make sure your butter is at room temperature for the best creaming results. It should be soft but not melted.
  • Don’t skip the chilling step if you find the dough too sticky. A quick chill in the fridge can make shaping easier!
  • Experiment with the amount of crushed candy canes—if you love that peppermint flavor, feel free to add a little more!

Serving Suggestions

These Candy Cane Cookies are delightful on their own, but why not add a little flair? Here are some serving ideas:

  • Pair them with a warm cup of hot cocoa or peppermint tea for a cozy treat.
  • Arrange them on a festive platter alongside other holiday cookies for a delightful cookie spread.
  • Wrap them up in cute gift bags with a ribbon to share with friends and neighbors.

Storage and Make-Ahead Tips

Want to make these cookies ahead of time? No problem! Here’s how to store them:

  • Store your cookies in an airtight container at room temperature for up to a week.
  • If you want to make them ahead of time, you can prepare the dough and freeze it! Just wrap it tightly in plastic wrap and store it in the freezer for up to a month.
  • When you’re ready to bake, simply thaw the dough in the fridge overnight before shaping and baking as directed.

Thank you for joining me in the kitchen today! I hope these Candy Cane Cookies bring you as much joy as they have brought me through the years. Let’s keep the spirit of cooking alive—after all, every recipe is another chance to create something delicious and memorable. Happy baking!

Bake These Candy Cane Cookies Once… and You’ll Make Them Every Year ❤️🍪

Prep Time 15 minutes
Cook Time 12 minutes
Total Time 27 minutes
Servings 24 cookies
Calories 150
Celebrate the holiday season with these festive candy cane cookies that are easy to make and irresistibly delicious. Perfect for annual tradition!

Ingredients

Dough

  • 1 cup unsalted butter, softened
  • 1 cup granulated sugar
  • 1 egg egg
  • 1 teaspoon vanilla extract
  • 1/2 teaspoon peppermint extract
  • 2 1/2 cups all-purpose flour
  • 1 teaspoon baking powder
  • 1/2 teaspoon salt
  • 1/2 cup crushed candy canes
  • 1/2 cup powdered sugar (for dusting)

Instructions 

  • Preheat oven to 350°F (175°C).
  • Cream butter and sugar, add egg and extracts. Mix dry ingredients, combine with wet, fold in candy canes.
  • Divide dough, roll into ropes, twist into candy cane shapes, place on baking sheet.
  • Bake for 10-12 minutes until edges are golden. Cool and dust with powdered sugar.

Notes

Store in an airtight container for best freshness.
Calories: 150kcal
Cost: $15
Course: Dessert
Cuisine: American
Keyword: Candy Cane, Cookies, Holiday

Nutrition

Calories: 150kcal | Carbohydrates: 20g | Protein: 2g | Fat: 8g | Sodium: 50mg

Loved this recipe? Save it to your favorite Pinterest board so you can easily find it later! It’s the perfect way to keep all your sweet ideas in one place. ✨
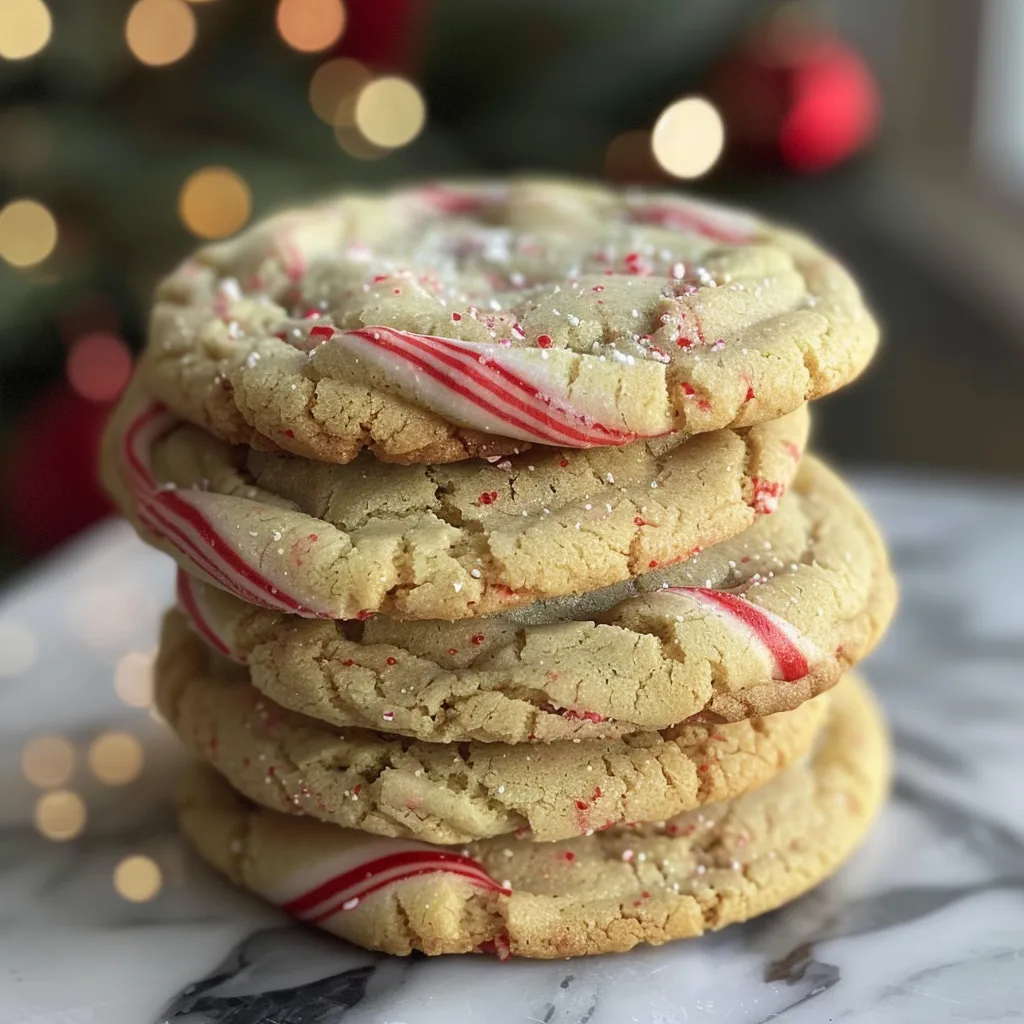

Bake These Candy Cane Cookies Once… and You’ll Make Them Every Year ❤️🍪

As the holiday season approaches, my kitchen fills with the delightful aroma of spices, sugar, and warmth—a symphony of scents that brings back memories of my childhood in Charleston. I can still picture it: standing on a stool in my mom’s kitchen, trying to sneak a taste of her famous biscuit dough while she laughed and swatted my hand away. It was in those moments that I learned cooking is more than just putting ingredients together; it’s about creating connections, sharing joy, and making memories that linger long after the last cookie is gone.

This year, I’m excited to share a recipe that brings all those cherished feelings to life: Christmas Thumbprint Cookies! They are not just any cookies; they are little bites of happiness, perfect for sharing with family and friends, or for indulging yourself (no judgment here!). Let’s dive into this delightful recipe and spread some holiday cheer!

Why You’ll Absolutely Love Christmas Thumbprint Cookies

These cookies are a holiday classic that never fails to bring a smile to my face. Here are a few reasons why you’ll adore them:

  • They’re incredibly easy to make, even for novice bakers!
  • The thumbprint design adds a charming touch that makes them perfect for gifting.
  • With endless jam flavor options, they can be customized to suit every taste.
  • They fill your home with a warm, inviting aroma that screams holiday spirit!

Ingredients You’ll Need

Let’s talk about the ingredients. This recipe uses simple, wholesome components that you might already have in your pantry, making it a breeze to whip up. Here’s what you’ll need:

  • 1 cup unsalted butter, softened
  • 2/3 cup granulated sugar
  • 1 teaspoon vanilla extract (this is where the magic happens!)
  • 2 cups all-purpose flour
  • 1/4 teaspoon salt
  • 1/2 cup jam (raspberry, strawberry, or whatever tickles your fancy)
  • Powdered sugar for dusting (optional, but who doesn’t love a little sparkle?)

You’ll find the full ingredient list with measurements in the recipe card below!

How to Make Christmas Thumbprint Cookies, Step-by-Step

Now that we have our ingredients ready, let’s get started on making these delightful cookies! Trust me, the process is as enjoyable as the end result.

  1. First, preheat your oven to 350°F (175°C). This ensures your cookies will bake evenly.
  2. In a mixing bowl, cream together the softened butter and granulated sugar until the mixture is light and fluffy. This step is crucial; it adds air into the dough, making your cookies tender and delicious.
  3. Add the vanilla extract and mix well. The smell of vanilla wafting through your kitchen is pure bliss!
  4. In a separate bowl, whisk together the flour and salt. Combining these dry ingredients helps avoid clumps later on.
  5. Gradually add the flour mixture to the butter mixture, mixing until just combined. Don’t overmix—this will keep your cookies soft and tender!
  6. Roll the dough into 1-inch balls and place them on a baking sheet lined with parchment paper. This keeps them from sticking and makes cleanup a breeze.
  7. Use your thumb or the back of a spoon to make an indentation in the center of each ball. Don’t worry if they crack a little; they’ll still taste amazing!
  8. Fill each indentation with a small amount of jam. Be generous but not overflowing; we want to keep that lovely shape!
  9. Bake for 12-15 minutes, or until the edges are lightly golden. Keep an eye on them, as baking times can vary!
  10. Allow the cookies to cool on the baking sheet for a few minutes before transferring them to a wire rack to cool completely. This step helps them set properly.
  11. If desired, dust with powdered sugar before serving for that festive touch!
Christmas Thumbprint Cookies

Pro Tips for the Best Results

Here are a few tips to ensure your thumbprint cookies turn out perfectly:

  • Make sure your butter is at room temperature for easy creaming with sugar. If it’s too hard, your cookies might turn out dense.
  • Experiment with different jam flavors! While raspberry and strawberry are classics, I love using apricot or even lemon curd for a zesty surprise.
  • Don’t skip the cooling step! Allowing them to cool on a wire rack helps maintain their texture and flavor.

Serving Suggestions

These Christmas Thumbprint Cookies are perfect on their own, but here are some fun serving suggestions:

  • Arrange them in festive cookie tins for gifting to neighbors and friends.
  • Serve alongside a warm cup of cocoa or your favorite holiday beverage for a cozy treat.
  • Pair them with a scoop of vanilla ice cream for a delightful dessert that’s sure to impress!

Storage and Make-Ahead Tips

If you’re planning to make these cookies ahead of time, here’s how to store them:

  • Store cooled cookies in an airtight container at room temperature for up to one week.
  • For longer storage, you can freeze the baked cookies. Just make sure they’re completely cooled before placing them in a freezer bag.
  • To enjoy frozen cookies, simply thaw at room temperature or warm them in the oven for a few minutes to regain that fresh-baked goodness.

Christmas Thumbprint Cookies

Prep Time 15 minutes
Cook Time 15 minutes
Total Time 30 minutes
Servings 24 cookies
Calories 80
Delight in these festive cookies with a buttery base and a sweet jam center, perfect for holiday gatherings.

Ingredients

Dough

  • 1 cup unsalted butter, softened
  • 2/3 cup granulated sugar
  • 1 teaspoon vanilla extract
  • 2 cups all-purpose flour
  • 1/4 teaspoon salt
  • 1/2 cup jam (raspberry, strawberry, or your choice)
  • optional powdered sugar for dusting (for dusting (optional))

Instructions 

  • Preheat oven to 350°F (175°C).
  • Cream butter and sugar until fluffy, add vanilla.
  • Mix in flour and salt until combined, form 1-inch balls.
  • Make an indentation in each ball, fill with jam.
  • Bake 12-15 minutes, cool, then dust with powdered sugar if desired.

Notes

Ensure not to overbake for soft, buttery cookies.
Calories: 80kcal
Cost: $15
Course: Dessert
Cuisine: American
Keyword: Cookies

Nutrition

Calories: 80kcal | Carbohydrates: 10g | Protein: 1g | Fat: 4g | Sodium: 20mg

Loved this recipe? Save it to your favorite Pinterest board so you can easily find it later! It’s the perfect way to keep all your sweet ideas in one place. ✨

Christmas Thumbprint Cookies

Welcome back to Emily’s Must-Try Kitchen, my cozy corner where we turn simple ingredients into delightful memories! Today, I’m excited to share a recipe that’s not only a feast for the eyes but also a joy for the taste buds: Chocolate Hazelnut Thumbprint Cookies. These little gems are a testament to how the best recipes come from the heart, blending nutty goodness with rich chocolate in a way that just begs to be shared. It takes me back to my childhood, when the kitchen would fill with laughter and delicious aromas, and I’d sneak a taste of everything that was baking in the oven.

As I stood on that stool in my mom’s kitchen, I learned that cooking is all about connection—connecting with ingredients, with memories, and with the people we love. And what better way to connect than over a plate of warm, gooey cookies? These Chocolate Hazelnut Thumbprint Cookies are perfect for any occasion, be it a festive gathering or a cozy night in. So let’s roll up our sleeves and dive into this delightful adventure together!

Why You’ll Absolutely Love Chocolate Hazelnut Thumbprint Cookies—Crunchy, Nutty, Chocolatey!

There’s something truly magical about thumbprint cookies, and when you add chocolate and hazelnuts to the mix, it’s a whole new level of deliciousness! Here’s why these cookies will quickly become a favorite in your household:

  • **Irresistible Flavor**: The combination of rich chocolate hazelnut spread and crunchy nuts creates a flavor explosion that’s sure to please.
  • **Easy to Make**: Even if you’re a beginner in the kitchen, this recipe is straightforward and forgiving. You’ll feel like a pro!
  • **Perfect for Sharing**: These cookies are not only beautiful but also make fantastic gifts for friends and family. Who wouldn’t love a box of homemade cookies?
  • **Versatile**: Enjoy them with a cup of coffee, as an after-school snack, or as a sweet addition to your holiday dessert table.

Ingredients You’ll Need

Let’s talk about the ingredients because they’re the stars of this show! For these Chocolate Hazelnut Thumbprint Cookies, you’ll need:

  • 1 cup hazelnuts, toasted and chopped
  • 1 cup all-purpose flour
  • 1/2 teaspoon baking powder
  • 1/4 teaspoon salt
  • 1/2 cup unsalted butter, softened
  • 1/2 cup granulated sugar
  • 1/2 cup brown sugar, packed
  • 1 teaspoon vanilla extract
  • 1 large egg yolk
  • 1/2 cup chocolate hazelnut spread
  • Extra chopped hazelnuts for topping

Each ingredient plays a vital role in creating that perfect balance of crunch and gooeyness. The toasted hazelnuts add a delightful nuttiness that pairs perfectly with the creamy chocolate hazelnut spread, while the combination of sugars gives the cookies a beautiful depth of flavor. You’ll find the full ingredient list with measurements in the recipe card below!

How to Make Chocolate Hazelnut Thumbprint Cookies—Crunchy, Nutty, Chocolatey!, Step-by-Step

Alright, let’s get into the fun part—baking these scrumptious cookies! Follow these simple steps, and let’s make some magic happen in the kitchen:

  1. Preheat your oven to 350°F (175°C) and line a baking sheet with parchment paper. This makes for easy cleanup and prevents sticking!
  2. In a bowl, whisk together the flour, baking powder, and salt. Set aside.
  3. In a separate bowl, cream the softened butter, granulated sugar, and brown sugar until light and fluffy. This is where the magic begins, so take your time!
  4. Add the vanilla extract and egg yolk to the butter mixture and mix until combined. Can you smell that deliciousness already?
  5. Gradually add the dry ingredients to the wet ingredients, mixing until just combined. Don’t overmix; we want these cookies to be tender!
  6. Now, fold in the chopped hazelnuts gently, making sure they’re evenly distributed.
  7. Using a tablespoon, scoop out dough and roll it into balls. Place them on the prepared baking sheet, giving them a little space to spread.
  8. Make an indentation in the center of each ball using your thumb or the back of a spoon. This is where the chocolate hazelnut spread will go, so make it nice and deep!
  9. Fill each indentation with chocolate hazelnut spread and sprinkle chopped hazelnuts on top. This step is where it gets extra decadent!
  10. Bake for 12-15 minutes or until the edges are lightly golden. Let them cool on the baking sheet for a few minutes before transferring them to a wire rack to cool completely.
Chocolate Hazelnut Thumbprint Cookies—Crunchy, Nutty, Chocolatey!

Pro Tips for the Best Results

To ensure your cookies turn out perfectly every time, here are a few pro tips from my kitchen to yours:

  • **Toast Your Hazelnuts**: Toasting enhances the nutty flavor and adds a delightful crunch. Just keep an eye on them to avoid burning!
  • **Don’t Overbake**: The cookies will continue to firm up as they cool, so take them out when the edges are just golden for a soft center.
  • **Experiment with Fillings**: While chocolate hazelnut spread is divine, feel free to try other fillings like raspberry jam or caramel for a fun twist!

Serving Suggestions

These Chocolate Hazelnut Thumbprint Cookies are perfect on their own, but here are some fun ideas to elevate your serving game:

  • Pair them with a scoop of vanilla ice cream for an indulgent dessert.
  • Serve them on a beautiful platter at your next gathering, and watch your guests swoon!
  • For a festive touch, dust with powdered sugar before serving, especially during the holiday season.

Storage and Make-Ahead Tips

Want to make these cookies ahead of time? No problem! Here are some handy storage tips:

  • Store the cookies in an airtight container at room temperature for up to a week. They stay fresh and delicious!
  • If you’d like to freeze them, layer the cookies between parchment paper in an airtight container. They’ll last up to 3 months in the freezer. Just thaw at room temperature before enjoying!

And there you have it—your guide to baking these delightful Chocolate Hazelnut Thumbprint Cookies! I hope this recipe brings as much joy to your kitchen as it does to mine. Remember, cooking is all about having fun and creating memories, so don’t be afraid to get a little messy. I can’t wait to hear how your cookies turn out—let’s keep the conversation going in the comments below!

Happy baking, friends!

Chocolate Hazelnut Thumbprint Cookies—Crunchy, Nutty, Chocolatey!

Prep Time 15 minutes
Cook Time 15 minutes
Total Time 30 minutes
Servings 24 cookies
Calories 150
These delightful cookies combine crunchy hazelnuts with rich chocolate hazelnut spread for a perfect treat.

Ingredients

Nuts and Dry Ingredients

  • 1 cup hazelnuts, toasted and chopped
  • 1 cup all-purpose flour
  • 1/2 teaspoon baking powder
  • 1/4 teaspoon salt
  • 1/2 cup unsalted butter, softened
  • 1/2 cup granulated sugar
  • 1/2 cup brown sugar, packed
  • 1 teaspoon vanilla extract
  • 1 large egg yolk
  • 1/2 cup chocolate hazelnut spread
  • extra chopped hazelnuts for topping chopped hazelnuts

Instructions 

  • Preheat oven to 350°F (175°C) and line a baking sheet with parchment.
  • Mix dry ingredients; cream butter and sugars, then add vanilla and egg yolk.
  • Combine wet and dry, fold in chopped hazelnuts, form dough balls, and place on sheet.
  • Make an indentation, fill with spread, top with chopped hazelnuts, and bake 12-15 mins.

Notes

Store in an airtight container for freshness.
Calories: 150kcal
Cost: $12
Course: Dessert
Cuisine: American
Keyword: chocolate, hazelnuts

Nutrition

Calories: 150kcal | Carbohydrates: 18g | Protein: 2g | Fat: 8g | Sodium: 50mg

Loved this recipe? Save it to your favorite Pinterest board so you can easily find it later! It’s the perfect way to keep all your sweet ideas in one place. ✨

Chocolate Hazelnut Thumbprint Cookies—Crunchy, Nutty, Chocolatey!

As the holiday season approaches, there’s a certain kind of magic that fills the air—twinkling lights, the scent of pine, and of course, the delicious aromas wafting from the kitchen. One of my fondest memories is standing on a stool next to my mom, helping her bake cookies that would fill our home with warmth and cheer. Among those cherished recipes were the beloved Russian Tea Cakes, also known as Melt-in-Your-Mouth Christmas Cookies. These little delights are not just cookies; they are tiny bites of joy that bring back memories of family gatherings, laughter, and the spirit of giving.

Each year, as I pull out my mixing bowl and begin to create these buttery treats, I can’t help but smile at the way they bring everyone together. Whether you’re sharing them with friends at a holiday party or wrapping them up as thoughtful gifts, these cookies are a reminder of the love and joy that cooking can inspire. So, roll up your sleeves with me, and let’s create some holiday magic in every bite!

Why You’ll Absolutely Love Melt-in-Your-Mouth Christmas Cookies Russian Tea Cakes

These cookies are more than just a treat; they embody the spirit of the holiday season. Here’s why you’re going to adore them:

  • They literally melt in your mouth, offering a buttery bliss that’s hard to resist.
  • The combination of nuts and vanilla creates a rich flavor that enhances the holiday cheer.
  • They’re incredibly easy to make, making them perfect for both novice bakers and seasoned pros.
  • These cookies make wonderful gifts, beautifully dusted in powdered sugar, adding a festive touch to any holiday gathering.

Ingredients You’ll Need

Let’s talk about the star players in this delightful recipe! For these Melt-in-Your-Mouth Christmas Cookies, you’ll need some simple yet quality ingredients. The unsalted butter is the foundation, giving these cookies their rich flavor and tender crumb. Powdered sugar sweetens the dough and helps create that signature melt-in-your-mouth texture.

The addition of finely chopped nuts—whether you choose walnuts or pecans—adds a lovely crunch and depth of flavor. Lastly, all-purpose flour and a pinch of salt bring everything together, creating a dough that’s easy to work with.

You’ll find the full ingredient list with measurements in the recipe card below!

How to Make Melt-in-Your-Mouth Christmas Cookies Russian Tea Cakes, Step-by-Step

Now, let’s dive into the fun part—making these cookies! Follow these simple steps to create your own batch of holiday cheer:

  1. Preheat your oven to 350°F (175°C). This ensures a perfectly baked cookie every time!
  2. In a large bowl, cream together the softened butter and powdered sugar until light and fluffy. This step is crucial for that delightful texture!
  3. Stir in the vanilla extract, letting that beautiful aroma fill your kitchen.
  4. In a separate bowl, combine the flour and salt. Gradually add this mixture to the butter mixture, stirring until just combined.
  5. Fold in the chopped nuts until they are evenly distributed throughout the dough. This is where the magic really starts to happen!
  6. Shape the dough into small balls, about 1 inch in diameter, and place them on an ungreased baking sheet.
  7. Bake for 10-12 minutes, or until the bottoms are lightly golden. Don’t be alarmed if they look a bit pale on top; that’s just how they like to be!
  8. Remove from the oven and let cool for 5 minutes. This is the hardest part—waiting!
  9. While still warm, roll the cookies in powdered sugar to coat them. This is what gives them that snowy appearance!
  10. Allow the cookies to cool completely, then roll them in powdered sugar again before serving. Trust me, the second dusting is essential!
Melt-in-Your-Mouth Christmas Cookies Russian Tea Cakes

Pro Tips for the Best Results

Here are a few of my favorite tips to ensure your Russian Tea Cakes turn out perfectly every time:

  • Make sure your butter is at room temperature. This helps it cream more easily, resulting in a lighter cookie.
  • Don’t skip the second dusting of powdered sugar! It not only enhances the presentation but also adds an extra layer of sweetness.
  • Experiment with different nuts! While walnuts and pecans are traditional, feel free to try almonds or hazelnuts for a unique twist.

Serving Suggestions

These cookies are perfect on their own, but if you want to get a little fancy, consider these serving ideas:

  • Arrange them on a festive platter alongside other holiday cookies for a beautiful dessert table.
  • Pair them with a warm cup of tea or coffee for a cozy afternoon treat.
  • Wrap them up in a pretty box with a ribbon for a thoughtful homemade gift that will surely delight.

Storage and Make-Ahead Tips

These cookies store beautifully! Here are some handy tips:

  • Store cooled cookies in an airtight container at room temperature for up to a week.
  • If you want to make them ahead of time, you can freeze the unbaked dough. Just roll it into balls and place them in a single layer on a baking sheet. Once frozen, transfer them to a zip-top bag. When you’re ready to bake, just pop them in the oven straight from the freezer, adding a couple of extra minutes to the baking time.
  • For longer storage, these cookies can be kept in the freezer for up to three months—just remember to roll them in powdered sugar once they’ve thawed!

There you have it, my friends! With these Melt-in-Your-Mouth Christmas Cookies, you’re not just baking; you’re creating sweet memories that will last a lifetime. So, gather your ingredients, invite a loved one into your kitchen, and let’s make this holiday season truly special! Happy baking!

Melt-in-Your-Mouth Christmas Cookies Russian Tea Cakes

Prep Time 15 minutes
Cook Time 12 minutes
Total Time 27 minutes
Servings 24 cookies
Calories 120
These delicate, buttery cookies coated in powdered sugar are a festive treat perfect for holiday gatherings.

Ingredients

Dough

  • 1 cup unsalted butter, softened
  • 1/2 cup powdered sugar
  • 1 teaspoon vanilla extract
  • 2 cups all-purpose flour
  • 1/4 teaspoon salt
  • 1 cup finely chopped nuts (walnuts or pecans)

Additional coating

  • additional powdered sugar for dusting

Instructions 

  • Preheat oven to 350°F (175°C).
  • Cream butter and powdered sugar until fluffy, then add vanilla.
  • Mix in flour, salt, and nuts; form into 1-inch balls.
  • Bake for 10-12 minutes, cool slightly, then roll in powdered sugar.
  • Once cooled, dust with powdered sugar again before serving.

Notes

Ensure cookies are fully cooled before dusting with powdered sugar to prevent melting.
Calories: 120kcal
Cost: $15
Course: Dessert
Cuisine: Russian
Keyword: Cookies

Nutrition

Calories: 120kcal | Carbohydrates: 15g | Protein: 1g | Fat: 7g | Sodium: 20mg

Loved this recipe? Save it to your favorite Pinterest board so you can easily find it later! It’s the perfect way to keep all your sweet ideas in one place. ✨

Melt-in-Your-Mouth Christmas Cookies Russian Tea Cakes

Welcome back to Emily’s Must-Try Kitchen! Today, I’m excited to share a delightful winter treat that is sure to warm your heart and your taste buds: 【型なしで簡単】雪だるまのマシュマロサンドクッキー⛄️! These cookies are not only adorable but also incredibly fun to make, especially when the chilly weather outside invites us to cozy up in the kitchen. I can still remember the joy of holiday baking with my family in Charleston, where the aroma of sweet treats filled our home as we gathered around the table, laughing and sharing stories. This recipe encapsulates that warmth and joy, making it perfect for any winter gathering.

So, roll up your sleeves and let’s dive into making these fun marshmallow sandwich cookies that will bring a sprinkle of magic to your kitchen. They’re like little snowmen, ready to bring smiles to your family and friends!

Why You’ll Absolutely Love 【型なしで簡単】雪だるまのマシュマロサンドクッキー⛄️

These cookies are more than just a sweet treat; they’re a delightful activity to share with loved ones. Here’s why you’ll absolutely adore them:

  • They are easy to make, which means you can involve your kids or friends in the fun!
  • The combination of soft marshmallow and rich cocoa cookie creates a delightful contrast that you won’t be able to resist.
  • They’re perfect for cozy gatherings, holiday parties, or even as a sweet afternoon pick-me-up.
  • Decorating these cookies is a chance for creativity, with colorful icing bringing each little snowman to life!

Ingredients You’ll Need

Let’s talk about the ingredients that will bring these delightful cookies to life! You’ll find a lovely mix of basics that you probably already have in your pantry, along with a few special touches. The cocoa powder gives these cookies a rich, chocolaty flavor, while the marshmallows add a delightful gooeyness that makes every bite a little piece of heaven. Here’s what you’ll gather:

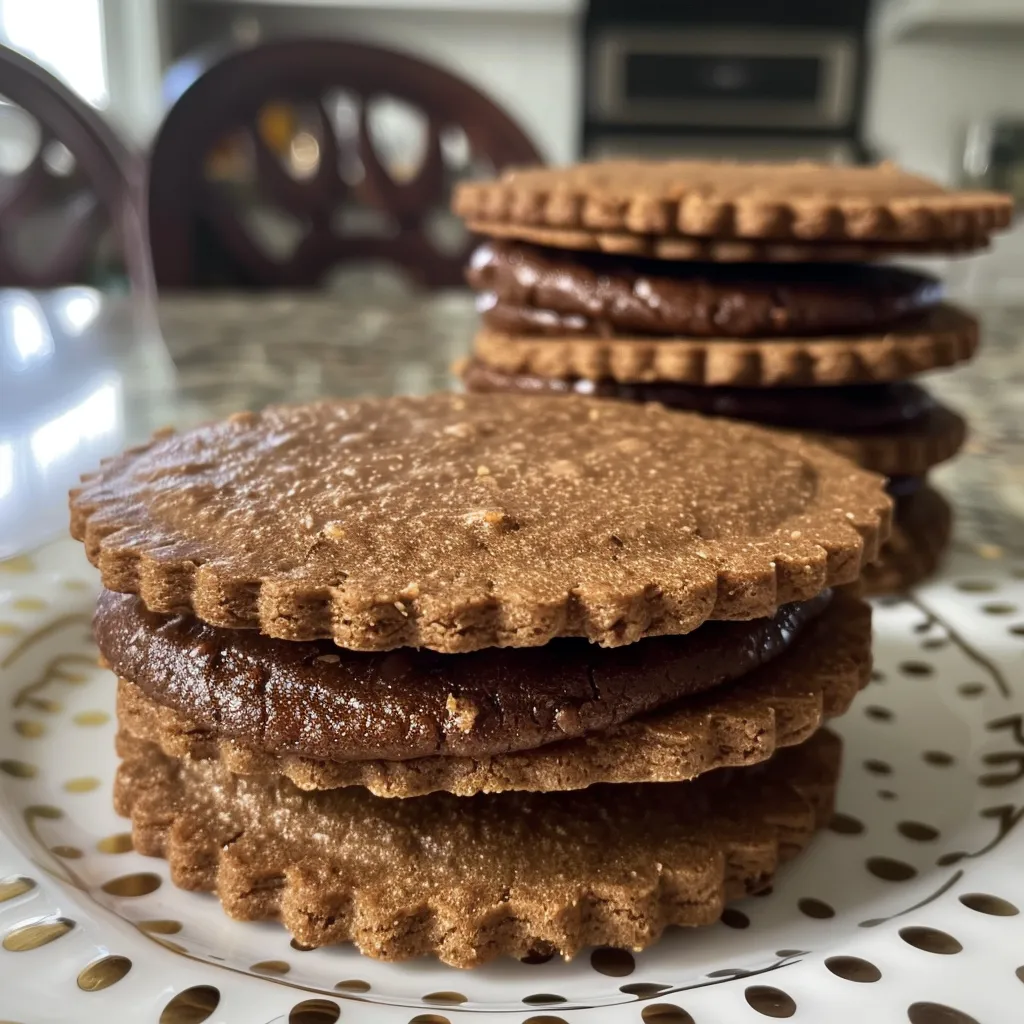
  • 薄力粉 40g (Cake flour)
  • ココアパウダー 6g (Cocoa powder)
  • バター 25g (Butter)
  • 粉糖 25g (Powdered sugar)
  • 全卵 10g (Whole egg)
  • マシュマロ 7個 (Marshmallows)
  • アイシングシュガー各色 適量 (Icing sugar in various colors)

You’ll find the full ingredient list with measurements in the recipe card below!

How to Make 【型なしで簡単】雪だるまのマシュマロサンドクッキー⛄️, Step-by-Step

Alright, let’s get to the fun part—making these cookies! Follow these steps, and soon you’ll have a plate full of adorable snowmen ready to brighten your day:

  1. First, we’ll make the cocoa cookie dough. In a mixing bowl, combine the butter and powdered sugar, and mix well with a rubber spatula until creamy and smooth.
  2. Add the whole egg and mix until fully incorporated. This is where the magic begins!
  3. Next, sift in the cake flour and cocoa powder, and gently fold until there are no dry bits left. It’s okay to get a little messy; that’s part of the fun!
  4. Wrap the dough in plastic wrap and refrigerate it for about 30 minutes. This helps the flavors meld and makes it easier to shape.
  5. Once chilled, roll out the dough and use two different piping tips to cut out shapes for your snowman cookies. You can get creative with sizes!
  6. Preheat your oven to 170°C (340°F) and bake the cookies for about 15 minutes, or until they’re just set. Your kitchen will smell heavenly!
  7. After baking, place a marshmallow on top of each cookie and microwave for about 10 seconds at 600W to soften them just enough to stick.
  8. Finally, sandwich another cookie on top and use icing to decorate little eyes and smiles. The more colorful, the better!
【型なしで簡単】雪だるまのマシュマロサンドクッキー⛄️

Pro Tips for the Best Results

Here are a few pro tips to ensure your marshmallow sandwich cookies turn out perfectly:

  • Chill your dough thoroughly. This step is crucial for getting the right texture and making it easier to cut out your cookie shapes.
  • Don’t skip the melting step for the marshmallows! It’s what makes the sandwich cookie chewy and delightful.
  • Get creative with decorations! Use different colors of icing and even edible glitter for a festive touch.

Serving Suggestions

These cookies are perfect for sharing! Consider serving them on a festive platter at your next holiday gathering, or gift them in cute little bags to friends and family. They also pair wonderfully with a warm cup of hot cocoa or coffee, making them a delightful treat for an afternoon pick-me-up. You could even set up a little decorating station and let your guests customize their cookies—what a fun way to engage everyone!

Storage and Make-Ahead Tips

If you want to make these cookies ahead of time, you can prepare the cookie dough and refrigerate it for up to 2 days before baking. Once baked, these cookies can be stored in an airtight container at room temperature for about a week. If you’re feeling extra ambitious, you can freeze the baked cookies for up to a month! Just be sure to let them thaw at room temperature before enjoying. Trust me, they taste just as good as the day you made them!

【型なしで簡単】雪だるまのマシュマロサンドクッキー⛄️

Prep Time 30 minutes
Cook Time 15 minutes
Total Time 45 minutes
Servings 8 pieces
Calories 150
かわいらしい雪だるまの形のマシュマロサンドクッキーを作りましょう。簡単にできて、見た目も楽しいお菓子です。

Ingredients

《ココアクッキー生地》

  • 40 g 薄力粉
  • 6 g ココアパウダー
  • 25 g バター
  • 25 g 粉糖
  • 10 g 全卵
  • 7 pcs マシュマロ
  • 適量 アイシングシュガー各色

Instructions 

  • クッキー生地を丸で抜き、天板に並べる。
  • 口金を2種使い穴を開けて型抜きし、170度のオーブンで15分焼く。
  • マシュマロをクッキーの上に乗せ、600Wで10秒加熱する。
  • クッキーで挟み、アイシングで目や口を描いて完成。

Notes

アイシングシュガーは色とりどりを用意すると見た目が華やかになります。
Calories: 150kcal
Cost: $15
Course: Dessert
Cuisine: Japanese
Keyword: marshmallow

Nutrition

Calories: 150kcal | Carbohydrates: 25g | Protein: 2g | Fat: 7g | Sodium: 20mg

Loved this recipe? Save it to your favorite Pinterest board so you can easily find it later! It’s the perfect way to keep all your sweet ideas in one place. ✨
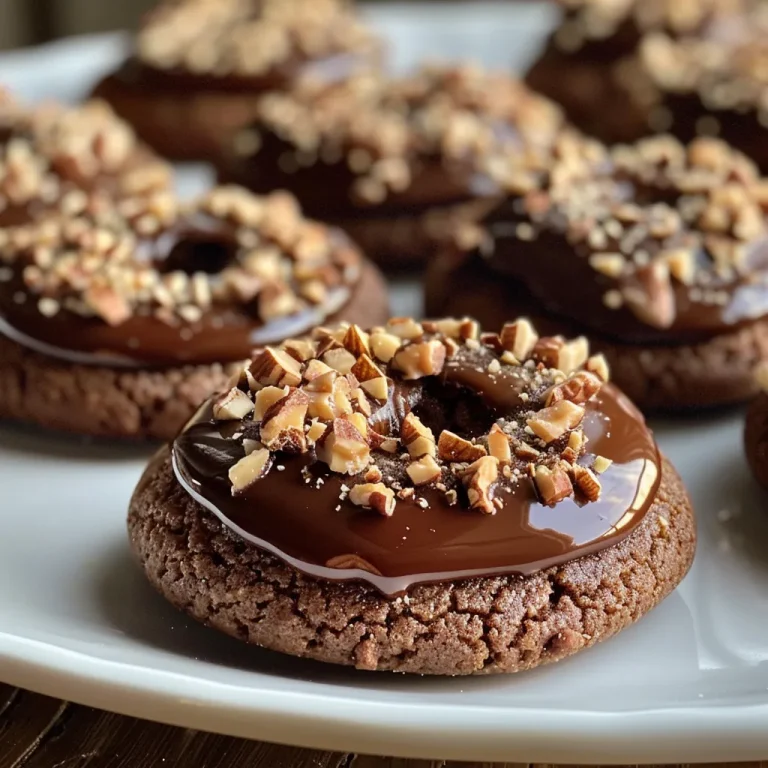
【型なしで簡単】雪だるまのマシュマロサンドクッキー⛄️

Ah, the holidays! A time filled with warmth, joy, and an abundance of delicious treats. As a child growing up in Charleston, South Carolina, I remember the excited anticipation that filled our home as the scent of freshly baked cookies wafted through the air. My mom would often let me stand on a stool in her kitchen, where I’d sneak tastes of dough and giggle as flour dusted my nose. Those moments weren’t just about the cookies; they were about connection, laughter, and creating memories that would last a lifetime.

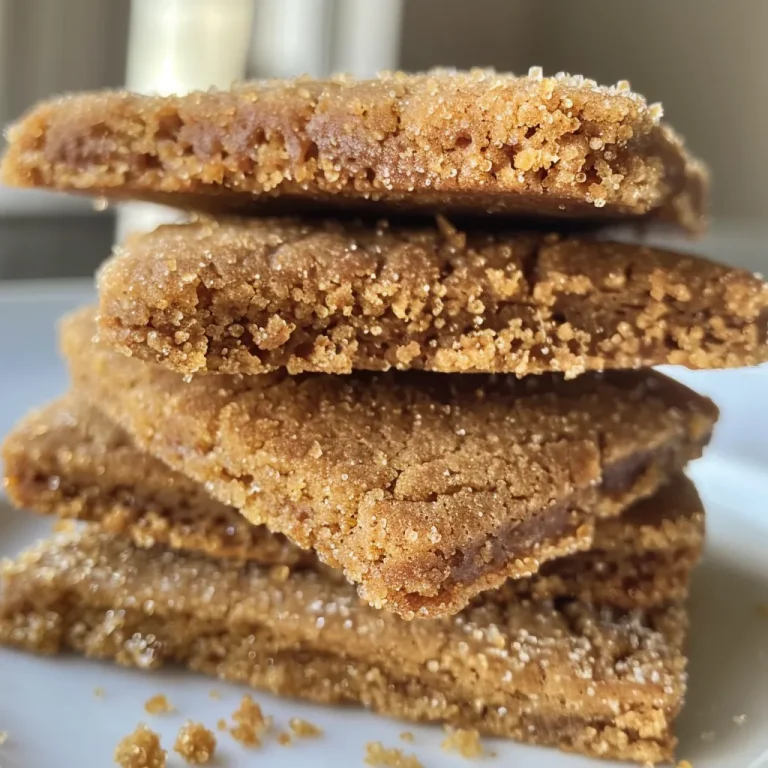
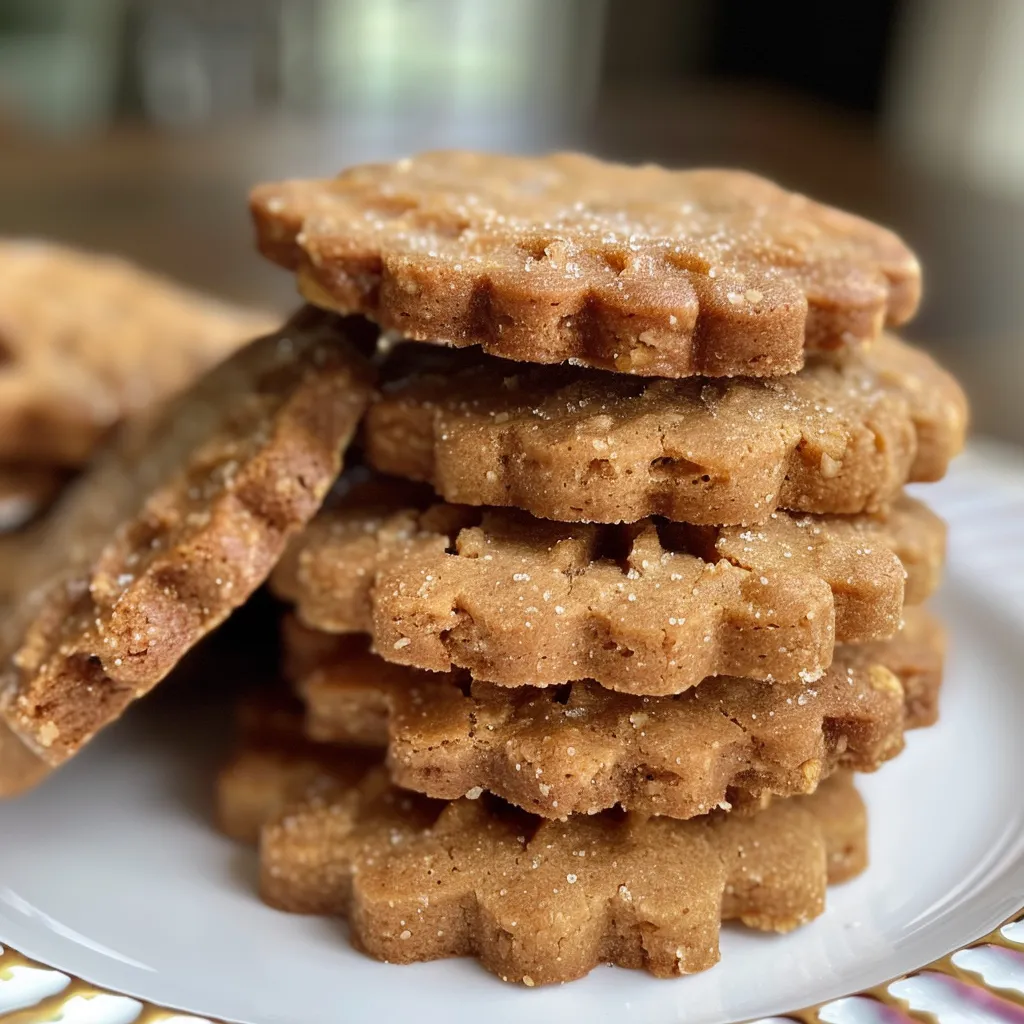
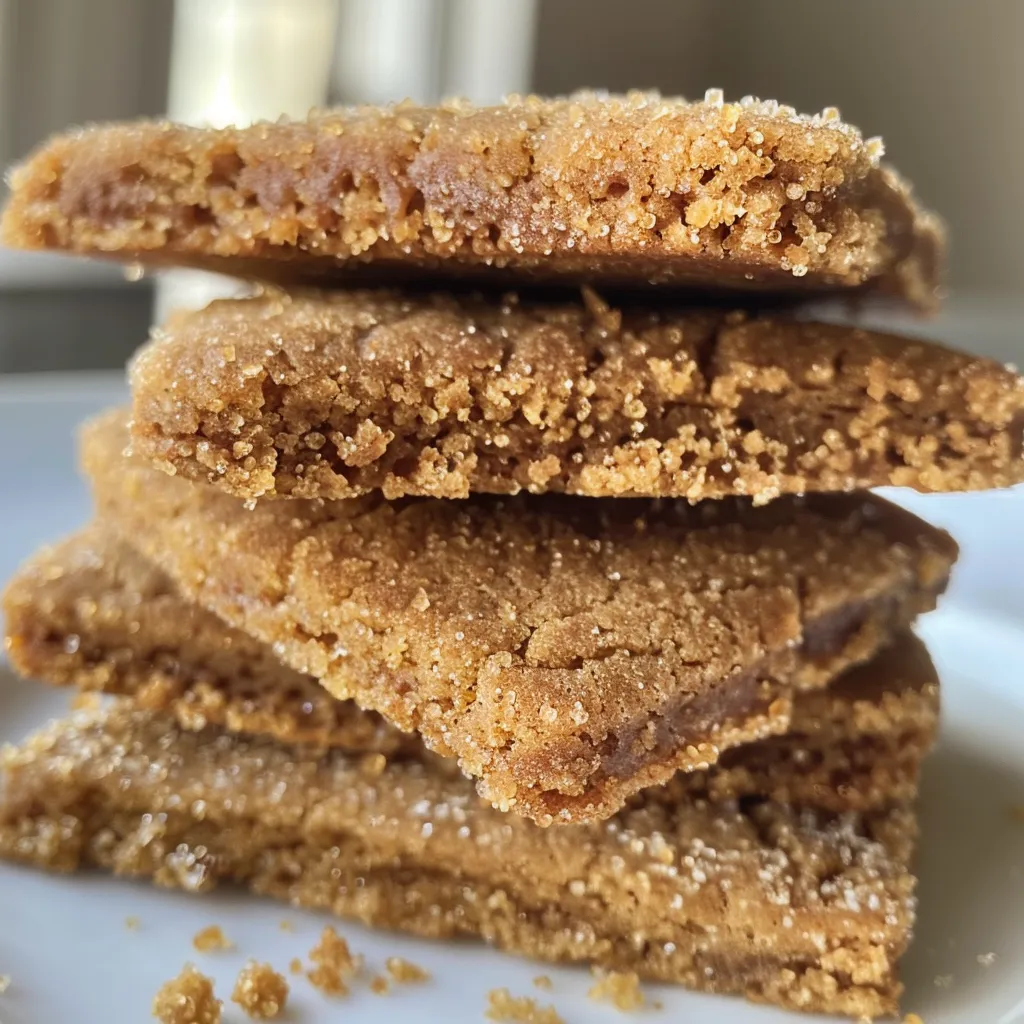
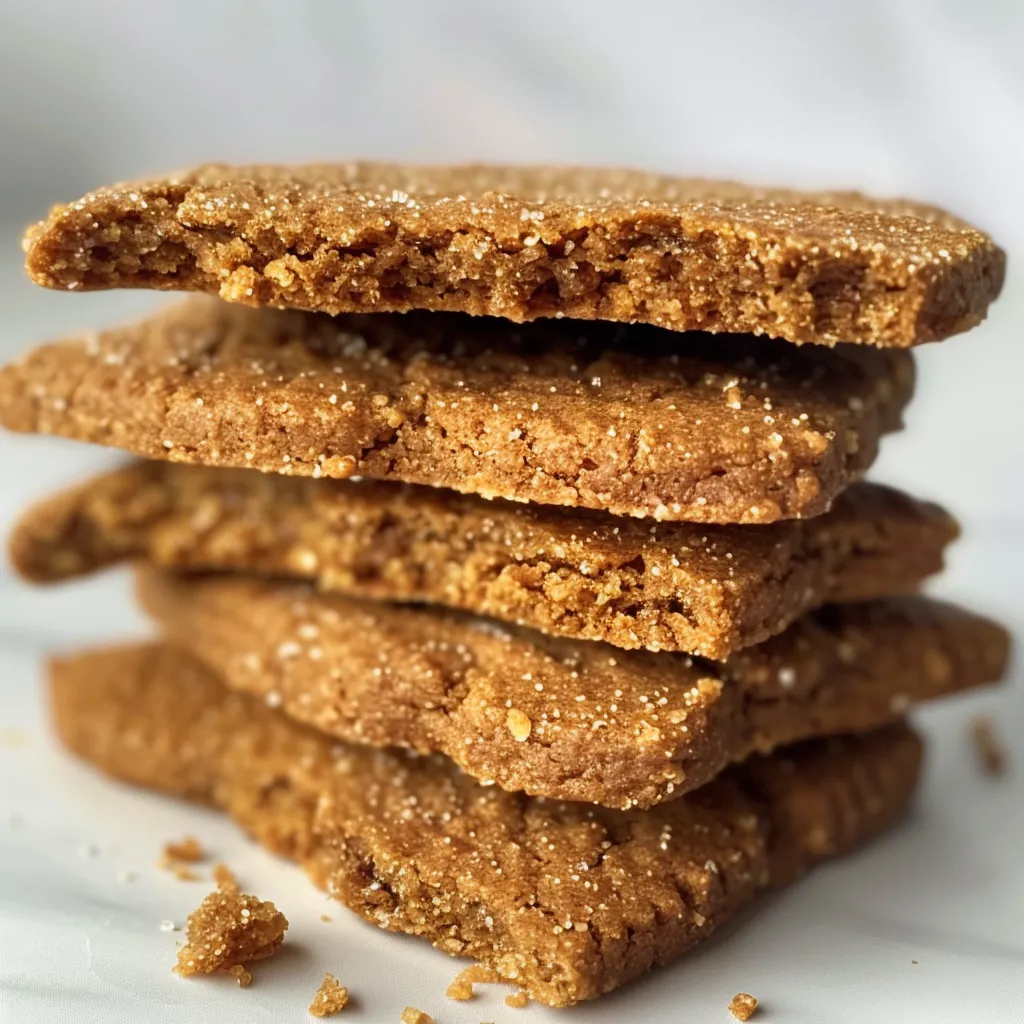
Now, as a passionate home chef and the heart behind ‘Emily’s Must-Try Kitchen,’ I cherish those memories and strive to recreate that joy in my own kitchen. This holiday season, I’m excited to share a recipe that’s become a favorite in my home: Crunchy Speculoos Cookies. These delightful treats are perfectly spiced, irresistibly crunchy, and sure to steal the show at any gathering. So, let’s roll up our sleeves and bake some joy together!

Why You’ll Absolutely Love Crunchy Speculoos Cookies Christmas Recipe

These cookies are not just another holiday treat; they are a celebration of flavor and nostalgia! Here’s why you’ll absolutely adore this recipe:

  • They are perfectly spiced, bringing the warmth of cinnamon, ginger, and cloves right into your home.
  • With a delightful crunch that’s satisfying to bite into, they are perfect for dunking in milk or hot cocoa!
  • These cookies are simple to make, making them an excellent choice for both novice bakers and seasoned pros.
  • They are a fantastic addition to holiday cookie trays and make thoughtful gifts for friends and family.

Ingredients You’ll Need

Let’s talk about the magic ingredients that come together to create these crunchy delights! We’re keeping it simple and using ingredients that you likely already have in your pantry. The star here is the blend of warming spices—cinnamon, ginger, nutmeg, and cloves—that infuse the cookies with that classic holiday flavor. The brown sugar adds a rich sweetness that complements the spices beautifully, while the softened butter creates that perfect melt-in-your-mouth texture.

You’ll find the full ingredient list with measurements in the recipe card below!

How to Make Crunchy Speculoos Cookies Christmas Recipe, Step-by-Step

Alright, let’s get baking! Follow these simple steps to create your very own batch of Crunchy Speculoos Cookies:

  1. Preheat your oven to 180°C (350°F). This is crucial for getting those cookies just right!
  2. In a large bowl, cream together the softened butter and brown sugar until light and fluffy. This step is essential for achieving that delightful texture.
  3. Add the egg and vanilla extract to the butter mixture and mix well until combined.
  4. In a separate bowl, whisk together the all-purpose flour, baking powder, and spices (cinnamon, ginger, nutmeg, cloves) along with the salt. This helps to evenly distribute the spices.
  5. Gradually add the dry ingredients to the wet mixture, mixing until just combined. Don’t overmix; we want to keep that lovely crunch!
  6. Roll the dough into small balls (about a tablespoon each) and place them on a baking sheet lined with parchment paper, flattening them slightly. They’ll spread just a bit while baking.
  7. Bake in the preheated oven for 10-12 minutes or until the edges are golden. Your kitchen will smell heavenly at this point!
  8. Allow the cookies to cool on the baking sheet for a few minutes before transferring them to a wire rack to cool completely. This helps them firm up.
  9. Enjoy your crunchy speculoos cookies with a glass of milk or hot cocoa! You deserve it!
Crunchy Speculoos Cookies Christmas Recipe

Pro Tips for the Best Results

Here are a few tips to ensure your cookies turn out perfectly every time:

  • Make sure your butter is softened but not melted. This will help create that light, fluffy texture.
  • For an extra touch of flavor, consider adding a pinch of black pepper to the spice mix. It adds a surprising depth!
  • If you prefer a softer cookie, take them out of the oven when they’re just set and allow them to cool on the sheet for a few minutes before moving them to a wire rack.

Serving Suggestions

These speculoos cookies are versatile and can be served in so many delightful ways! Consider pairing them with:

Storage and Make-Ahead Tips

These cookies can be stored in an airtight container at room temperature for up to a week—if they last that long! For longer storage, you can freeze the baked cookies for up to three months. Just make sure to layer them with parchment paper to prevent sticking. You can also make the dough ahead of time and refrigerate it for up to three days before baking. Just let it sit at room temperature for a bit before rolling and baking.

So there you have it—a simple, delicious recipe for Crunchy Speculoos Cookies that will surely become a holiday favorite in your home. Whether you’re baking for yourself or sharing with loved ones, these cookies are sure to spread joy and warmth. Happy baking, friends!

Crunchy Speculoos Cookies Christmas Recipe

Prep Time 15 minutes
Cook Time 12 minutes
Total Time 27 minutes
Servings 24 cookies
Calories 120
Enjoy these crunchy, spiced cookies perfect for the holiday season. They combine warm cinnamon and ginger flavors with a crisp texture.

Ingredients

Dough

  • 250 g all-purpose flour
  • 150 g brown sugar
  • 100 g unsalted butter, softened
  • 1 tsp baking powder
  • 1 tsp ground cinnamon
  • 0.5 tsp ground ginger
  • 0.25 tsp ground nutmeg
  • 0.25 tsp ground cloves
  • 0.25 tsp salt
  • 1 unit egg
  • 1 tsp vanilla extract

Instructions 

  • Preheat oven to 180°C (350°F).
  • Cream butter and sugar, then add egg and vanilla.
  • Mix in dry ingredients until dough forms.
  • Shape into balls, flatten, and place on baking sheet.
  • Bake for 10-12 minutes until edges are golden. Cool and enjoy.

Notes

Chill the dough for easier handling if needed.
Calories: 120kcal
Cost: $15
Course: Dessert
Cuisine: European
Keyword: Christmas, Cookies, speculoos

Nutrition

Calories: 120kcal | Carbohydrates: 18g | Protein: 2g | Fat: 5g | Sodium: 50mg

Loved this recipe? Save it to your favorite Pinterest board so you can easily find it later! It’s the perfect way to keep all your sweet ideas in one place. ✨
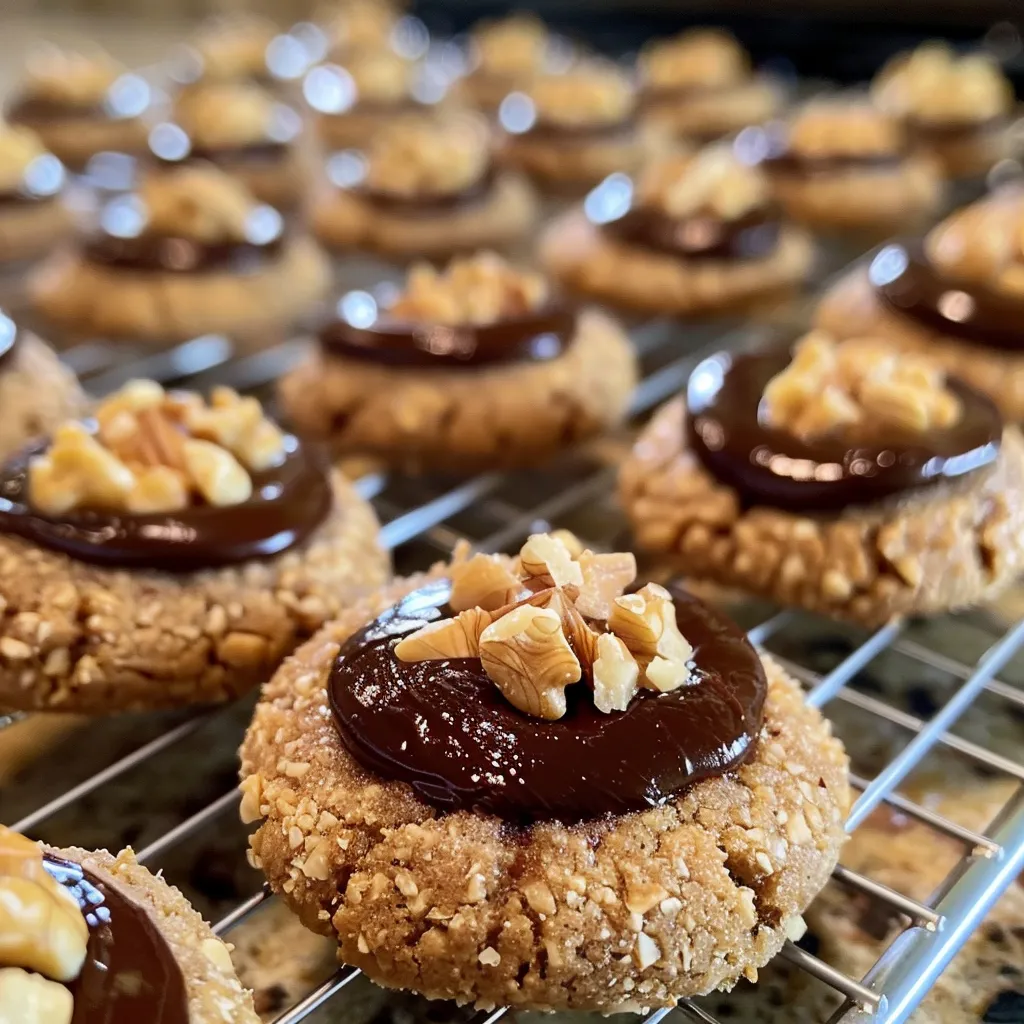
Crunchy Speculoos Cookies Christmas Recipe

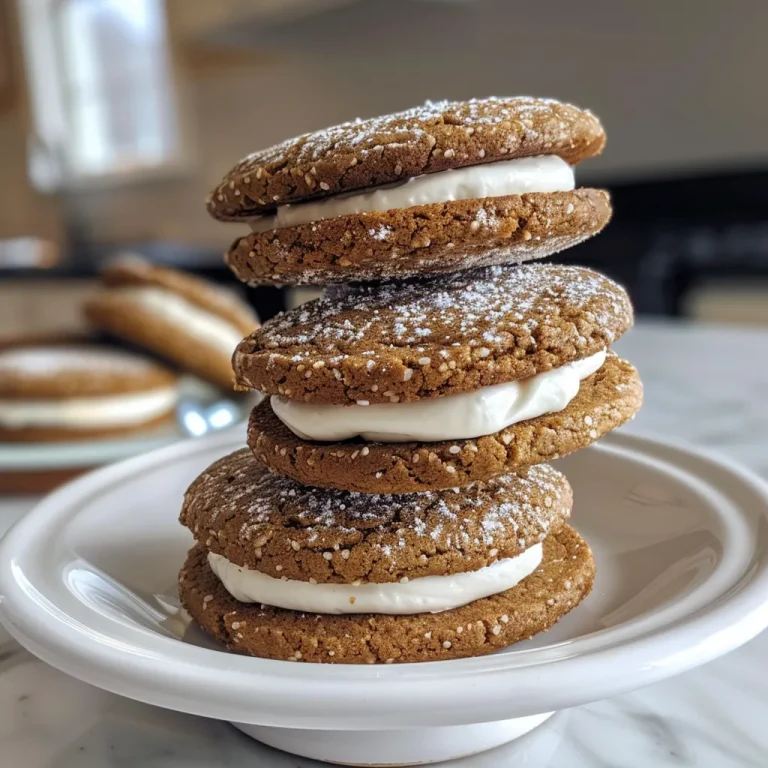
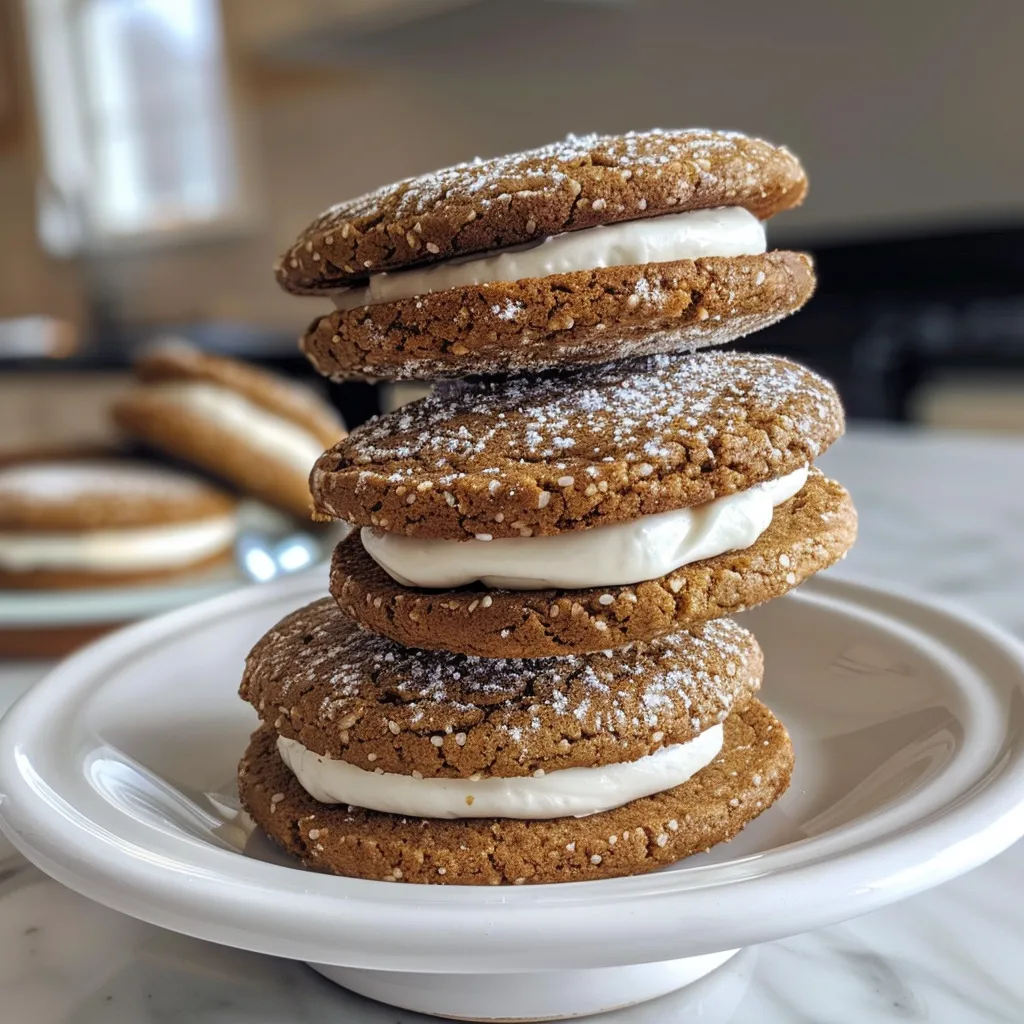
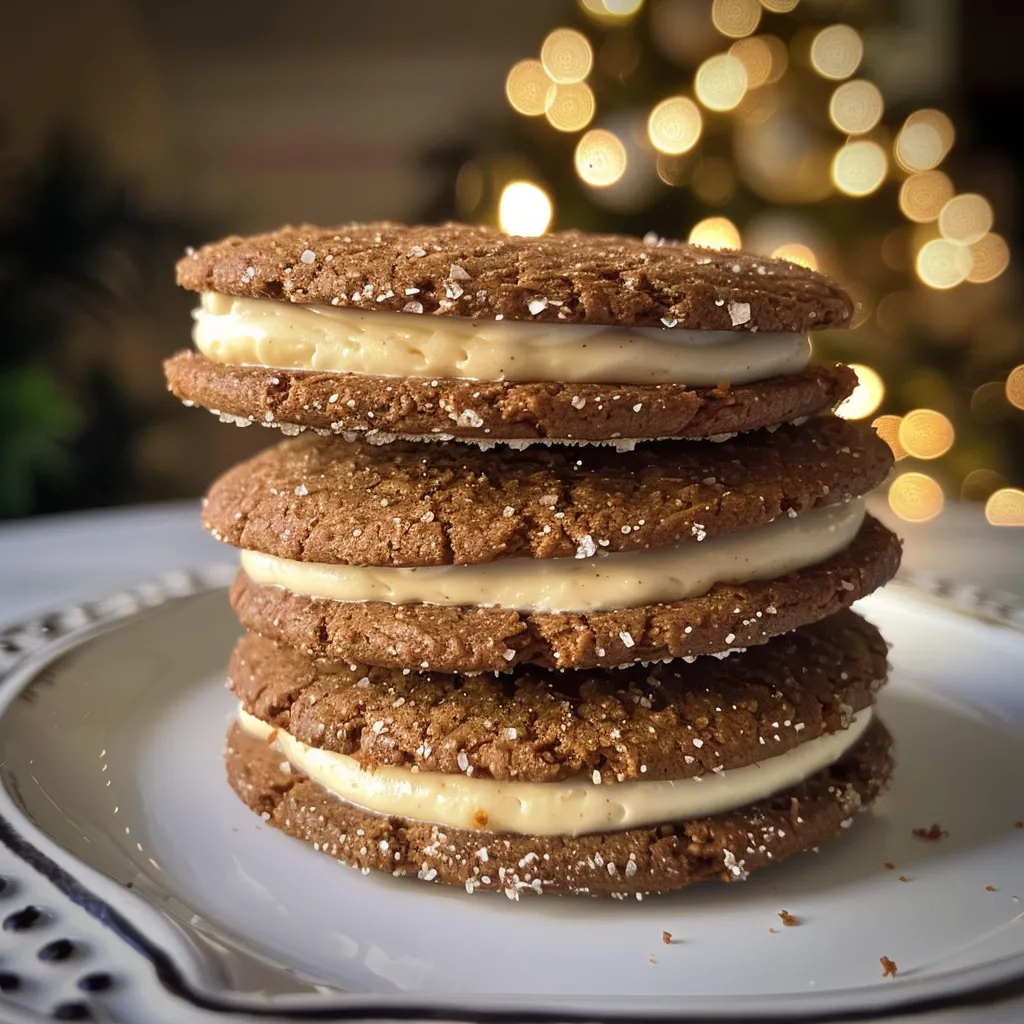
Ah, the holiday season! It’s that magical time of year when the air is filled with the scent of pine, twinkling lights adorn every corner, and the joy of baking fills our homes with warmth and love. Growing up in Charleston, South Carolina, my fondest memories revolve around the kitchen, where my mom would whip up batch after batch of gingerbread cookies. I can still picture myself standing on a stool, eagerly waiting for the first batch to come out of the oven, the spicy aroma wrapping around me like a cozy blanket. Now, as I’ve grown and carved out my own culinary path, I’m thrilled to share one of my favorite cookie recipes that has stood the test of time: Gingerbread Sandwich Cookies.

These cookies are not just delightful treats; they are the essence of the season wrapped in a creamy, spiced hug. Perfect for holiday gatherings, cozy afternoons with a cup of tea, or even as a thoughtful gift, these cookies are bound to become a cherished family favorite. So, let’s roll up our sleeves and dive into the magic of baking together!

Why You’ll Absolutely Love Gingerbread Sandwich Cookies | Teak & Thyme

Let me share why these gingerbread sandwich cookies are destined to steal your heart (and your taste buds):

  • They are the perfect blend of sweet and spicy, offering a delightful twist on classic gingerbread.
  • The cream cheese filling adds a luscious, tangy sweetness that perfectly complements the spiced cookies.
  • These cookies are perfect for decorating with your favorite festive sprinkles or icing, making them a fun activity for the whole family.
  • They are easy to make and can be prepared ahead of time, saving you precious moments during the busy holiday season.

Ingredients You’ll Need

Gathering the right ingredients is key to creating these scrumptious gingerbread sandwich cookies. Here’s what you’ll need:

  • 2 1/4 cups all-purpose flour
  • 1 teaspoon baking soda
  • 1 tablespoon ground ginger
  • 1 tablespoon ground cinnamon
  • 1/2 teaspoon ground cloves
  • 1/4 teaspoon salt
  • 3/4 cup unsalted butter, softened
  • 1/2 cup brown sugar, packed
  • 1/2 cup granulated sugar
  • 1 large egg
  • 1/2 cup molasses
  • 1 teaspoon vanilla extract
  • Cream cheese frosting (for filling)

You’ll find the full ingredient list with measurements in the recipe card below!

How to Make Gingerbread Sandwich Cookies | Teak & Thyme, Step-by-Step

Let’s get started on this delicious journey! Here’s how to make these gingerbread sandwich cookies step by step:

  1. Preheat your oven to 350°F (175°C) and line baking sheets with parchment paper. This helps to ensure your cookies bake evenly and don’t stick!
  2. In a bowl, whisk together the flour, baking soda, ground ginger, cinnamon, cloves, and salt. This is where the magic begins—the spicy aroma of ginger and cinnamon will fill your kitchen!
  3. In a large mixing bowl, beat the softened butter, brown sugar, and granulated sugar until creamy. This step is crucial; the creaminess helps create a light texture.
  4. Add the egg, molasses, and vanilla extract to the butter mixture and mix until combined. The molasses will give your cookies that rich, dark color and deep flavor.
  5. Gradually add the dry ingredients to the wet ingredients, mixing until just combined. Be careful not to overmix; we want tender cookies!
  6. Scoop tablespoon-sized balls of dough onto the prepared baking sheets, spacing them about 2 inches apart. These cookies will spread a bit as they bake.
  7. Bake for 8-10 minutes, or until the edges are firm. Let cool on the baking sheet for a few minutes before transferring to a wire rack to cool completely.
  8. Once cooled, spread cream cheese frosting on the flat side of one cookie and sandwich it with another cookie. Repeat until all cookies are filled. Enjoy your gingerbread sandwich cookies!
Gingerbread Sandwich Cookies | Teak & Thyme

Pro Tips for the Best Results

Here are a few tips from my kitchen to yours to ensure your gingerbread sandwich cookies turn out perfectly:

  • Let your butter come to room temperature before mixing; it will incorporate better and create a smoother dough.
  • Don’t skip cooling the cookies completely before frosting. This helps the frosting stay in place and prevents it from melting into the cookies.
  • For an extra festive touch, sprinkle some crushed candy canes or festive sprinkles on the cream cheese frosting before sandwiching the cookies.

Serving Suggestions

These gingerbread sandwich cookies are delightful on their own, but here are a few creative serving suggestions to elevate your cookie experience:

  • Pair them with a warm cup of spiced tea or hot cocoa for a cozy afternoon treat.
  • Serve them on a decorative platter at holiday gatherings, alongside other festive cookies.
  • Wrap them in parchment paper and tie with a ribbon for a charming homemade gift.

Storage and Make-Ahead Tips

To keep these cookies fresh and delicious, here are some storage tips:

  • Store the filled cookies in an airtight container in the refrigerator for up to one week. If you want to keep them longer, consider freezing them before frosting!
  • To freeze, place the cooled cookies in a single layer in a freezer-safe bag or container. You can frost them once they’re thawed for the best texture.

So there you have it, friends! A delightful recipe for gingerbread sandwich cookies that are sure to warm your heart and fill your home with the spirit of the season. I hope you enjoy making these as much as I do. Don’t forget to share your cookie-making adventures with me on social media—let’s swap stories, laugh at our floury mishaps, and celebrate the joy of cooking together!

Gingerbread Sandwich Cookies | Teak & Thyme

Prep Time 15 minutes
Cook Time 10 minutes
Total Time 25 minutes
Servings 12 cookies
Calories 150
Delight in these spiced gingerbread cookies filled with creamy frosting, perfect for holiday treats or cozy gatherings.

Ingredients

Dough

  • 2 1/4 cups all-purpose flour
  • 1 teaspoon baking soda
  • 1 tablespoon ground ginger
  • 1 tablespoon ground cinnamon
  • 1/2 teaspoon ground cloves
  • 1/4 teaspoon salt
  • 3/4 cup unsalted butter, softened
  • 1/2 cup brown sugar, packed
  • 1/2 cup granulated sugar
  • 1 large egg
  • 1/2 cup molasses
  • 1 teaspoon vanilla extract

Filling

  • cream cheese frosting (for filling)

Instructions 

  • Preheat oven to 350°F (175°C) and line baking sheets with parchment.
  • Mix dry ingredients; beat butter and sugars until creamy.
  • Add egg, molasses, vanilla; combine well.
  • Gradually mix in dry ingredients; form dough balls and bake 8-10 mins.
  • Cool cookies, spread frosting on flat sides, and sandwich together.

Notes

Ensure cookies are completely cooled before filling to prevent melting.
Calories: 150kcal
Cost: $15
Course: Dessert
Cuisine: American
Keyword: gingerbread

Nutrition

Calories: 150kcal | Carbohydrates: 22g | Protein: 2g | Fat: 7g | Sodium: 80mg

Loved this recipe? Save it to your favorite Pinterest board so you can easily find it later! It’s the perfect way to keep all your sweet ideas in one place. ✨
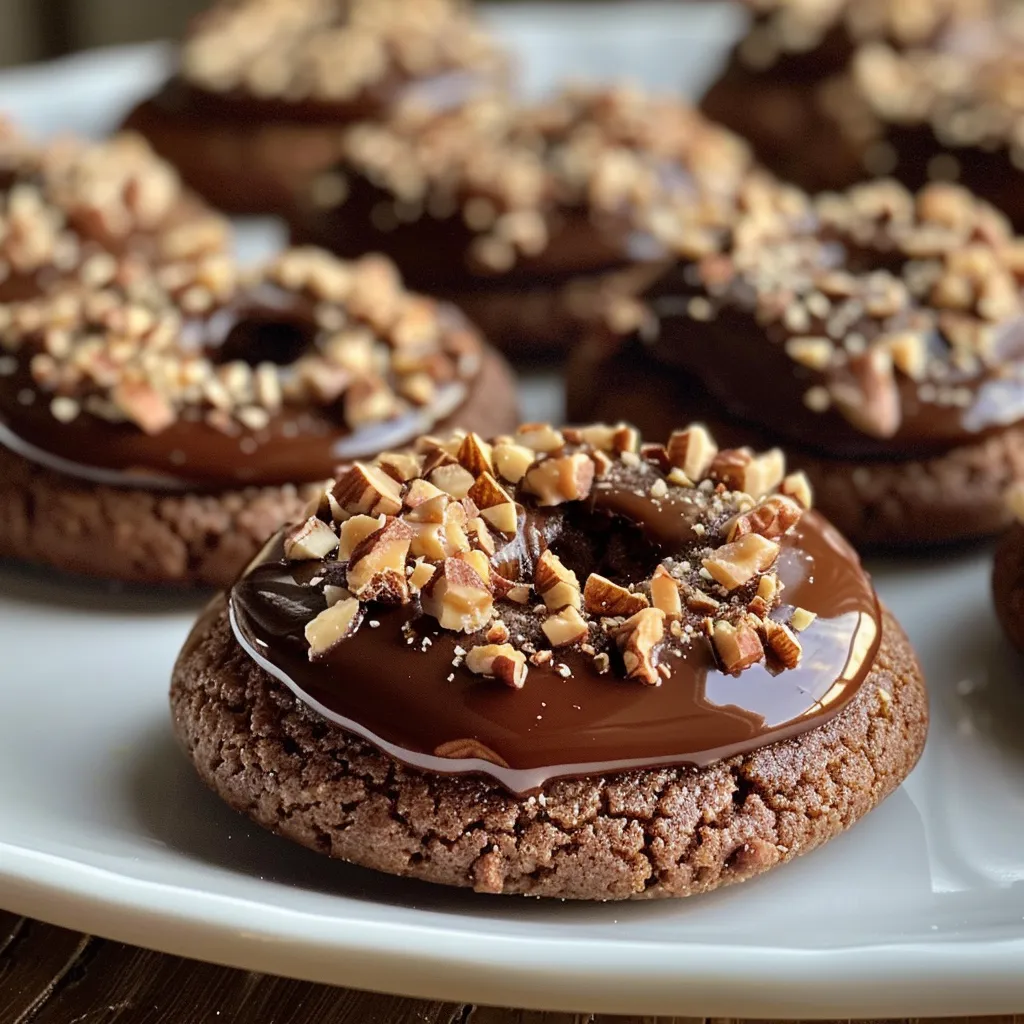
Gingerbread Sandwich Cookies | Teak & Thyme

Welcome back to Emily’s Must-Try Kitchen, my cozy little corner of the internet where we whip up delicious treats that bring joy to our tables! Today, I am beyond excited to share a recipe that has a special place in my heart: Danish Butter Recipe. Growing up in Charleston, I remember my grandmother making the most delightful cookies and treats, filling the house with warmth and love. This Danish butter is one of those recipes that captures that feeling perfectly—it’s creamy, rich, and oh-so-delicious!

As I stand here in my kitchen, the smell of butter and sugar wafting through the air, I can’t help but think about how this simple recipe can brighten even the gloomiest of days. Whether you’re hosting a festive gathering or simply indulging in a quiet moment with a cup of tea, this Danish butter is sure to make you smile. So, let’s dive into this charming adventure together!

Why You’ll Absolutely Love Danish Butter Recipe | Veronika’s Kitchen

This Danish butter recipe is not just a treat; it’s an experience! Here are a few reasons why you’ll absolutely adore it:

  • It’s incredibly easy to make! With just a handful of ingredients, you’ll feel like a pro in no time.
  • The buttery, melt-in-your-mouth texture is simply irresistible! Each slice is a little piece of heaven.
  • It’s versatile! Perfect for spreading on warm bread, topping your favorite pancakes, or even as a delightful addition to your holiday cookie platters.
  • It brings people together. Share it with friends, family, or keep it all to yourself—either way, it’s bound to create some delicious memories!

Ingredients You’ll Need

Let’s talk ingredients! For this Danish Butter Recipe, we’re keeping it simple yet flavorful. Here’s what you’ll need:

  • 1 cup unsalted butter, softened
  • 1/2 cup powdered sugar
  • 1/4 cup all-purpose flour
  • 1/4 teaspoon salt
  • 1 teaspoon vanilla extract

You’ll find the full ingredient list with measurements in the recipe card below!

How to Make Danish Butter Recipe | Veronika’s Kitchen, Step-by-Step

Ready to get started? Here’s how you can make this delightful Danish butter step by step:

  1. In a mixing bowl, beat the softened butter until creamy. This is where the magic begins! You want it to be light and fluffy.
  2. Add the powdered sugar and mix until well combined. This will add a sweet touch to your butter, making it irresistible!
  3. Gradually add the all-purpose flour and salt, mixing until smooth. Don’t rush this step; take your time to ensure it all comes together beautifully.
  4. Stir in the vanilla extract until evenly distributed. The aroma will have you dreaming of holiday cookies!
  5. Transfer the mixture to a piece of parchment paper and shape it into a log. It doesn’t have to be perfect—just roll it up with love!
  6. Wrap the log tightly and refrigerate for at least 1 hour until firm. This is the hardest part—waiting! But trust me, it’s worth it.
  7. Once chilled, slice the butter into rounds and serve as desired. You can even use cookie cutters for fun shapes!
Danish Butter Recipe | Veronika's Kitchen

Pro Tips for the Best Results

Here are a few of my favorite tips to ensure your Danish butter turns out perfectly:

  • Make sure your butter is truly softened. If it’s too hard, it won’t blend well, and if it’s too soft, it will be too sticky to work with.
  • Use high-quality vanilla extract for the best flavor—trust me, it makes a difference!
  • If you want to get creative, feel free to add a pinch of cinnamon or nutmeg for a warm, cozy twist!

Serving Suggestions

Now that you’ve created this delightful Danish butter, how can you enjoy it? Here are a few fun serving ideas:

  • Spread it on warm, toasted bread or bagels for a breakfast treat that’s sure to start your day off right.
  • Use it as a topping for pancakes or waffles—because who doesn’t love a little extra butter on their breakfast?
  • Pair it with fresh fruit or serve it alongside a cheese platter for a delightful afternoon snack.
  • Don’t forget to include it in your holiday cookie platters! It’s a beautiful addition that everyone will love.

Storage and Make-Ahead Tips

Wondering how to store your delicious Danish butter? Here are some tips:

  • Store the wrapped log in the refrigerator for up to two weeks. You can also freeze it for up to three months! Just make sure to wrap it tightly.
  • When you’re ready to use it, simply slice off what you need and let it soften at room temperature for a few minutes before serving.
  • This recipe is perfect for making ahead of time, especially during the busy holiday season. You can whip it up and have it ready to impress your guests!

So there you have it, friends—my cherished Danish Butter Recipe that’s sure to whisk up happiness in your kitchen! I can’t wait to hear how yours turns out, so be sure to share your stories and photos with our community. Remember, cooking is all about joy, so have fun with it! Until next time, happy cooking!

Danish Butter Recipe | Veronika's Kitchen

Prep Time 10 minutes
Total Time 10 minutes
Servings 8 slices
Calories 150
This rich and creamy Danish butter is perfect for spreading or baking, offering a delightful homemade touch.

Ingredients

Main ingredients

  • 1 cup unsalted butter, softened
  • 1/2 cup powdered sugar
  • 1/4 cup all-purpose flour
  • 1/4 teaspoon salt
  • 1 teaspoon vanilla extract

Instructions 

  • Beat softened butter until creamy.
  • Add powdered sugar and mix well.
  • Mix in flour, salt, and vanilla until smooth.
  • Shape mixture into a log on parchment paper.
  • Wrap and refrigerate for 1 hour until firm.
  • Slice into rounds and serve.

Notes

Ensure butter is softened for easier mixing.
Calories: 150kcal
Cost: $10
Course: Dessert
Cuisine: Danish
Keyword: butter

Nutrition

Calories: 150kcal | Carbohydrates: 12g | Protein: 1g | Fat: 11g | Sodium: 1mg

Loved this recipe? Save it to your favorite Pinterest board so you can easily find it later! It’s the perfect way to keep all your sweet ideas in one place. ✨
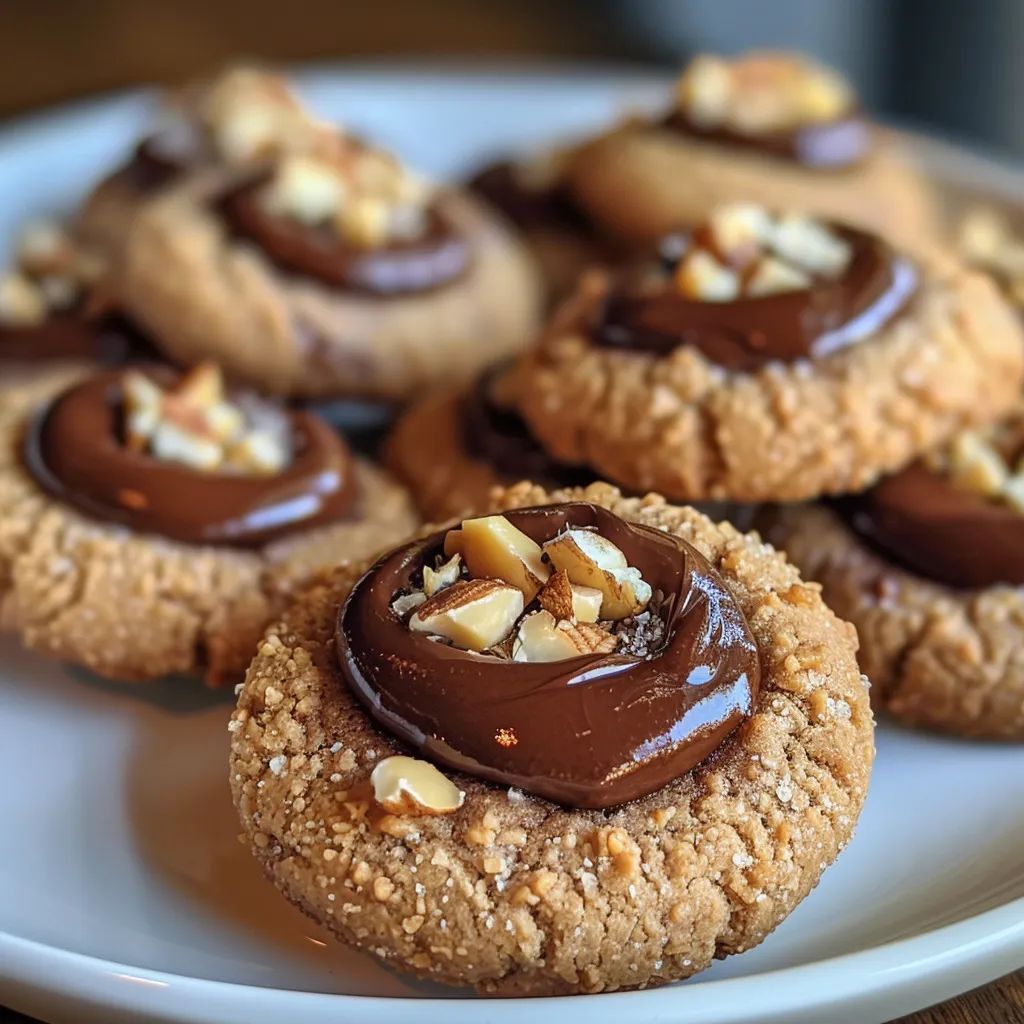
Danish Butter Recipe | Veronika's Kitchen

As the holiday season approaches, there’s something undeniably magical about filling your home with the sweet scents of baking cookies. Growing up in Charleston, I remember the warmth that enveloped our kitchen as my family gathered around the table, flour dusting our noses and laughter echoing against the walls. We would whip up batches of sugar cookies, each one adorned with colorful frosting and sprinkles, a tradition that always brought joy and connection. Today, I’m excited to share a delightful twist on this classic recipe: Christmas Sugar Cookies with Isomalt. Not only do they taste heavenly, but they’ll also add a fun, festive touch to your holiday celebrations!

These cookies are a celebration of love, laughter, and creativity. As I stand in my kitchen, mixing the dough and dreaming of festive gatherings, I can’t help but think about how food brings us all together. Whether you’re hosting a holiday party or just want to brighten your day, these cookies will do the trick! So, let’s roll up our sleeves and get baking!

Why You’ll Absolutely Love Christmas Sugar Cookies with Isomalt

These Christmas Sugar Cookies are not your average holiday treat. Here’s why you’ll absolutely adore them:

  • **Unique Flavor:** The addition of isomalt gives these cookies a delightful crunch and a touch of sweetness that sets them apart from traditional sugar cookies.
  • **Fun to Decorate:** With isomalt for decoration, you can unleash your creativity! The shiny, clear crystals add a festive flair that’s sure to impress your friends and family.
  • **Perfect for Gifting:** Pack these cookies in a cute tin or box and share them with neighbors and loved ones, spreading holiday cheer with every bite.
  • **Family-Friendly Activity:** Baking these cookies is a wonderful way to spend time with family and friends in the kitchen, creating memories that will last a lifetime.

Ingredients You’ll Need

Let’s gather our ingredients! Each one plays a crucial role in creating these delightful cookies. Here’s what you’ll need:

  • 2 3/4 cups all-purpose flour
  • 1 teaspoon baking soda
  • 1/2 teaspoon baking powder
  • 1 cup unsalted butter, softened (the secret to that melt-in-your-mouth texture!)
  • 1 1/2 cups white sugar
  • 1 egg
  • 1 teaspoon vanilla extract
  • 1/2 teaspoon almond extract (this adds a lovely depth of flavor)
  • 1/4 teaspoon salt
  • Isomalt for decoration (trust me, you’ll love the sparkly finish!)
  • Sprinkles or colored sugar for topping (optional, but who can resist a little extra color?)

You’ll find the full ingredient list with measurements in the recipe card below!

How to Make Christmas Sugar Cookies with Isomalt, Step-by-Step

Ready to create some holiday magic? Follow these easy steps:

  1. Preheat your oven to 375°F (190°C).
  2. In a small bowl, stir together the flour, baking soda, baking powder, and salt; set aside.
  3. In a large bowl, cream together the softened butter and sugar until the mixture is smooth and fluffy. This is where the magic begins!
  4. Beat in the egg, vanilla extract, and almond extract until well blended. The aroma will fill your kitchen with holiday cheer!
  5. Gradually blend the dry ingredients into the creamed mixture until well combined.
  6. Roll rounded teaspoonfuls of dough into balls, and place them onto ungreased cookie sheets. Give them a little space to spread!
  7. Flatten each ball slightly with the bottom of a glass, and sprinkle generously with isomalt and optional colorful sprinkles.
  8. Bake in the preheated oven for 8 to 10 minutes, or until the edges are golden. Keep an eye on them; you want that perfect balance of chewy and crisp!
  9. Let the cookies cool on the sheets for a few minutes before transferring them to wire racks to cool completely.
Christmas Sugar Cookies with Isomalt

Pro Tips for the Best Results

To ensure your Christmas Sugar Cookies turn out perfectly, here are a few of my favorite tips:

  • **Chill the Dough:** If you have time, chilling the dough for about 30 minutes before baking can help the cookies maintain their shape and enhance their flavor.
  • **Experiment with Flavors:** Feel free to mix in some citrus zest or spices like nutmeg or cinnamon for an extra holiday twist!
  • **Avoid Overbaking:** The cookies will continue to firm up as they cool, so take them out of the oven just as they start to turn golden around the edges.

Serving Suggestions

Now that your cookies are baked and cooled, let’s talk about how to serve them! Here are some festive ideas:

  • **Cookie Platters:** Arrange your cookies on a beautiful platter, mixing in some chocolate chip or gingerbread cookies for variety.
  • **Holiday Gift Bags:** Place a few cookies in clear treat bags tied with a festive ribbon for a sweet homemade gift.
  • **Cookie Decorating Party:** Invite friends over for a decorating party! Set up a station with different toppings and let everyone customize their cookies.

Storage and Make-Ahead Tips

Planning ahead can make your holiday season smoother. Here are some storage tips:

  • **Storage:** Keep your cookies in an airtight container at room temperature for up to a week. If they last that long!
  • **Freezing:** You can freeze the cookie dough for up to three months. Just roll the dough into balls, freeze them on a baking sheet, then transfer to a freezer bag. Bake directly from frozen, adding a couple of extra minutes to the baking time.
  • **Decorating Ahead:** If you want to get creative with decorations, you can bake the cookies ahead of time and decorate them just before serving for a fresh look!

There you have it—my festive Christmas Sugar Cookies with Isomalt! I hope you find joy in the process of making these cookies and that they bring sweetness to your holiday celebrations. Remember, cooking is all about the love and laughter you share along the way. Happy baking, friends!

Christmas Sugar Cookies with Isomalt

Prep Time 20 minutes
Cook Time 10 minutes
Total Time 30 minutes
Servings 24 cookies
Calories 150
Celebrate the holidays with festive sugar cookies decorated with shimmering isomalt and colorful sprinkles.

Ingredients

Dough

  • 2 3/4 cups all-purpose flour
  • 1 teaspoon baking soda
  • 1/2 teaspoon baking powder
  • 1 cup unsalted butter, softened
  • 1 1/2 cups white sugar
  • 1 egg egg
  • 1 teaspoon vanilla extract
  • 1/2 teaspoon almond extract
  • 1/4 teaspoon salt

Decorations

  • isomalt isomalt for decoration
  • sprinkles or colored sugar sprinkles or colored sugar for topping (optional) (optional)

Instructions 

  • Preheat oven to 375°F (190°C). Mix dry ingredients; set aside.
  • Cream butter and sugar, then add egg and extracts. Combine with dry ingredients.
  • Shape dough into balls, place on ungreased sheets, flatten, and decorate with isomalt and sprinkles.
  • Bake for 8-10 minutes until golden. Cool on racks.

Notes

Chill dough if too soft for easier handling.
Calories: 150kcal
Cost: $15
Course: Dessert
Cuisine: American
Keyword: sugar cookies

Nutrition

Calories: 150kcal | Carbohydrates: 22g | Protein: 2g | Fat: 7g | Sodium: 80mg

Loved this recipe? Save it to your favorite Pinterest board so you can easily find it later! It’s the perfect way to keep all your sweet ideas in one place. ✨

Christmas Sugar Cookies with Isomalt

As the winter chill settles in and the scent of pine and cinnamon wafts through the air, I can’t help but feel a wave of nostalgia wash over me. Growing up in Charleston, South Carolina, the holidays were a time when our kitchen transformed into a warm haven filled with laughter, stories, and the delightful aroma of baking goodies. I can still see myself standing on a stool, peeking over the counter as my mother mixed up her famous gingerbread cookie dough. Those moments were more than just cooking; they were family rituals that wrapped us in love and warmth, teaching me that food is the ultimate expression of care.

Now, as I gather my own family around the kitchen, I cherish the opportunity to create those same memories. Today, I’m excited to share with you my ultimate gingerbread cookie recipe—a recipe that embodies the spirit of the season and is sure to bring smiles to your loved ones. Whether you’re hosting a cozy gathering or simply indulging in a quiet night at home, these cookies will fill your kitchen with warmth and sweet whispers of winter.

Why You’ll Absolutely Love The Best Gingerbread Cookies

Let me tell you why this gingerbread cookie recipe has become a staple in my kitchen:

  • They are perfectly spiced—just the right balance of ginger, cinnamon, and cloves will transport you to a winter wonderland.
  • These cookies are easy to make, even if you’re new to baking. The step-by-step process ensures that anyone can whip them up with confidence!
  • They make for a delightful holiday gift! Package them in a festive tin, and you’ve got a thoughtful present that friends and family will adore.
  • The aroma that fills your kitchen while they bake will make your home feel like a cozy holiday retreat.

Ingredients You’ll Need

For these delightful cookies, I’ve chosen ingredients that not only enhance the flavor but also evoke the essence of the holidays. You’ll need:

  • 3 cups all-purpose flour – The foundation of our cookies, providing the perfect chewy texture.
  • 1 teaspoon baking soda – To give our cookies that lovely lift.
  • 1 tablespoon ground ginger – The star of the show, bringing warmth and spice to each bite.
  • 1 tablespoon ground cinnamon – Because what’s gingerbread without this classic flavor?
  • 1/2 teaspoon ground cloves – A hint of clove adds depth and complexity to our cookie dough.
  • 1/2 teaspoon salt – Just a pinch to balance the sweetness.
  • 3/4 cup unsalted butter, softened – For that rich, buttery flavor that makes these cookies irresistible.
  • 1 cup brown sugar, packed – This adds moisture and a delightful caramel-like sweetness.
  • 1 large egg – Binding everything together.
  • 1/2 cup molasses – The secret ingredient that gives gingerbread its signature richness.
  • 1 teaspoon vanilla extract – Because a touch of vanilla makes everything better!

You’ll find the full ingredient list with measurements in the recipe card below!

How to Make The Best Gingerbread Cookies, Step-by-Step

Now let’s dive into the fun part—making these cookies! Follow along with me, and don’t forget to enjoy the process:

  1. Preheat your oven to 350°F (175°C). You want it nice and warm for our cookies!
  2. In a bowl, whisk together the flour, baking soda, ginger, cinnamon, cloves, and salt. This will ensure our spices are evenly distributed.
  3. In another large bowl, cream the softened butter and brown sugar until light and fluffy. This step is crucial—it adds air and makes your cookies tender.
  4. Beat in the egg, molasses, and vanilla extract until well combined. Just imagine the sweet, spicy aroma already!
  5. Gradually add the dry ingredients to the wet ingredients, mixing until a dough forms. Don’t be afraid to get your hands in there at the end; it’s the best part!
  6. Cover the dough and refrigerate for at least 1 hour. This step helps the flavors meld and makes the dough easier to roll out.
  7. Roll out the dough on a floured surface to about 1/4 inch thickness. Don’t worry if it’s not perfect—homemade is all about love!
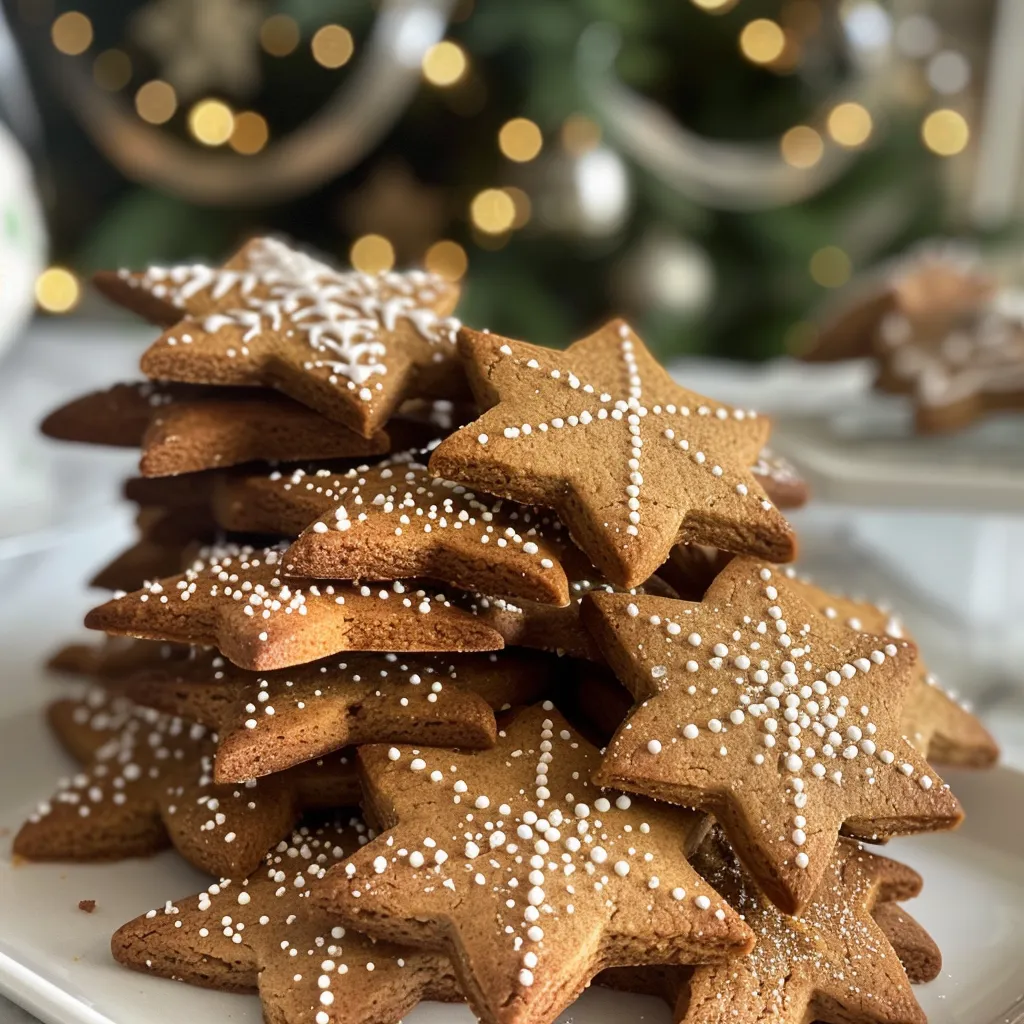
  8. Cut out shapes with cookie cutters and place them on a baking sheet lined with parchment paper. Get creative—stars, trees, or even gingerbread men!
  9. Bake for 8-10 minutes, or until the edges are firm but the centers are soft. Keep an eye on them—no one likes burnt cookies!
  10. Allow to cool on the baking sheet for a few minutes before transferring to a wire rack to cool completely. The smell in your kitchen will be heavenly!
The Best Gingerbread Cookies

Pro Tips for the Best Results

To ensure your gingerbread cookies turn out perfectly every time, here are a few of my favorite tips:

  • For a softer cookie, slightly underbake them. They’ll continue to firm up as they cool.
  • Chill your dough! This not only makes it easier to handle but also helps the flavors develop.
  • Don’t be afraid to experiment with different spices or add-ins. A dash of nutmeg or some chocolate chips can elevate your cookies to a new level!

Serving Suggestions

Once your cookies are cool and ready to enjoy, consider these creative serving ideas:

  • Serve them with a hot cup of cocoa or spiced tea for a cozy afternoon treat.
  • Decorate them with royal icing and colorful sprinkles for a festive touch—perfect for holiday gatherings!
  • Crush them up and use as a topping for ice cream or yogurt for a delightful twist.

Storage and Make-Ahead Tips

These cookies can be made ahead of time, making them perfect for busy holiday schedules. Here’s how to store them:

  • Store your baked cookies in an airtight container at room temperature for up to a week.
  • If you want to make the dough ahead of time, wrap it tightly in plastic wrap and freeze it for up to three months. Just thaw it in the fridge before rolling out!

Now that you have the recipe for The Best Gingerbread Cookies, I can’t wait for you to try them out! Remember, cooking is all about joy and connection, so gather your loved ones, share some laughs, and create sweet memories this winter. Happy baking, friends!

The Best Gingerbread Cookies

Prep Time 20 minutes
Cook Time 10 minutes
Total Time 30 minutes
Servings 24 cookies
Calories 120
Enjoy these classic, spicy gingerbread cookies perfect for the holiday season or any time you crave a sweet, warming treat.

Ingredients

Dough

  • 3 cups all-purpose flour
  • 1 teaspoon baking soda
  • 1 tablespoon ground ginger
  • 1 tablespoon ground cinnamon
  • 1/2 teaspoon ground cloves
  • 1/2 teaspoon salt
  • 3/4 cup unsalted butter, softened
  • 1 cup brown sugar, packed
  • 1 large egg
  • 1/2 cup molasses
  • 1 teaspoon vanilla extract

Instructions 

  • Mix dry ingredients; set aside.
  • Cream butter and sugar; add egg, molasses, vanilla.
  • Combine wet and dry; chill dough for 1 hour.
  • Roll out, cut shapes, and bake at 350°F (175°C) for 8-10 mins.
  • Cool cookies before serving.

Notes

Store in an airtight container for freshness.
Calories: 120kcal
Cost: $15
Course: Dessert
Cuisine: American
Keyword: gingerbread

Nutrition

Calories: 120kcal | Carbohydrates: 20g | Protein: 1g | Fat: 5g | Sodium: 50mg

Loved this recipe? Save it to your favorite Pinterest board so you can easily find it later! It’s the perfect way to keep all your sweet ideas in one place. ✨

The Best Gingerbread Cookies