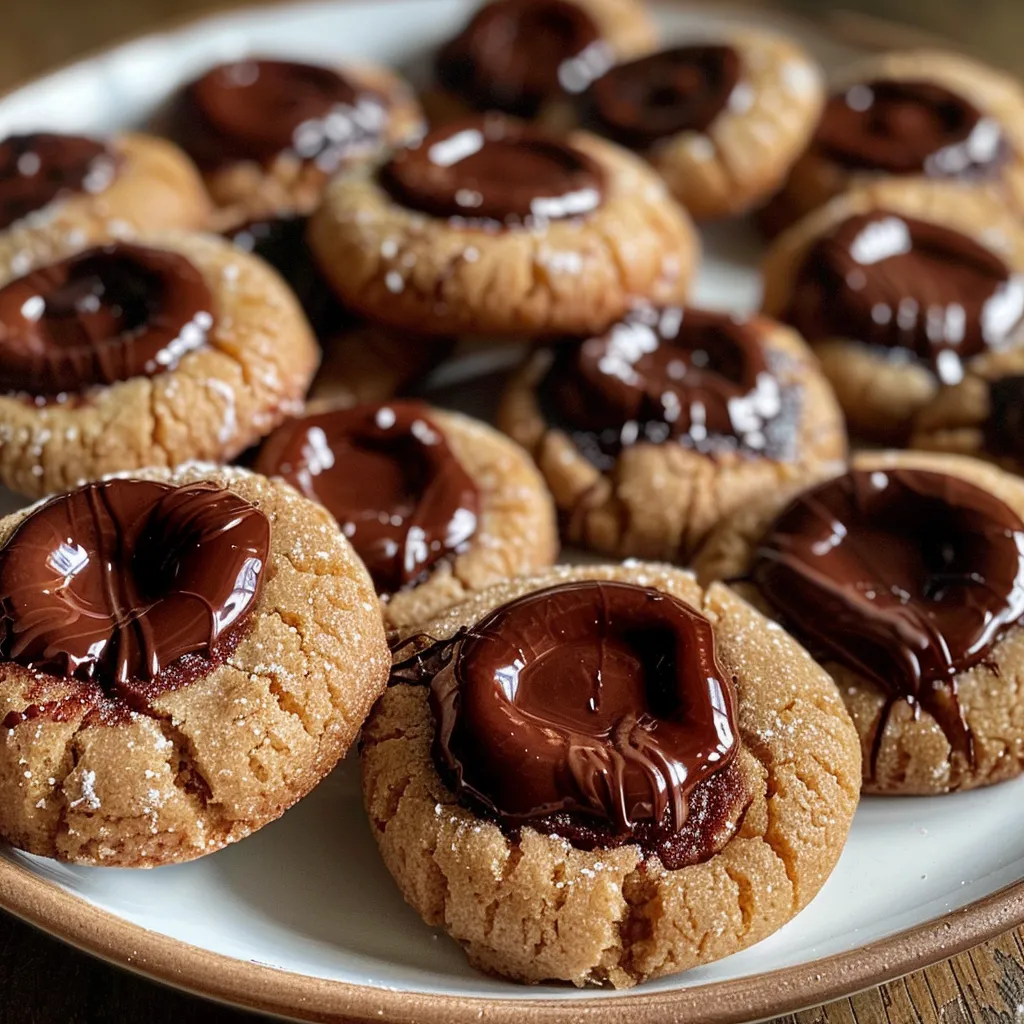
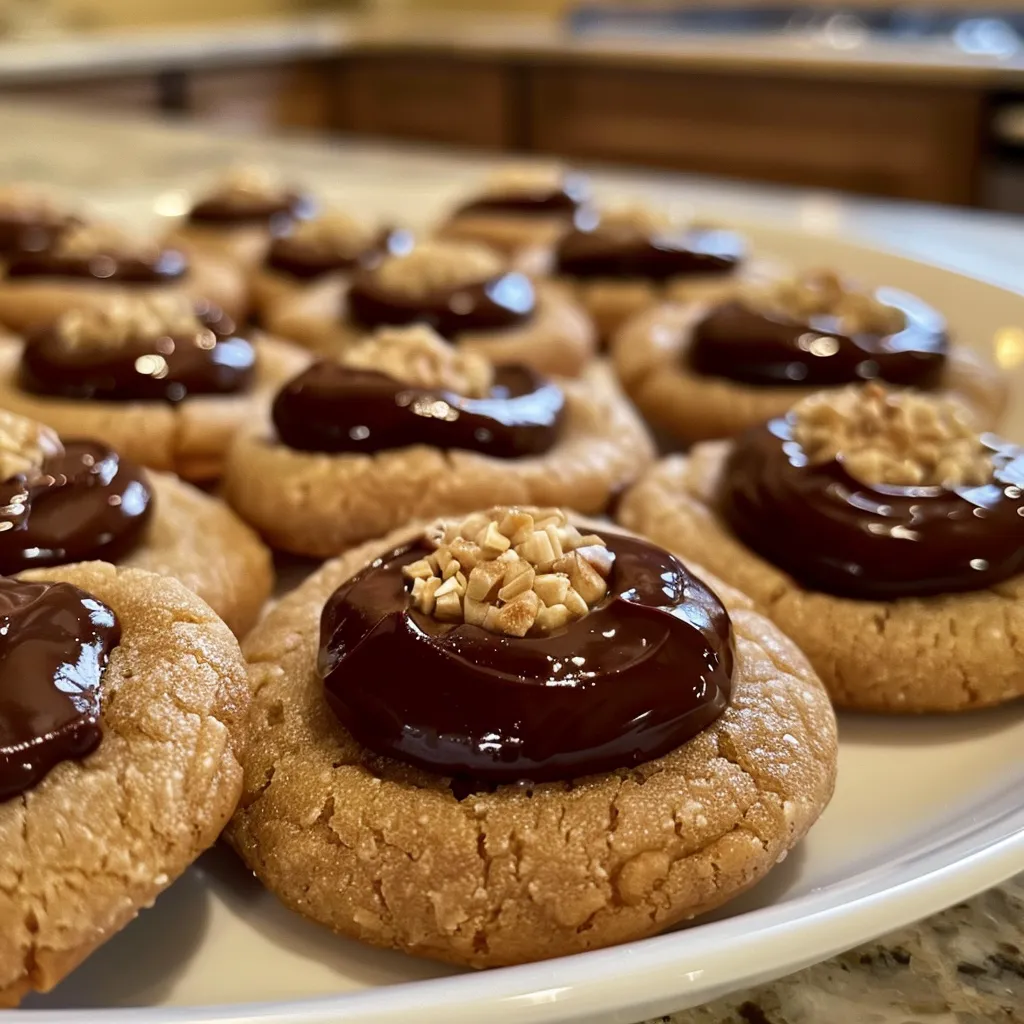
Author

Emily

Browsing

Welcome back to Emily’s Must-Try Kitchen, my dear friends! Today, I’m whisking up something truly delightful that will warm your heart and fill your home with the most wonderful aromas. Have you ever found yourself in need of a little sweetness to brighten your day? Well, let me introduce you to my Almond Crescent Cookies, the perfect buttery treats that are as delightful to share as they are to savor all by yourself. These little gems are not just cookies; they’re a celebration of flavor, nostalgia, and the joy of baking that I learned from my mom in our cozy Charleston kitchen.

Picture this: a chilly afternoon, the golden light streaming through the window, and the scent of toasted almonds wafting through the air. These cookies are not only easy to make, but they also carry a touch of that Southern warmth I hold dear. So, roll up your sleeves, gather your ingredients, and let’s create some magic!

Why You’ll Absolutely Love Almond Crescent Cookies

These Almond Crescent Cookies are a delightful addition to your baking repertoire, and here’s why:

  • They are incredibly easy to make, perfect for bakers of all skill levels!
  • Buttery and nutty, they melt in your mouth, leaving you craving more.
  • They make for a lovely gift or treat for gatherings, sharing warmth and love with every bite.
  • With their delicate crescent shape, they are not only delicious but also beautiful to present!

Ingredients You’ll Need

To make these scrumptious Almond Crescent Cookies, you’ll need just a handful of ingredients that come together to create something truly special. Here’s what you’ll want to gather:

  • 1 cup unsalted butter, softened: The star of the show! This lends a rich, creamy base to our cookies.
  • 1/2 cup powdered sugar: For that melt-in-your-mouth sweetness.
  • 1 teaspoon vanilla extract: A touch of warmth that elevates the flavor.
  • 2 cups all-purpose flour: The foundation for our cookie dough.
  • 1 cup ground almonds: This is where the magic happens! It adds a beautiful nutty flavor and lovely texture.
  • 1/4 teaspoon salt: Just a pinch to enhance all the flavors.
  • 1/2 cup powdered sugar for dusting: Because every cookie deserves a sprinkle of sweetness!

You’ll find the full ingredient list with measurements in the recipe card below!

How to Make Almond Crescent Cookies, Step-by-Step

Now that we have our ingredients, let’s get to the fun part—baking! Follow these simple steps to whip up your own batch of Almond Crescent Cookies:

  1. Preheat your oven to 350°F (175°C) and line a baking sheet with parchment paper.
  2. In a large bowl, cream together the softened butter and 1/2 cup powdered sugar until the mixture is light and fluffy. This is where the magic begins—don’t rush this step!
  3. Mix in the vanilla extract, stirring until well combined.
  4. In a separate bowl, whisk together the flour, ground almonds, and salt. This helps to ensure that the almonds and flour are evenly distributed.
  5. Gradually add the dry ingredients to the butter mixture, mixing until just combined. Be careful not to overmix; we want our cookies to be tender!
  6. Take small portions of the dough and shape them into crescent shapes. I like to think of each cookie as a little hug waiting to be baked!
  7. Place the cookies on the prepared baking sheet, spacing them about 2 inches apart. They’ll spread a little, so give them room to breathe!
  8. Bake for 15-20 minutes or until the edges are lightly golden. Your kitchen will smell heavenly!
  9. Allow the cookies to cool slightly on the baking sheet before transferring them to a wire rack to cool completely.
  10. Once cooled, dust the cookies with powdered sugar before serving. This is the finishing touch that makes them look extra special!
Almond Crescent Cookies

Pro Tips for the Best Results

Here are a few of my favorite tips to ensure your Almond Crescent Cookies turn out perfectly:

  • Make sure your butter is softened but not melted; this helps create that perfect creamy texture.
  • For an extra nutty flavor, you can toast the ground almonds in a dry skillet for a few minutes before adding them to the dough.
  • Don’t skip the cooling step! Allowing the cookies to cool slightly before dusting with powdered sugar helps the sugar adhere better.

Serving Suggestions

These Almond Crescent Cookies are delightful on their own, but if you want to take it up a notch, here are a few serving suggestions:

  • Serve them alongside a warm cup of tea or coffee for the perfect afternoon treat.
  • Pair them with a scoop of vanilla ice cream for a delicious dessert experience.
  • Arrange them on a festive platter for holiday gatherings, and watch them disappear!

Storage and Make-Ahead Tips

These cookies are not just a one-time treat! Here’s how to store them and make them ahead of time:

  • Store the cookies in an airtight container at room temperature for up to a week. They tend to stay fresh and delicious!
  • If you want to make them ahead of time, you can freeze the unbaked cookie dough. Just shape the crescents, place them on a baking sheet, and freeze until solid. Then transfer them to a freezer bag, and bake straight from frozen—just add a couple of extra minutes to the baking time!

There you have it, friends! A simple yet elegant recipe for Almond Crescent Cookies that’s sure to bring warmth and joy to your kitchen. I can’t wait for you to try these delicious little treats. Share your baking adventures with me, and let’s keep the joy of cooking alive together!

Almond Crescent Cookies

Prep Time 15 minutes
Cook Time 15 minutes
Total Time 30 minutes
Servings 24 cookies
Calories 150
Delight in these buttery, almond-flavored crescent cookies dusted with powdered sugar, perfect for holidays or special occasions.

Ingredients

Dough

  • 1 cup unsalted butter, softened
  • 1/2 cup powdered sugar
  • 1 teaspoon vanilla extract
  • 2 cups all-purpose flour
  • 1 cup ground almonds
  • 1/4 teaspoon salt
  • 1/2 cup powdered sugar for dusting

Instructions 

  • Preheat oven to 350°F (175°C).
  • Cream butter and 1/2 cup powdered sugar until fluffy. Mix in vanilla.
  • Whisk flour, ground almonds, and salt. Gradually add to butter mixture.
  • Shape dough into crescent shapes and place on baking sheet.
  • Bake 15-20 minutes until edges are golden. Cool and dust with powdered sugar.

Notes

Chill the dough if it becomes too soft for easier shaping.
Calories: 150kcal
Cost: $10
Course: Dessert
Cuisine: American
Keyword: Almond

Nutrition

Calories: 150kcal | Carbohydrates: 18g | Protein: 2g | Fat: 9g | Sodium: 50mg

Loved this recipe? Save it to your favorite Pinterest board so you can easily find it later! It’s the perfect way to keep all your sweet ideas in one place. ✨

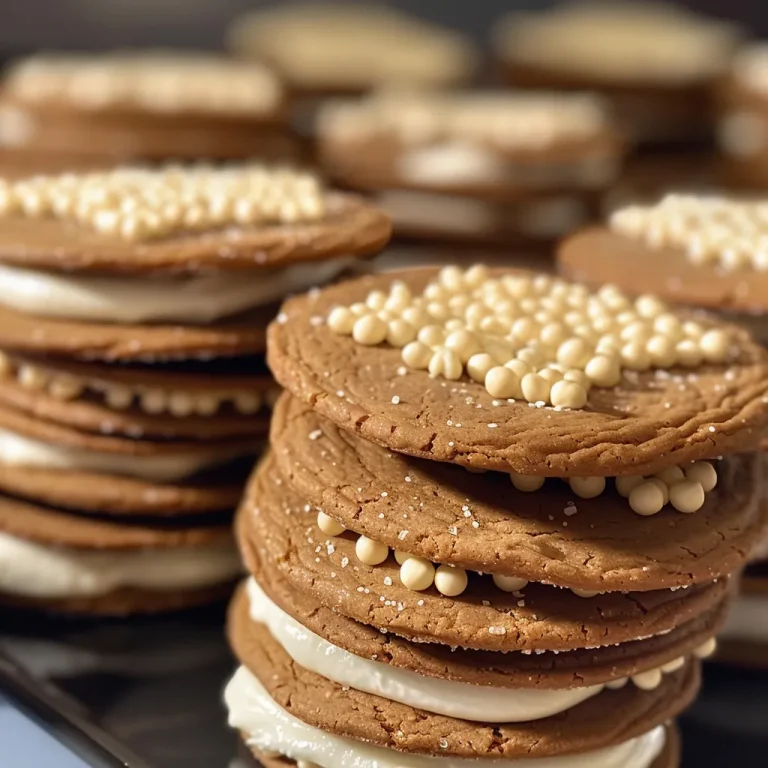
Almond Crescent Cookies

As the holiday season approaches, my heart is full of warmth and nostalgia. I can still remember the scent of ginger and cinnamon wafting through my childhood home in Charleston, where my family would gather to bake and share stories over the kitchen counter. It was in those moments, standing on a stool and sneaking bites of cookie dough, that I learned that food is a love language. Today, I’m excited to share a recipe that brings those cherished memories back to life: Gingerbread Cheesecake Cookies! These delightful treats are a perfect blend of spiced gingerbread and creamy cheesecake, making them a wonderful addition to any holiday gathering.

Whether you’re hosting a festive cookie exchange or simply looking to sweeten your evenings with a cozy treat, these cookies are sure to bring smiles and joy. So, roll up your sleeves, and let’s whisk up some whimsy together!

Why You’ll Absolutely Love Gingerbread Cheesecake Cookies – In Bloom Bakery

These Gingerbread Cheesecake Cookies are not just another holiday treat; they’re a celebration of flavor and joy! Here’s why you’ll absolutely adore them:

  • They’re the perfect balance of spiced cookie and creamy filling, creating a delightful taste experience.
  • These cookies are not only delicious but also visually stunning, making them a showstopper at any gathering.
  • They’re easy to make, allowing you to enjoy the baking process without any stress.
  • Every bite is a warm hug, evoking the spirit of the season and creating lasting memories.

Ingredients You’ll Need

Let’s talk about the star ingredients that make these cookies a holiday favorite. You’ll need:

  • Unsalted butter: This is the base for our cookie dough, giving it that rich flavor.
  • Brown sugar and granulated sugar: The combination adds depth of flavor and sweetness.
  • Egg: This helps bind everything together and gives the cookies that perfect chewy texture.
  • Vanilla extract: A splash of vanilla adds warmth and enhances the flavors.
  • All-purpose flour: The backbone of our cookie dough, giving it structure.
  • Baking soda: This is our leavening agent, providing the right rise.
  • Spices (ginger, cinnamon, nutmeg, cloves): These spices are what make these cookies taste like the holidays!
  • Salt: A pinch of salt balances the sweetness.
  • Cream cheese: This is the star of our cheesecake filling, giving it that creamy, dreamy texture.
  • Powdered sugar: For sweetness and smoothness in our filling.

You’ll find the full ingredient list with measurements in the recipe card below!

How to Make Gingerbread Cheesecake Cookies – In Bloom Bakery, Step-by-Step

Now, let’s dive into the delightful process of making these cookies! Follow these steps, and I promise you’ll have a batch of cookies that will warm your heart and fill your home with festive cheer.

  1. Preheat the oven to 350°F (175°C) and line a baking sheet with parchment paper. This is where the magic happens!
  2. In a large bowl, cream together the softened butter, brown sugar, and granulated sugar until light and fluffy. This usually takes about 3-4 minutes—don’t rush it!
  3. Beat in the egg and vanilla extract until well combined, ensuring everything is mixed together beautifully.
  4. In another bowl, whisk together the flour, baking soda, ginger, cinnamon, nutmeg, cloves, and salt—this is where your kitchen will start to smell heavenly!
  5. Gradually add the dry ingredients to the wet ingredients, mixing until just combined. Be careful not to overmix; we want our cookies to be tender!
  6. In another bowl, beat the softened cream cheese, powdered sugar, and vanilla extract until smooth and creamy. This filling is what dreams are made of!
  7. Scoop out a tablespoon of gingerbread cookie dough and flatten it in your palm. Place a small dollop of the cheesecake filling in the center and fold the dough around it, sealing it completely.
  8. Place the filled cookie balls on the prepared baking sheet, spacing them about 2 inches apart. They’ll spread a bit, so give them room!
  9. Bake for 12-15 minutes or until the edges are golden brown. Allow them to cool on the baking sheet for 5 minutes before transferring them to a wire rack to cool completely.
Gingerbread Cheesecake Cookies - In Bloom Bakery

Pro Tips for the Best Results

Here are a few tips to ensure your Gingerbread Cheesecake Cookies turn out perfectly:

  • Make sure your butter and cream cheese are at room temperature for easy mixing and a creamy texture.
  • Don’t skip chilling the dough if it feels too soft; a little time in the fridge can help with shaping.
  • If you want to add extra flair, sprinkle a little coarse sugar on top before baking for a sparkling finish!

Serving Suggestions

These cookies are delicious on their own, but here are a few fun ideas to elevate your serving:

  • Serve them warm with a drizzle of caramel sauce for an indulgent treat.
  • Pair them with a steaming cup of spiced chai or hot cocoa for the ultimate cozy experience.
  • Arrange them on a festive platter alongside other holiday cookies for a delightful cookie exchange.

Storage and Make-Ahead Tips

Want to enjoy these cookies later? No problem! Here’s how to store them:

  • Store the cookies in an airtight container at room temperature for up to a week. They stay soft and delicious!
  • You can freeze the unbaked cookie dough for up to 3 months. Just scoop and freeze the balls on a baking sheet, then transfer them to a freezer bag. When you’re ready to bake, just add a couple of minutes to the baking time!
  • If you have leftovers (which is rare!), you can keep them in the fridge for a few days; just bring them to room temperature before enjoying.

Now that you have the recipe for these delightful Gingerbread Cheesecake Cookies, it’s time to gather your loved ones and create some delicious memories in the kitchen. Don’t forget to check out my other festive recipes, like Whimsical Winter Treats: Delightful Pecan Snowball Cookies for the Holidays, Spice Up Your Holiday: Delightful Gingerbread Crinkle Cookies for the Cookie Swap, and Whisking Up Holiday Cheer: Delightful Gingerbread Men Cookies for Decorating Fun! Happy baking, friends!

Gingerbread Cheesecake Cookies - In Bloom Bakery

Prep Time 20 minutes
Cook Time 15 minutes
Total Time 35 minutes
Servings 24 cookies
Calories 150
Delight in these festive gingerbread cookies filled with creamy cheesecake, perfect for holiday treats or special occasions.

Ingredients

Dough

  • 1 cup unsalted butter, softened
  • 1 cup brown sugar
  • 1/2 cup granulated sugar
  • 1 large egg
  • 1 teaspoon vanilla extract
  • 3 cups all-purpose flour
  • 1 teaspoon baking soda
  • 1 tablespoon ground ginger
  • 1 tablespoon ground cinnamon
  • 1/2 teaspoon ground nutmeg
  • 1/2 teaspoon ground cloves
  • 1/2 teaspoon salt

Cheesecake Filling

  • 8 oz cream cheese, softened
  • 1/4 cup powdered sugar
  • 1 teaspoon vanilla extract

Instructions 

  • Preheat oven to 350°F (175°C) and line baking sheet with parchment.
  • Cream butter, sugars until fluffy; beat in egg and vanilla.
  • Mix dry ingredients; gradually add to wet, combine.
  • Beat cream cheese, powdered sugar, vanilla until smooth.
  • Form dough balls, add cheesecake filling, seal, and bake 12-15 mins.

Notes

Chill the dough for easier handling if needed.
Calories: 150kcal
Cost: $15
Course: Dessert
Cuisine: American
Keyword: cheesecake, Cookies, gingerbread

Nutrition

Calories: 150kcal | Carbohydrates: 20g | Protein: 2g | Fat: 8g | Sodium: 100mg

Loved this recipe? Save it to your favorite Pinterest board so you can easily find it later! It’s the perfect way to keep all your sweet ideas in one place. ✨

Gingerbread Cheesecake Cookies - In Bloom Bakery

Ah, the holidays! A time filled with twinkling lights, cozy gatherings, and the sweet aroma of baked goods wafting through the air. Growing up in Charleston, South Carolina, the holiday season meant bustling kitchens, laughter echoing off the walls, and, of course, my mom’s famous cookies. I can still picture myself standing on a stool, peeking into the oven, and sneaking tastes of dough as it transformed into heavenly treats. One of my all-time favorites has to be the Classic Pecan Snowball Christmas Cookies. These delightful little bites are not just cookies; they’re a celebration of everything that makes this season special.

Today, I want to share my cherished recipe for Classic Pecan Snowball Christmas Cookies. Soft, buttery, and rolled in a generous coating of powdered sugar, these cookies capture the essence of winter and are perfect for sharing (or keeping all to yourself, no judgment here!). So, let’s roll up our sleeves and dive into this delightful adventure in baking together!

Why You’ll Absolutely Love Classic Pecan Snowball Christmas Cookies

These cookies are a festive treat that brings a smile to everyone’s face. Here’s why you’ll absolutely adore them:

  • **Irresistibly Buttery:** Each bite melts in your mouth, offering a soft and tender texture that’s simply delightful.
  • **Easy to Make:** With just a handful of ingredients, these cookies are approachable for bakers of all skill levels.
  • **Perfect for Sharing:** These cookies make a wonderful gift for friends, family, or neighbors during the holiday season.
  • **Versatile:** You can easily customize these cookies by adding chocolate chips or using different nuts for a fun twist!

Ingredients You’ll Need

Before we get started, let’s gather our ingredients. This recipe is wonderfully simple, featuring pantry staples that come together to create a holiday classic. Here’s what you’ll need:

  • 1 cup unsalted butter, softened
  • 1/2 cup powdered sugar
  • 1 teaspoon vanilla extract
  • 2 cups all-purpose flour
  • 1 cup finely chopped pecans
  • 1/4 teaspoon salt
  • Additional powdered sugar for dusting

You’ll find the full ingredient list with measurements in the recipe card below!

How to Make Classic Pecan Snowball Christmas Cookies, Step-by-Step

Now that we have our ingredients ready, let’s get baking! Follow these simple steps to make your own batch of Classic Pecan Snowball Christmas Cookies:

  1. Preheat your oven to 350°F (175°C) and line a baking sheet with parchment paper. This will keep your cookies from sticking and make cleanup a breeze!
  2. In a large mixing bowl, cream together the softened butter and powdered sugar until light and fluffy. This step is crucial for achieving that melt-in-your-mouth texture!
  3. Add the vanilla extract and mix until combined—this is where the magic starts to happen!
  4. Gradually add the flour, chopped pecans, and salt, mixing until the dough comes together. Don’t be afraid to use your hands here; it’s all part of the fun!
  5. Shape the dough into small balls, about 1 inch in diameter, and place them on the prepared baking sheet. Give them a little space to spread out.
  6. Bake in the preheated oven for 15-20 minutes, or until the bottoms are lightly golden. Your kitchen will smell heavenly!
  7. Remove from the oven and let the cookies cool on the baking sheet for a few minutes.
  8. While still warm, roll the cookies in additional powdered sugar to coat them. This gives them that snowy appearance we all adore.
  9. Allow the cookies to cool completely on a wire rack before serving. They’ll be the perfect treat to enjoy with a cup of hot cocoa!
Classic Pecan Snowball Christmas Cookies

Pro Tips for the Best Results

Want to elevate your baking game? Here are my pro tips for making the best Classic Pecan Snowball Christmas Cookies:

  • **Chill the Dough:** If you find the dough too soft to work with, pop it in the fridge for about 30 minutes. This will make it easier to shape into balls.
  • **Use Fresh Nuts:** For the best flavor, toast your pecans lightly before chopping them. This brings out their nutty essence and adds depth to your cookies.
  • **Dust Generously:** Don’t skimp on the powdered sugar! Rolling the cookies while they’re still warm helps the sugar stick better, creating that iconic snowball look.

Serving Suggestions

These cookies are delightful on their own, but why not take it up a notch? Here are some fun serving suggestions:

  • Serve them alongside a steaming cup of coffee or hot cocoa for the perfect pairing.
  • Arrange them on a festive platter for holiday parties, garnished with some fresh mint leaves for a pop of color.
  • Package them in cute tins or boxes as homemade gifts for friends and family. Who wouldn’t love a sweet surprise?

Storage and Make-Ahead Tips

Want to enjoy these cookies beyond the holiday rush? Here’s how to store them:

  • **Storage:** Keep your cookies in an airtight container at room temperature for up to a week. They’ll still be delicious!
  • **Freezing:** You can freeze the unbaked dough for up to three months. Shape the dough into balls, freeze them on a baking sheet, then transfer to a zip-top bag. When you’re ready to bake, just add a few extra minutes to the baking time.
  • **Make-Ahead:** You can bake these cookies a week in advance. Just make sure to coat them in powdered sugar right before serving for that fresh look!

So, there you have it! A delightful recipe that captures the spirit of the season. I can’t wait for you to try these Classic Pecan Snowball Christmas Cookies. Remember, cooking is all about joy and connection, so invite your loved ones into the kitchen and make some memories together!

Happy baking, friends!

Whimsical Winter Treats: Crafting Crumbl-Inspired Christmas Sugar Cookies

Whimsical Winter Treats: Delightful Pecan Snowball Cookies for the Holidays

Classic Pecan Snowball Christmas Cookies

Prep Time 15 minutes
Cook Time 15 minutes
Total Time 30 minutes
Servings 24 cookies
Calories 120
Delight in these buttery, nutty snowball cookies coated in powdered sugar, perfect for holiday celebrations.

Ingredients

Dough

  • 1 cup unsalted butter, softened
  • 1/2 cup powdered sugar
  • 1 teaspoon vanilla extract
  • 2 cups all-purpose flour
  • 1 cup finely chopped pecans
  • 1/4 teaspoon salt

Additional powdered sugar for dusting

Instructions 

  • Preheat oven to 350°F (175°C). Line baking sheet with parchment.
  • Cream butter and powdered sugar until fluffy. Mix in vanilla.
  • Add flour, pecans, and salt; mix until dough forms.
  • Shape into 1-inch balls and place on sheet. Bake 15-20 mins.
  • Cool slightly, then roll in powdered sugar. Cool completely.

Notes

Ensure cookies are fully cooled before dusting with powdered sugar to prevent melting.
Calories: 120kcal
Cost: $12
Course: Dessert
Cuisine: American
Keyword: Cookies

Nutrition

Calories: 120kcal | Carbohydrates: 15g | Protein: 2g | Fat: 7g | Sodium: 20mg

Loved this recipe? Save it to your favorite Pinterest board so you can easily find it later! It’s the perfect way to keep all your sweet ideas in one place. ✨

Classic Pecan Snowball Christmas Cookies

Oh, the holidays! A time filled with laughter, joy, and of course, the sweet aromas wafting from the kitchen. Growing up in Charleston, South Carolina, I remember the thrill of gathering around the table with my family, each dish telling its own story. It was in my mom’s kitchen where my love for cooking blossomed—standing on a stool, sneaking tastes of biscuit dough, and soaking in the warmth of togetherness. This season, let’s bring that same joy to our kitchens with a delightful treat that will have everyone smiling: Santa Claus Macarons!

These charming little confections are not only visually stunning but also pack a delightful punch of flavor. Imagine a soft, chewy meringue shell filled with luscious buttercream or ganache, all dressed up like Santa himself! Whether you’re hosting a holiday gathering or attending a Christmas cookie exchange, these festive macarons are sure to steal the show. Let’s roll up our sleeves and dive into this magical recipe together!

Why You’ll Absolutely Love Santa Claus Macarons

If you’re wondering why these Santa Claus Macarons deserve a place on your holiday dessert table, let me share a few reasons that will surely entice you!

  • They’re a fun and festive way to impress your friends and family.
  • Perfectly chewy and melt-in-your-mouth delicious, they’re a real treat for the taste buds.
  • They add a playful touch to any holiday gathering, sparking joy and laughter.
  • Making them is a creative adventure, allowing you to experiment with flavors and colors.

Ingredients You’ll Need

Let’s gather our ingredients for these delightful Santa Claus Macarons! We’re keeping it simple yet delicious with a few key staples that you may already have in your pantry. Here’s what you’ll need:

  • 200g almond flour – This gives our macarons their signature nutty flavor and chewy texture.
  • 200g powdered sugar – For that perfect sweetness and smooth finish.
  • 150g egg whites (about 5 large eggs) – The star ingredient for our meringue base.
  • 50g granulated sugar – To stabilize our egg whites and help achieve those stiff peaks.
  • Red food coloring – Because what’s Santa without his iconic red suit?
  • Buttercream or ganache for filling – Choose your favorite for that delicious creamy center.
  • Black edible marker or chocolate for eyes – To give our Santa some character!
  • Mini marshmallows for the hat – Because every Santa needs a fluffy hat!

You’ll find the full ingredient list with measurements in the recipe card below!

How to Make Santa Claus Macarons, Step-by-Step

Alright, let’s get baking! Follow these steps, and you’ll have Santa Claus Macarons that are not only adorable but also incredibly delicious:

  1. Preheat your oven to 150°C (300°F) and line your baking sheets with parchment paper. This is crucial for easy removal later!
  2. In a mixing bowl, sift together the almond flour and powdered sugar to ensure there are no lumps. This step is vital for achieving that smooth macaron shell.
  3. In a separate bowl, beat the egg whites until they form soft peaks. This is where the magic begins! Gradually add in the granulated sugar and continue to beat until you achieve stiff peaks. Think of it as a workout for those arm muscles!
  4. Add a few drops of red food coloring to your meringue and gently fold until combined. You want a vibrant red, just like Santa’s suit!
  5. Next, fold the almond flour mixture into the meringue until it reaches a lava-like consistency. Be gentle but thorough; you want to keep those air bubbles!
  6. Transfer the mixture to a piping bag fitted with a round tip and pipe small circles onto the prepared baking sheets. Aim for uniform sizes for even baking.
  7. Tap the baking sheets on the counter to release any air bubbles and let them sit for 30-60 minutes until the tops are dry. This is a crucial step; it helps form that signature macaron “foot”.
  8. Bake the macarons for 15-18 minutes, then let them cool completely. The smell will be heavenly!
  9. Pair the macarons, spread buttercream or ganache on one half, then sandwich with the other half.
  10. Finally, decorate with mini marshmallows on top for Santa’s hat and use the edible marker or melted chocolate for the eyes. Voilà! You’ve created Santa Claus in macaron form!
Santa Claus Macarons

Pro Tips for the Best Results

Before you dash off to the kitchen, here are a few pro tips to ensure your macarons turn out perfectly:

  • Make sure your mixing bowls and utensils are completely clean and dry. Any grease can affect the meringue’s ability to whip up properly.
  • Use a kitchen scale for precise measurements. Macarons are finicky, and accuracy is key!
  • Don’t rush the resting time! Allowing the piped macarons to dry before baking will help create that perfect outer shell.

Serving Suggestions

These Santa Claus Macarons are a showstopper on their own, but why not elevate the experience? Here are a few creative serving suggestions:

  • Arrange them on a festive platter alongside other holiday treats for a colorful dessert table.
  • Package them in cute boxes tied with ribbons for thoughtful gifts or party favors.
  • Pair them with a warm cup of cocoa or eggnog for the ultimate holiday treat.

Storage and Make-Ahead Tips

If you want to get a head start on your holiday baking, these macarons can be made ahead of time! Here’s how to store them:

  • Once filled, macarons can be stored in an airtight container in the fridge for up to 5 days. They actually taste better after a day or two as the flavors meld!
  • For longer storage, freeze the unfilled shells in an airtight container for up to a month. Just let them come to room temperature before filling.

Now that you have all the tips and tricks, I can’t wait for you to try making these Santa Claus Macarons! They are sure to bring a dash of cheer to your holiday celebrations. Remember, cooking is all about joy, so have fun with it! And don’t forget to share your creations—tag me on social media, because I love seeing your culinary adventures!

Santa Claus Macarons

Prep Time 30 minutes
Cook Time 15 minutes
Total Time 45 minutes
Servings 12 pieces
Calories 150
Create adorable Santa Claus-themed macarons perfect for festive occasions with a simple, fun process.

Ingredients

Dry ingredients

  • 200 g almond flour
  • 200 g powdered sugar

Egg whites

  • 150 g egg whites (about 5 large eggs)
  • 50 g granulated sugar

Food coloring

  • as needed red food coloring

Filling

  • as needed buttercream or ganache

Decorations

  • as needed black edible marker or chocolate for eyes
  • as needed mini marshmallows for the hat

Instructions 

  • Preheat oven to 150°C (300°F). Sift almond flour and powdered sugar.
  • Beat egg whites until soft peaks, add sugar gradually, then fold in red food coloring.
  • Fold dry ingredients into meringue, pipe small circles, then let sit 30-60 mins.
  • Bake for 15-18 mins, cool completely, then fill with buttercream or ganache.
  • Decorate with mini marshmallows for the hat and use edible marker or chocolate for eyes.

Notes

Ensure macarons rest before baking for better texture.
Calories: 150kcal
Cost: $15
Course: Dessert
Cuisine: festive
Keyword: Christmas, macarons, Santa

Nutrition

Calories: 150kcal | Carbohydrates: 20g | Protein: 3g | Fat: 7g | Sodium: 50mg

Loved this recipe? Save it to your favorite Pinterest board so you can easily find it later! It’s the perfect way to keep all your sweet ideas in one place. ✨

Santa Claus Macarons

As the holiday season approaches, I find myself reminiscing about the sweet aromas that filled my childhood home in Charleston, South Carolina. The kitchen was always a buzz of activity, with my mom whipping up her famous treats, and I was right there, perched on a stool, eagerly sneaking spoonfuls of cookie dough. Those moments were more than just about food; they were about family, laughter, and creating memories that would last a lifetime. So, in keeping with that spirit, I’m thrilled to share one of my favorite holiday treasures: Soft Christmas Thumbprint Cookies!

These delightful cookies are not only simple to make, but they also embody the joy of sharing something special with loved ones. With their buttery texture and a burst of fruit preserves in the center, they’re the perfect treat to bring to a holiday gathering or to enjoy cozied up at home with a warm cup of cocoa. Let’s dive into the magic of these cookies and spread some holiday cheer!

Why You’ll Absolutely Love Soft Christmas Thumbprint Cookies

These Soft Christmas Thumbprint Cookies are sure to become a favorite in your holiday baking repertoire. Here’s why:

  • They are incredibly soft and chewy, melting in your mouth with each bite.
  • Customization is key! You can use any fruit preserves you love—raspberry, apricot, or even a zesty lemon curd.
  • They make a beautiful presentation, especially when sprinkled with colorful decorations, inviting festive cheer.
  • These cookies are an easy bake that even your little ones can help with, making it a fun family activity!

Ingredients You’ll Need

Now, let’s talk about the ingredients that will bring these delightful cookies to life. You’ll need simple, wholesome ingredients that you might already have in your pantry. Here’s what you’ll gather:

  • 1 cup unsalted butter, softened: This gives the cookies their rich flavor and soft texture.
  • 1 cup powdered sugar: For that sweet touch, adding the perfect amount of sweetness.
  • 1 teaspoon vanilla extract: Because what’s a cookie without a hint of vanilla? It enhances the flavor beautifully!
  • 2 cups all-purpose flour: The base of our cookies, ensuring they hold their shape while remaining tender.
  • 1/4 teaspoon salt: A pinch to balance the sweetness and enhance the flavors.
  • 1/2 cup fruit preserves (your choice): This is where the magic happens! Choose your favorite fruit preserves to create a delightful center.
  • Colored sprinkles (optional): To add a festive touch, making these cookies even more cheerful!

You’ll find the full ingredient list with measurements in the recipe card below!

How to Make Soft Christmas Thumbprint Cookies, Step-by-Step

Ready to make your kitchen smell like a holiday wonderland? Let’s get started with these easy steps:

  1. Preheat your oven to 350°F (175°C) and line a baking sheet with parchment paper. This will ensure your cookies bake evenly and don’t stick.
  2. In a large bowl, cream together the softened butter and powdered sugar until light and fluffy. This step is crucial for the texture—don’t rush it!
  3. Add in the vanilla extract and mix until combined. The aroma will start to fill your kitchen, and you’ll be dreaming of cookies already!
  4. Gradually add the flour and salt, mixing until a soft dough forms. You can use a spatula or your hands—get in there!
  5. Scoop tablespoon-sized portions of dough and roll them into balls. They don’t have to be perfect; that’s part of the charm!
  6. Place the balls on the prepared baking sheet, spacing them about 2 inches apart. They’ll spread in the oven.
  7. Using your thumb or the back of a spoon, create an indentation in the center of each cookie. This is where the preserves will go, so make it a nice little well!
  8. Fill each indentation with a small amount of fruit preserves. Don’t go overboard, or they might overflow while baking.
  9. If desired, sprinkle colored sprinkles around the edges of the cookies. This adds a fun festive flair!
  10. Bake in the preheated oven for 12-15 minutes or until the edges are lightly golden. Keep an eye on them; you want that perfect softness!
  11. Allow the cookies to cool on the baking sheet for a few minutes before transferring them to a wire rack to cool completely. Patience is key here!
Soft Christmas Thumbprint Cookies

Pro Tips for the Best Results

Here are a few of my favorite tips to ensure your thumbprint cookies turn out perfectly every time:

  • Make sure your butter is at room temperature. This will help in achieving that creamy, fluffy texture when creaming with the sugar.
  • Experiment with different preserves! Try mixing flavors or even adding a splash of liqueur to your fruit preserves for an adult twist.
  • If you want to make these cookies ahead of time, you can freeze the rolled dough balls. Just thaw them before baking and fill with preserves!

Serving Suggestions

These thumbprint cookies are delightful on their own, but why not elevate the experience? Here are a few serving ideas:

  • Serve them on a festive platter alongside a selection of other holiday treats—your friends and family will love the variety!
  • Pair with a warm cup of tea or coffee for a cozy afternoon treat.
  • Wrap them in cellophane with a cute ribbon for a homemade gift that’s sure to bring smiles.

Storage and Make-Ahead Tips

These cookies can be enjoyed fresh or stored for later. Here’s how to keep your cookies delicious:

  • Store the cooled cookies in an airtight container at room temperature for up to a week. If they last that long!
  • You can freeze the baked cookies for up to three months. Just make sure to layer them in between parchment paper to prevent sticking.
  • If you’re making them ahead of time, consider preparing the dough and refrigerating it for up to a day before baking.

There you have it—a delightful recipe for Soft Christmas Thumbprint Cookies that’s sure to fill your home with warmth and joy this holiday season. I can’t wait for you to try them and create your own memories in the kitchen. Remember, cooking is about the love you put into it, so let’s make this holiday season delicious together!

Soft Christmas Thumbprint Cookies

Prep Time 15 minutes
Cook Time 15 minutes
Total Time 30 minutes
Servings 24 cookies
Calories 150
Delight in these buttery, festive cookies filled with fruit preserves and colorful sprinkles, perfect for holiday gatherings.

Ingredients

Dough

  • 1 cup unsalted butter, softened
  • 1 cup powdered sugar
  • 1 teaspoon vanilla extract
  • 2 cups all-purpose flour
  • 1/4 teaspoon salt

Filling

  • 1/2 cup fruit preserves (your choice)

Optional toppings

  • colored sprinkles (optional) colored sprinkles (for decoration)

Instructions 

  • Preheat oven to 350°F (175°C). Line baking sheet with parchment.
  • Cream butter and powdered sugar until fluffy. Mix in vanilla.
  • Add flour and salt; form a soft dough. Roll into balls and place on sheet.
  • Indent centers of cookies, fill with preserves, and add sprinkles if desired.
  • Bake for 12-15 minutes until edges are golden. Cool before serving.

Notes

Use your favorite fruit preserves for a personalized touch.
Calories: 150kcal
Cost: $10
Course: Dessert
Cuisine: American
Keyword: Cookies

Nutrition

Calories: 150kcal | Carbohydrates: 20g | Protein: 2g | Fat: 8g | Sodium: 50mg

Loved this recipe? Save it to your favorite Pinterest board so you can easily find it later! It’s the perfect way to keep all your sweet ideas in one place. ✨
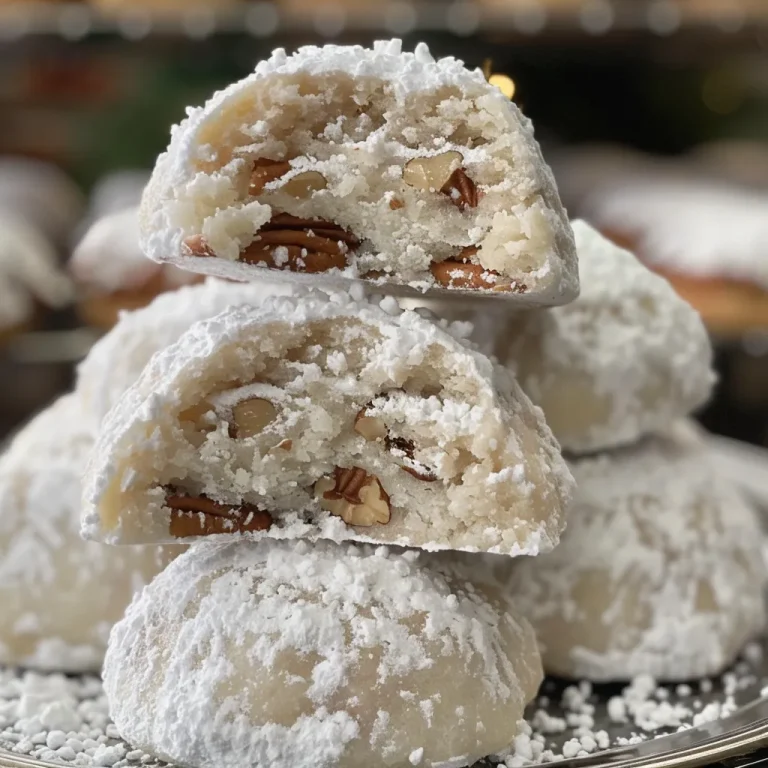
Soft Christmas Thumbprint Cookies

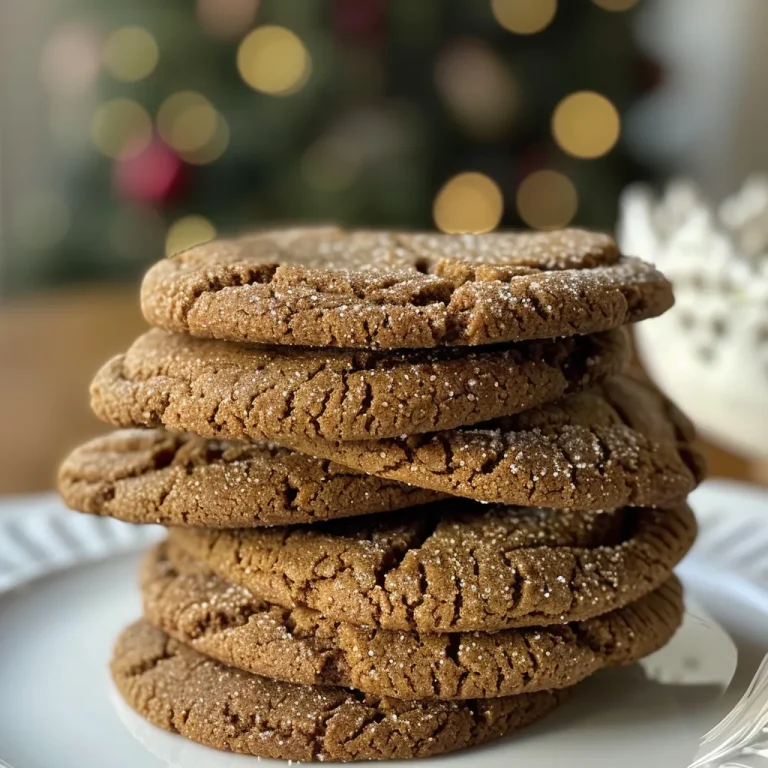
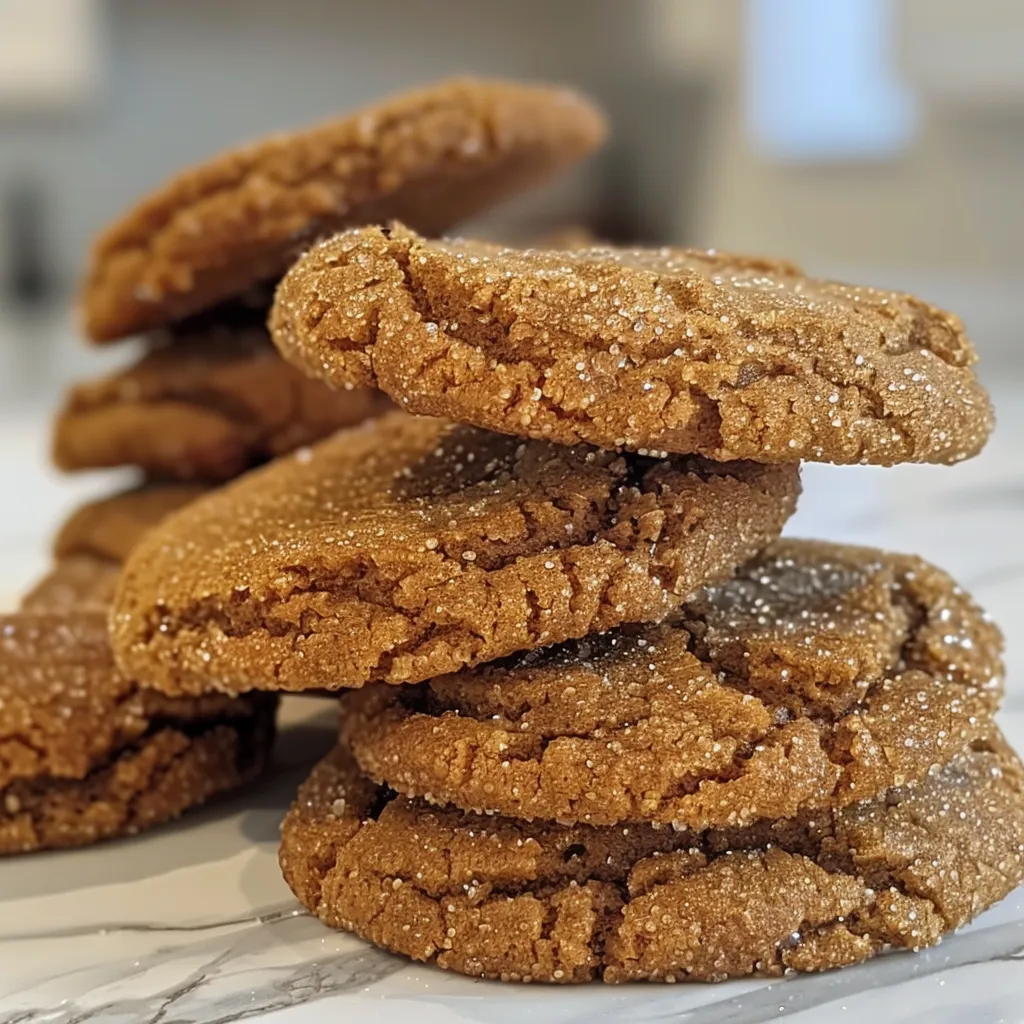
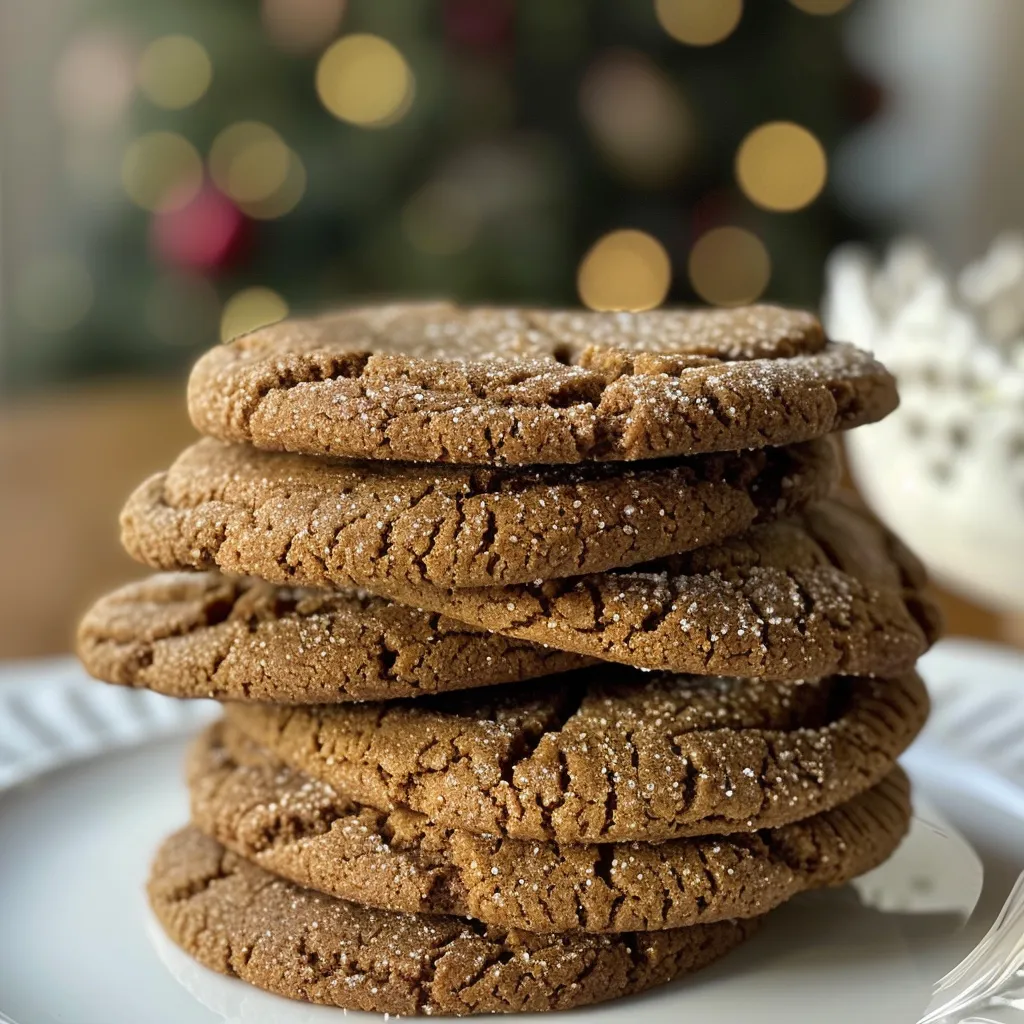
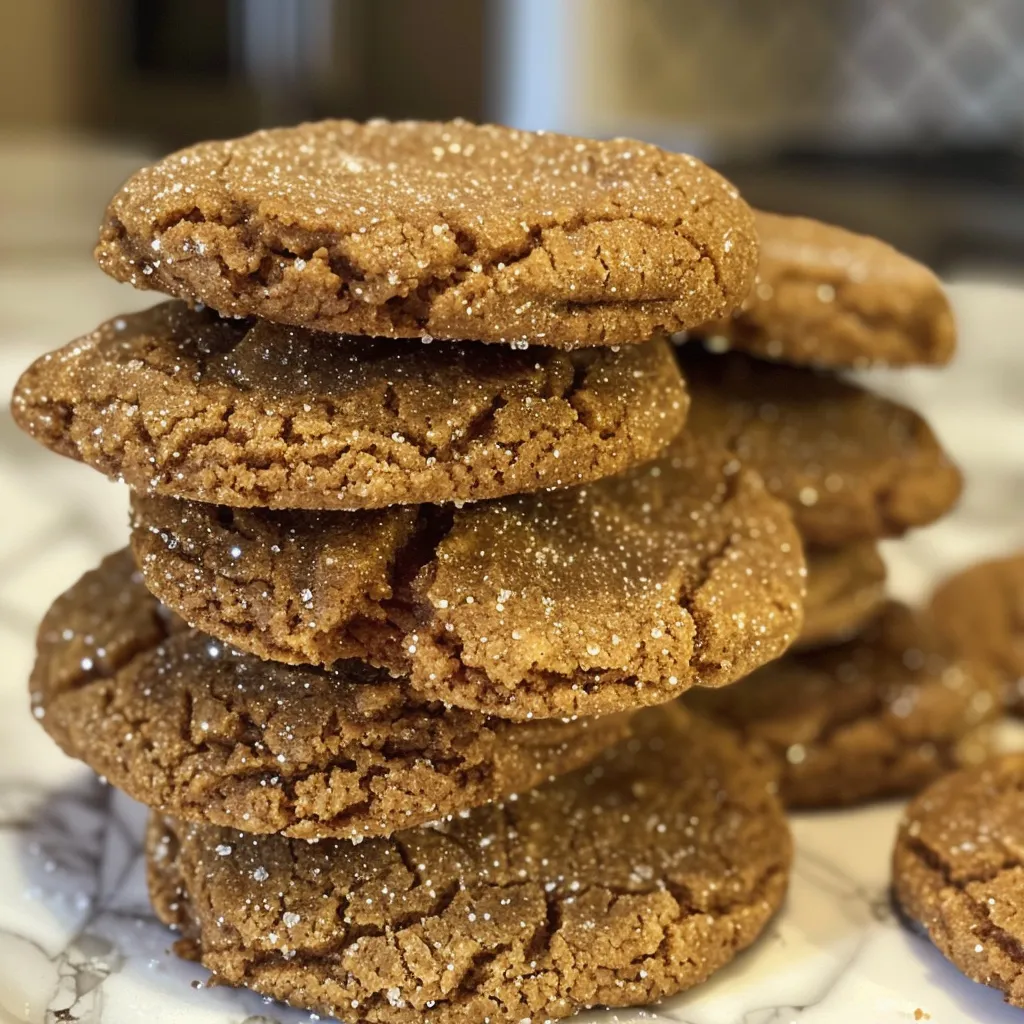
Ah, the holiday season! It’s that magical time of year when the air is filled with the scents of cinnamon, nutmeg, and all things festive. Growing up in Charleston, South Carolina, I remember the warmth of my family’s kitchen as we gathered to bake our favorite holiday treats. One of the standout memories is of my mom’s gingerbread cookies, which always seemed to disappear within moments. Now, as I stand in my own kitchen, I find immense joy in recreating those memories and sharing them with you. Today, I’m thrilled to introduce you to my Gingerbread Crinkle Cookies—perfect for your holiday cookie swap or just to enjoy with a warm cup of cocoa.

Why You’ll Absolutely Love Gingerbread Crinkle Cookies for the Holiday Cookie Swap

These delightful cookies are not just any ordinary holiday treat; they’re bursting with flavor and charm. Let me share a few reasons why you’ll want to add these Gingerbread Crinkle Cookies to your holiday baking lineup:

  • **Irresistibly Soft and Chewy:** These cookies have a texture that strikes the perfect balance between soft and chewy, making them a delight to bite into.
  • **Festively Spiced:** The combination of ginger, cinnamon, and cloves gives these cookies that quintessential holiday flavor that warms the heart.
  • **Gorgeous Appearance:** With their signature crinkled tops dusted in powdered sugar, these cookies are as beautiful as they are delicious, making them a showstopper at any cookie swap.
  • **Easy to Make:** Even if you’re new to baking, this recipe is straightforward and approachable, allowing you to whip up a batch without any stress!

Ingredients You’ll Need

Let’s talk about the star players in this festive cookie recipe. Each ingredient is chosen with care to bring out the best flavors and textures:

  • All-Purpose Flour: This is the base of our cookie, providing structure while keeping them soft.
  • Spices: Ground ginger, cinnamon, and cloves are essential for that cozy, holiday spice profile.
  • Baking Soda and Salt: These help our cookies rise and enhance the overall flavor.
  • Unsalted Butter: Softened butter adds richness and a lovely texture.
  • Sugars: A mix of brown and granulated sugars creates a delightful sweetness and depth of flavor.
  • Egg, Molasses, and Vanilla: These ingredients contribute to the moisture and flavor, making each bite a little piece of heaven.
  • Powdered Sugar: This is for dusting, adding that charming snowy finish to our cookies.

You’ll find the full ingredient list with measurements in the recipe card below!

How to Make Gingerbread Crinkle Cookies for the Holiday Cookie Swap, Step-by-Step

Now, let’s roll up our sleeves and get baking! Here’s how to make these delightful cookies:

  1. Preheat your oven to 350°F (175°C) and line a baking sheet with parchment paper. This will prevent your cookies from sticking and make cleanup a breeze!
  2. In a bowl, whisk together the flour, ground ginger, cinnamon, cloves, baking soda, and salt. Set this aside; the spices are about to infuse your cookies with holiday magic!
  3. In a large mixing bowl, cream together the softened butter, brown sugar, and granulated sugar until light and fluffy. This is where the magic begins, so take your time to ensure it’s well combined.
  4. Add the egg, molasses, and vanilla extract to the butter mixture and mix until everything is beautifully combined.
  5. Gradually add the dry ingredients to the wet ingredients, mixing until just combined. Be careful not to overmix; we want soft, tender cookies!
  6. Chill the dough in the refrigerator for about 30 minutes. This makes it easier to handle and helps the flavors meld together.
  7. Scoop tablespoon-sized portions of dough and roll them into balls. Then, roll each ball in powdered sugar until fully coated—it’s like giving them a warm, snowy blanket!
  8. Place the balls on the prepared baking sheet, spacing them about 2 inches apart to give them room to spread.
  9. Bake for 10-12 minutes, or until the edges are set and the tops are crinkled. Don’t worry if they look a little underbaked; they’ll firm up as they cool!
  10. Allow the cookies to cool on the baking sheet for a few minutes before transferring them to a wire rack to cool completely.
Gingerbread Crinkle Cookies for the Holiday Cookie Swap

Pro Tips for the Best Results

Before you dive into the cookie swap, here are a few pro tips to ensure your Gingerbread Crinkle Cookies turn out perfectly:

  • Use Fresh Spices: The potency of your spices can make a big difference in flavor. If your spices have been sitting in the pantry for a while, consider picking up fresh ones for that extra oomph!
  • Don’t Skip the Chill: Chilling the dough is key to preventing the cookies from spreading too much. Trust me, you’ll appreciate the texture!
  • Keep an Eye on Baking Time: Every oven is different, so keep an eye on your cookies as they bake. You want them to look set but still soft in the center.

Serving Suggestions

These Gingerbread Crinkle Cookies are delightful on their own, but why not take it up a notch? Here are some fun serving suggestions:

  • Pair them with a hot cup of spiced apple cider or your favorite holiday tea for a cozy afternoon treat.
  • Serve them on a festive platter alongside other holiday cookies for a beautiful cookie swap spread.
  • For a fun twist, sandwich two cookies with a dollop of cream cheese frosting for an indulgent treat!

Storage and Make-Ahead Tips

These cookies are not only delicious but also practical for the busy holiday season. Here’s how to store and prepare them in advance:

  • **Storage:** Keep your cooled cookies in an airtight container at room temperature for up to a week. If you want them to last longer, you can refrigerate them.
  • **Make-Ahead:** You can prepare the cookie dough in advance and freeze it! Just scoop the dough balls and freeze them on a baking sheet. Once frozen, transfer them to a zip-top bag and store for up to three months. When you’re ready to bake, no need to thaw; just add a couple of extra minutes to the baking time.

So there you have it! A delightful recipe for Gingerbread Crinkle Cookies that’s sure to bring joy to your holiday celebrations. Remember, the kitchen is a place for creativity and laughter, so don’t be afraid to make this recipe your own. Happy baking, friends!

Gingerbread Crinkle Cookies for the Holiday Cookie Swap

Prep Time 15 minutes
Cook Time 12 minutes
Total Time 27 minutes
Servings 24 cookies
Calories 120
Enjoy these festive, crinkled gingerbread cookies that are perfect for holiday gatherings and cookie swaps.

Ingredients

Dough

  • 2 1/4 cups all-purpose flour
  • 2 teaspoons ground ginger
  • 1 teaspoon ground cinnamon
  • 1/2 teaspoon ground cloves
  • 1/2 teaspoon baking soda
  • 1/4 teaspoon salt
  • 1/2 cup unsalted butter, softened
  • 1/2 cup brown sugar, packed
  • 1/4 cup granulated sugar
  • 1 large egg
  • 1/2 cup molasses
  • 1 teaspoon vanilla extract

Dusting

  • 1/2 cup powdered sugar for dusting

Instructions 

  • Preheat oven to 350°F (175°C) and line baking sheet.
  • Mix dry ingredients in a bowl; set aside.
  • Cream butter and sugars; add egg, molasses, vanilla.
  • Gradually add dry ingredients; chill dough 30 mins.
  • Shape dough into balls, coat with powdered sugar, and place on sheet.
  • Bake 10-12 mins; cool before serving.

Notes

Chill the dough for easier handling and better crinkle effect.
Calories: 120kcal
Cost: $15
Course: Dessert
Cuisine: holiday
Keyword: gingerbread

Nutrition

Calories: 120kcal | Carbohydrates: 20g | Protein: 1g | Fat: 4g | Sodium: 50mg

Loved this recipe? Save it to your favorite Pinterest board so you can easily find it later! It’s the perfect way to keep all your sweet ideas in one place. ✨

Gingerbread Crinkle Cookies for the Holiday Cookie Swap

Ah, the holiday season! It’s that magical time of year when the air is filled with the scent of pine, twinkling lights adorn every corner, and laughter fills the home as families gather to celebrate. Growing up in Charleston, South Carolina, my holiday memories are steeped in the warmth of my mom’s kitchen. I remember standing on a stool, just barely tall enough to peek over the counter, eagerly waiting to sneak tastes of the gingerbread dough she would whip up. Those sweet moments, filled with giggles and the aroma of spices, taught me that cooking is truly about connection and joy.

This year, I invite you into my kitchen to create something special: Classic Gingerbread Men Cookies! These adorable, spiced delights are not only perfect for decorating but also serve as a wonderful excuse to gather with loved ones and share some festive cheer. So, let’s roll up our sleeves and whisk up some holiday magic together!

Why You’ll Absolutely Love Classic Gingerbread Men Cookies – Adorable, Spiced & Perfect for Decorating! ☃️🍪

These cookies are a holiday staple, and for good reason! Here’s why you’ll absolutely adore making them:

  • They fill your home with the warm, inviting scents of ginger, cinnamon, and cloves.
  • Decorating them is a fun activity for all ages, making it a perfect family tradition!
  • They are wonderfully versatile—enjoy them plain or decked out with colorful icing and sprinkles.
  • They make delightful gifts! Share a batch with friends or neighbors to spread joy.

Ingredients You’ll Need

Let’s talk about the ingredients that make these cookies so special. You’ll find that they’re quite straightforward and feature warm spices that embody the spirit of the season. Here’s what you’ll need:

  • 3 cups all-purpose flour
  • 1 teaspoon baking soda
  • 1 tablespoon ground ginger
  • 1 tablespoon ground cinnamon
  • 1/2 teaspoon ground cloves
  • 1/2 teaspoon salt
  • 1/2 cup unsalted butter, softened
  • 1/2 cup brown sugar, packed
  • 1/2 cup molasses
  • 1 large egg
  • 1 teaspoon vanilla extract
  • Royal icing for decorating
  • Sprinkles and edible decorations (optional)

You’ll find the full ingredient list with measurements in the recipe card below!

How to Make Classic Gingerbread Men Cookies – Adorable, Spiced & Perfect for Decorating! ☃️🍪, Step-by-Step

Now, let’s dive into the fun part—making these delightful cookies! Follow these simple steps, and soon you’ll have a batch of gingerbread men ready for decorating:

  1. In a bowl, whisk together the flour, baking soda, ginger, cinnamon, cloves, and salt. Set aside.
  2. In a large mixing bowl, cream together the softened butter and brown sugar until light and fluffy. This is where the magic begins!
  3. Add the molasses, egg, and vanilla extract to the butter mixture and mix until well combined. The molasses gives these cookies that rich, dark color and flavor.
  4. Gradually add the dry ingredients to the wet mixture, mixing until a dough forms. You may need to use your hands to bring it all together—don’t be afraid to get a little messy!
  5. Divide the dough into two equal parts, wrap in plastic wrap, and refrigerate for at least 1 hour. This helps the flavors meld and makes rolling out easier.
  6. Preheat the oven to 350°F (175°C) and line baking sheets with parchment paper.
  7. On a floured surface, roll out one portion of dough to about 1/4 inch thick. Don’t worry if it’s not perfect; that’s part of the charm!
  8. Use a gingerbread man cookie cutter to cut out shapes and place them on the prepared baking sheets. Each one will have its own personality!
  9. Bake for 8-10 minutes, or until the edges are firm. The aroma will be heavenly! Let cool on the baking sheets for a few minutes before transferring to wire racks to cool completely.
  10. Once cooled, it’s time for the fun part! Decorate the gingerbread men with royal icing and any additional decorations you like. Get creative—there are no rules here!
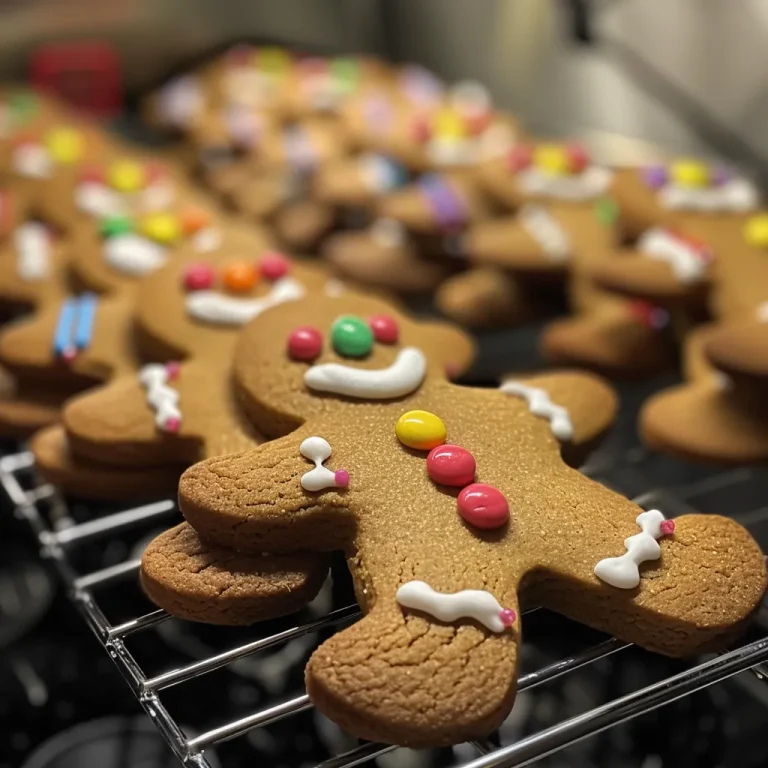
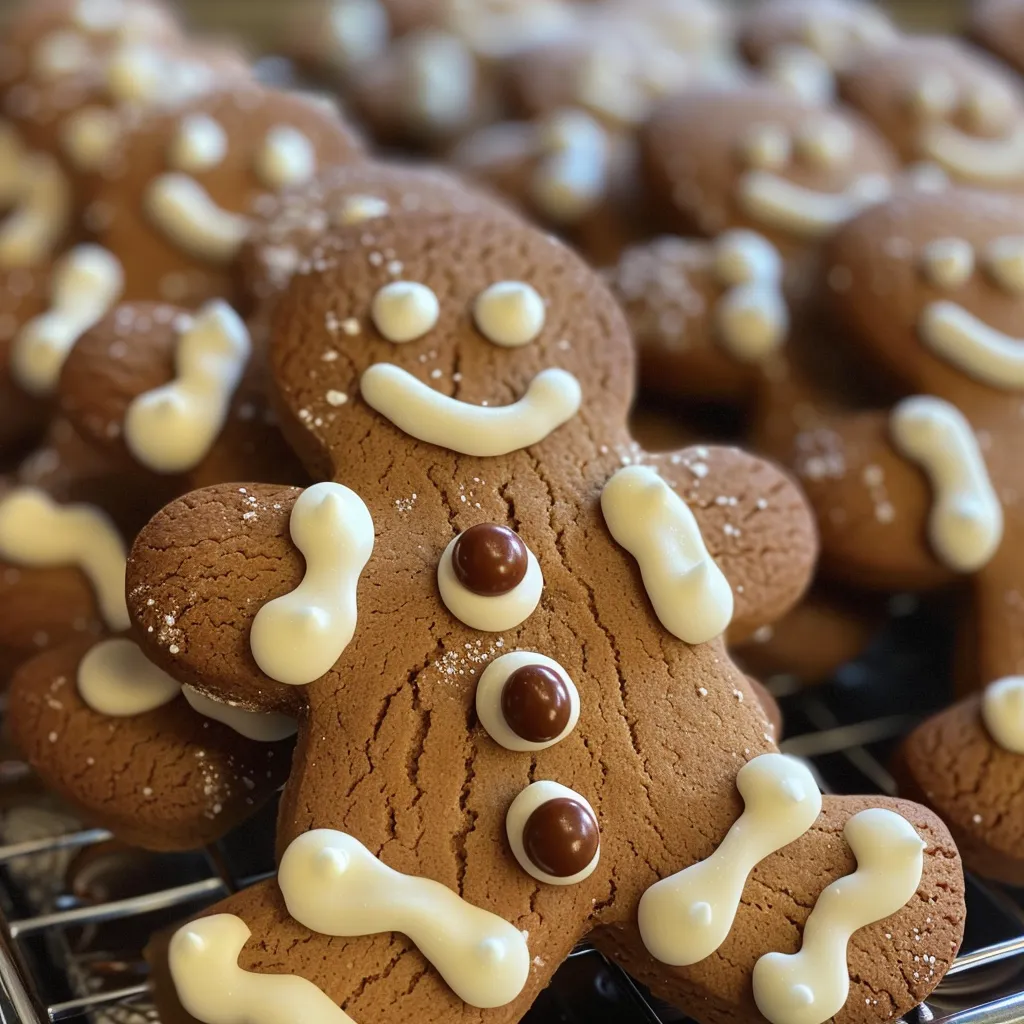
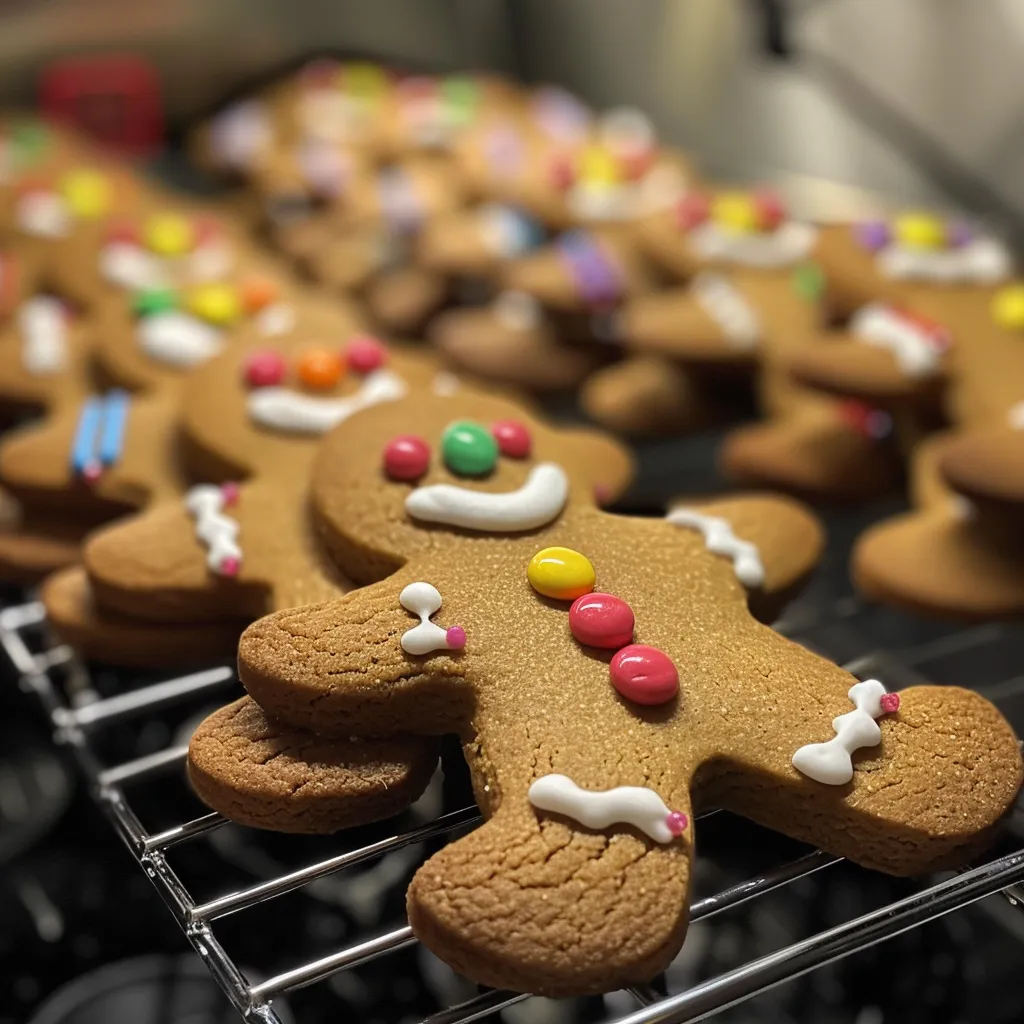
Classic Gingerbread Men Cookies – Adorable, Spiced & Perfect for Decorating! ☃️🍪

Pro Tips for the Best Results

To ensure your gingerbread men turn out perfectly every time, here are a few of my favorite tips:

  • Make sure your butter is softened but not melted; this helps create a light and fluffy dough.
  • Don’t skip the chilling step! It not only helps the dough firm up but also enhances the flavor.
  • If you’re decorating with royal icing, allow the cookies to cool completely to avoid any melting mishaps.

Serving Suggestions

These gingerbread men are perfect for sharing! Here are some creative ways to serve them:

Storage and Make-Ahead Tips

Want to make these cookies ahead of time? No problem! Here are some storage tips:

  • Store cooled cookies in an airtight container at room temperature for up to a week. They’ll stay delicious, and the flavors will continue to develop!
  • If you want to make the dough ahead of time, you can freeze it for up to three months. Just thaw it in the refrigerator before rolling out.
  • Decorated cookies can also be stored in an airtight container, but be sure to separate layers with parchment paper to keep your icing intact.

Classic Gingerbread Men Cookies – Adorable, Spiced & Perfect for Decorating! ☃️🍪

Prep Time 20 minutes
Cook Time 10 minutes
Total Time 30 minutes
Servings 24 cookies
Calories 150
Enjoy these festive gingerbread men cookies, perfect for decorating and sharing during the holidays.

Ingredients

Dough

  • 3 cups all-purpose flour
  • 1 teaspoon baking soda
  • 1 tablespoon ground ginger
  • 1 tablespoon ground cinnamon
  • 1/2 teaspoon ground cloves
  • 1/2 teaspoon salt
  • 1/2 cup unsalted butter, softened
  • 1/2 cup brown sugar, packed
  • 1/2 cup molasses
  • 1 large egg
  • 1 teaspoon vanilla extract

Decorations

  • royal icing for decorating
  • sprinkles and edible decorations (optional)

Instructions 

  • Mix dry ingredients in a bowl and set aside.
  • Cream butter and sugar until fluffy, then add molasses, egg, and vanilla.
  • Gradually add dry ingredients to form dough, refrigerate for 1 hour.
  • Roll out dough, cut shapes, and place on baking sheets.
  • Bake at 350°F (175°C) for 8-10 minutes, cool, then decorate.

Notes

Chill the dough well for easier rolling and cutting.
Calories: 150kcal
Cost: $15
Course: Dessert
Cuisine: American
Keyword: gingerbread

Nutrition

Calories: 150kcal | Carbohydrates: 25g | Protein: 2g | Fat: 6g | Sodium: 150mg

Loved this recipe? Save it to your favorite Pinterest board so you can easily find it later! It’s the perfect way to keep all your sweet ideas in one place. ✨

Classic Gingerbread Men Cookies – Adorable, Spiced & Perfect for Decorating! ☃️🍪

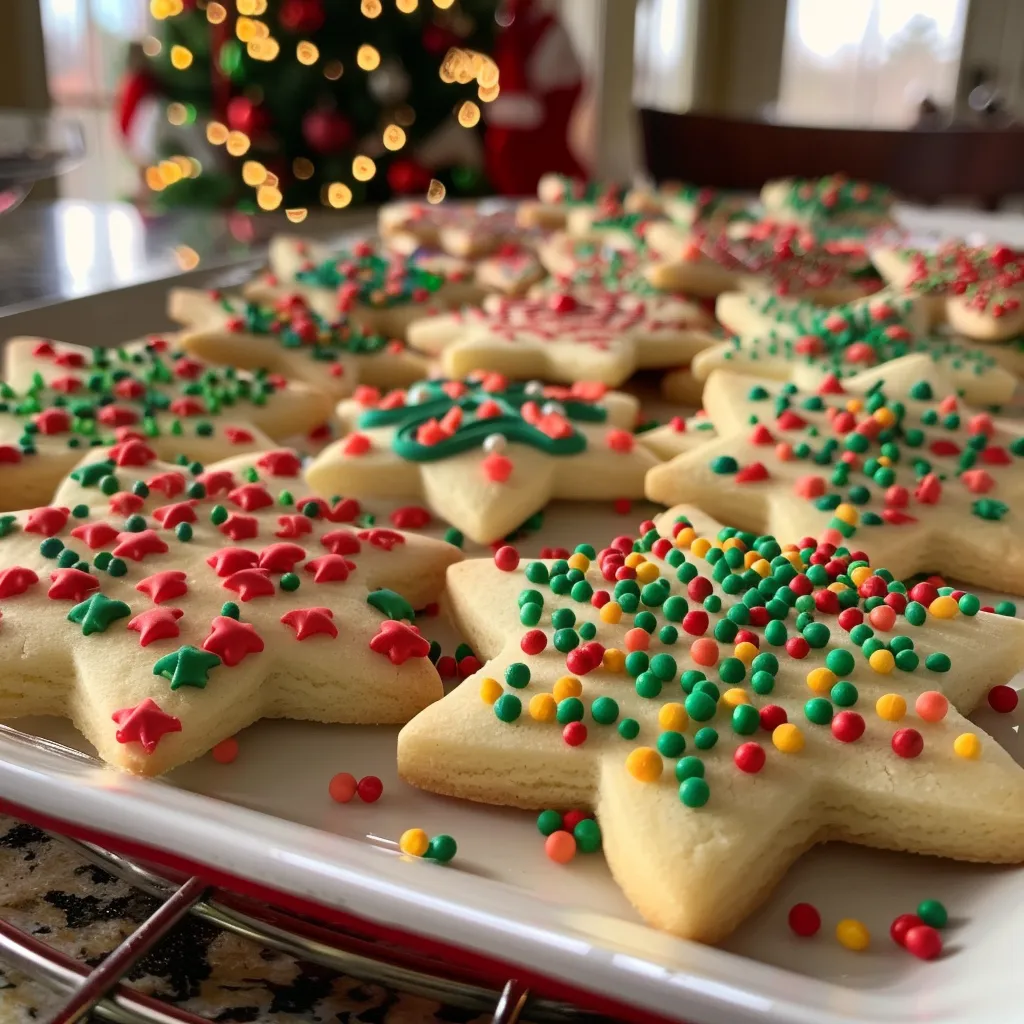
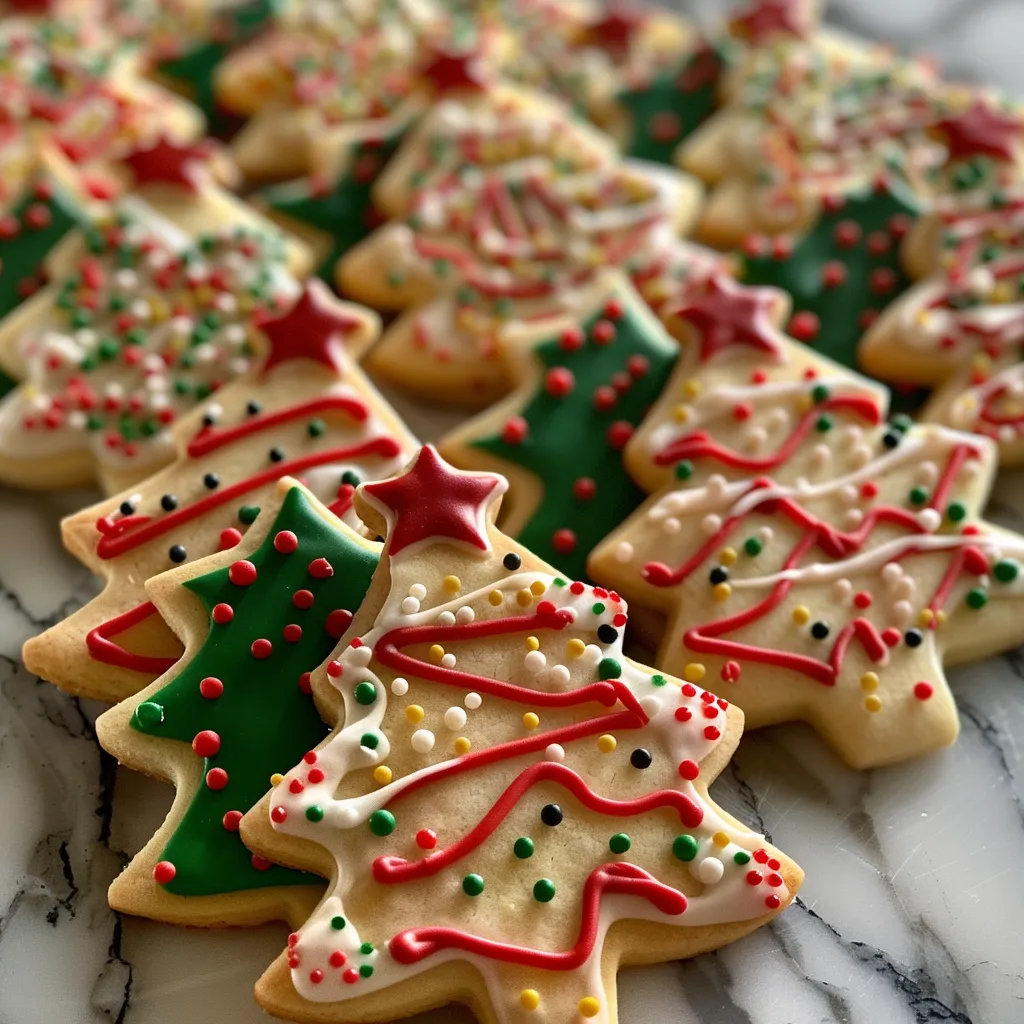
Welcome back to Emily’s Must-Try Kitchen, dear friends! As the air turns crisp and the scent of pine fills our homes, it’s time to gather in the kitchen and whip up something truly magical. Today, I’m inviting you to join me as we create a batch of whimsical Christmas sugar cookies that are sure to bring joy to your holiday festivities. Inspired by the beloved Crumbl cookies, these soft and sweet treats are adorned with festive sprinkles, making them perfect for sharing with family and friends—or indulging in all by yourself while watching your favorite holiday movie!

Growing up in Charleston, I fondly remember the excitement of baking during the holidays. My mom and I would spend afternoons rolling dough and decorating cookies, creating memories that still warm my heart. Each cookie was a canvas for our creativity, and I learned that the kitchen was not just a place for food, but a space for love and laughter. So, roll up your sleeves, grab your mixing bowl, and let’s create some delicious memories together!

Why You’ll Absolutely Love Christmas Sugar Cookies (Crumbl Copycat)

These Christmas sugar cookies are not just any cookies; they are a delightful blend of nostalgia and modern flair that will make your holiday celebrations extra special. Here’s why you’ll absolutely fall in love with them:

  • **Soft and Chewy Texture:** These cookies have a soft, melt-in-your-mouth texture that will leave you craving more.
  • **Festive Flair:** Adorned with colorful Christmas jimmies, they add a whimsical touch to your holiday spread.
  • **Easy to Make:** Even if you’re a novice baker, this recipe is simple and forgiving—perfect for all skill levels!
  • **Customizable:** Feel free to get creative! Swap out the sprinkles or add your favorite flavors to personalize your cookies.

Ingredients You’ll Need

Let’s talk about the star players in this cookie recipe. Each ingredient is chosen with care to ensure the best flavor and texture possible. Here’s what you’ll need:

  • All-purpose flour provides the backbone of our cookies, giving them structure.
  • Softened unsalted butter adds richness and a lovely buttery flavor.
  • Granulated sugar and powdered sugar give sweetness while helping achieve that signature Crumbl cookie texture.
  • Eggs and extracts (vanilla and almond) bring depth and warmth to each bite.
  • And, of course, the Christmas sprinkles—because what’s a holiday cookie without a sprinkle of cheer?

You’ll find the full ingredient list with measurements in the recipe card below!

How to Make Christmas Sugar Cookies (Crumbl Copycat), Step-by-Step

Now that we’ve gathered our ingredients, let’s get baking! Follow these simple steps to create your festive cookies:

  1. Preheat your oven to 350°F (175°C). Line 2-3 baking sheets with parchment paper to prevent sticking.
  2. In a medium bowl, whisk together the flour, baking powder, and salt. Setting this aside will ensure a well-mixed dough.
  3. In the bowl of a stand mixer fitted with the paddle attachment (or using a hand mixer), beat the softened butter and granulated sugar on medium speed until light and fluffy, about 1-2 minutes. Don’t forget to scrape down the sides of the bowl to get every bit mixed in!
  4. Add the egg and both extracts, then beat on medium-low speed until everything is well combined, about 30 seconds.
  5. Gradually add the dry ingredients to the butter mixture in two parts, mixing on low speed until just combined. Be careful not to overmix—this will keep our cookies tender!
  6. Gently fold in the Christmas jimmies sprinkles with a spatula until evenly distributed throughout the dough.
  7. Using a 3-tablespoon cookie scoop, portion out the dough (48-50 g each) and roll them into balls. Place them on the prepared baking sheets, about 2 inches apart.
  8. Slightly flatten each dough ball with your fingers or the bottom of a glass, ensuring they are still at least ½-inch thick.
  9. Bake in your preheated oven for 9-11 minutes, or until the edges are set and the tops look soft and no longer glossy. Remember, we don’t want them to brown!
  10. Once baked, remove from the oven and immediately shape into perfect circles by gently rotating a larger cookie cutter or glass around each cookie to refine the edges.
  11. Let the cookies cool on the baking sheets for about 5 minutes before transferring them to a wire rack to cool completely.
  12. While the cookies cool, let’s make the frosting! In a clean bowl of a stand mixer fitted with the whisk attachment, beat the cream cheese and butter on low speed until smooth and creamy, about 1-2 minutes. Scrape down the sides of the bowl as needed.
  13. Add in the vanilla extract and salt, then beat on low until combined.
  14. Gradually incorporate the sifted powdered sugar in three parts, mixing on low speed until just combined. Scrape the bowl as needed.
  15. Slowly drizzle in the cold heavy cream while whisking on low speed until stiff peaks form, about 1-1½ minutes. Be careful not to overwhip!
  16. Now, it’s time to frost! Pipe the frosting in a spiral pattern over the cooled cookies using a #2A or #1A piping tip, or simply spread with a spatula for decorative swirls.
  17. Just before serving, sprinkle those festive Christmas sprinkles over the frosting for that extra touch of holiday cheer!
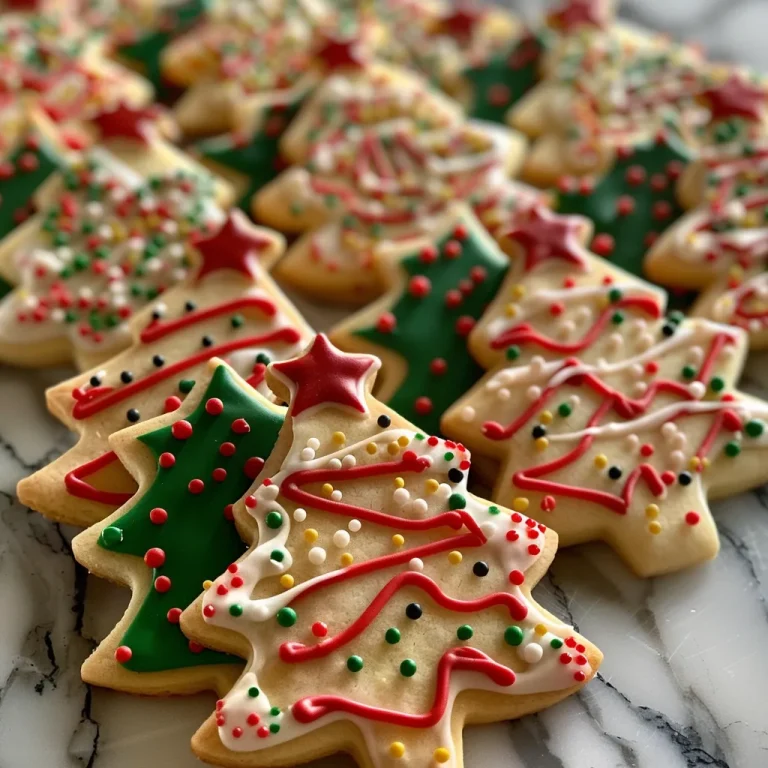
Christmas Sugar Cookies (Crumbl Copycat)

Pro Tips for the Best Results

As you embark on your cookie-baking adventure, here are a few pro tips to ensure your cookies turn out perfectly:

  • **Use Room Temperature Ingredients:** Make sure your butter and cream cheese are softened to room temperature for a smooth batter and frosting.
  • **Don’t Overbake:** Keep an eye on your cookies—everyone’s oven is different, and you want them to be soft and chewy without browning.
  • **Chill the Dough:** If you have time, chilling the dough for about 30 minutes can help the cookies hold their shape better during baking.

Serving Suggestions

These Christmas sugar cookies are perfect for any holiday gathering! Serve them on a festive platter at your next holiday party, or package them in cute boxes as gifts for friends and family. Pair them with a warm cup of cocoa or a glass of milk for a cozy treat. They also make a delightful addition to a cookie exchange, where their whimsy is sure to steal the show!

Storage and Make-Ahead Tips

Want to get a head start on your holiday baking? You can make the cookie dough ahead of time and refrigerate it for up to 3 days, or freeze it for up to 3 months. Just thaw in the fridge overnight before baking. Once baked, store your cookies in an airtight container at room temperature for up to a week. For longer storage, you can freeze the baked cookies and thaw them as needed—just be sure to frost them after thawing for that fresh look!

So there you have it, my friends! A delightful recipe for whimsical Christmas sugar cookies that will fill your home with joy and delicious aromas this holiday season. I can’t wait to hear about your baking adventures and see how your cookies turn out. Happy baking and merry making!

Christmas Sugar Cookies (Crumbl Copycat)

Prep Time 20 minutes
Cook Time 10 minutes
Total Time 30 minutes
Servings 24 cookies
Calories 250
Celebrate the holidays with these festive sugar cookies topped with colorful sprinkles and creamy frosting, perfect for sharing with loved ones.

Ingredients

Dry Ingredients

  • 270 g all-purpose flour
  • 4 g baking powder
  • 0.25 tsp salt

Cookies

  • 170 g unsalted butter, softened ((68-72°F))
  • 200 g granulated sugar
  • 1 large egg (room temperature)
  • 1 tbsp vanilla extract
  • 0.25 tsp almond extract (optional)
  • 54 g christmas jimmies sprinkles

Frosting

  • 283 g full-fat cream cheese, softened ((68-72°F))
  • 184 g salted butter, softened ((68-72°F))
  • 2 tsp vanilla extract
  • 0.125 tsp salt
  • 150 g powdered sugar, sifted
  • 80 ml heavy cream, very cold
  • 24 g christmas sprinkles (jimmies, nonpareils, trees, etc.)

Instructions 

  • Preheat oven to 350°F (175°C). Line baking sheets with parchment.
  • Mix dry ingredients; set aside. Beat butter and sugar until fluffy. Add egg and vanilla; combine. Mix in dry ingredients. Fold in sprinkles.
  • Portion dough with a cookie scoop, shape into balls, flatten slightly. Bake 9-11 minutes until edges are set but not browned.
  • Cool cookies, then shape into circles if desired. Prepare frosting by beating cream cheese and butter, then add vanilla, salt, powdered sugar, and heavy cream until stiff peaks form.
  • Pipe frosting over cooled cookies, sprinkle with Christmas sprinkles before serving.

Notes

Ensure frosting is not overwhipped to prevent splitting. Use cold heavy cream for best frosting texture.
Calories: 250kcal
Cost: $15
Course: Dessert
Cuisine: American
Keyword: Christmas, Cookies, Festive

Nutrition

Calories: 250kcal | Carbohydrates: 35g | Protein: 3g | Fat: 12g | Sodium: 150mg

Loved this recipe? Save it to your favorite Pinterest board so you can easily find it later! It’s the perfect way to keep all your sweet ideas in one place. ✨

Christmas Sugar Cookies (Crumbl Copycat)

There’s something magical about the holiday season that makes me want to fill my kitchen with the warmth of baked goods and the sweet aroma of maple. Growing up in Charleston, South Carolina, I remember the holiday gatherings where my family would come together to share stories, laughter, and, of course, delicious treats. One of my fondest memories is standing on a stool in my mom’s kitchen, stealing bites of cookie dough while we baked together. Those moments taught me that cooking isn’t just about the food; it’s about connection, love, and creating memories that last a lifetime.

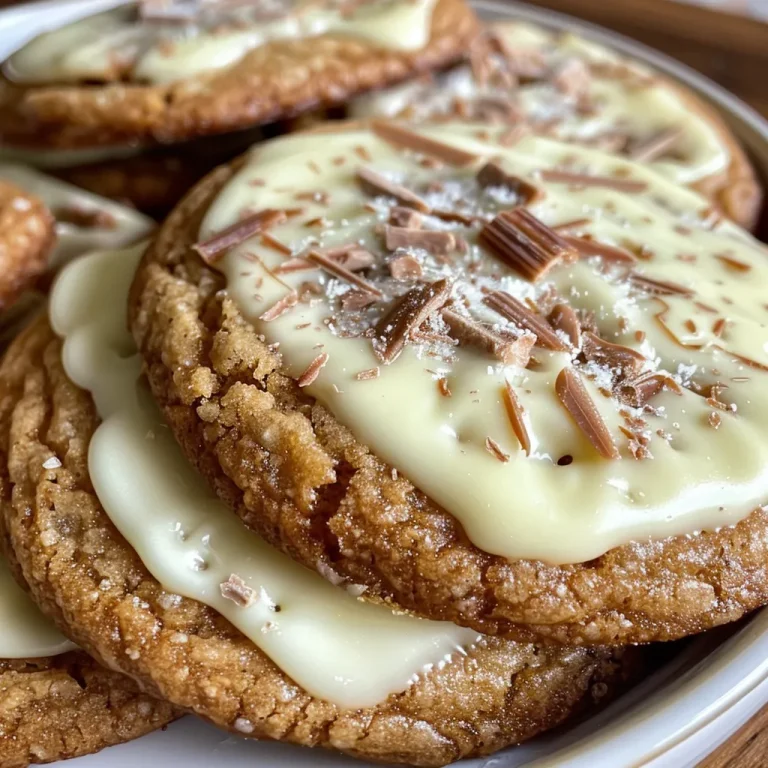
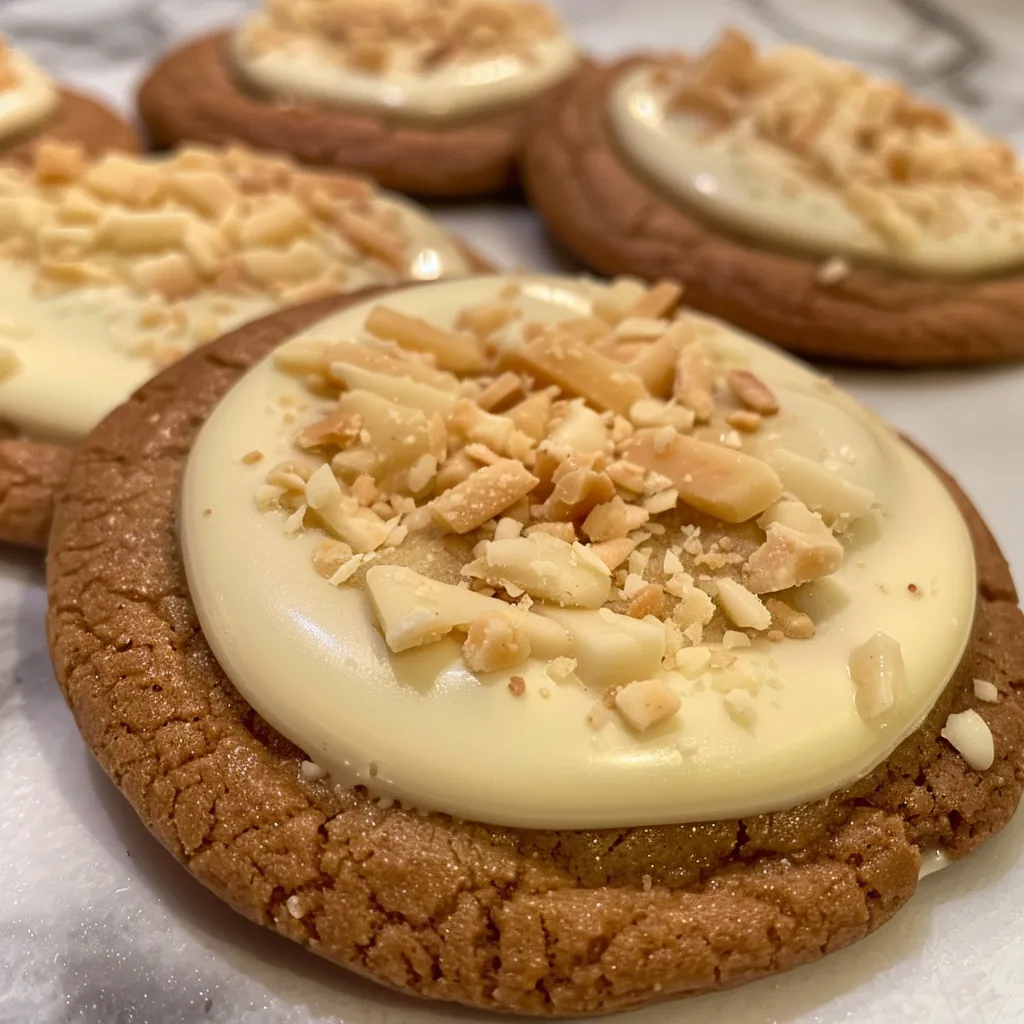
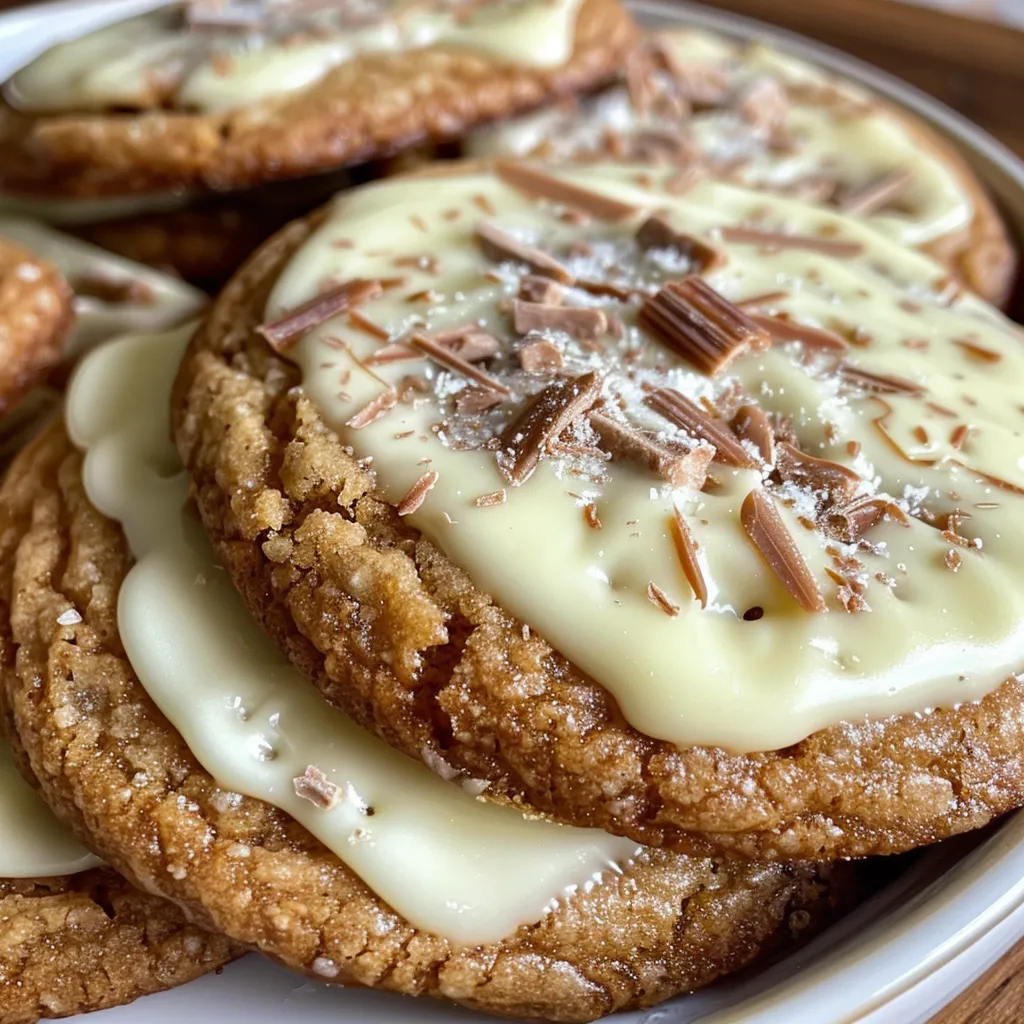
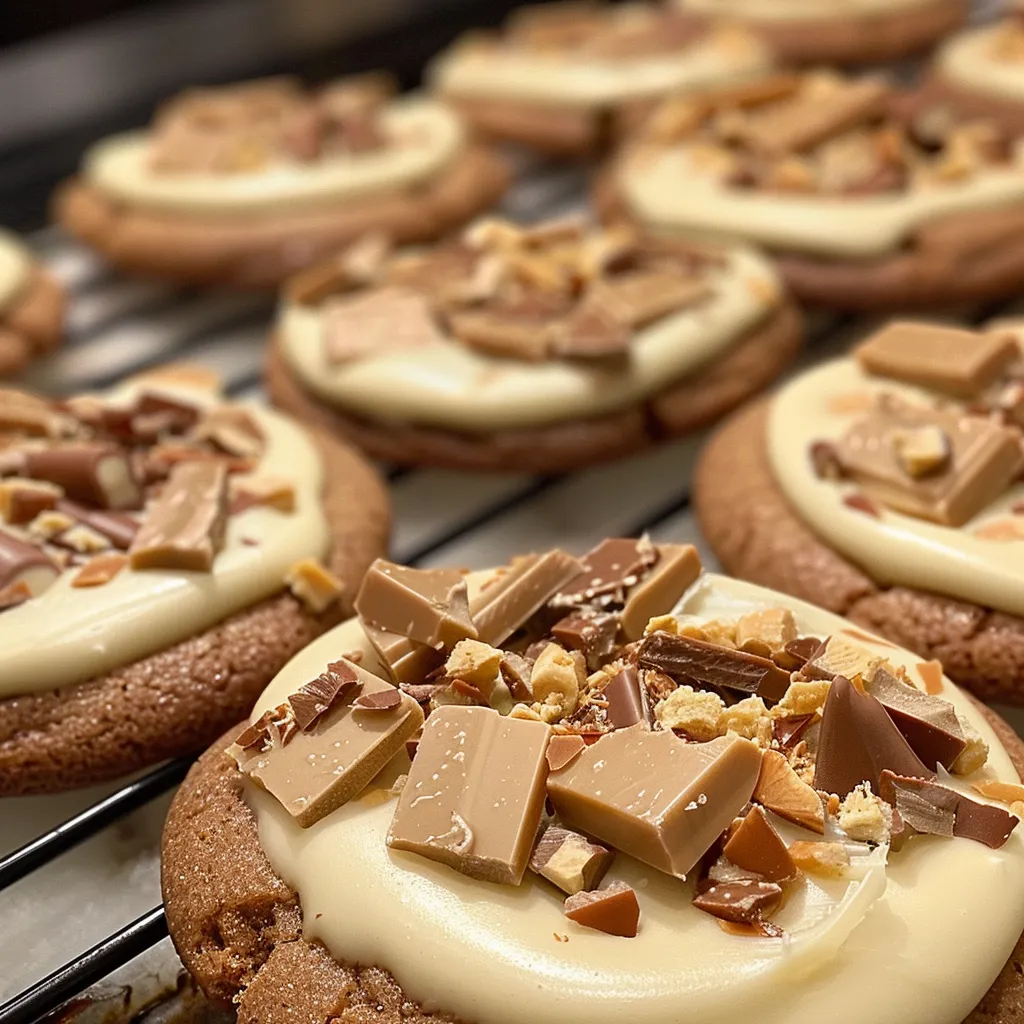
This year, I’m excited to share with you a recipe that embodies that spirit of joy and togetherness: White Chocolate Dipped Chewy Maple Cookies. These cookies are not only irresistibly chewy and packed with the comforting flavor of maple, but they’re also dipped in creamy white chocolate to elevate them to a festive treat that everyone will adore. Let’s roll up our sleeves and create something special for your holiday gatherings!

Why You’ll Absolutely Love White Chocolate Dipped Chewy Maple Cookies for Christmas

These cookies are the perfect addition to your holiday baking repertoire for so many reasons:

  • They are incredibly chewy and flavorful, thanks to the rich maple syrup that adds a lovely depth of sweetness.
  • The white chocolate dip adds a luxurious touch, making them feel extra special for the holiday season.
  • They’re quick and easy to make—perfect for busy holiday schedules when you want to whip up something delicious without spending all day in the kitchen.
  • These cookies are perfect for sharing! Whether you’re gifting them to neighbors, bringing them to a holiday party, or simply enjoying them with family, they’re sure to spread joy.

Ingredients You’ll Need

Let’s talk about the star ingredients that make these cookies so delightful. I chose to use a mix of brown sugar and granulated sugar to give these cookies that perfect chewy texture while keeping them sweet and flavorful. The star of the show, of course, is the maple syrup, which not only sweetens the cookies but also adds that warm, cozy flavor we all associate with the holidays.

Here’s what you’ll need:

  • 2 1/4 cups all-purpose flour
  • 1 teaspoon baking soda
  • 1/2 teaspoon salt
  • 1 cup unsalted butter, softened
  • 1 cup brown sugar, packed
  • 1/2 cup granulated sugar
  • 1/2 cup maple syrup
  • 1 teaspoon vanilla extract
  • 2 large eggs
  • 2 cups white chocolate chips
  • Optional: sea salt for sprinkling

You’ll find the full ingredient list with measurements in the recipe card below!

How to Make White Chocolate Dipped Chewy Maple Cookies for Christmas, Step-by-Step

Alright, let’s dive into the fun part—making these cookies! Follow along, and don’t be afraid to get your hands a little messy; it’s all part of the joy of baking!

1. Preheat your oven to 350°F (175°C) and line your baking sheets with parchment paper. This little step ensures that your cookies won’t stick and makes cleanup a breeze!

2. In a bowl, whisk together the flour, baking soda, and salt, then set it aside. This helps to evenly distribute the baking soda so your cookies rise beautifully.

3. In a large mixing bowl, cream together the softened butter, brown sugar, and granulated sugar until the mixture is light and fluffy. This step is crucial for that perfect cookie texture, so don’t rush it!

4. Next, add the maple syrup, vanilla extract, and eggs to the butter mixture. Mix until everything is well combined—this is where the magic starts to happen!

5. Gradually add the dry ingredients to the wet ingredients, mixing until just combined. You don’t want to over-mix; we want those cookies to stay nice and chewy.

6. Now, fold in the white chocolate chips. These little gems will melt slightly when baked, creating delightful pockets of sweetness in every bite.

7. Using a tablespoon, drop balls of dough onto the prepared baking sheets, spacing them about 2 inches apart. They’ll spread a little, so give them some room!

8. Bake for 10-12 minutes or until the edges are lightly golden. You want them to look slightly underbaked in the center; they will continue to cook as they cool.

9. Remove from the oven and let them cool on the baking sheets for 5 minutes before transferring them to a wire rack to cool completely.

10. Once cooled, melt the remaining white chocolate chips in a microwave-safe bowl, stirring every 30 seconds until smooth.

11. Dip half of each cookie into the melted white chocolate, allowing excess to drip off. This is where they become truly indulgent!

12. Place the dipped cookies on a parchment-lined tray and sprinkle with sea salt if desired. The salty-sweet combination is simply divine.

13. Allow the chocolate to set before serving or packaging.

White Chocolate Dipped Chewy Maple Cookies for Christmas

Pro Tips for the Best Results

Here are a few tips I’ve learned along the way to ensure your cookies turn out perfectly:

  • Be sure your butter is softened to room temperature for easy creaming with the sugars. This will help you achieve that light and fluffy texture!
  • If you prefer a more pronounced maple flavor, consider adding a splash of maple extract in addition to the maple syrup.
  • Don’t skip the sea salt on top of the white chocolate! It adds a delightful contrast to the sweetness of the cookie and the chocolate.

Serving Suggestions

These cookies are perfect on their own, but if you’re feeling a little extra festive, consider serving them with a side of whipped cream or a scoop of vanilla ice cream. They also make great gifts when packaged in decorative tins or boxes, so don’t hesitate to share the joy with friends and family!

Storage and Make-Ahead Tips

If you want to get ahead of your holiday baking, these cookies can be made a few days in advance and stored in an airtight container at room temperature. For longer storage, you can freeze the unbaked cookie dough. Just scoop the dough onto a parchment-lined baking sheet, freeze until solid, and then transfer to a freezer bag. When you’re ready to bake, just pop them in the oven straight from the freezer, adding a couple of extra minutes to the baking time.

White Chocolate Dipped Chewy Maple Cookies for Christmas

Prep Time 15 minutes
Cook Time 12 minutes
Total Time 27 minutes
Servings 24 cookies
Calories 150
Celebrate the holidays with these chewy maple cookies dipped in white chocolate, topped with a sprinkle of sea salt for a festive touch.

Ingredients

Dry Ingredients

  • 2 1/4 cups all-purpose flour
  • 1 teaspoon baking soda
  • 1/2 teaspoon salt

Wet Ingredients

  • 1 cup unsalted butter, softened
  • 1 cup brown sugar, packed
  • 1/2 cup granulated sugar
  • 1/2 cup maple syrup
  • 1 teaspoon vanilla extract
  • 2 large eggs

Chocolate

  • 2 cups white chocolate chips
  • optional sea salt for sprinkling (for topping)

Instructions 

  • Preheat oven to 350°F (175°C). Mix dry ingredients; set aside.
  • Cream butter and sugars, then add maple syrup, vanilla, and eggs.
  • Gradually mix in dry ingredients, fold in white chocolate chips.
  • Drop dough onto baking sheets, bake 10-12 minutes, cool.
  • Melt remaining white chocolate, dip cookies, sprinkle with sea salt, and let set.

Notes

Chill the dough for easier handling if needed.
Calories: 150kcal
Cost: $15
Course: Dessert
Cuisine: American
Keyword: Christmas, Cookies, Maple

Nutrition

Calories: 150kcal | Carbohydrates: 20g | Protein: 2g | Fat: 8g | Sodium: 70mg

Loved this recipe? Save it to your favorite Pinterest board so you can easily find it later! It’s the perfect way to keep all your sweet ideas in one place. ✨

White Chocolate Dipped Chewy Maple Cookies for Christmas

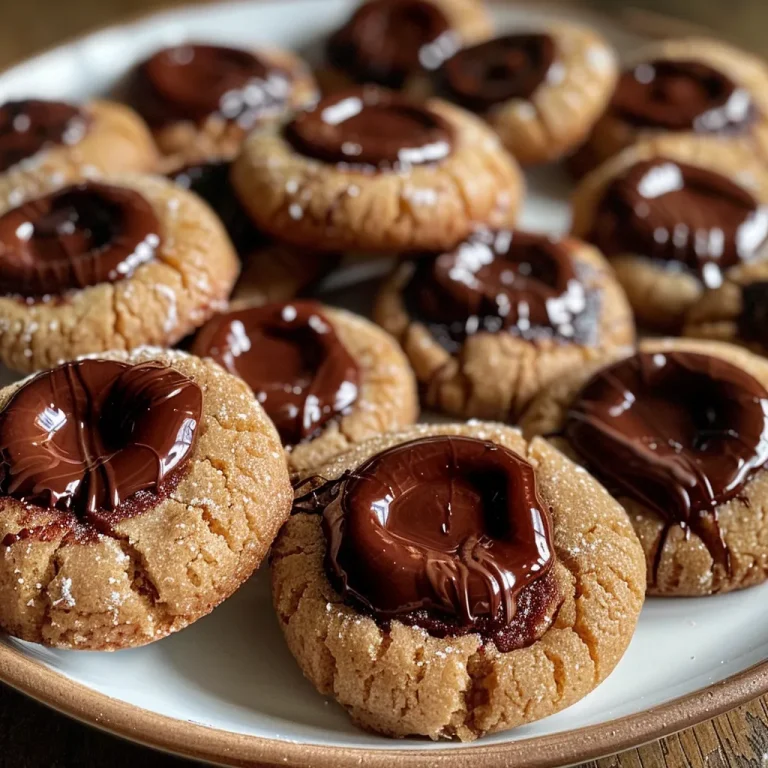
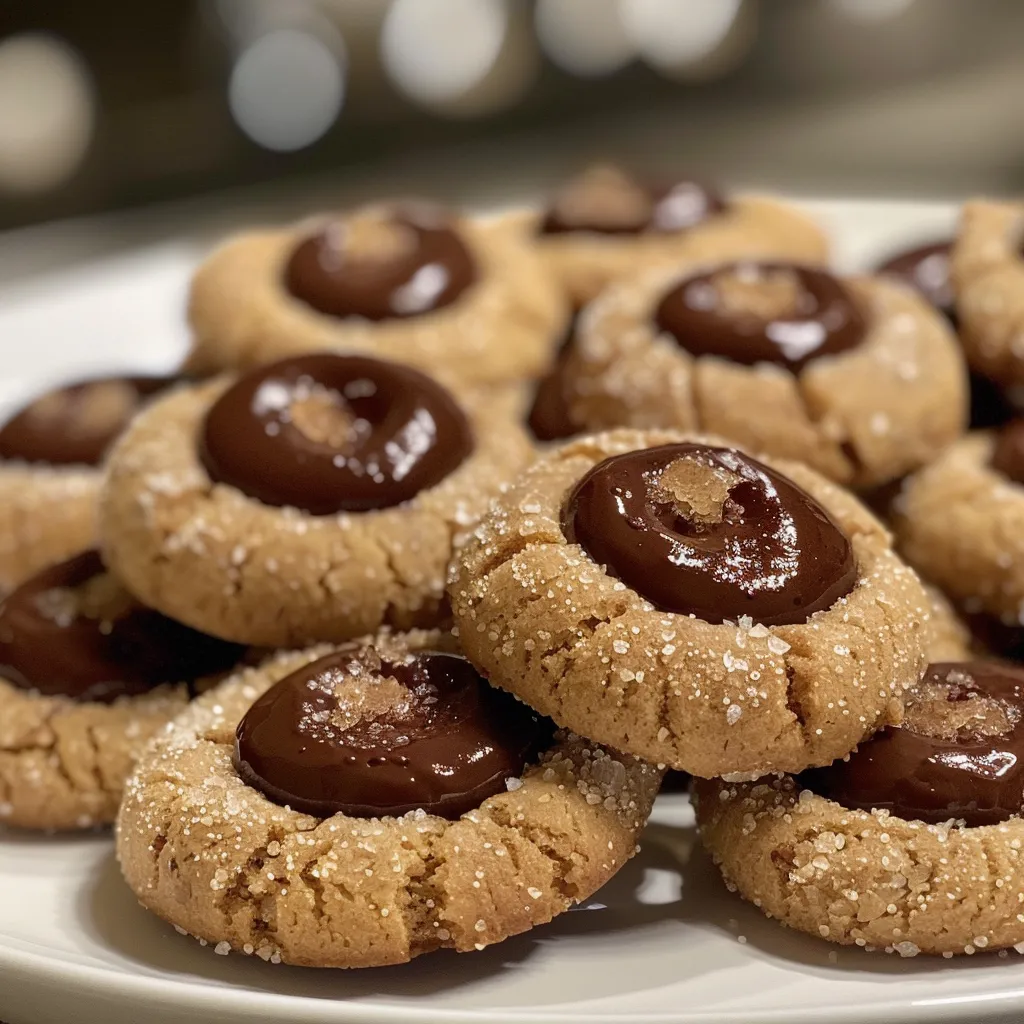
Welcome to Emily’s Must-Try Kitchen, where every recipe is a story waiting to be told! Today, I’m thrilled to share a delightful treat that’s sure to become a favorite in your home: Chocolate Thumbprint Cookies. These little gems are not just cookies; they’re a celebration of flavor, nostalgia, and the joy of sharing sweet moments with loved ones. I still remember the first time I had a thumbprint cookie at a family gathering. The combination of rich chocolate and a gooey center was like a warm hug from my grandma. It’s amazing how food can transport us back to cherished memories, isn’t it?

As we dive into this recipe, I want you to know that these cookies are perfect for any occasion—from holiday gatherings to cozy nights in with a cup of tea. They’re simple enough to whip up on a whim yet impressive enough to steal the show at any dessert table. So, roll up your sleeves, and let’s make some magic happen in the kitchen!

Why You’ll Absolutely Love Chocolate Thumbprint Cookies – In Bloom Bakery

These Chocolate Thumbprint Cookies have a few delicious secrets that make them irresistible. Here’s why you’re going to adore them:

  • Easy to Make: With straightforward steps, even novice bakers will find joy in creating these cookies.
  • Decadent Chocolate Flavor: The combination of cocoa powder and melted chocolate chips creates a rich, chocolatey experience that chocolate lovers will cherish.
  • Customizable Fillings: While I love classic chocolate filling, feel free to get creative! Try peanut butter, caramel, or even fruit preserves for a twist.
  • Perfect for Sharing: These cookies are made for sharing—perfect for holiday parties, bake sales, or simply enjoying with friends over coffee.

Ingredients You’ll Need

Gathering the right ingredients is half the fun! Here’s what you’ll need for these delightful Chocolate Thumbprint Cookies:

  • 1 cup unsalted butter, softened
  • 3/4 cup granulated sugar
  • 1/4 cup brown sugar, packed
  • 2 large eggs
  • 1 teaspoon vanilla extract
  • 2 cups all-purpose flour
  • 1/2 cup unsweetened cocoa powder
  • 1/2 teaspoon baking powder
  • 1/4 teaspoon salt
  • 1 cup chocolate chips (for filling)
  • 1/4 cup powdered sugar (for dusting)

You’ll find the full ingredient list with measurements in the recipe card below!

How to Make Chocolate Thumbprint Cookies – In Bloom Bakery, Step-by-Step

Now, let’s get to the fun part—making these cookies! Follow this step-by-step guide and let your creativity shine:

  1. Preheat your oven to 350°F (175°C) and line a baking sheet with parchment paper. This little step ensures your cookies won’t stick and makes cleanup a breeze!
  2. In a large mixing bowl, cream together the softened butter, granulated sugar, and brown sugar until light and fluffy. This is where the magic begins—your kitchen will smell heavenly!
  3. Add the eggs one at a time, mixing well after each addition. Stir in the vanilla extract for that lovely aromatic touch.
  4. In a separate bowl, sift together the flour, cocoa powder, baking powder, and salt. Sifting is a great way to avoid clumps and ensure a smooth cookie dough.
  5. Gradually add the dry ingredients to the wet mixture, mixing until combined. Don’t overmix; we want tender cookies!
  6. Scoop tablespoon-sized portions of dough and roll them into balls. Place them on the prepared baking sheet, spacing them apart to give them room to spread.
  7. Use your thumb or the back of a spoon to make an indentation in the center of each dough ball. This is where your chocolate filling will go, so make it nice and deep!
  8. Bake in the preheated oven for 10-12 minutes. Remove from the oven and let cool slightly. You want them to be soft and chewy!
  9. While the cookies are cooling, melt the chocolate chips in a microwave-safe bowl or over a double boiler. Stir until smooth and luscious.
  10. Once the cookies are cool, fill each thumbprint indentation with melted chocolate. This is the moment you can really indulge!
  11. Dust with powdered sugar before serving. Enjoy your delicious Chocolate Thumbprint Cookies!
Chocolate Thumbprint Cookies - In Bloom Bakery

Pro Tips for the Best Results

Here are some of my favorite tips to ensure your cookies turn out perfectly:

  • Butter Temperature: Make sure your butter is softened but not melted. This helps create that fluffy texture we all love!
  • Chill the Dough: If you find your dough is too sticky to handle, pop it in the fridge for about 30 minutes. Chilled dough is easier to work with and results in neater cookies.
  • Experiment with Fillings: Don’t be afraid to switch things up! Try using different flavored chocolate chips or even nut butters for a unique twist.

Serving Suggestions

These Chocolate Thumbprint Cookies are perfect on their own, but here are some fun serving suggestions to elevate your dessert experience:

  • Pair them with a scoop of vanilla ice cream for a decadent sundae.
  • Serve alongside a cup of steaming hot cocoa or coffee for a cozy treat.
  • Arrange on a festive platter for holiday gatherings and watch them disappear!

Storage and Make-Ahead Tips

Want to enjoy these cookies later? No problem! Here’s how to store and make them ahead of time:

  • Store baked cookies in an airtight container at room temperature for up to a week. They’ll stay soft and delicious!
  • If you want to make them ahead, prepare the dough and refrigerate it for up to three days before baking.
  • You can also freeze the baked cookies for up to three months. Just place them in a freezer-safe container and separate layers with parchment paper.

Thank you for joining me in making these Chocolate Thumbprint Cookies today! I hope you find as much joy in baking them as I do. Remember, cooking is all about having fun and sharing love through food, so don’t be afraid to get a bit messy. Happy baking, and I can’t wait to hear about your cookie adventures!

Chocolate Thumbprint Cookies - In Bloom Bakery

Prep Time 15 minutes
Cook Time 12 minutes
Total Time 27 minutes
Servings 24 cookies
Calories 150
Delight in these rich, chocolatey cookies with a sweet chocolate filling, perfect for any occasion.

Ingredients

Dough

  • 1 cup unsalted butter, softened
  • 3/4 cup granulated sugar
  • 1/4 cup brown sugar, packed
  • 2 large eggs
  • 1 teaspoon vanilla extract

Dry ingredients

  • 2 cups all-purpose flour
  • 1/2 cup unsweetened cocoa powder
  • 1/2 teaspoon baking powder
  • 1/4 teaspoon salt

Filling and dusting

  • 1 cup chocolate chips (for filling)
  • 1/4 cup powdered sugar (for dusting)

Instructions 

  • Preheat oven to 350°F (175°C). Mix softened butter, sugars until fluffy.
  • Add eggs one at a time, then vanilla. Mix well.
  • Combine dry ingredients; gradually add to wet mixture. Form dough balls and place on baking sheet.
  • Make an indentation in each ball, bake for 10-12 minutes. Cool slightly.
  • Melt chocolate chips, fill indentations, dust with powdered sugar. Serve.

Notes

Ensure not to overbake for soft, chewy cookies.
Calories: 150kcal
Cost: $15
Course: Dessert
Cuisine: American
Keyword: chocolate

Nutrition

Calories: 150kcal | Carbohydrates: 20g | Protein: 2g | Fat: 8g | Sodium: 50mg

Loved this recipe? Save it to your favorite Pinterest board so you can easily find it later! It’s the perfect way to keep all your sweet ideas in one place. ✨

Chocolate Thumbprint Cookies - In Bloom Bakery